Infiniti QX56 (JA60). Manual — part 642
DOOR FINISHER
INT-13
< ON-VEHICLE REPAIR >
C
D
E
F
G
H
I
K
L
M
A
B
INT
N
O
P
Removal
1. Remove the power window switch assembly.
• Disconnect the harness connector.
2. Remove the pull handle cover.
• Remove the screws behind the pull handle cover.
3. Remove the cap from the inside door handle escutcheon and the remove screw.
4. Remove the inside door handle escutcheon.
• Remove the screw behind inside door handle escutcheon.
5. Remove step lamp.
• Disconnect the step lamp harness connector.
6. Remove the door finisher and disconnect lock cable and handle cable from inside door handle assembly.
INT-11, "Removal and Installation"
7. Remove the inside door handle assembly.
8. Remove door lock knob.
9. Remove the rear door tweeter.
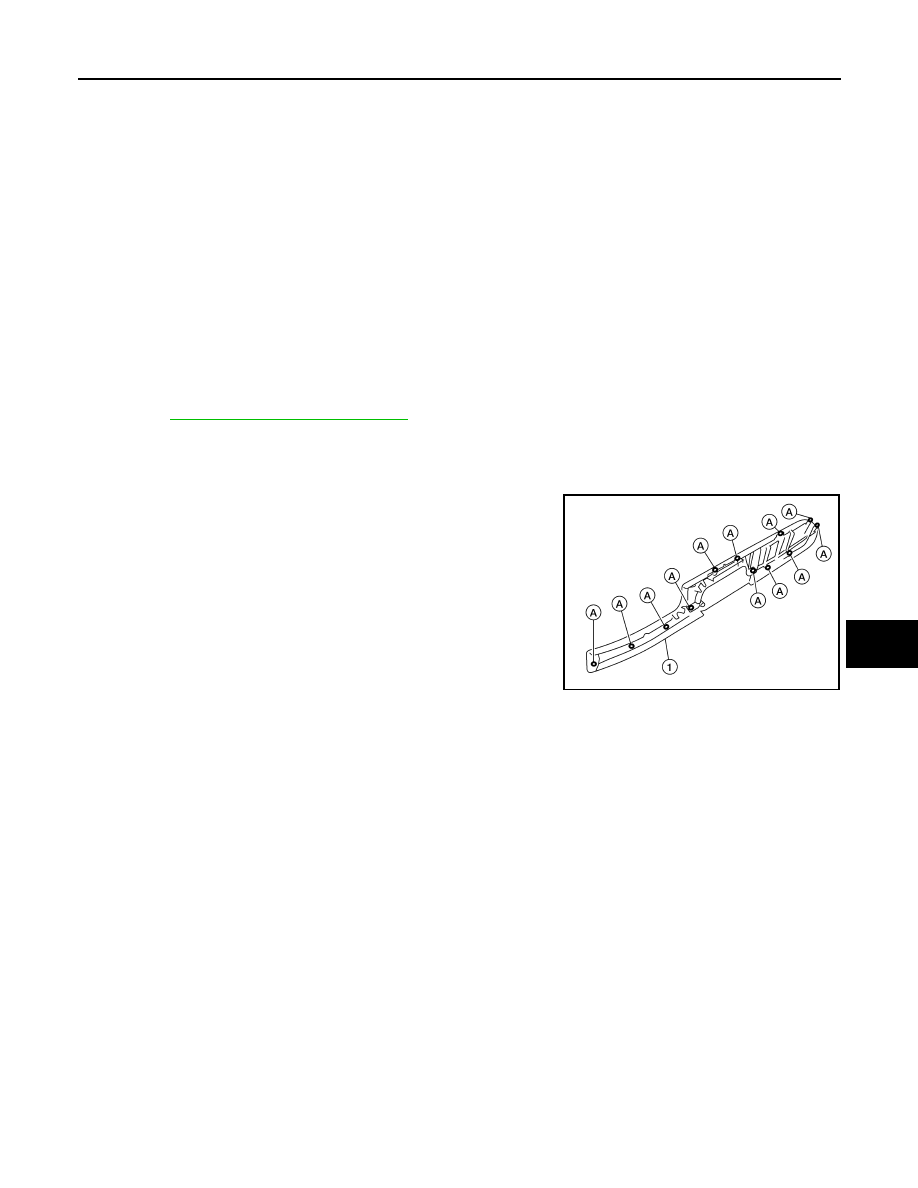
10. Remove the armrest screws (A), then remove the armrest (1).
Installation
Installation is in the reverse order of removal.
1.
Armrest
2.
Power window switch assembly
3.
Rear door finisher LH
4.
Pull handle cover
5.
Cap
6.
Inside door handle escutcheon
7.
Door lock knob
8.
Step lamp
9.
Inside door handle assembly
10. Rear door tweeter
AWJIA0452ZZ
INT-14
< ON-VEHICLE REPAIR >
BODY SIDE TRIM
BODY SIDE TRIM
Removal and Installation
INFOID:0000000005147350
CAUTION:
• Wrap the tip of flat-bladed screwdriver with a cloth when removing metal clips from finishers.
• When removing or installing body side welts, do not allow butyl seal to come in contact with pillar
finisher.
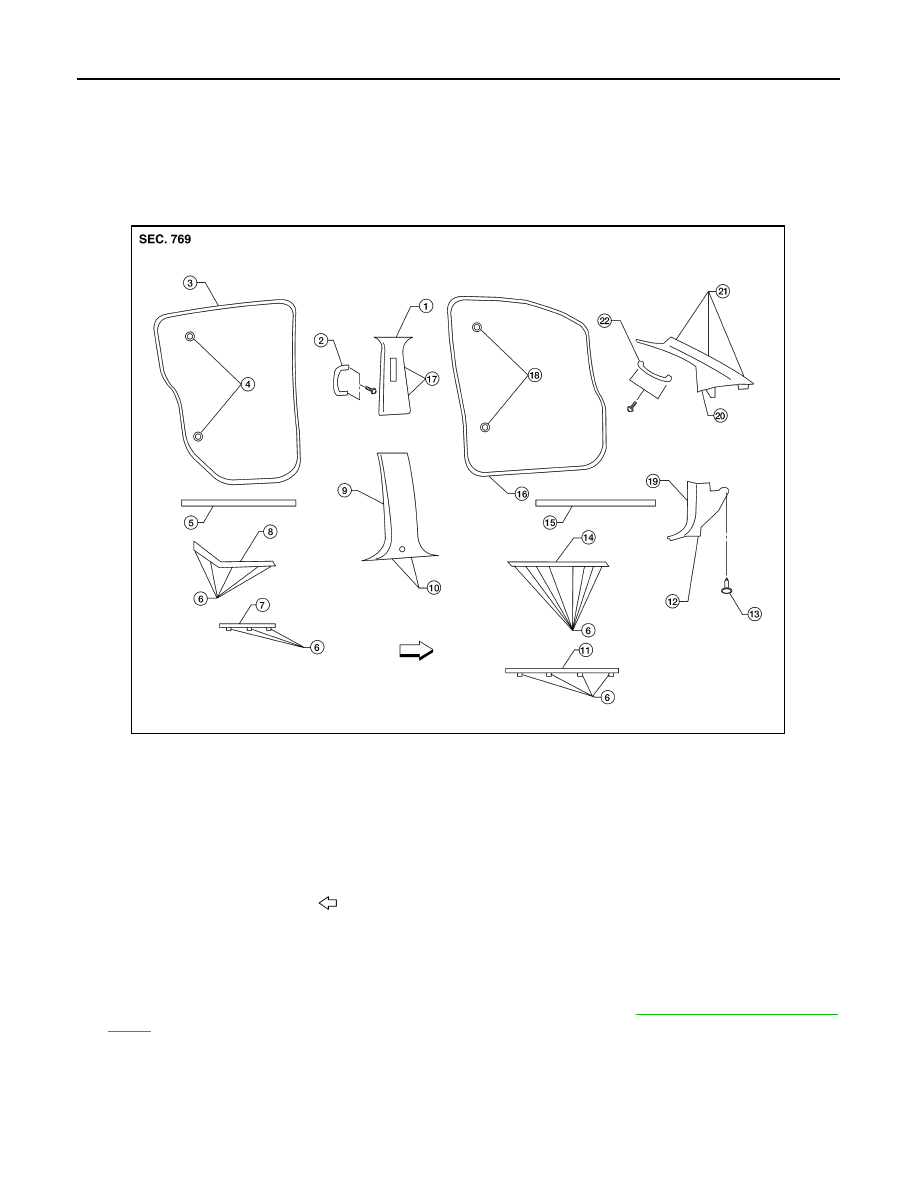
LOWER DASH SIDE FINISHER
Removal
1. Remove the push pin from the lower dash side finisher.
2. Remove the front kicking plate from the center pillar lower finisher. Refer to
.
3. Remove the lower dash side finisher and the front kicking plate together.
4. Remove the lower dash side finisher from the front kicking plate.
Installation
Installation is in the reverse order of removal.
1.
Center pillar upper finisher LH
2.
Center pillar assist grip
3.
Rear door welt
4.
Rear door bumper
5.
Rear door parting seal
6.
Clip CG104
7.
Rear mudguard finisher
8.
Rear kicking plate
9.
Center pillar lower finisher LH
10. Metal clip
11. Front mudguard finisher
12. Metal clip
13. Clip CG103
14. Front kicking plate
15. Front door parting seal
16. Front door welt
17. Metal clip
18. Front door bumper
19. Lower dash side finisher LH
20. Front pillar finisher LH
21. Metal clip
22. Front pillar assist grip
Vehicle front
WIIA0967E
BODY SIDE TRIM
INT-15
< ON-VEHICLE REPAIR >
C
D
E
F
G
H
I
K
L
M
A
B
INT
N
O
P
CENTER PILLAR LOWER FINISHER
Removal
CAUTION:
Disconnect both terminals from battery in advance.
1. Disconnect the battery negative terminal.
2. Remove seat belt anchor. Refer to
SB-14, "Removal and Installation"
• On RH side, disconnect seat belt tension sensor.
3. Remove front and rear kicking plates.
4. Remove center pillar lower finisher.
Installation
Installation is in the reverse order of removal.
CENTER PILLAR UPPER FINISHER
Removal
1. Remove front and rear door welts.
2. Disconnect the battery negative terminal.
3. Remove seat belt shoulder anchor and D-ring. Refer to
SB-14, "Removal and Installation"
4. Remove front and rear kicking plates.
5. Remove center pillar lower finisher.
6. Remove center pillar assist grip.
7. Remove center pillar upper finisher.
Installation
Installation is in the reverse order of removal.
FRONT PILLAR FINISHER
Removal
1. Remove the assist grip.
2. Remove the front pillar finisher.
Installation
Installation is in the reverse order of removal.
KICKING PLATES
Removal
Release the clips and remove the front and/or rear kicking plates.
Installation
Installation is in the reverse order of removal.
MUDGUARD FINISHERS
Removal
Release the clips and remove the front and/or rear mudguard finishers.
Installation
Installation is in the reverse order of removal.
DOOR PARTING SEALS
Removal
1. Open front and/or rear doors fully.
2. Release clips and remove parting seals.
Installation
Installation is in the reverse order of removal.
INT-16
< ON-VEHICLE REPAIR >
FLOOR TRIM
FLOOR TRIM
Removal and Installation
INFOID:0000000005147351
REMOVAL
1. Remove the front seats. Refer to
SE-51, "Removal and Installation"
.
• Remove the subwoofer. Refer to
AV-177, "Removal and Installation"
.
• Remove the navigation display control unit. Refer to
AV-171, "Removal and Installation"
2. Remove the second row seats. Refer to
SE-56, "Removal and Installation"
equipped.
3. Remove the third row rear seats. Refer to
.
4. Remove the lower seat belt anchors. Refer to
SB-14, "Removal and Installation"
5. Remove the lower body side trim. Refer to
6. Remove the luggage lower side finishers (left / right). Refer to
7. Remove the kicking plates. Refer to
.
8. Remove the center console. Refer to
IP-20, "Removal and Installation"
.
9. Remove the rear console, if equipped. Refer to
IP-21, "Removal and Installation"
10. Remove the rear lower finisher. Refer to
11. Remove the carpet.
12. Remove the floor mat hooks.
INSTALLATION
Installation is in the reverse order of removal.
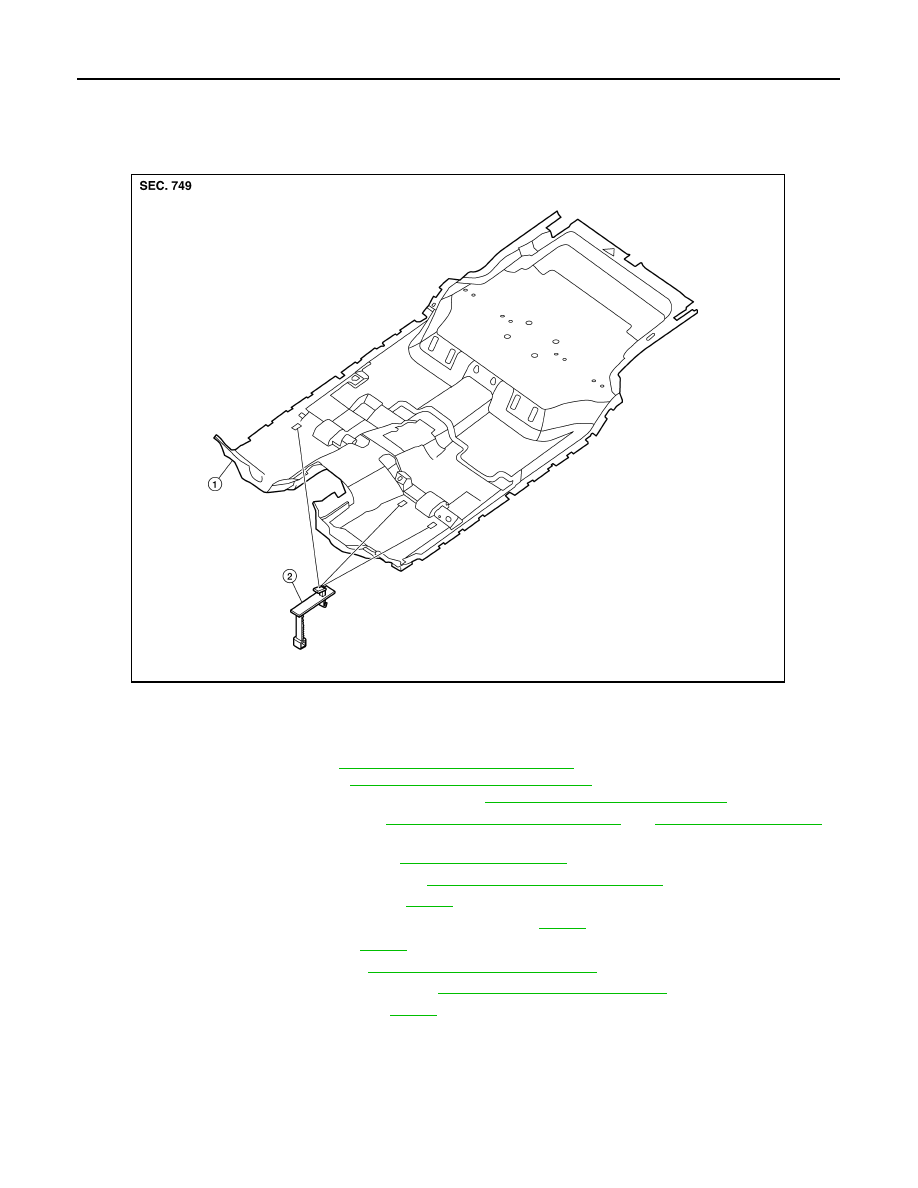
1.
Carpet
2.
Floor mat hooks
AWJIA0408ZZ
Нет комментариевНе стесняйтесь поделиться с нами вашим ценным мнением.
Текст