Mitsubishi Lancer Evolution IX. Manual — part 297

REVERSE IDLER GEAR
MANUAL TRANSMISSION OVERHAUL
22B-33
2. Check the synchronizer cone surface of the
reverse idler gear for roughness, damage and
excessive wear.
3. Check the inside surface and front and back sides
of the reverse idler gear for damage and
excessive wear.
SYNCHRONIZER RING
AK204103
AK204103AC
1. Check the clutch gear on the synchronizer ring for
damaged and missing teeth.
2. Check the inner surface of the synchronizer ring
cone for damage and excessive wear. Also check
that the inside ridges are intact.
3. Check the synchronizer key contact surface of the
synchronizer ring for damage and excessive
wear.
AK204104
A
AD
Reverse
idler gear
Synchronizer ring
4. Press the synchronizer ring against the cone of
the reverse idler gear and check clearance A.
Replace the synchronizer ring if the clearance is
less than the limit.
Limit: 0.7 mm
REAR REVERSE IDLER GEAR AND
REVERSE IDLER GEAR SLEEVE
AK204113AC
Match marks
CAUTION
When assembling the reverse idler gear sleeve
and reverse idler gear sleeve, align the match
marks that were made during disassembly.
AK204105AC
Reverse
idler gear
Rverse idler
gear sleeve
1. Check that the reverse idler gear sleeve slides
smoothly on the reverse idler gear hub when they
are combined.
AK204106
AK204106AC
2. Check the front and back ends of the inner splines
of the reverse idler gear sleeve for damage.
3. Check the helical gear teeth and clutch gear teeth
of the reverse idler gear for damage and
excessive wear.
4. Check the front, back, and inner surfaces of the
reverse idler gear for damage and excessive
wear.
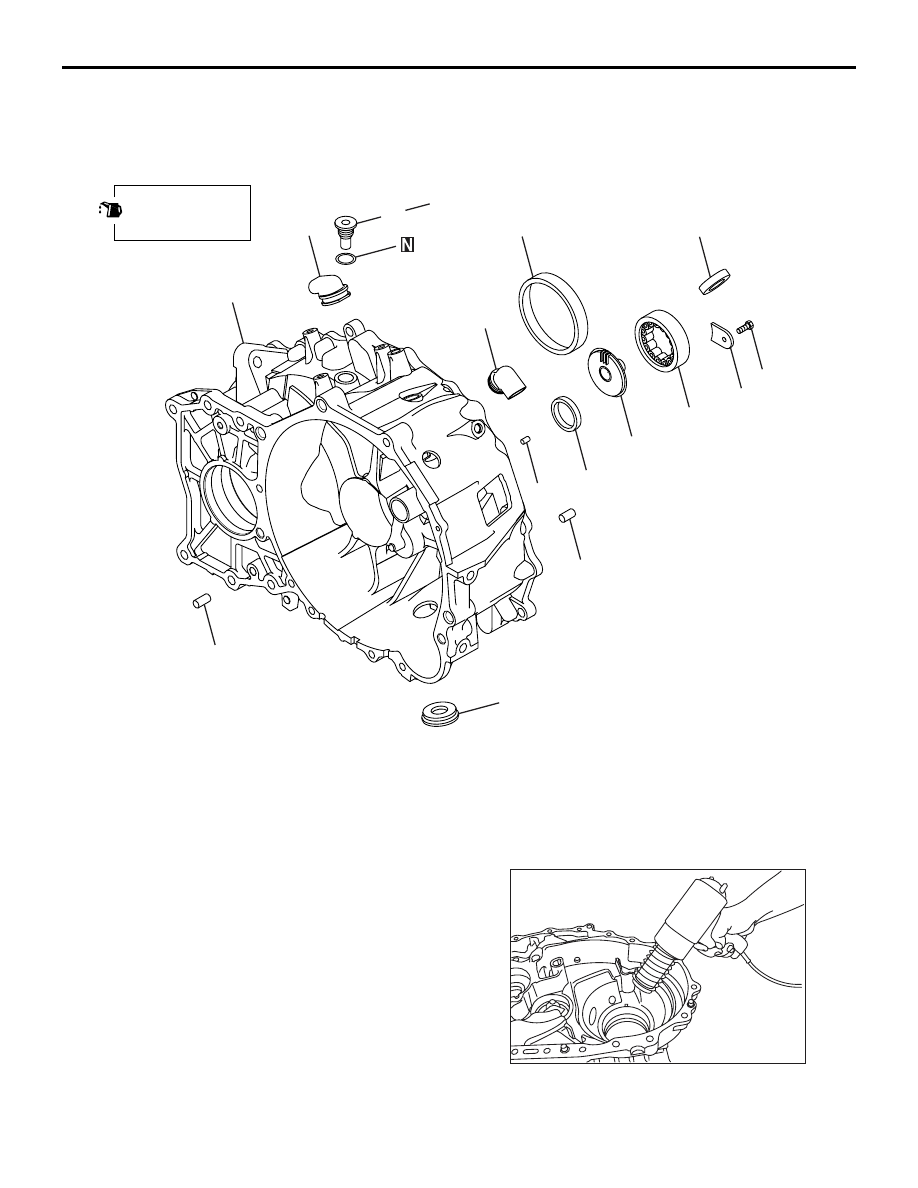
CLUTCH HOUSING
MANUAL TRANSMISSION OVERHAUL
22B-34
CLUTCH HOUSING
DISASSEMBLY AND REASSEMBLY
M1222003700165
AK204363
7.3 ± 1.0 N·m
2
3
4
6
8
7
7
5
1
9
10
35 ± 4 N·m
11
11
13
12
AC
Apply gear oil to
all moving parts
before installation.
Disassembly steps
1.
Magnet
>>C<<
2.
Main shaft bearing retainer
3.
Main shaft front bearing
>>B<<
4.
Oil channel
<<A>>
>>D<<
5.
Differential side bearing outer race
>>A<<
6.
Input shaft oil seal
7.
Dowel pin
8.
Knock pin
9.
Drain plug gasket
10. Drain plug
11. Cover A
12. Maintenance hole cover
13. Clutch housing
DISASSEMBLY SERVICE POINTS
<<A>> DIFFERENTIAL SIDE BEARING
OUTER RACE REMOVAL
AK203782
1. Heat the clutch housing to about 100
°C
(maximum temprerature: 120
°C).
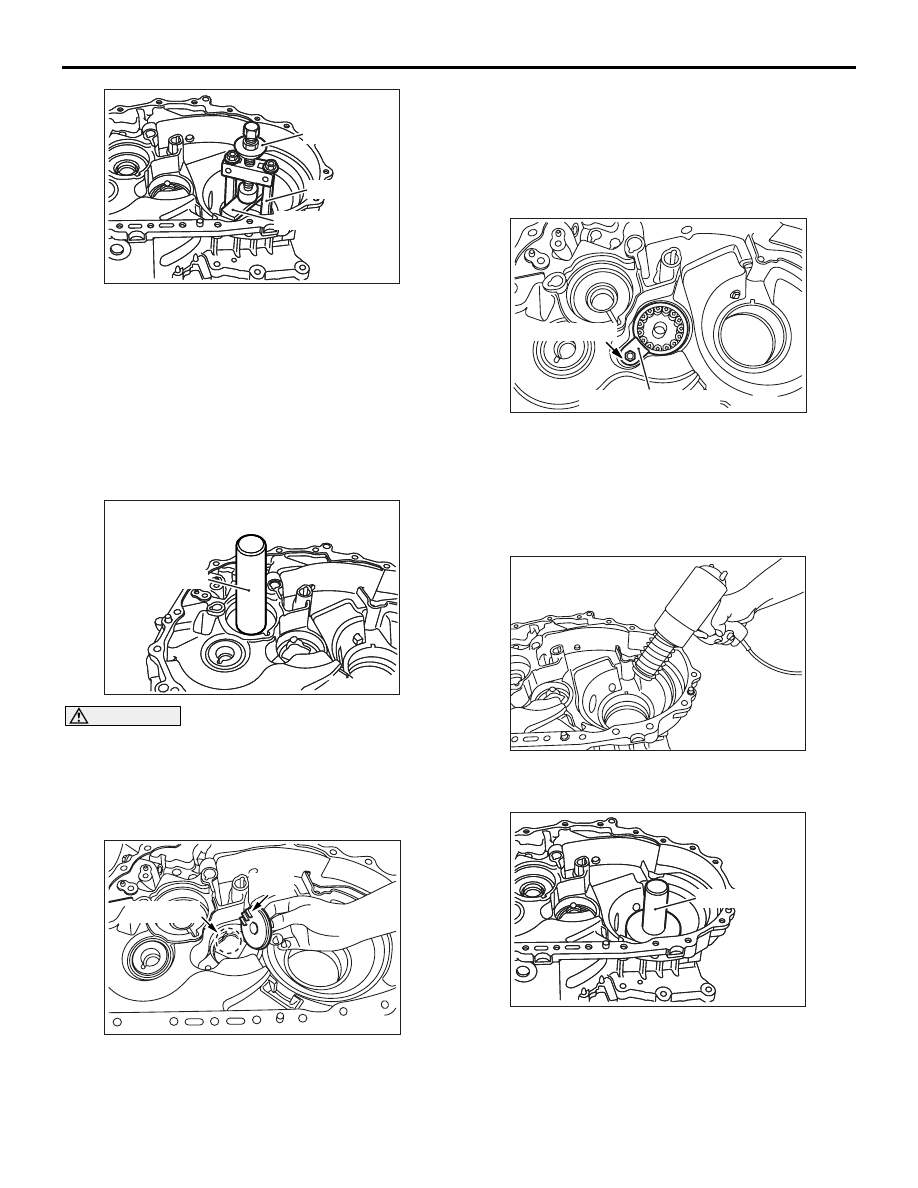
AK204356
AK204356AC
MB990810
MB991968
MB991967
CLUTCH HOUSING
MANUAL TRANSMISSION OVERHAUL
22B-35
2. Using the following special tools, remove the
differential side bearing outer race.
• Side bearing puller (MB990810)
• Claw (MB991967)
• Bridge (MB991968)
REASSEMBLY SERVICE POINTS
>>A<< INPUT SHAFT OIL SEAL INSTAL-
LATION
AK203784
AK203784AC
MD998323
CAUTION
The oil seal is not reusable.
Using the special tool Bearing installer (MD998323) ,
install the input shaft oil seal into the clutch housing.
>>B<< OIL CHANNEL INSTALLATION
AK203323AD
Spot facing
Ribs
Install the oil channel so that the ribs located on the
channel's main shaft side are fitted into the spot
faced portion on the clutch housing.
>>C<< BEARING RETAINER
INSTALLATION
AK203324AE
Stamp mark
Bearing retainer
Install the bearing retainer so that the stamp mark is
visible, and tighten the mounting bolt to the specified
torque.
>>D<< DIFFERENTIAL SIDE BEARING
OUTER RACE INSTALLATION
AK203782
1. Heat the clutch housing to about 100
°C
(maximum temperature: 120
°C).
AK204357
AK204357AC
MB991966
2. Using the special tool Bearing outer race installer
(MB991966) to install the differential side bearing
outer race in the clutch housing.
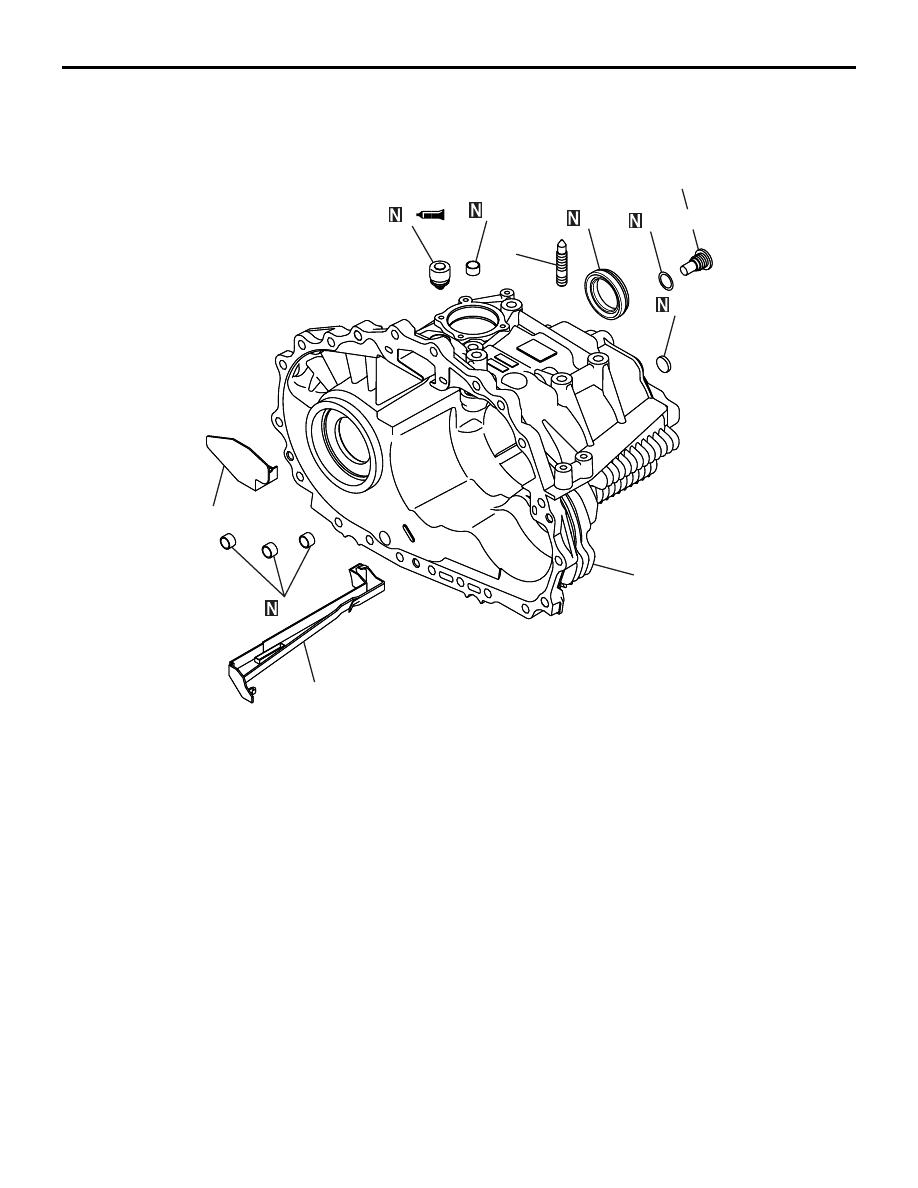
TRANSMISSION CASE
MANUAL TRANSMISSION OVERHAUL
22B-36
TRANSMISSION CASE
DISASSEMBLY AND REASSEMBLY
M1222013400121
AK204369
AK204369AC
1
10
2
3
4
6
7
35 ± 4 N·m
8
5
8
9
Disassembly steps
>>C<<
1.
Oil gutter
>>C<<
2.
Baffle plate
3.
Welch plug
>>B<<
4.
Differential oil seal
>>A<<
5.
Air breather
6.
Filler plug
7.
Drain plug gasket
8.
Rod bushing
9.
Stud
10. Transaxle case
Disassembly steps (Continued)
Нет комментариевНе стесняйтесь поделиться с нами вашим ценным мнением.
Текст