Acura RL (1996-2004 year). Manual — part 620
Headlights
HID Bulb Removal ('99 - 04 models)
A transient high tension (25,000 V) occurs
at the bulb sockets of the high intensity discharge (HID)
lamps when the combination light switch is turned ON.
It may cause serious electrical shock or electrocution if
you do not observe the cautions below.
CAUTION:
• Never turn on the combination light switch before
fitting the HID bulbs to their bulb sockets and com-
pleting the reassembly of the headlight assembly.
• To prevent electrocution, do not service the head-
lights assembly in wet conditions, such as rain or
snow, near a sprinkler system, or when your hands
are wet.
• Do not touch the surface of the HID bulbs with your
bare hands and do not stain it with any oils and
fats.
• Do not disassemble the inverter unit and the igniter
unit.
• Do not turn on the HID bulb by using a power
source other than the battery mounted on your
vehicle.
1. Make sure you have the anti-theft code for the radio
and the navigation system, then write down the fre-
quencies for the radio's preset buttons.
2. Turn the combination light switch OFF.
3. Disconnect the battery negative cable, then discon-
nect the positive cable.
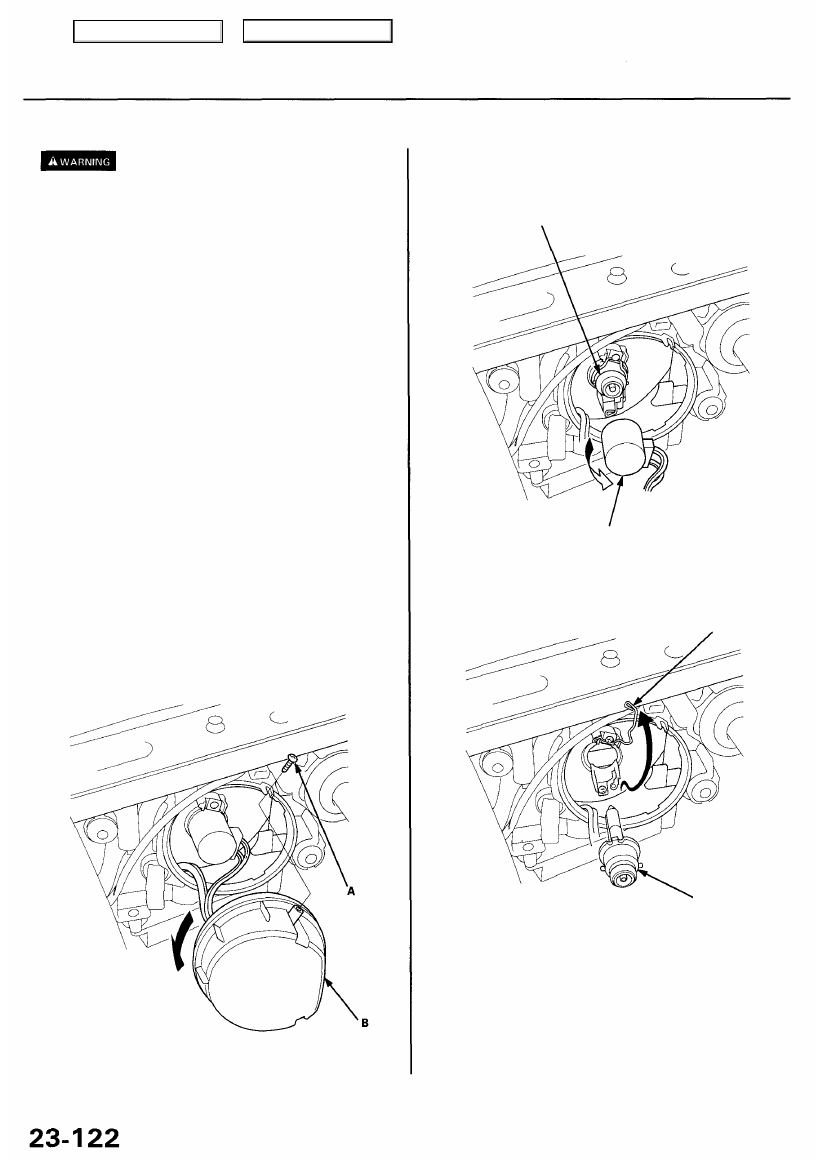
4. Remove the Torx bolt (A) using a Torx T20 bit.
5. Turn the cover (B) 45° counterclockwise to remove
it from the headlight assembly.
8. Install the new bulb in the reverse order of removal.
9. After reconnecting the battery, enter the anti-theft
code for the radio and the navigation system, then
enter the customer's radio station presets.
BULB
SPRING
6. Turn the socket 45° counterclockwise to remove it
from the bulb.
BULB
7. Pull the retaining spring away from the bulb, then
remove the bulb.
SOCKET
Main Menu
Table of Contents
Adjustment ('96 - 98 models)
Before adjusting the headlights:
• Park the vehicle on level ground.
• Make sure the fuel tank is full.
• The driver or someone who weighs the same should
sit in the driver's seat.
• Load the trunk with the items you usually carry.
• Push down on the front and rear bumpers several
times to make sure the vehicle is sitting normally.
CAUTION: Halogen headlights become very hot in use;
do not touch them or the attaching hardware immedi-
ately after they have been turned off.
1. Open the hood.
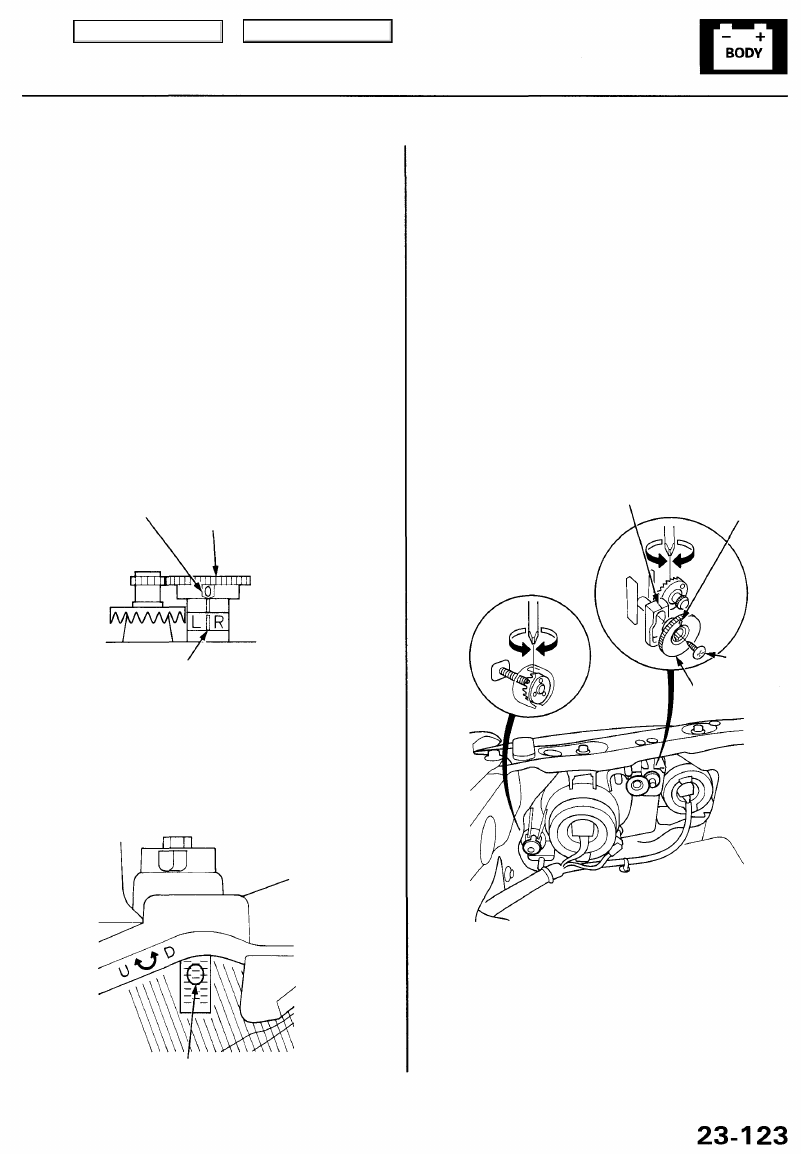
2. Check the horizontal adjustment indicator.
The mark on the horizontal indicator gear should be
aligned with the mark on the horizontal indicator.
NOTE: The illustration shows the left side adjuster.
HORIZONTAL INDICATOR
GEAR
ARROW
MARK
3. Check the vertical adjustment indicator. The bubble
should be centered underneath the longest scribe
mark on the gauge.
4. If either indicator is not aligned with its "O" mark as
described above, an adjustment can be made by
using a Phillips screwdriver.
VERTICAL INDICATOR:
INDICATOR (Bubble)
5. Adjust the headlights to local requirements by turn-
ing the adjusters.
6. After headlight replacement, it may be necessary to
readjust the horizontal indicator gear.
• First install the headlight, and adjust its horizontal
and vertical aimings according to local require-
ments.
• Then check that the arrow on the horizontal indi-
cator gear is aligned with the mark on the hori-
zontal indicator.
• If they are not aligned, remove the screw, adjust
the indicator gear, and retighten the screw.
NOTE: As the outer lenses are made of an acryli-
coated, polycarbonated material, do not cover the
headlights when they are turned on.
MARK
ARROW
SCREW
HORIZONTAL
INDICATOR
GEAR
Main Menu
Table of Contents
Headlights
Adjustment ('99 - 04 models)
CAUTION: Headlights become very hot in use; do not
touch them or any attaching hardware immediately
after they have been turned off.
Before adjusting the headlights:
• Park the vehicle on a level surface.
• Make sure the tire pressures are correct.
• The driver or someone who weighs the same should
sit in the driver's seat.
1. Clean the outer lens so that you can see the center
of the headlights.
4. Turn the low beams on.
5. Determine if the headlights are aimed properly.
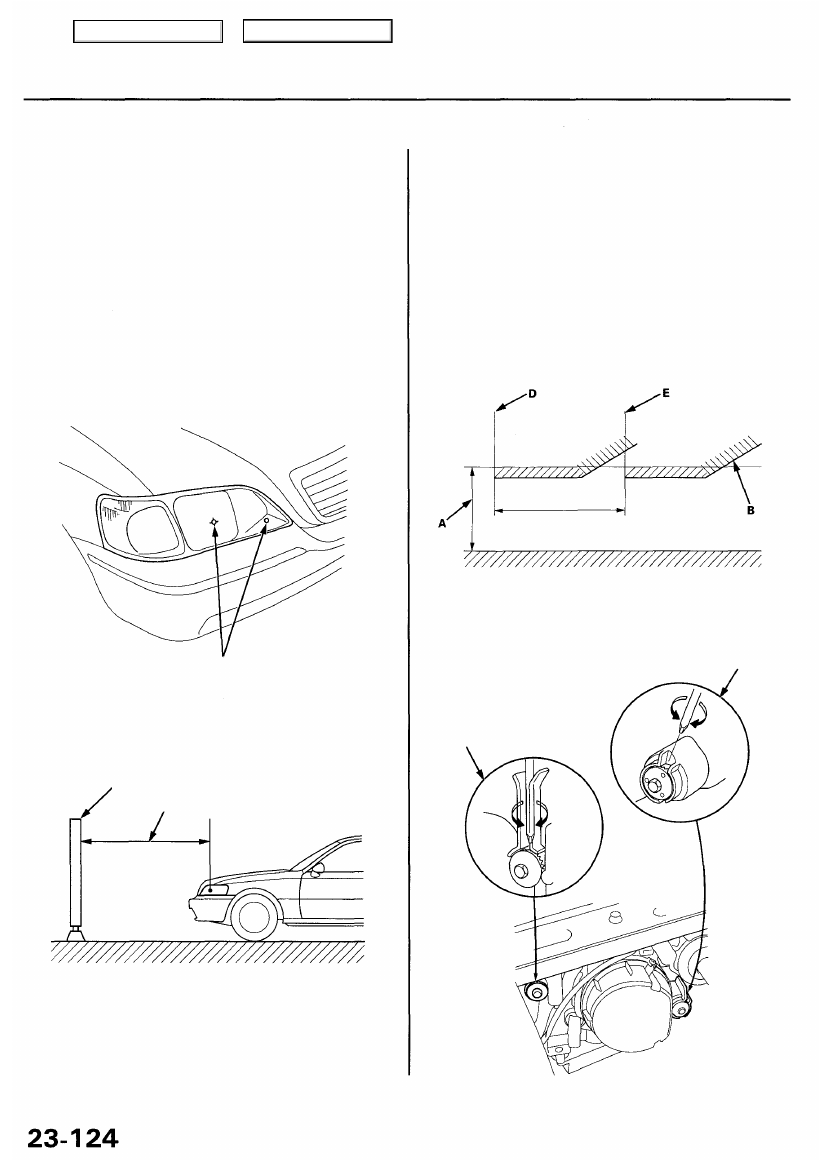
Vertical adjustment:
Measure the height of the headlights (A). The lights
should reflect 52 mm (2.1 in.) below (B) the head-
light height.
Horizontal adjustment: ('99 - 00 models)
The width of the refracting points (C) should be the
same as the width of the headlight central points (D,
E).
2. Park the vehicle in front of a wall or a screen.
CENTER
SCREEN
3. Open the hood.
7.5 m (25 ft)
6. If necessary, adjust the headlights to local require-
ments by turning the horizontal adjuster and the
vertical adjuster.
VERTICAL
ADJUSTER
HORIZONTAL
ADJUSTER ('99 - 00 models)
Main Menu
Table of Contents
NOTE:
• Inspect the gasket; replace it if it is distorted or
stays compressed.
• After installing them, run water over the lights to
make sure they do not leak.
Taillights
Replacement
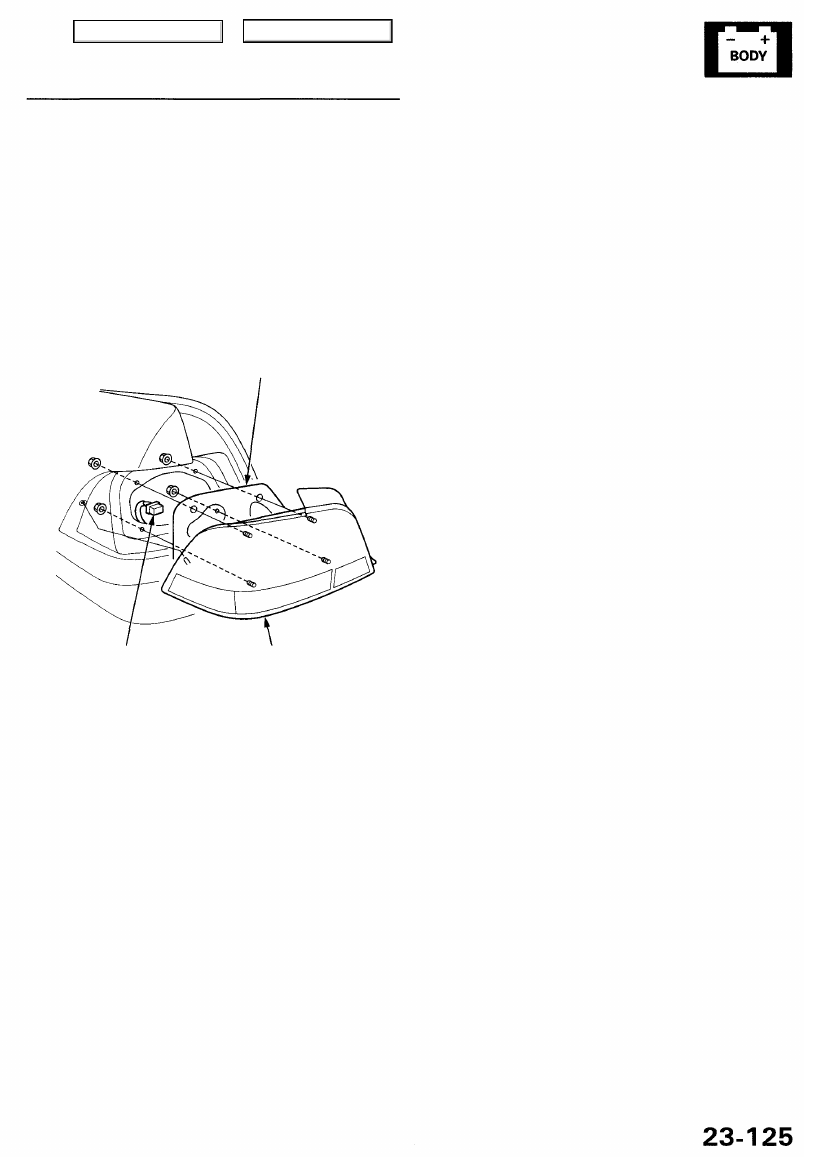
1. Open the trunk lid, and pull back the trunk side
panel.
2. Disconnect the connector(s) from the taillight
assembly.
3. Remove the four mounting nuts and the taillight
assembly.
GASKET
CONNECTOR
TAILLIGHT
ASSEMBLY
Main Menu
Table of Contents
Нет комментариевНе стесняйтесь поделиться с нами вашим ценным мнением.
Текст