Acura RL (1996-2004 year). Manual — part 618
Lighting System
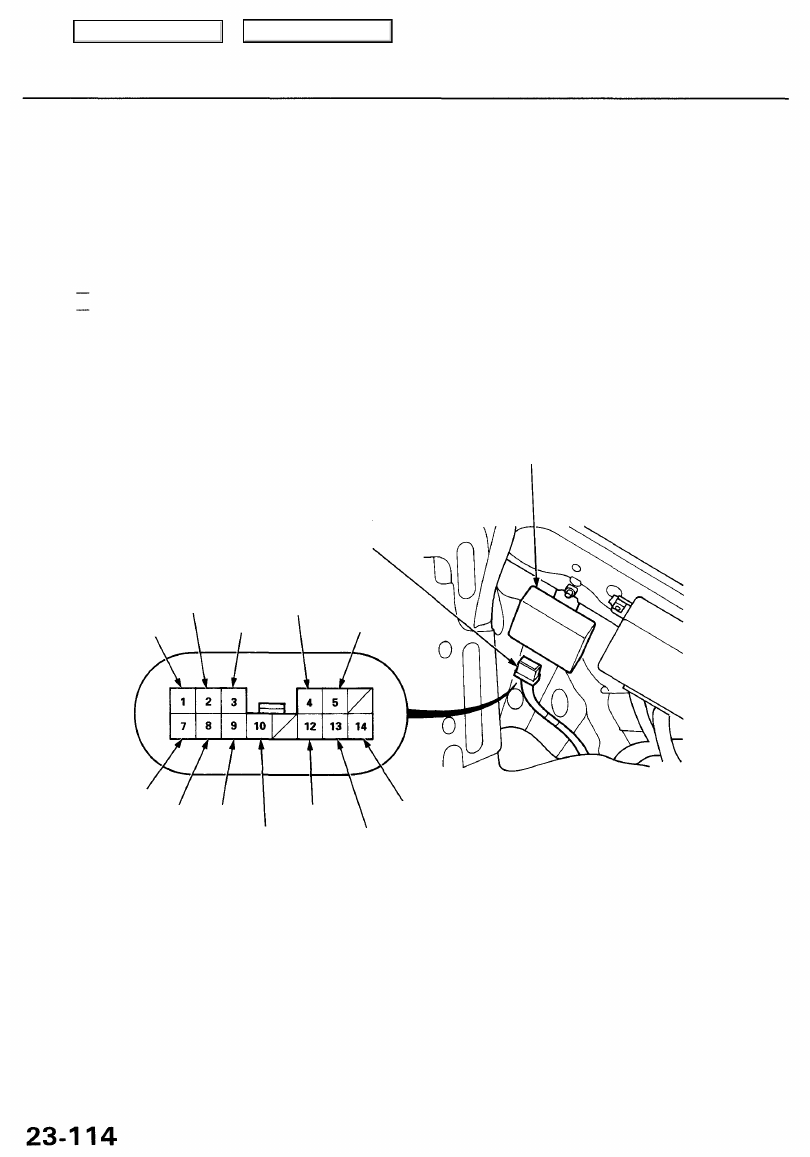
Automatic Lighting Control Unit Input Test (USA)
1. Remove the rear seat-back.
2. Disconnect the 14P connector from the control unit.
3. Inspect the connector and socket terminals to be sure they are all making good contact.
• If the terminals are bent, loose or corroded, repair them as necessary, and recheck the system.
• If the terminals look OK, make the following input tests at the connector.
If any test indicates a problem, find and correct the cause, then recheck the system.
If all the input test probe OK, the control unit must be faulty; replace it.
14P CONNECTOR
BLK/YEL
RED/YEL
AUTOMATIC LIGHTING
CONTROL UNIT
Wire side of
female terminals
BLK BLK
WHT/YEL
GRN/YEL
BRN
GRN/BLU
RED/GRN
YEL/BLK
BLU/RED
YEL/GRN
Main Menu
Table of Contents
BLK/YEL
YEL/BLK
BLU/RED
BLK
WHT/YEL
GRN/BLU
GRN/YEL
RED/GRN
Ignition switch ON (II)
Under all conditions
Under all conditions
Under all conditions
Driver's door open
Combination light
switch ON
(Except "AUTO")
Under all conditions
Check for voltage to ground:
There should be battery voltage.
Check for voltage to ground:
There should be battery voltage.
Check for continuity to ground:
There should be continuity.
Check for voltage to ground:
There should be battery voltage.
Check for voltage to ground:
There should be 1 V or less.
Check for continuity to ground:
There should be continuity.
Check for voltage to ground:
There should be battery voltage.
• Blown No. 20 (20 A) fuse in the
under-dash fuse/relay box
• An open in the wire
• Blown No. 19 (7.5 A) fuse in the
under-dash fuse/relay box
• An open in the wire
• Faulty headlight relay
• An open in the wire
• Poor ground (G401, G402, G651)
• An open in the wire
• Blown No. 56 (7.5 A) fuse in the
under-hood fuse/relay box
• An open in the wire
• Faulty driver's door switch
• Poor ground (G401, G402)
• An open in the wire
• Faulty combination light switch
• Poor ground (G401, G402)
• An open in the wire
• Faulty taillight relay
• An open in the wire
• Blown No. 1 (15 A) fuse in the
under-dash fuse/relay box
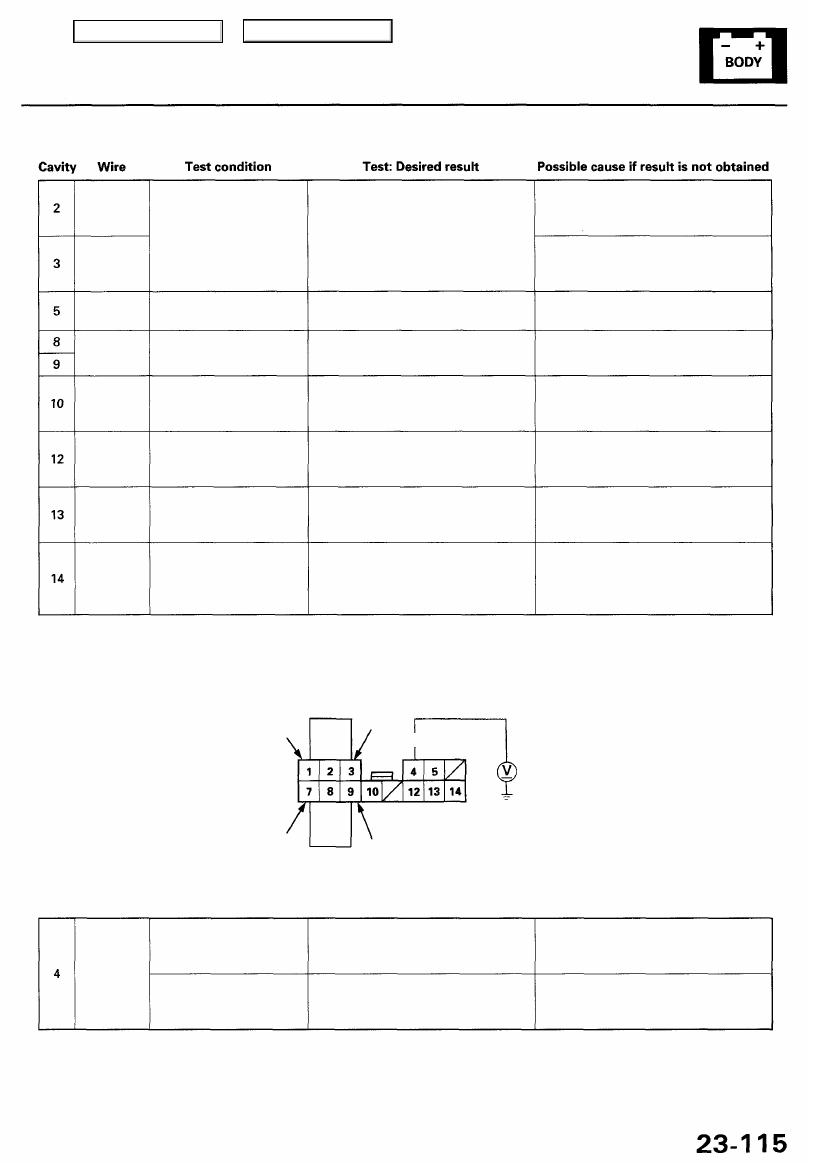
NOTE: Before testing, connect a voltmeter and jumper wires as shown:
Jumper
wire
YEL/BLK
YEL/GRN
Wire side of
female terminals
BLK
Jumper
wire
BRN
RED/YEL
Cavity Wire Test condition Test: Desired result Possible cause if result is not obtained
YEL/GRN
Cover the automatic
lighting sensor*
Shine light on the
automatic lighting
sensor
Check for voltage between the No.
4 terminal and body ground: There
should be 1 V or less.
Check for voltage between the No.
4 terminal and body ground:
There should be 5 V or more.
• Faulty automatic lighting sensor
• An open in the wire
• Faulty automatic lighting sensor
• An open in the wire
*: The automatic lighting sensor is located in the middle of dashboard. Cut the light off completely with a dark cloth.
Main Menu
Table of Contents
Lighting System
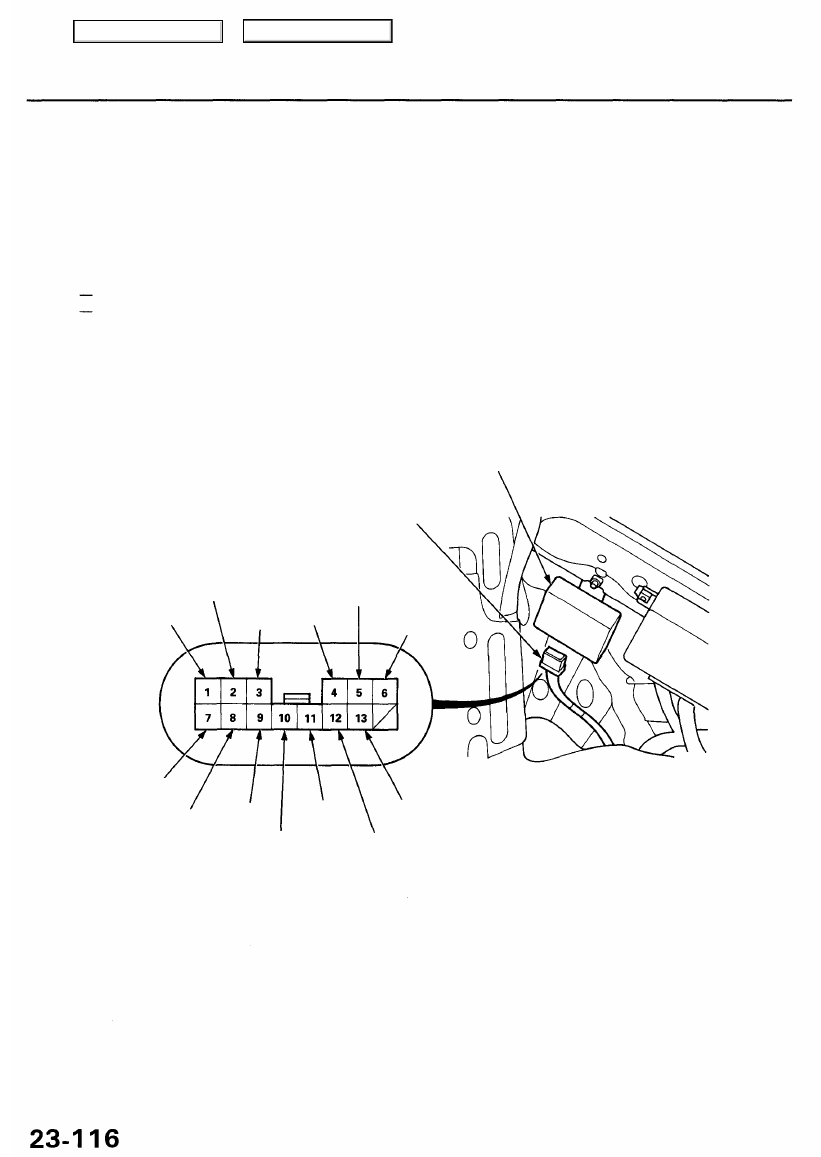
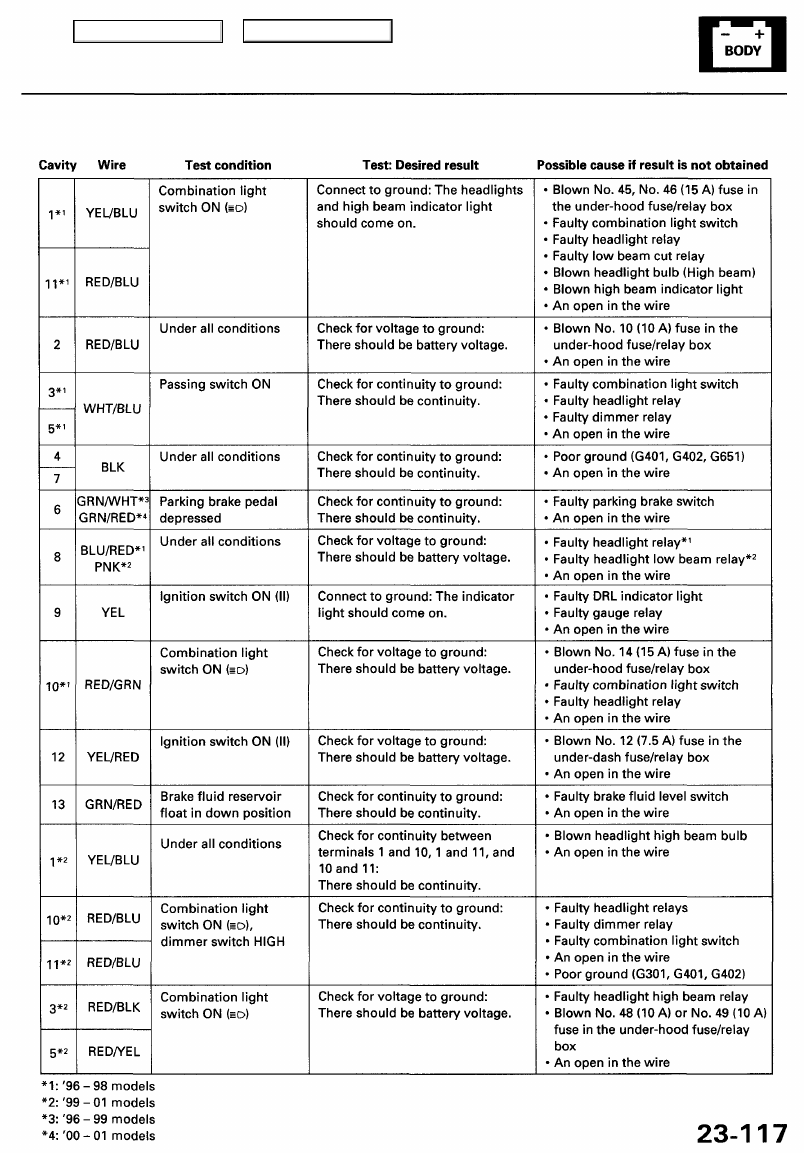
Daytime Running Lights Control Unit Input Test (Canada)
1. Open the trunk lid.
2. Disconnect the 14P connector from the control unit.
3. Inspect the connector and socket terminals to be sure they are all making good contact.
• If the terminals are bent, loose or corroded, repair them as necessary, and recheck the system.
• If the terminals look OK, make the following input tests at the connector.
If any test indicates a problem, find and correct the cause, then recheck the system.
If all the input test prove OK, the control unit must be faulty; replace it.
DAYTIME RUNNING LIGHTS
CONTROL UNIT
14P CONNECTOR
YEL/BLU
RED/BLU
WHT/BLU*
1
RED/BLK*
2
WHT/BLU*
1
RED/YEL*
2
GRN/WHT*
3
GRN/RED*
4
BLK
Wire side of
female terminals
BLK
BLU/RED*
1
PNK*
2
YEL
RED/GRN*
1
RED/BLU*
2
RED/BLU
YEL/RED
GRN/RED
Main Menu
Table of Contents
Main Menu
Table of Contents
Нет комментариевНе стесняйтесь поделиться с нами вашим ценным мнением.
Текст