Acura RL (1996-2004 year). Manual — part 331
Timing Belt and Balancer Belt
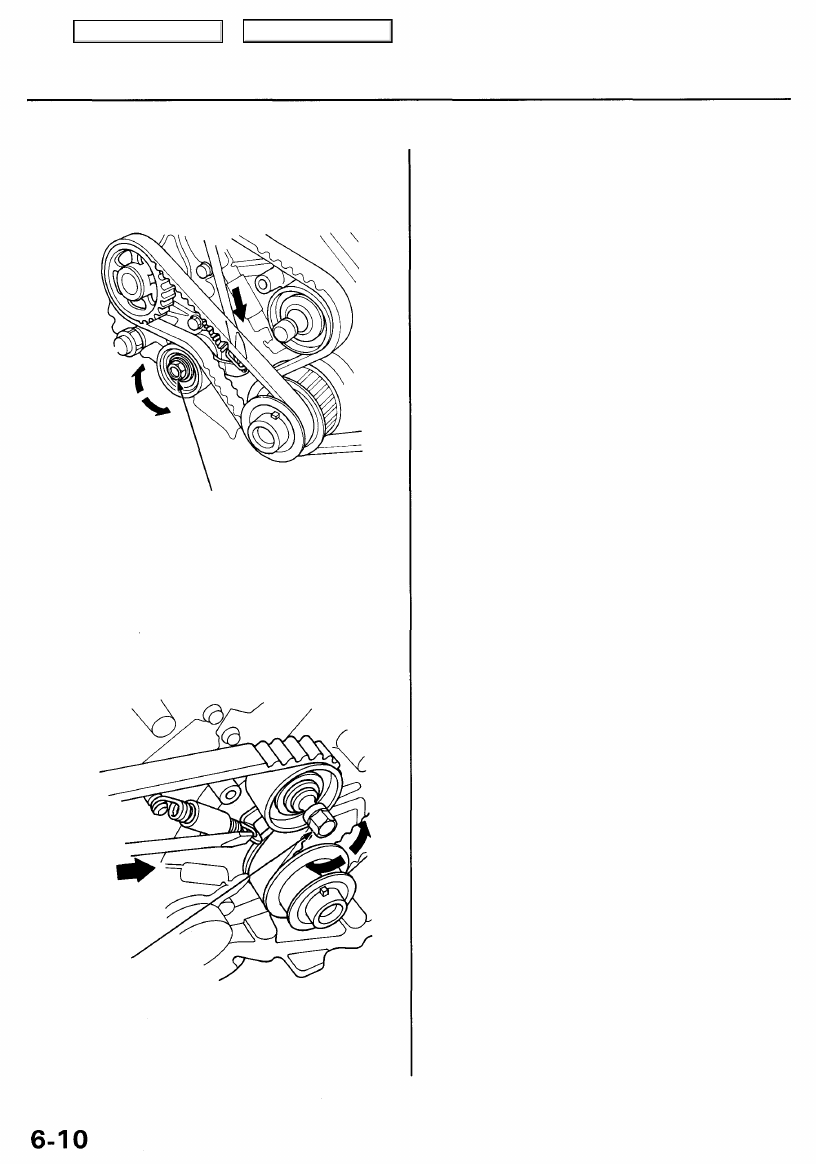
Removal (cont'd)
14. Loosen the balancer belt adjusting bolt 180°. Push
the tensioner to remove tension from the balancer
belt, then retighten the adjusting bolt.
BALANCER
BELT ADJUSTING BOLT
10 x 1.25 mm
44 N-m (4.5 kgf-m,
33 Ibf-ft)
15. Remove the balancer belt.
16. Loosen the timing belt adjusting bolt 180°. Push the
tensioner to remove tension from the timing belt,
then retighten the adjusting bolt.
TIMING BELT
ADJUSTING BOLT
10 x 1.25 mm
42 N-m (4.3 kgf-m,
31 Ibf-ft)
17. Remove the timing belt.
Main Menu
Table of Contents
Timing Belt and Balancer Belt
Installation
Install the timing belt and balancer belt in the reverse
order of removal; only key points are described here.
CAUTION: Do not rotate the crankshaft pulley or cam-
shaft pulleys with the timing belt removed. The pistons
may hit the valves and cause damage.
NOTE: When installing only the balancer belt, go to step
12.
1. Remove the spark plugs.
2. Remove the balancer belt drive pulley and timing
).
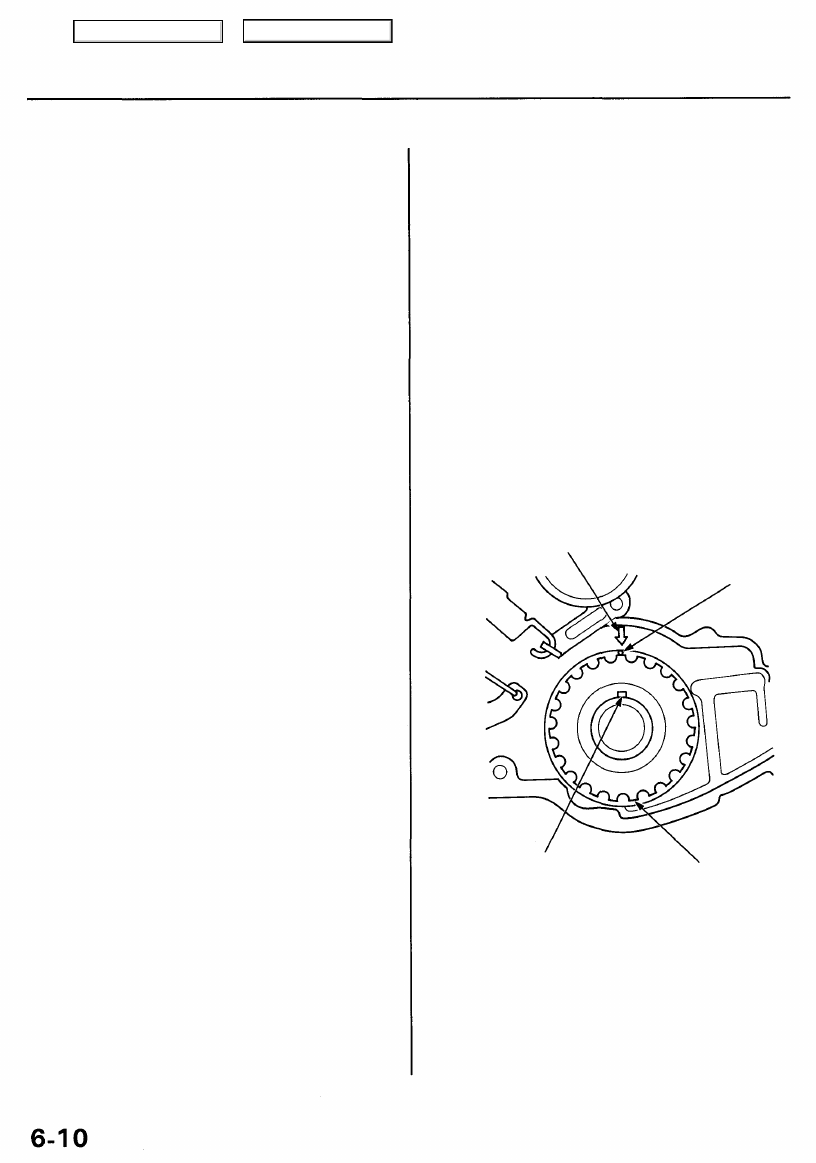
3. Set the tinning belt drive pulley so that the No. 1 pis-
ton is at top dead center (TDC). Align the TDC mark
on the timing belt drive pulley with the pointer on the
oil pump.
POINTER
TDC
MARK
KEY
TIMING BELT
DRIVE PULLEY
Clean.
Main Menu
Table of Contents
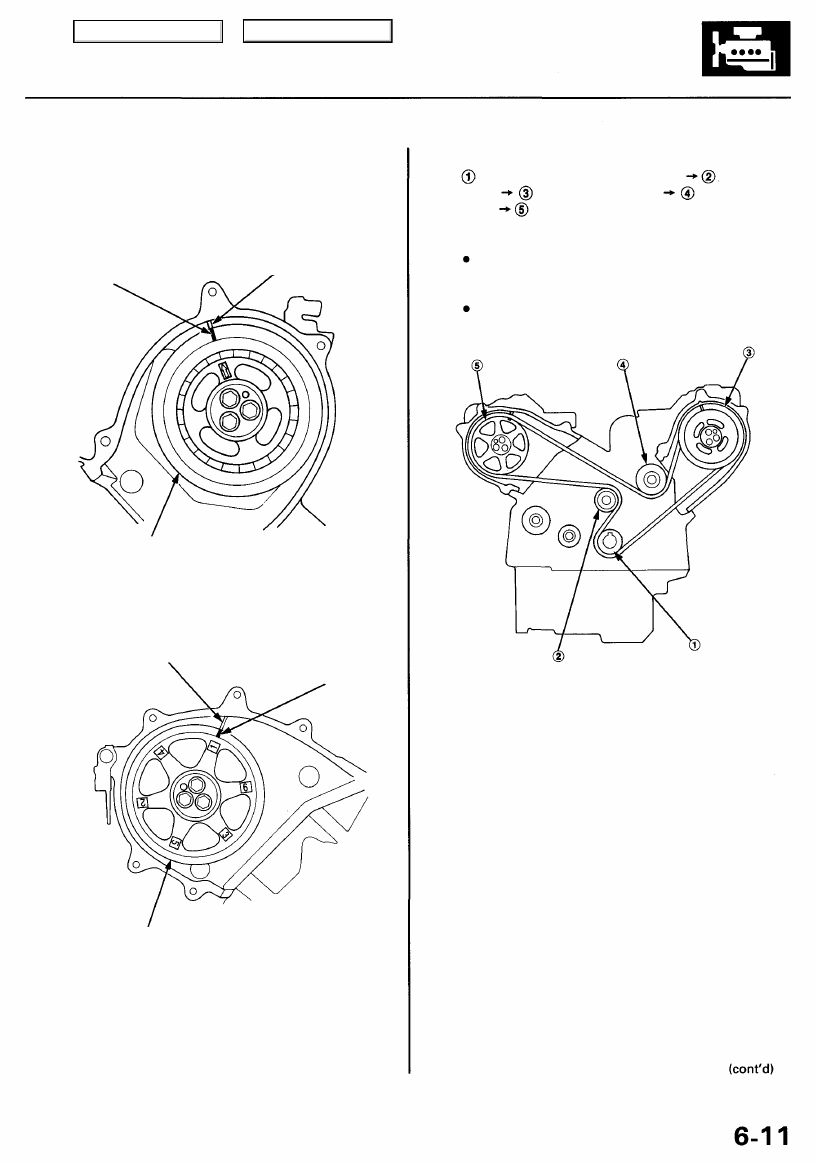
4. Set the camshaft pulleys so that the No. 1 piston is at
TDC. Align the TDC marks on the camshaft pulleys to
the pointers on the back covers.
LEFT:
TDC MARK
(BLUE)
BACK COVER
POINTER
(YELLOW)
LEFT CAMSHAFT
PULLEY
Clean.
RIGHT:
BACK COVER
POINTER
(YELLOW)
TDC MARK
RIGHT CAMSHAFT
PULLEY
Clean.
5. Install the timing belt in the sequence shown.
Timing belt drive pulley (crankshaft) Adjusting
pulley Left camshaft pulley Water pump
pulley Right camshaft pulley.
NOTE:
For easier installation, turn the right camshaft pul-
ley clockwise about a half tooth from the TDC posi-
tion.
Make sure the timing belt drive pulley and cam-
shaft pulleys are at TDC.
6. Loosen and retighten the timing belt adjusting bolt
to tension the timing belt.
7. Install the lower cover and crankshaft pulley (see
).
8. Rotate the crankshaft pulley about 5 or 6 turns clock-
wise so the timing belt positions on the pulleys.
9. Adjust the timing belt tension (see page
).
10. Remove the crankshaft pulley and lower cover.
11. Install the timing belt guide plate and balancer belt
).
Main Menu
Table of Contents
Timing Belt and Balancer Belt
Installation (cont'd)
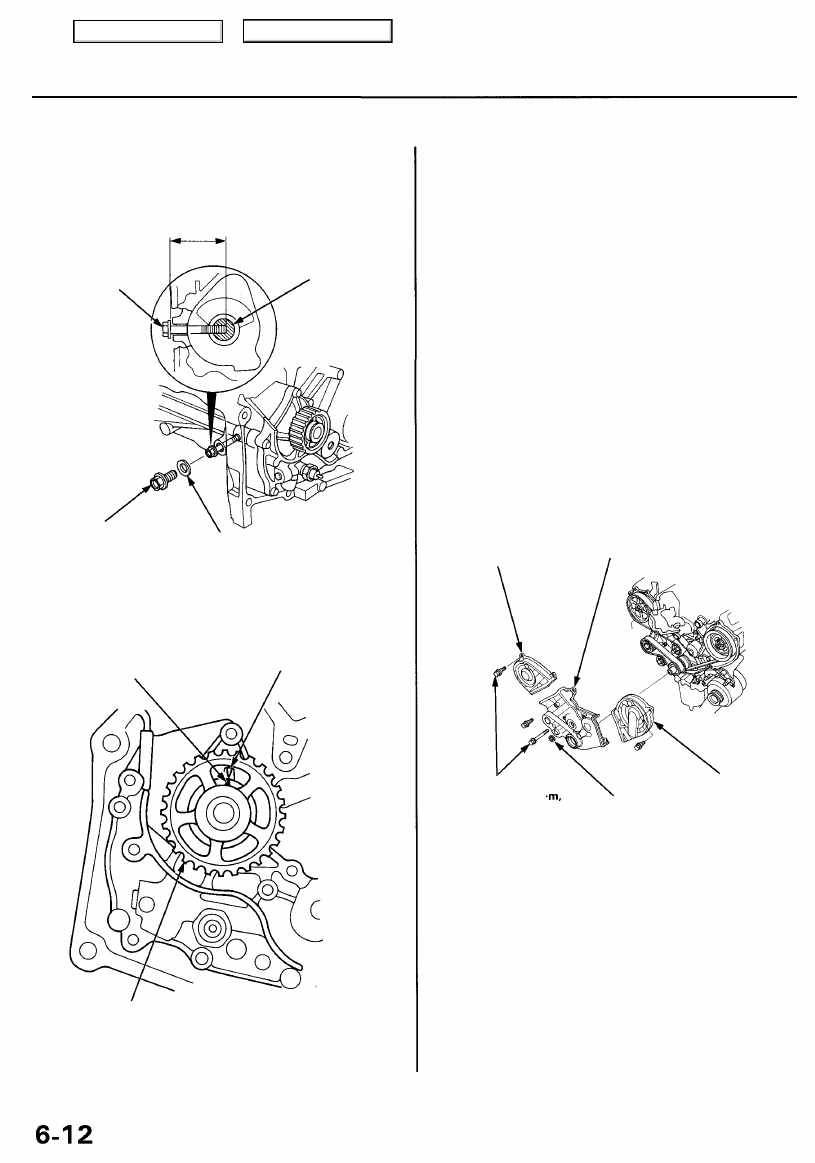
12. Align the maintenance hole and the balancer shaft
hole. Insert a 6 mm bolt that is at least 45 mm (1.8
in) long into the balancer shaft.
6 mm BOLT
BALANCER
SHAFT
12 mm SEALING
BOLT
20 N-m (2.0 kgf-m,
14 Ibf-ft)
WASHER
Replace.
13. Check alignment of the pointers.
BALANCER BELT
DRIVEN PULLEY
POINTER
BALANCER GEAR CASE
POINTER
BALANCER BELT
DRIVEN PULLEY
Clean.
14. Set the timing belt drive pulley so that the No. 1 pis-
).
15. Install the balancer belt drive pulley, then install the
balancer belt.
16. Loosen and retighten the balancer belt adjusting
bolt to tension the balancer belt.
17. Remove the 6 mm bolt. Install the sealing bolt in the
maintenance hole. Use a new washer.
18. Install the crankshaft pulley, then rotate the crank-
shaft pulley about 5 or 6 turns clockwise so that the
balancer belt positions on the pulleys.
19. Adjust the balancer belt tension (see page
).
20. Remove the crankshaft pulley.
21. Install the upper and lower covers, then install the
crankshaft pulley.
RIGHT UPPER
COVER
LOWER
COVER
6 x 1.0 mm
12 N-m (1.2 kgf
8.7 Ibf-ft)
RUBBER
SEAL
LEFT UPPER
COVER
45 mm (1.8 in) or longer
Main Menu
Table of Contents
Нет комментариевНе стесняйтесь поделиться с нами вашим ценным мнением.
Текст