Acura TL (1995-1998) body repair. Manual — part 19
Rear Floor
Replacement (cont'd)
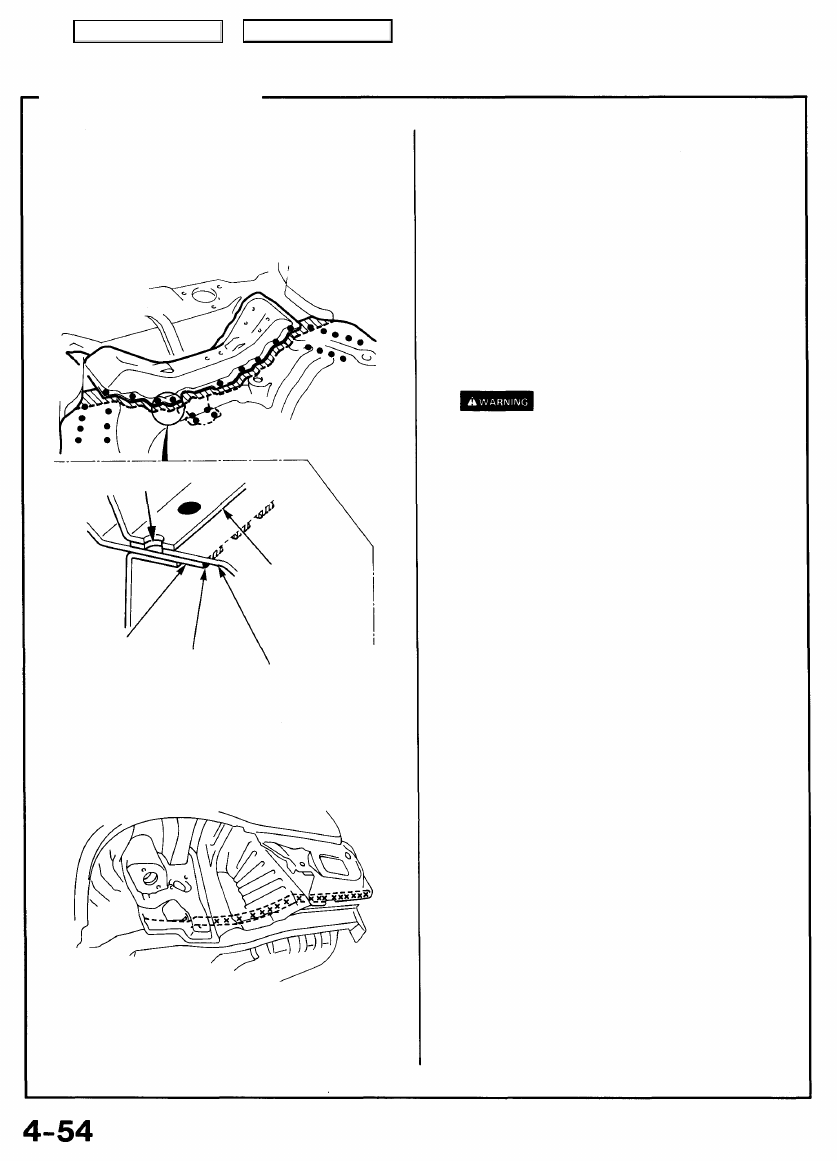
• Make 5 mm (0.2 in) hole in the MIG weld hole with the
repair part.
• Weld the rear floor, repair part and rear floor upper
cross member.
REAR
FLOOR
MIG
welding
REPAIR
PART
• Weld the rear wheelhouse and outer panel.
• Weld the rear panel and install the rear floor upper
extension.
13. Finish the welded area.
Even out the welded area with a hammer and dolly, and
fit the flange surfaces closely together.
14. Apply the sealer.
Apply sealer at the overlapped area of the rear floor, and
the welded surfaces of the rear wheelhouse and rear
end inner panel. Seal gaps completely (see
).
15. Apply the paint.
See Paint Repair section.
• Ventilate when spraying paint. Most paint
contains substances that are harmful if inhaled
or swallowed. Read the paint label before
opening the paint container.
• Avoid contact with skin. Wear an approved
respirator, gloves, eye protection and appropriate
clothing when painting.
• Paint is flammable. Store it in a safe place, and
keep it away from sparks, flames or cigarettes.
16. Apply the undercoat.
Apply anti-rust agent to the inside of the jack-up stif-
fener and jointed areas of the rear floor (see
).
17- Weld the rear panel and install the related parts.
Install in the reverse order in which they were removed.
18. Inspect and clean.
• Measure the rear wheel alignment.
• Clean the inside of the trunk compartment.
REAR FLOOR
UPPER CROSS
MEMBER
Main Menu
Table of Contents
Rear Floor Cross Member
Description
The rear floor cross member position is critical for rear wheel alignment. During replacement, check the position of the rear beam
and rear damper base and position the rear floor cross member properly.
Weld securely following the welder manufacturer's instructions to maintain rigidity. Use of the positioning jig is recommended.
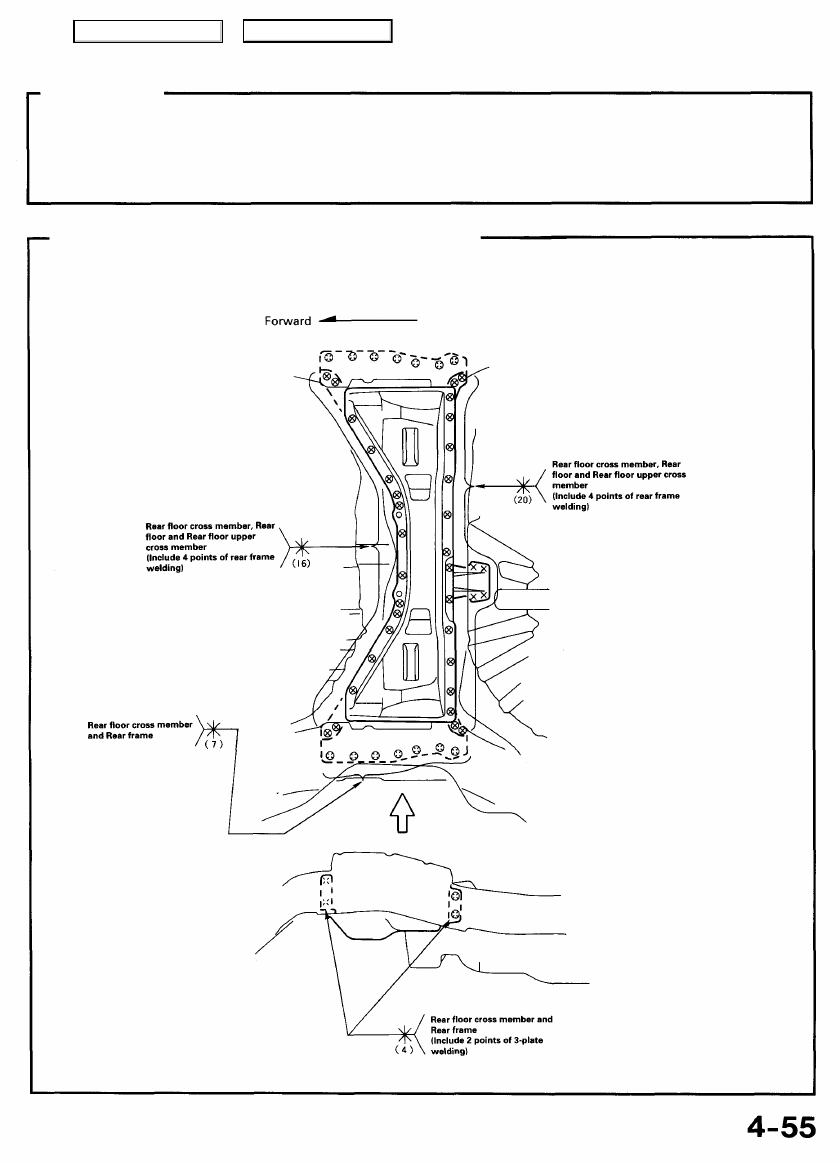
Mass Production Body Welding Diagram
Main Menu
Table of Contents
Rear Floor Cross Member
Replacement
1. See Rear Floor Replacement for removal of related
parts.
2. Peel off the undercoat.
Heat the undercoat at the weld areas of the rear floor
and rear frame with a gas torch, and peel off the
undercoat with a metal spatula.
CAUTION: Be careful not to burn the fittings inside
the trunk compartment when heating.
3. Remove the rear floor cross member.
To prevent eye injury, wear goggles
or safety glasses whenever sanding, cutting or
grinding.
• Center punch around the spot weld imprints on the
rear floor cross member from under the rear floor.
• Drill holes with a spot cutter at the area joined to the
rear floor cross member and rear floor.
NOTE: When drilling holes be careful not to drill down to
the rear floor upper cross member.
• Center punch around the spot weld imprints on the
rear frame.
• Drill holes with a spot cutter.
• Be careful not to let them penetrate through to the
rear frame.
• Pry off the part with a chisel.
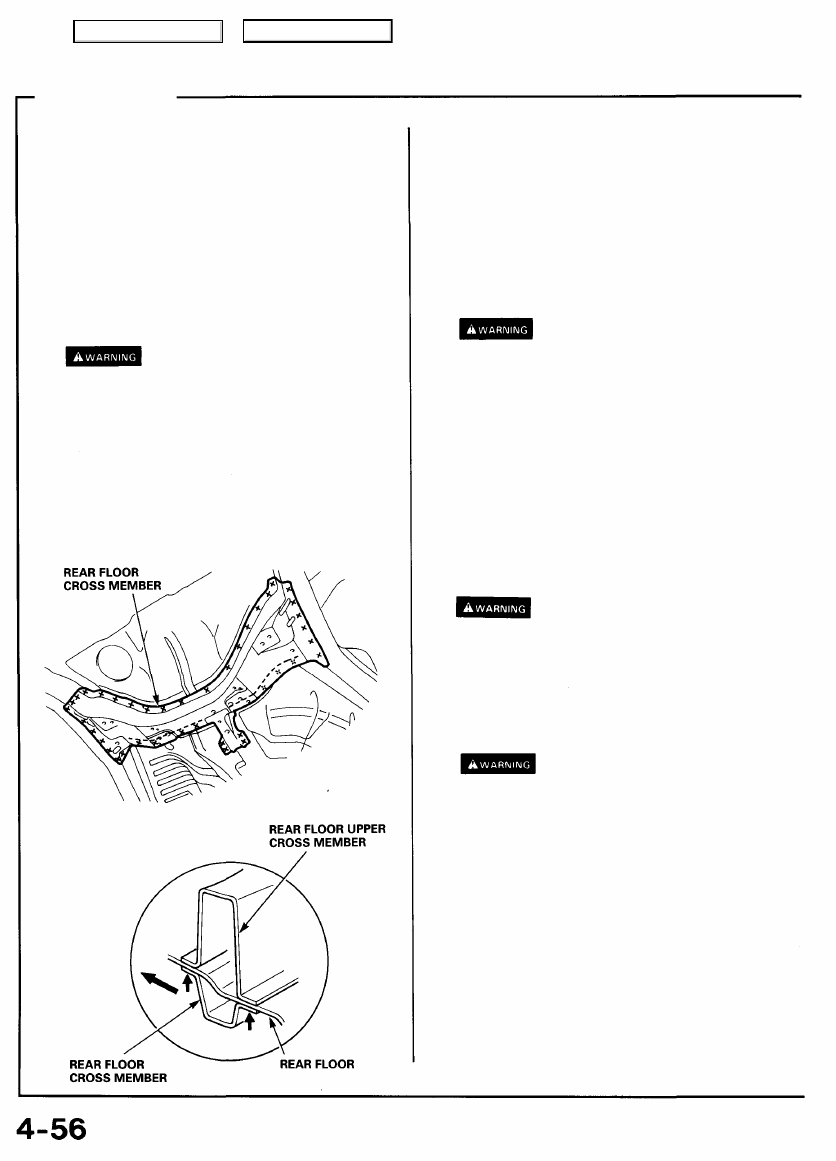
4. Set the new rear floor cross member.
• Sand off undercoat from both sides of the areas to
be welded to expose the steel plate.
To prevent eye injury, wear goggles
or safety glasses whenever sanding, cutting or
grinding.
• Make 5 mm (0.2 in) holes in the MIG weld holes with
the new rear floor cross member.
• Set the new rear floor cross member in the original
position properly and place a jack under the rear
floor cross member for support.
• Refer to the set position body dimensional drawings
) for proper positioning of the rear floor
cross member.
• Temporarily weld the mating surfaces with the rear
frame.
To prevent eye injury and burns
when welding, wear an approved welding helmet,
gloves and safety shoes.
• Check the rear floor cross member in its correct
position with the fuel tank installed.
5. Perform the main welding.
To prevent eye injury and burns
when welding, wear an approved welding helmet,
gloves and safety shoes.
• MIG weld the rear floor cross member from under the
rear floor.
Main Menu
Table of Contents
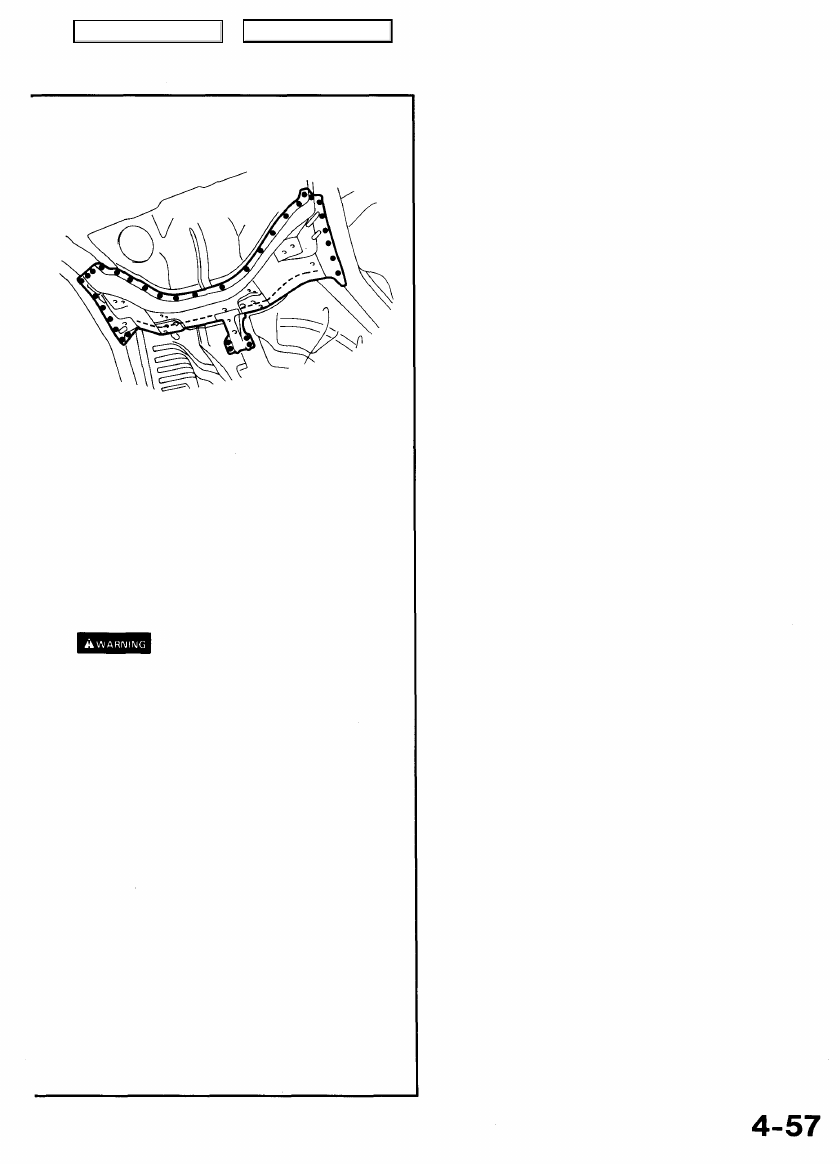
6. Finish the welding area.
Roughly grind the welds in the trunk compartment with
a disc grinder. Be sure to leave the finishing allowance.
NOTE: Take care not to grind excessively.
).
8. Apply the paint.
See Paint Repair section.
• Ventilate when spraying paint. Most paint
contains substances that are harmful if inhaled
or swallowed. Read the paint label before
opening the paint container.
• Avoid contact with skin. Wear an approved
respirator, gloves, eye protection and appropriate
clothing when painting.
• Paint is flammable. Store it in
a
safe place, and
keep it away from sparks, flames or cigarettes.
).
10. Install the related parts.
Install in the reverse order of removal.
11. Check and clean.
• Check the rear wheel alignment.
• Clean the trunk compartment.
Main Menu
Table of Contents
Нет комментариевНе стесняйтесь поделиться с нами вашим ценным мнением.
Текст