Acura TL (1995-1998) body repair. Manual — part 17
Rear Panel
Replacement
1. Remove the related parts.
• Rear bumper
• Rear bumper upper beam
• Trunk lid lock and its attachments
• Other related parts
• Rear and side trim panels
• Taillights
2. Pull out and straighten the damaged area.
• Pull out the related rear side inner panel, rear floor,
rear side frame and other damaged parts with the
frame straightener.
• Attach the car to the frame straightener by tighten-
ing the underbody clamps located at the jack-up
points on the bottom of the side sill and the side sill
side flanges.
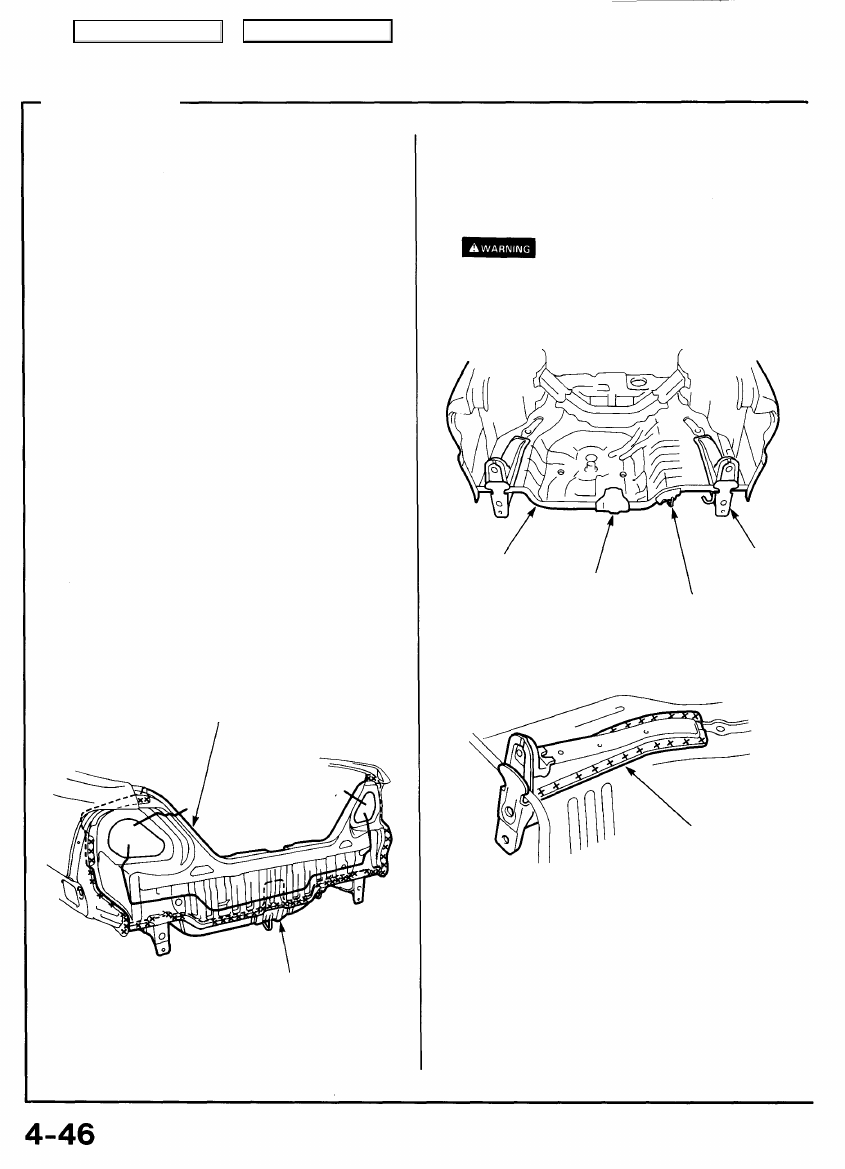
3. Cut and pry off the rear panel.
• Cut along the bold line shown with a gas cutter or an
air chisel and remove the rear panel.
• Center punch around the spot weld imprints with the
rear side outer panel and rear floor.
• Drill holes using the spot cutter.
NOTE: Be careful not to let holes penetrate through to
the rear floor.
• Remove weld flange with a chisel.
REAR
PANEL
JACK-UP
STIFFENER
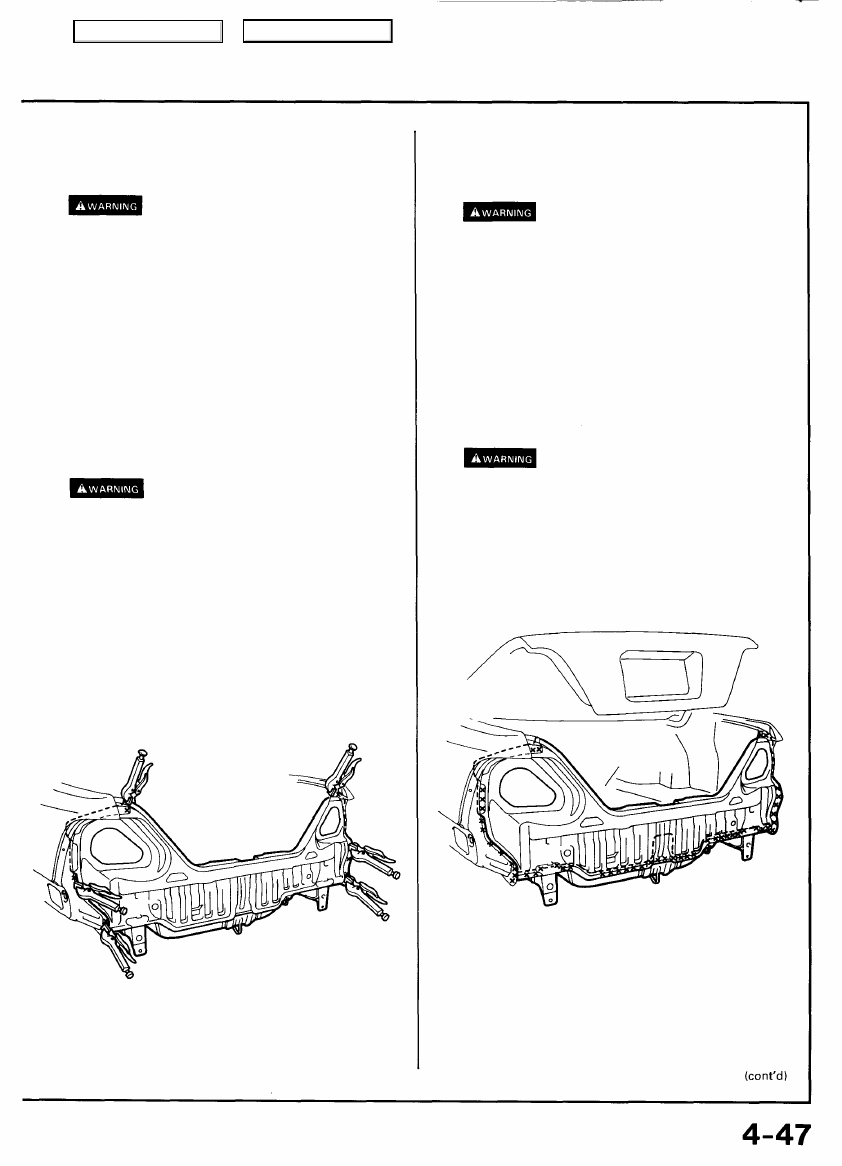
4. Mold the related parts.
• Repair the rear floor upper stiffener if necessary.
• Repair all cracks, holes or other defects by MIG or
gas welding.
To prevent eye injury and burns
when welding, wear an approved welding helmet,
gloves and safety shoes.
REAR FLOOR
JACK-UP
STIFFENER
REAR
FRAME
SILENCER MOUNT
BRACKET
REAR FLOOR
UPPER
STIFFENER
Main Menu
Table of Contents
5. Set the new rear panel.
• Paint the inside of the panel with the body color.
• See Paint Repair section.
• Ventilate when spraying paint. Most paint
contains substances that are harmful if inhaled
or swallowed. Read the paint label before
opening the paint container.
• Avoid contact with skin. Wear an approved
respirator, gloves, eye protection and appropriate
clothing when painting.
• Paint is flammable. Store it in a safe place, and
keep it away from sparks, flames or cigarettes.
• Remove the undercoat from the welding section of
the panel and expose the steel plate using a disc
sander.
To prevent eye injury, wear goggles
or safety glasses whenever sanding, cutting or
grinding.
• Install the new rear panel and clamp it with vise-
grips.
NOTE: Apply the spot sealer to the welding surface when
spot welding.
• Check the rear panel position using the body dimen-
).
6. Tack weld the rear panel.
• Weld the clamped sections for temporary installa-
tion.
To prevent eye injury and burns
when welding, wear an approved welding helmet,
gloves and safety shoes.
7. Open and close the trunk lid to check for proper
installation.
NOTE: Make sure the trunk lid or tailgate locks securely.
Position the rear panel in its correct position with the rear
bumper and taillight installed.
8. Perform the main welding.
To prevent eye injury and burns
when welding, wear an approved welding helmet,
gloves and safety shoes.
• Make 20% to 30% more spot welds than there were
holes drilled.
Main Menu
Table of Contents
Rear Panel
Replacement (cont'd)
9. Finish the welding areas.
• Level the welded acres with a disc sander, then even
out high areas with a hammer. Be careful not to de-
form them.
To prevent eye injury, wear goggles
or safety glasses whenever sanding, cutting or
grinding.
• Even out the spot welded flange area with a hammer
and dolly.
).
• Apply sealer to the rear side outer joint and around
the taillight areas of the rear panel.
• Apply sealer to the rear panel and rear floor joint.
11. Apply the paint.
See Paint Repair section.
• Ventilate when spraying paint. Most paint
contains substances that are harmful if inhaled
or swallowed. Read the paint label before
opening the paint container.
• Avoid contact with skin. Wear an approved
respirator, gloves, eye protection and appropriate
clothing when painting.
• Paint is flammable. Store it in a safe place, and
keep it away from sparks, flames or cigarettes.
12. Apply anti-rust agent (see
).
• Apply agent to the outer panel, rear panel and rear
floor joint.
• Apply agent to the inside of the jack-up stiffener.
13. Install the related parts.
Install in the reverse order in which they were removed.
14. Inspect, check, and clean.
• Adjust the clearance with the trunk lid, then adjust the
level difference and fit. Check operation.
• Test for leaks in the trunk compartment.
• Clean the trunk floor.
Main Menu
Table of Contents
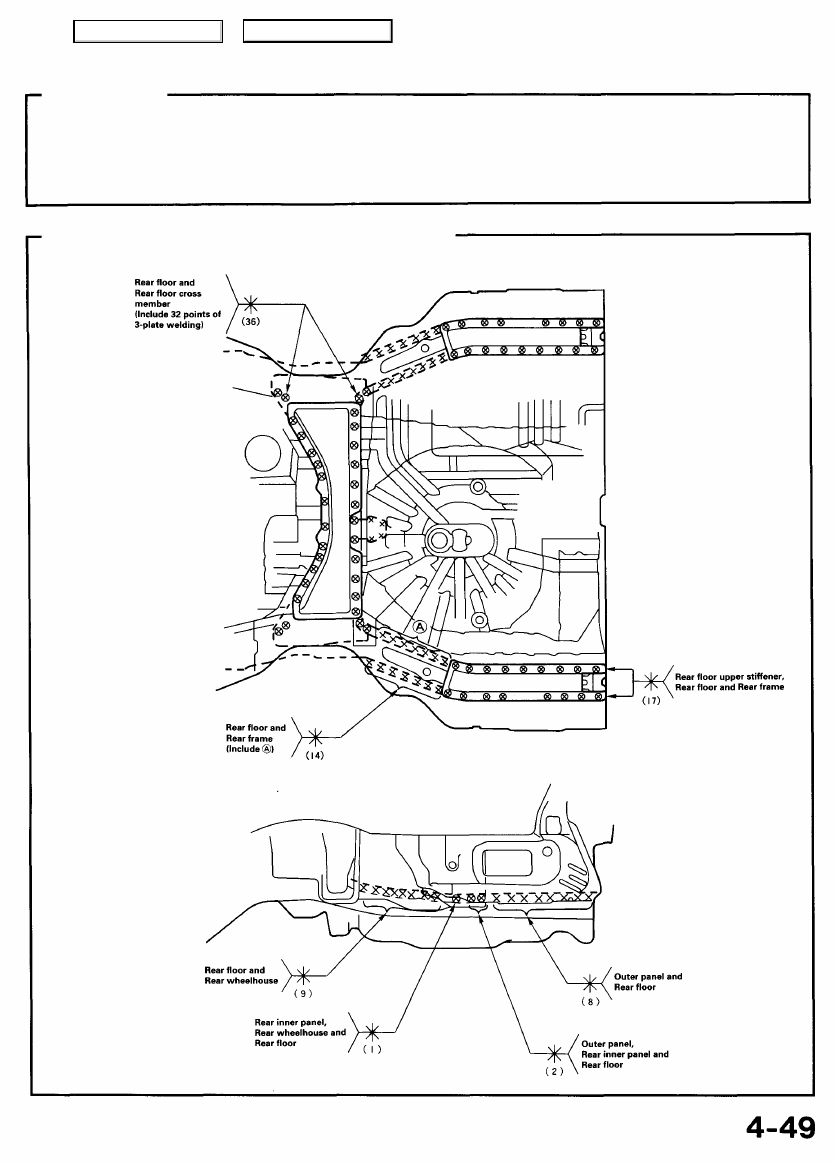
Rear Floor
Description
The rear floor is the base of the rear body and it is critical for the rigidity of the rear body. During replacement, refer to the body
dimension chart or body correction chart and determine the position to set the rear floor properly. Be sure that the rear floor is
not bent or deformed. Weld securely following the welder manufacturer's instructions to maintain the rigidity of the body.
Mass Production Body Welding Diagram
Main Menu
Table of Contents
Нет комментариевНе стесняйтесь поделиться с нами вашим ценным мнением.
Текст