Acura TL (1995-1998) body repair. Manual — part 20
Honeycomb Floors (2.5TL)
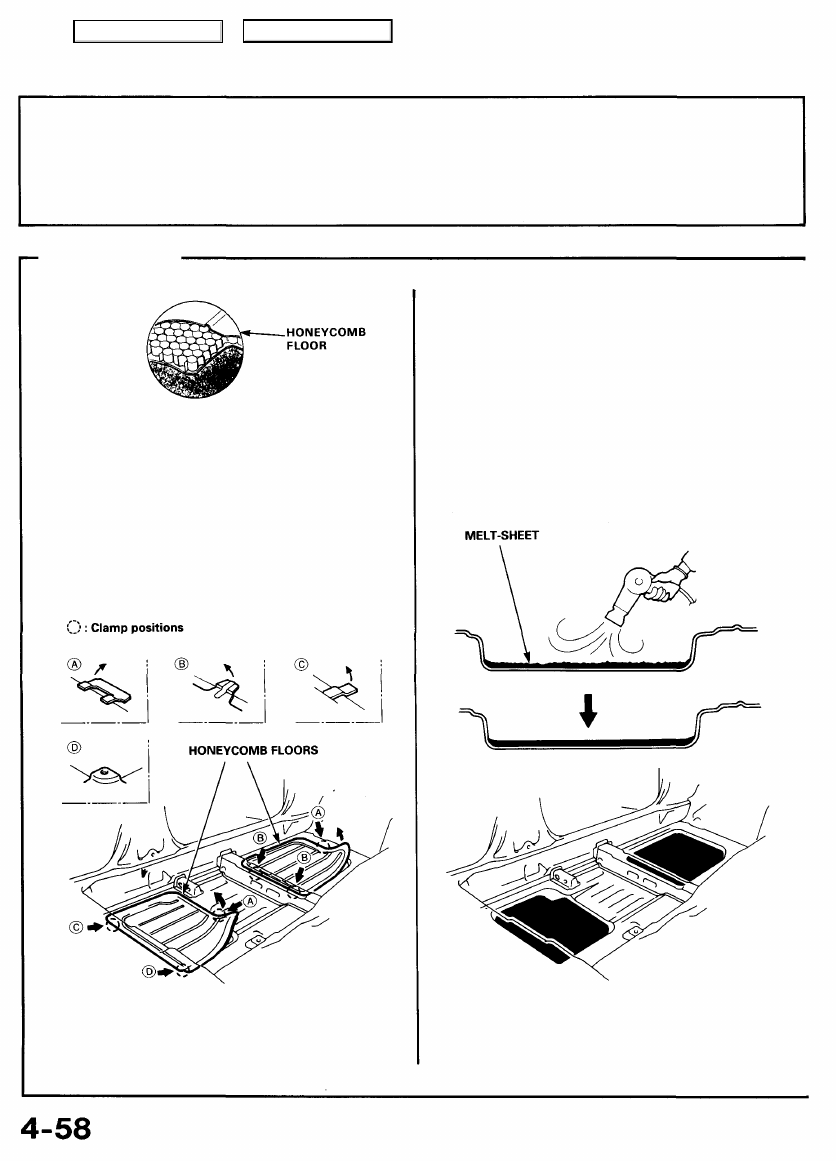
NOTE: What is known as "honeycomb" construction is employed for the front floor. Properly designed and applied, it plays an
important role in maintaining the structural rigidity of that section of the car's floor. The honeycomb floor is installed with an epoxy
resin adhesive. Care must be exercised when installing a new honeycomb floor as seepage of water into the honeycomb
construction will adversely affect its performance.
Replacement
1. Remove the related parts.
• Front and rear seats.
• Carpet, others
2. Removal of honeycomb floors.
• Scrape off the dust sealer all the way around the
floor.
• Separate the floor from the body by using a pair of
pliers.
3. Flattening of melt-sheet
• Heat the surface of the melt-sheet with a torch or heat
gun until it becomes soft and pliable.
• Finish the surface smooth and flat with a steel spatula.
NOTE: In order to take full advantage of the honeycomb
floor, its face must contact the base fully.
CAUTION: Be careful not to burn the fittings inside
the passenger compartment when heating.
Main Menu
Table of Contents
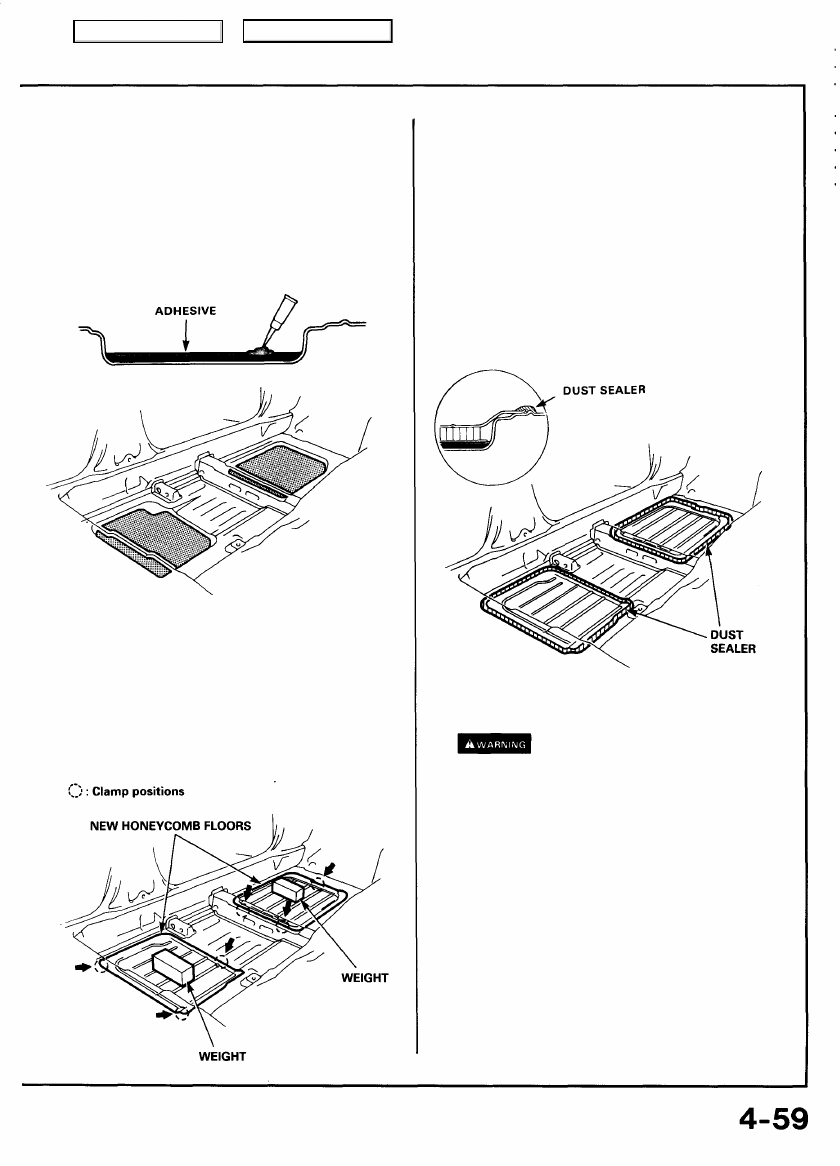
4. Application of adhesive.
• Apply adhesive all over the melt-sheet.
NOTE: Use CEMEDINE EP-330 or equivalent (epoxy
resin adhesive designed to harden quickly at normal
temperature). Follow the adhesive manufacturer's
instructions.
6. Application of dust sealant.
• Apply dust sealer all the way around the floors.
NOTE: It is essential to make the floor completely imper-
vious to water as seepage into honeycomb construction
will adversely affect its performance. Use sufficient dust
sealant to seal the floor.
• Using a bristle brush or spatula, spread the dust
sealant all over the surface until it becomes smooth
and flat.
• Check that the dust sealant is applied to the seat
brackets thoroughly.
5. Installation of new honeycomb floors.
• Install the new honeycomb floors.
• Clamp the floor in place using a clamp at the front
and rear as shown.
NOTE: Place weights on the floor for 30-60 minutes
until the adhesive hardens.
7. Apply the paint (body color).
• See Paint Repair Manual.
• Ventilate when spraying paint. Most paint
contains substances that are harmful if inhaled
or swallowed. Read the paint label before
opening paint container.
• Avoid contact with skin. Wear an approved
respirator, gloves, eye protection and appropriate
clothing when painting.
• Paint is flammable. Store in a safe place, and
keep it away from sparks, flames or cigarettes.
8. Install the related parts.
9. Check and clean.
Check the electrical parts for proper operation.
Main Menu
Table of Contents
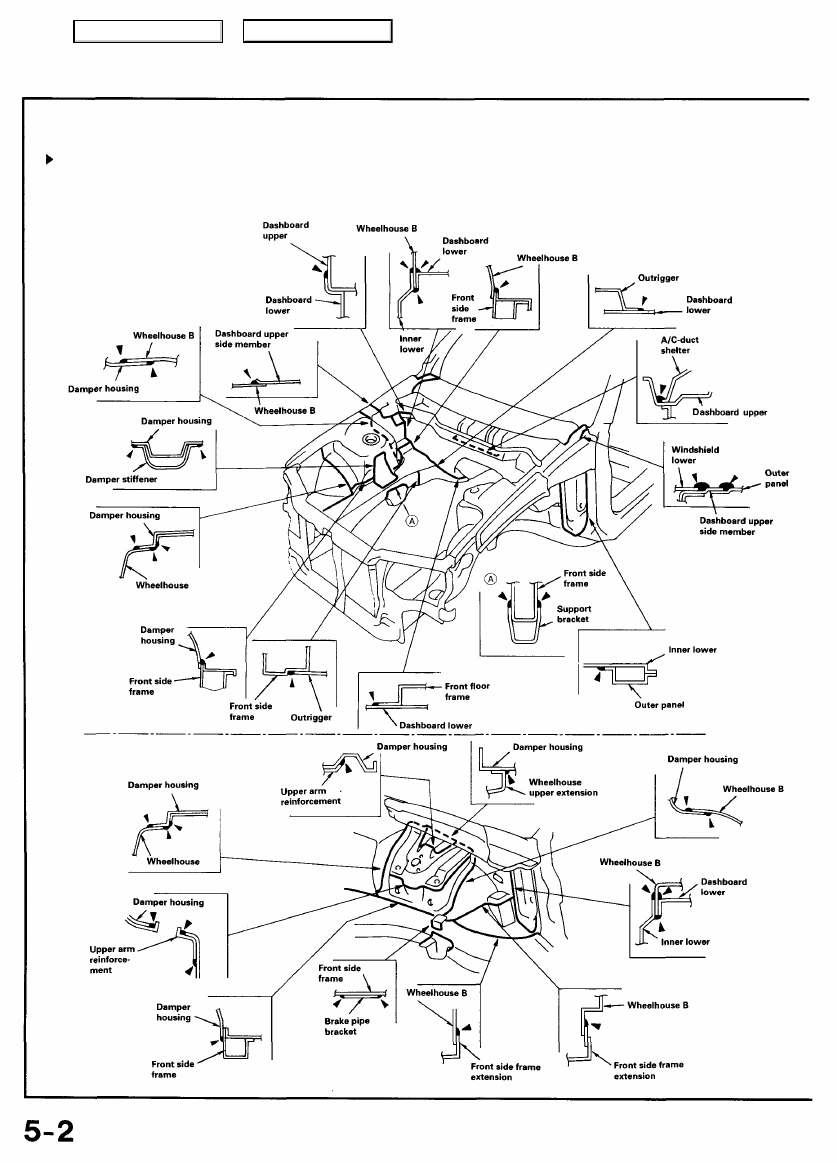
NOTE: Seal the following areas to prevent air leaks, water leaks and rust.
Spot Sealer: 3M #08892 (Internal)
: 3M #08893 (External)
Use materials above or equivalents.
: Sealing locations
2.5TL:
<Engine Compartment>
<Front Wheelhouse>
Cross Section of Body and Sealants
Main Menu
Table of Contents
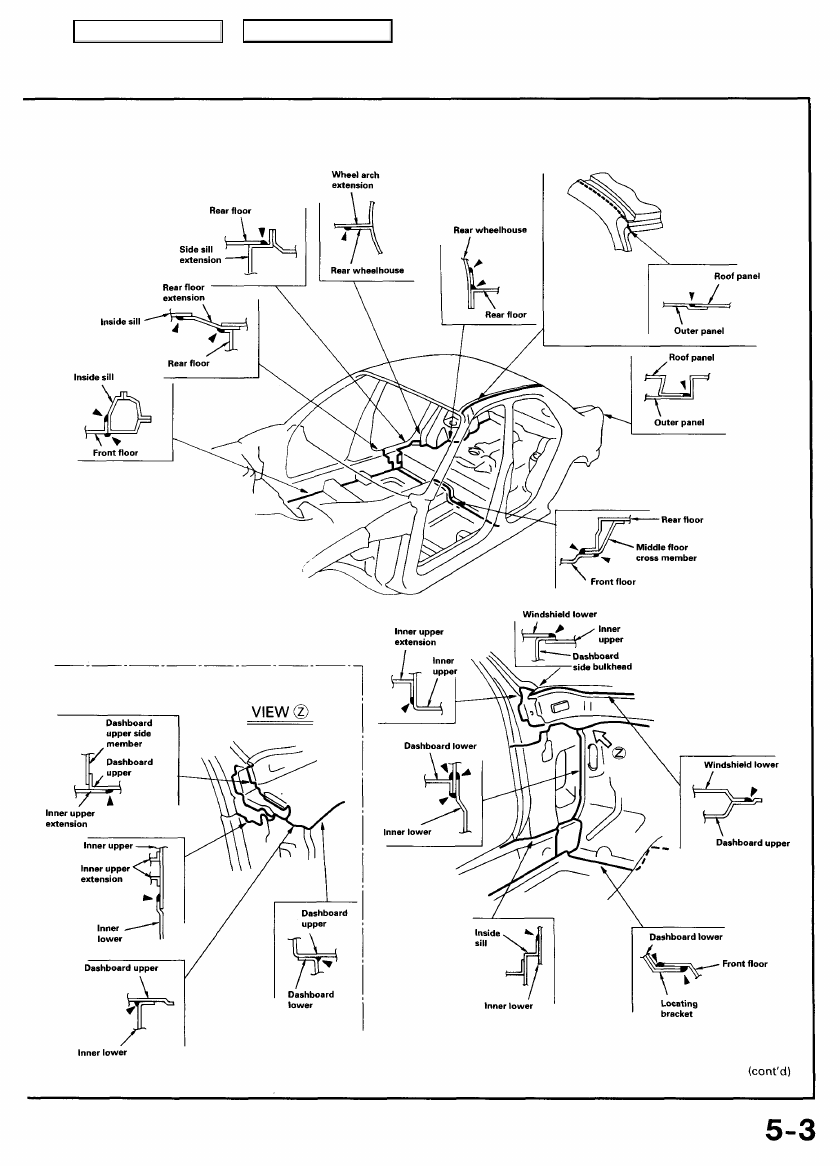
<Front Floor/Rear Floor>
<Roof panel>
<Front Pillar Inner Panel>
Main Menu
Table of Contents
Нет комментариевНе стесняйтесь поделиться с нами вашим ценным мнением.
Текст