Defender (1999-2002). Manual — part 135
86
ELECTRICAL
12
REPAIR
Refit
7. Fit solenoid to mounting bracket and secure with
screws.
8. Connect operating rod to solenoid assembly.
9. Fit solenoid to door, fit screw and tighten bolt to
6 Nm (4 lbf.ft).
10. Position harness to solenoid mounting bracket
and secure with clip.
11. Connect multiplug to solenoid.
12. Fit tail door trim casing. See CHASSIS AND
BODY, Repair.
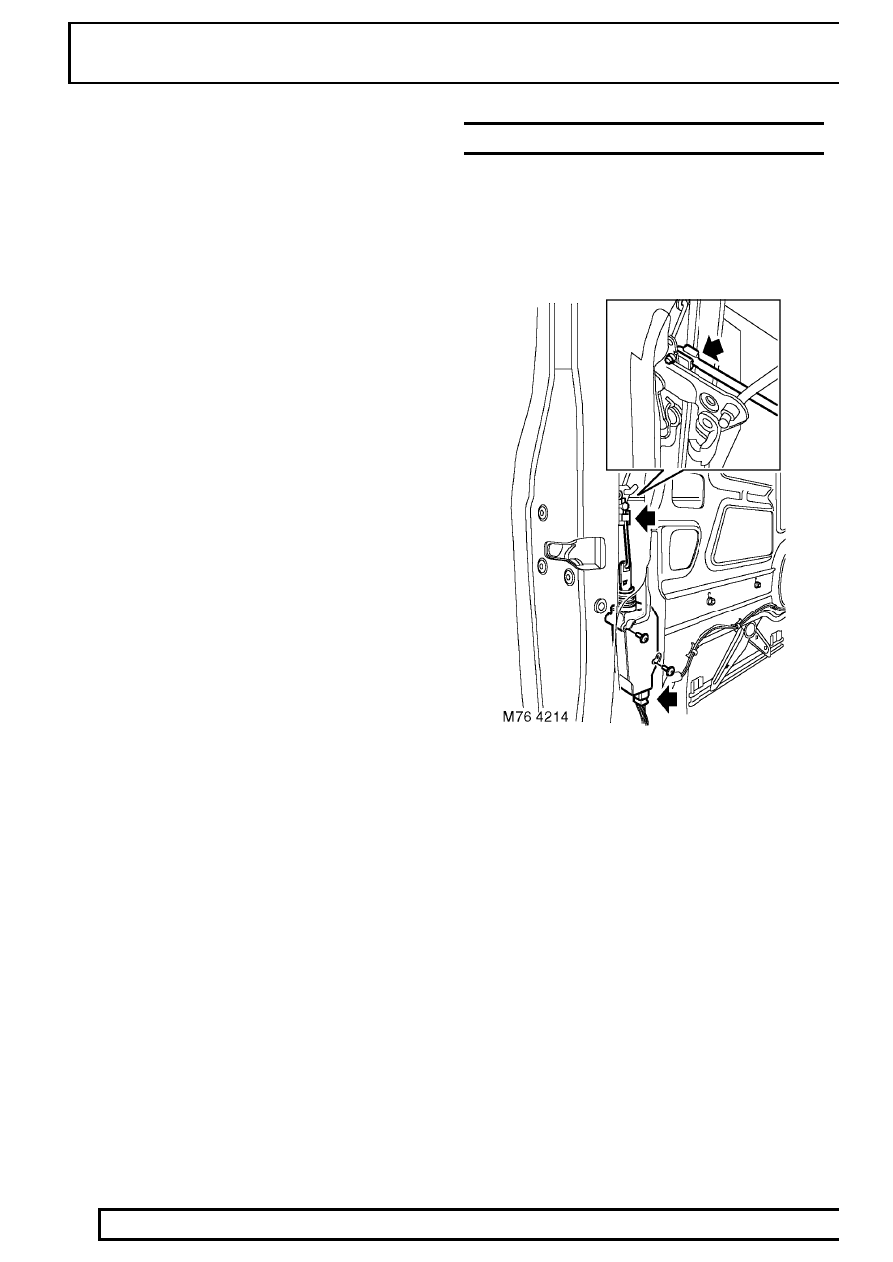
SOLENOID/MOTOR - FRONT DOOR - FROM 02MY
Service repair no - 86.26.08
Remove
1. Remove door trim casing. See CHASSIS AND
BODY, Repair.
2. Carefully peel back plastic sheet to expose
mechanism.
3. Release clip, detach and remove lock solenoid
link.
4. Loosen 2 screws securing solenoid, release
solenoid from mounting panel, disconnect
multiplug and remove solenoid.
Refit
5. Connect multiplug to solenoid, locate solenoid to
mounting panel and tighten screws.
6. Fit and secure link.
7. Secure plastic sheet.
8. Fit door trim casing. See CHASSIS AND
BODY, Repair.
9. Adjust door lock solenoid. See Adjustment.

ELECTRICAL
13
REPAIR
SOLENOID/MOTOR - REAR DOOR - FROM 02MY
Service repair no - 86.26.09
Remove
1. Remove plastic sheet. See CHASSIS AND
BODY, Repair.
2. Release clip, detach and remove lock solenoid
link.
3. Release clip and disconnect interior handle link
from latch mechanism.
4. Remove 3 bolts securing mounting panel.
5. Loosen remaining bolts and nut, ease mounting
panel away from door and retain in this position
for access.
6. Disconnect multiplug from solenoid.
7. Remove 2 screws securing solenoid.
8. Remove centre pin from bellcrank pivot and
release pivot from mounting panel.
9. Release bellcrank from sill button link and
remove from lock solenoid link.
10. Remove door lock solenoid.
11. Remove link from solenoid.

86
ELECTRICAL
14
REPAIR
Refit
12. Fit link to solenoid, position solenoid, fit bellcrank
and connect to sill button link.
13. Secure bellcrank to mounting panel and fit
centre pin.
14. Align solenoid and fit and tighten screws.
15. Connect multiplug to solenoid.
16. Fit mounting panel bolts and tighten all bolts and
nut to 10 Nm (7 lbf.ft).
17. Connect interior handle link to latch and secure
with clip.
18. Fit and secure solenoid link.
19. Fit plastic sheet. See CHASSIS AND BODY,
Repair.
HARNESS - REAR DOOR - FROM 02MY
Service repair no - 86.26.19
Remove
1. Remove rear door trim casing. See CHASSIS
AND BODY, Repair.
2. Remove nut and disconnect check strap.
3. Carefully peel back section of plastic sheet for
access to harness.
4. Disconnect multiplug from solenoid.
5. Release clips securing harness to panel.
6. Release harness sleeve and withdraw harness
from door.
ELECTRICAL
15
REPAIR
7. Release multiplug from location at base of ’B/C’
post and disconnect multiplug.
8. Release clip securing harness to ’B/C’ post.
9. Release harness sleeve and remove harness.
Refit
10. Feed harness through ’B/C’ post, connect and
secure multiplug.
11. Clip harness to ’B/C’ post and secure sleeve.
12. Connect multiplug to motor.
13. Secure harness clips and sleeve.
14. Connect check strap, fit nut and tighten
sufficiently to allow check strap to pivot without
rattling.
15. Secure plastic sheet.
16. Fit door trim casing. See CHASSIS AND
BODY, Repair.
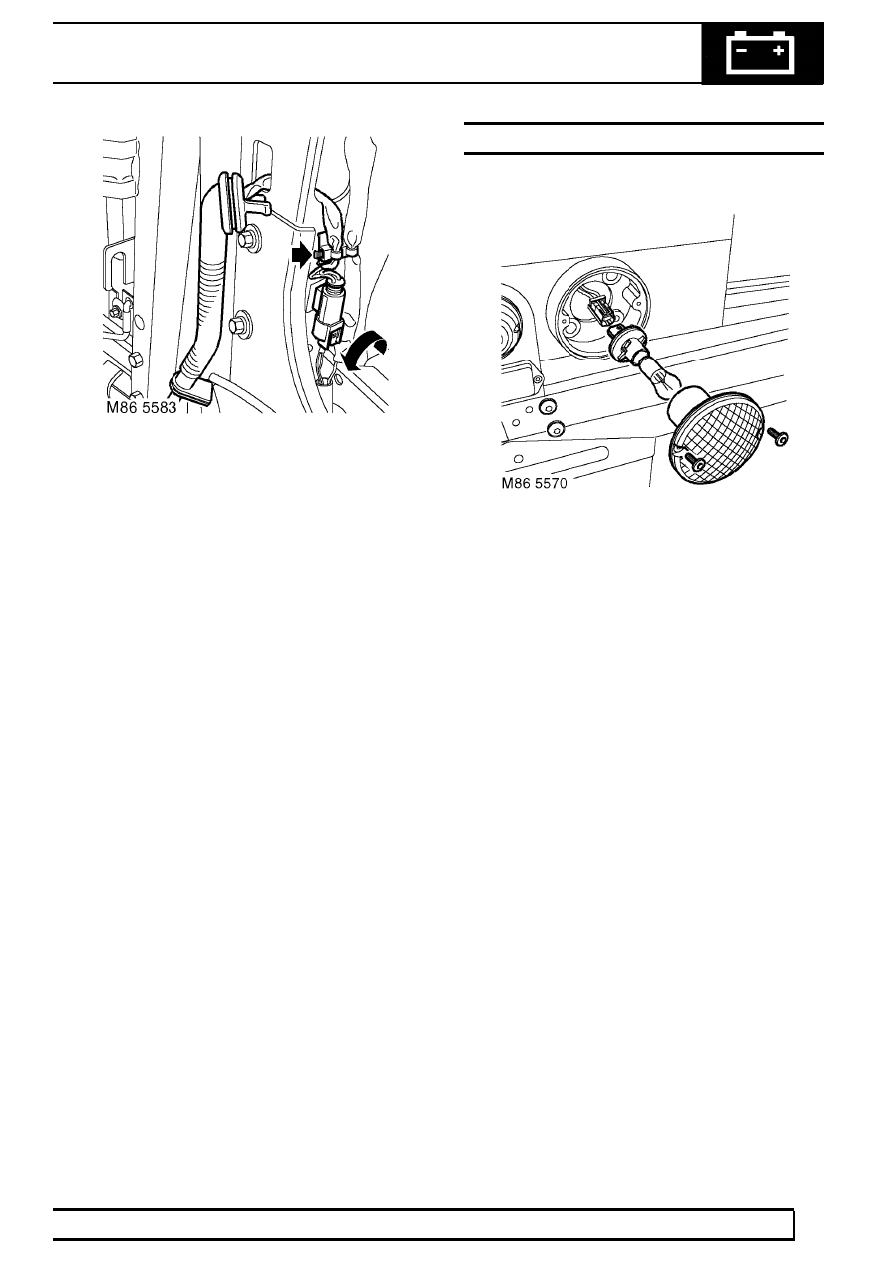
REVERSE AND FOG GUARD LAMP - BULB
Service repair no - 86.40.90
Remove
1. Remove 2 screws securing lamp to housing and
withdraw. Disconnect bayonet bulb holder from
lamp housing.
2. Remove bulb.
Refit
3. Clean bulb and holder.
4. Fit new bulb to holder.
5. Fit bulb holder to lamp.
6. Position lamp, fit and tighten screws.
Нет комментариевНе стесняйтесь поделиться с нами вашим ценным мнением.
Текст