Subaru Impreza 3 / Impreza WRX / Impreza WRX STI. Service manual — part 744
EI-63
Trunk Room Trim
EXTERIOR/INTERIOR TRIM
24.Trunk Room Trim
A: REMOVAL
1) Remove the rear seat backrest. <Ref. to SE-13,
2) Remove the trunk room mat.
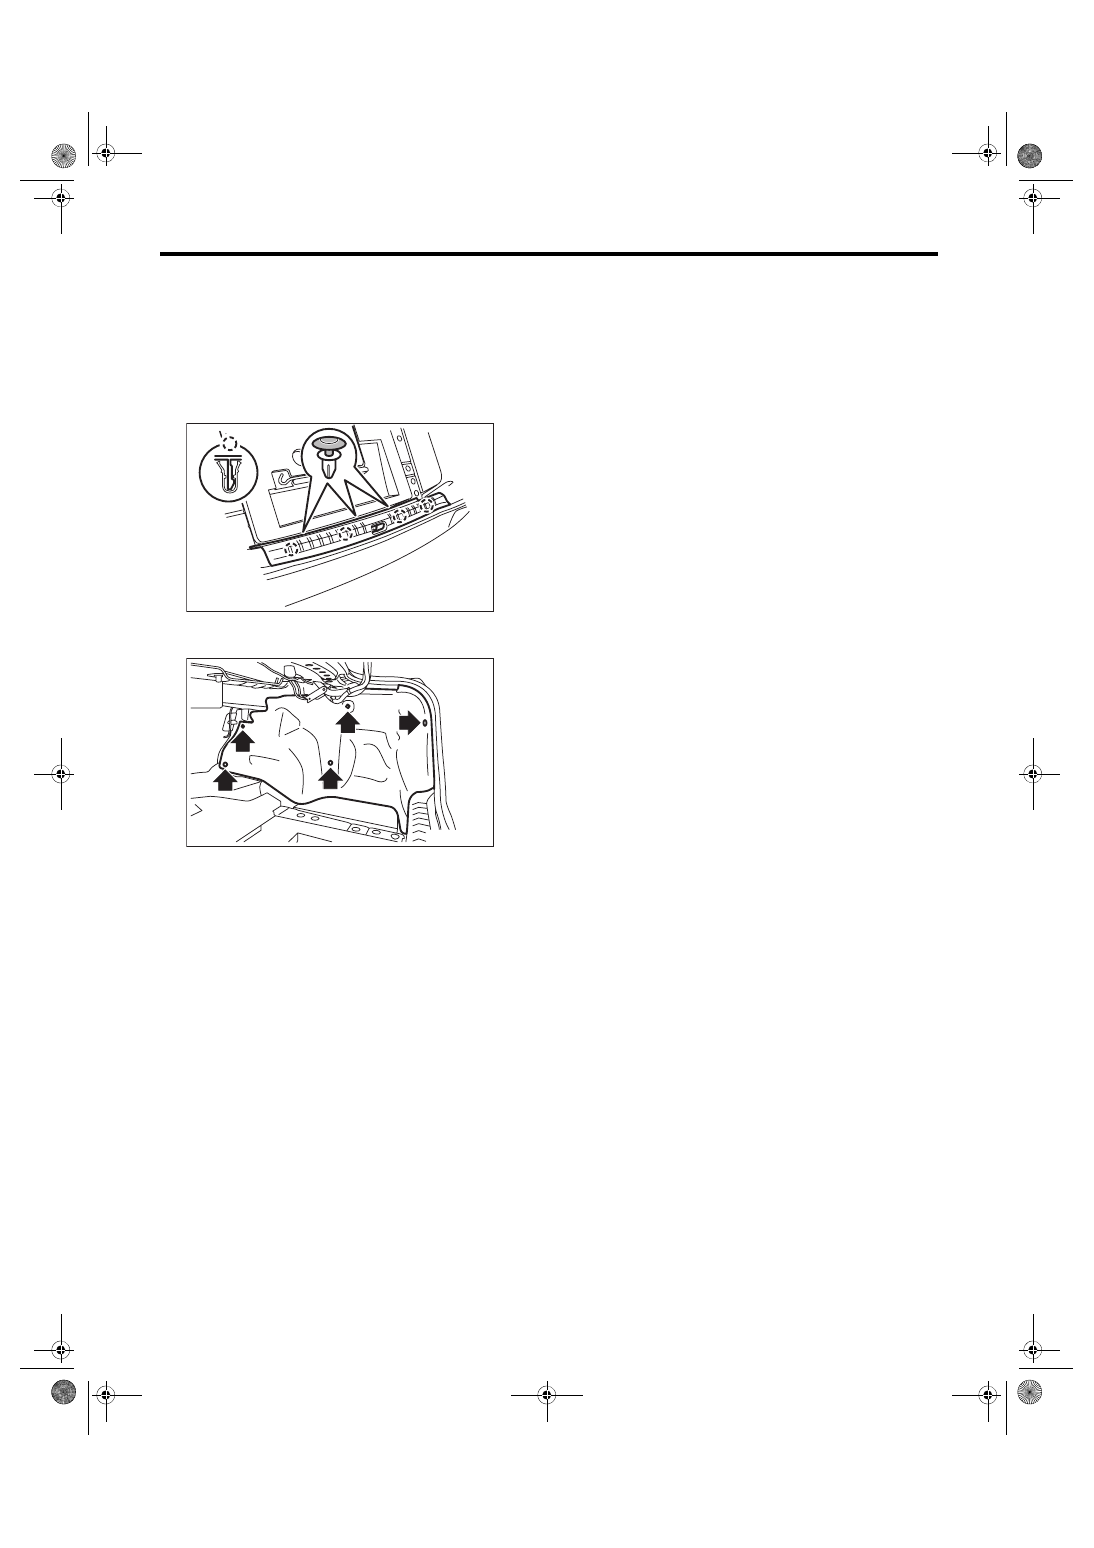
3) Remove the clips, and then remove the trunk
room rear trim.
4) Remove the clips, and remove the trunk side
trim.
B: INSTALLATION
Install each part in the reverse order of removal.
EI-02389
EI-01901
EI-64
Sun Visor
EXTERIOR/INTERIOR TRIM
25.Sun Visor
A: REMOVAL
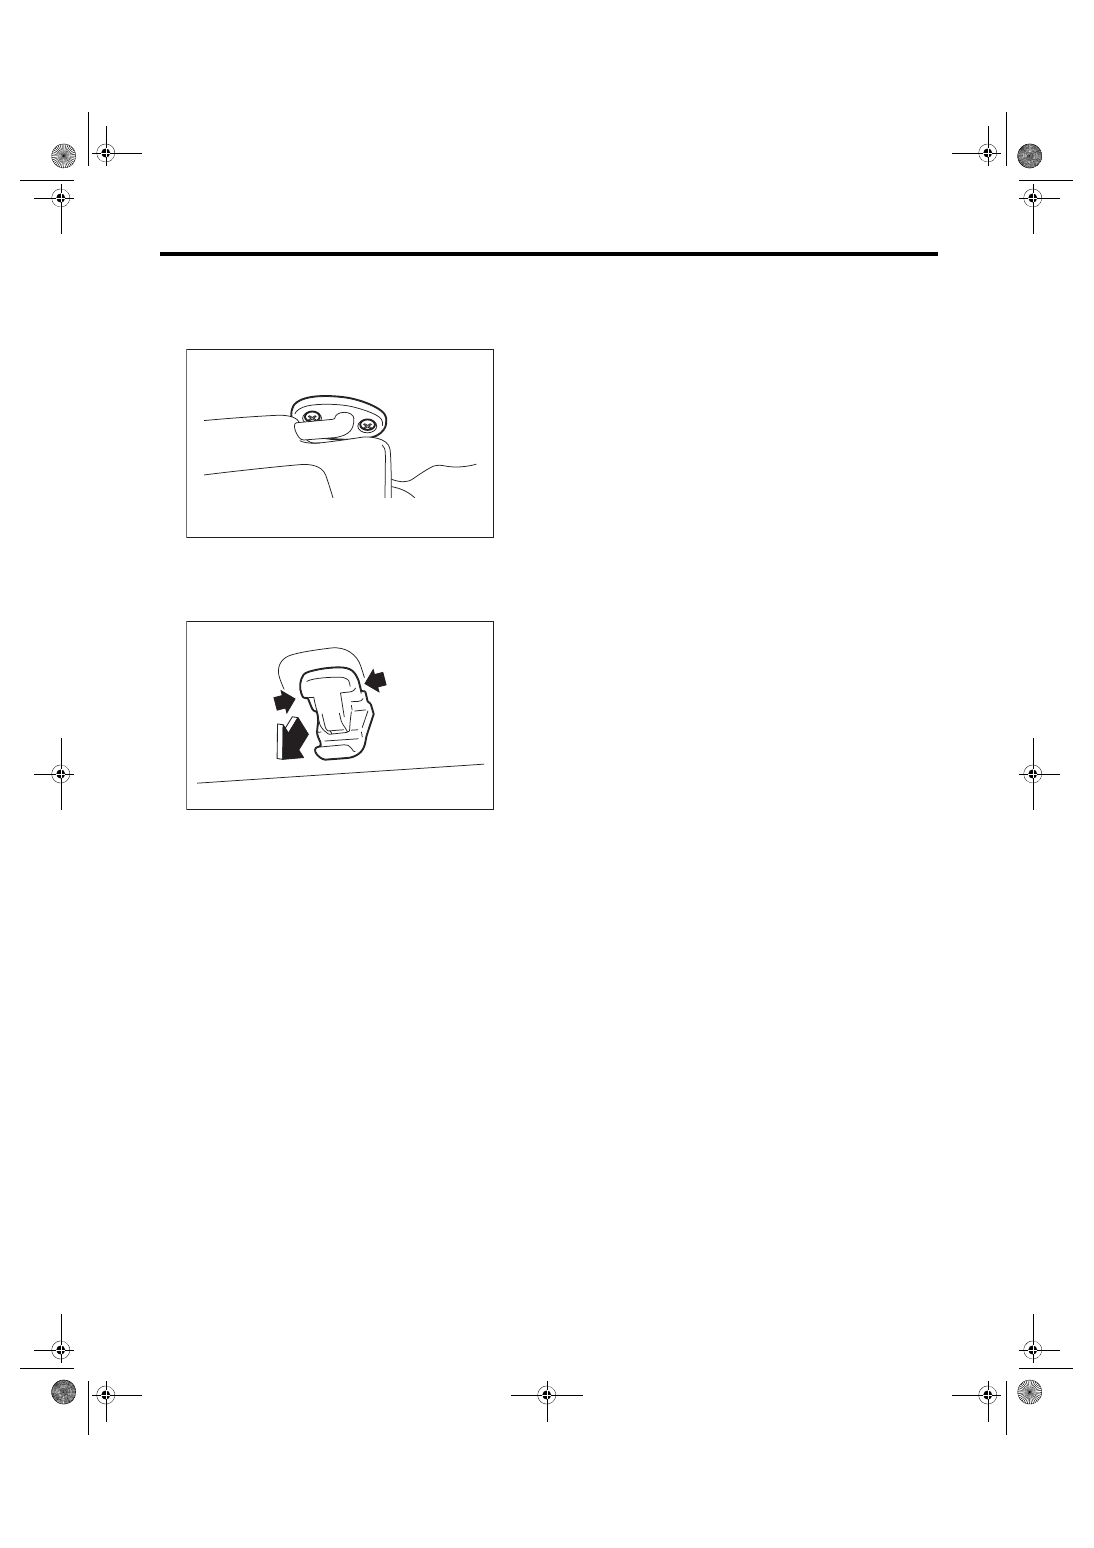
1) Remove the screws and detach the sun visor.
2) Disconnect the connector. (Model with vanity
mirror light)
3) While pressing the (A) on the both side using flat
tip screwdriver, pull the sun visor hook to remove it.
B: INSTALLATION
Install each part in the reverse order of removal.
EI-00932
EI-00662
(A)
(A)
EI-65
Assist Grip
EXTERIOR/INTERIOR TRIM
26.Assist Grip
A: REMOVAL
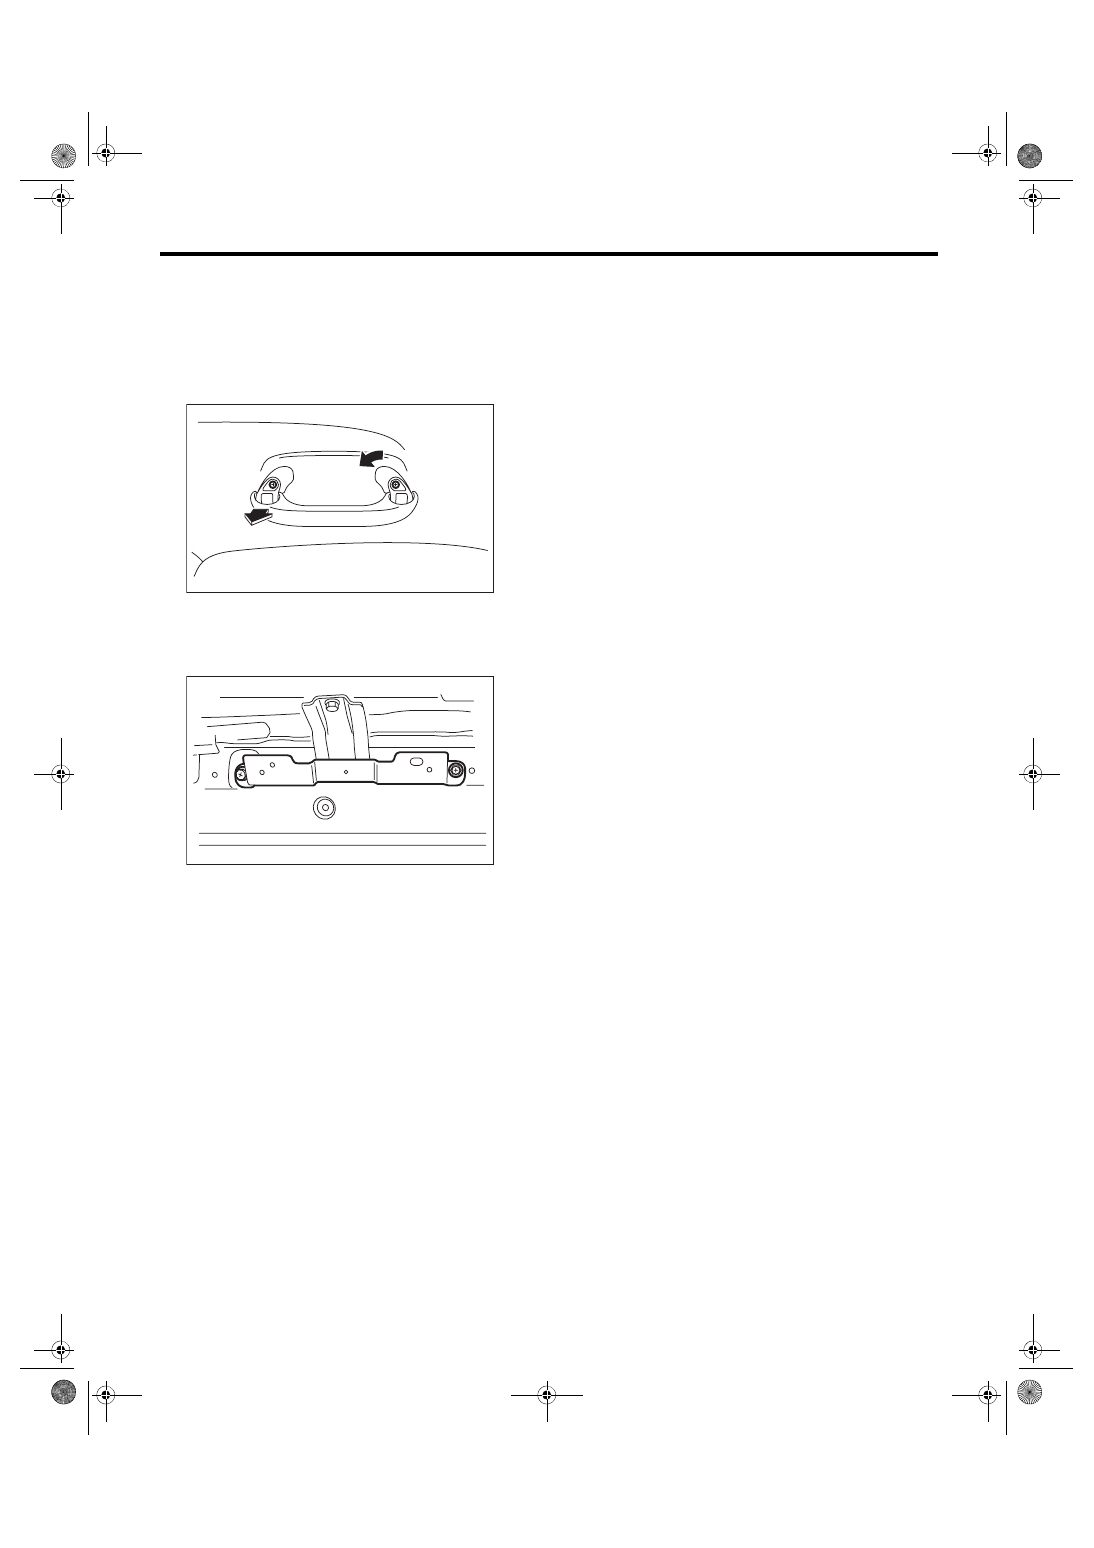
1) Remove the screw cover, and remove the screw
inside.
2) Pull the left side of assist grip, and rotate the
right side of it counterclockwise to remove.
3) Remove the roof trim. <Ref. to EI-66, REMOV-
4) Remove the bolts, and remove the assist grip
bracket.
B: INSTALLATION
Install each part in the reverse order of removal.
Tightening torque
7.5 N·m (0.76 kgf-m, 5.5 ft-lb)
EI-00809
EI-01916
EI-66
Roof Trim
EXTERIOR/INTERIOR TRIM
27.Roof Trim
A: REMOVAL
1. 5 DOOR MODEL
1) Disconnect the ground cable from battery.
2) Remove the spot map light. <Ref. to LI-33, REMOVAL, Spot Map Light.>
3) Remove the room light. <Ref. to LI-34, REMOVAL, Room Light.>
4) Remove the sun visor. <Ref. to EI-64, REMOVAL, Sun Visor.>
5) Remove the assist grip. <Ref. to EI-65, REMOVAL, Assist Grip.>
6) Remove the upper inner trim. <Ref. to EI-59, REMOVAL, Upper Inner Trim.>
7) Remove the rear quarter trim. <Ref. to EI-60, REMOVAL, Rear Quarter Trim.>
8) Disconnect the harness connectors of the right and left front pillars, and the rear quarter (LH).
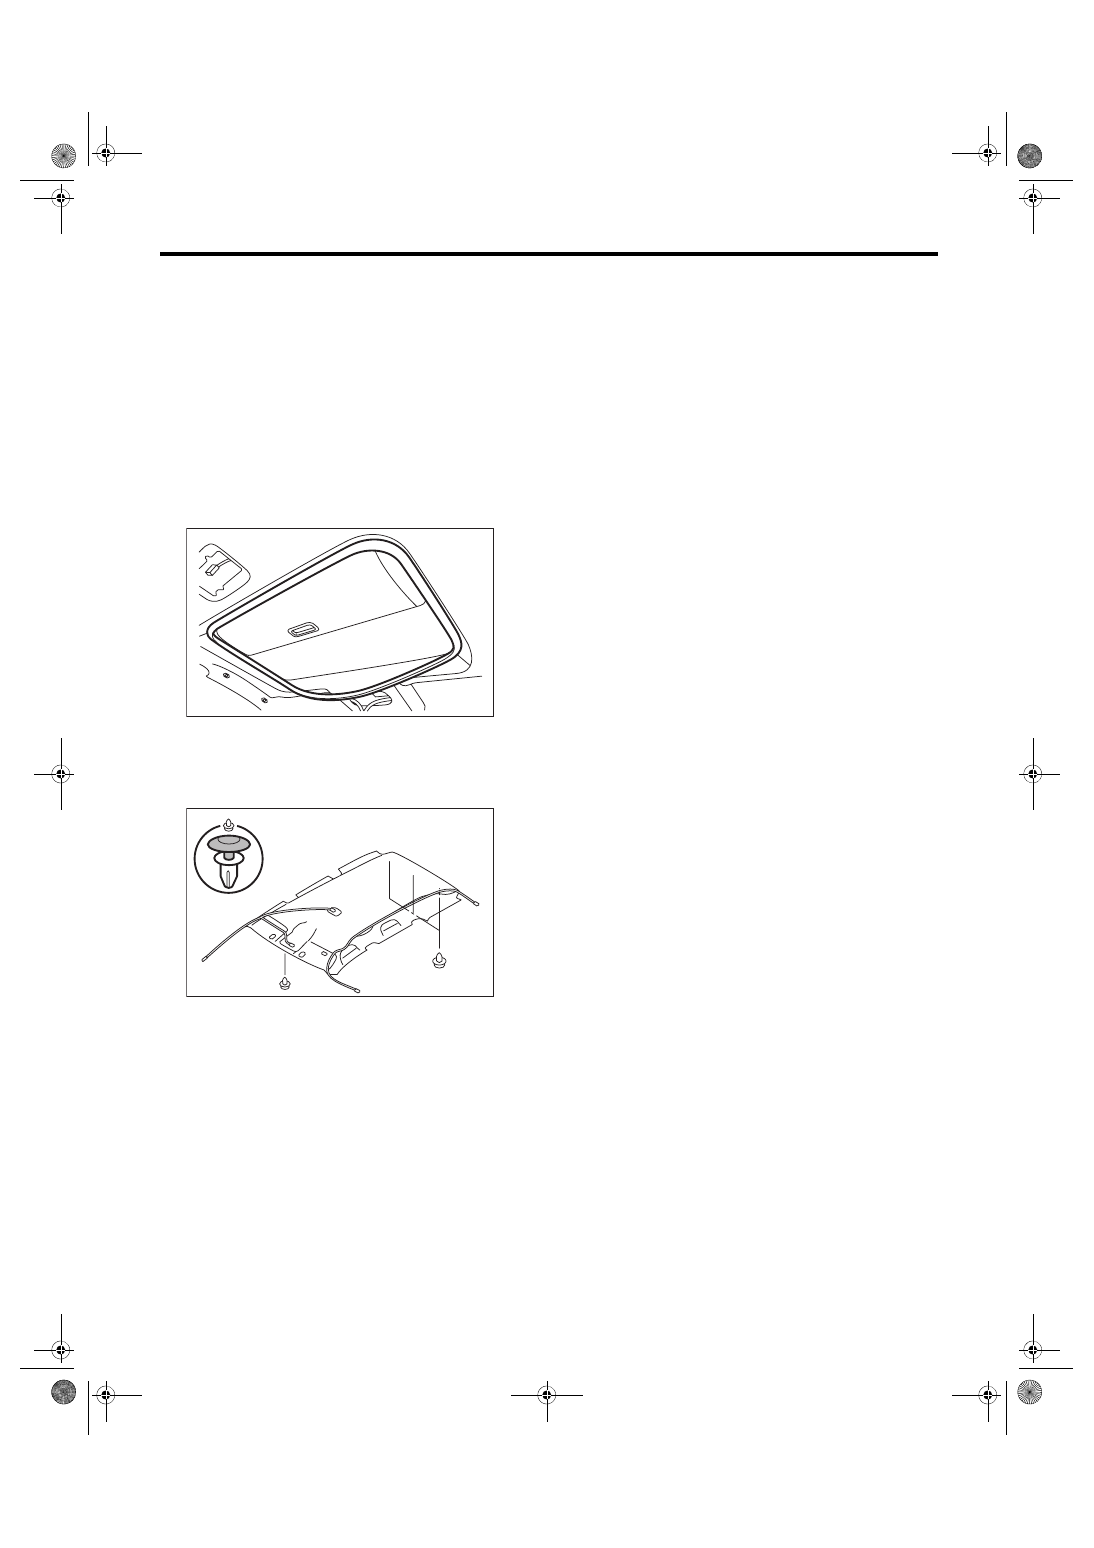
9) Remove the sunroof opening trim. (Model with sunroof)
10) Remove the clips, and then remove the roof trim.
CAUTION:
Do not remove the roof end trim with excessive force. Otherwise the roof trim may become damaged.
Roof trim and roof end trim are fastened by tapping screws.
2. 4 DOOR MODEL
CAUTION:
When taking the roof trim out of the vehicle, be careful not to damage the room inner trim. Perform
this work with 3 persons.
1) Disconnect the ground cable from battery.
2) Apply protective tape, etc. to prevent damage to the face of the instrument panel.
3) Remove the spot map light. <Ref. to LI-33, REMOVAL, Spot Map Light.>
4) Remove the room light. <Ref. to LI-34, REMOVAL, Room Light.>
5) Remove the sun visor. <Ref. to EI-64, REMOVAL, Sun Visor.>
6) Remove the assist grip. <Ref. to EI-65, REMOVAL, Assist Grip.>
7) Remove the upper inner trim. <Ref. to EI-59, REMOVAL, Upper Inner Trim.>
8) Remove the rear quarter trim. <Ref. to EI-60, REMOVAL, Rear Quarter Trim.>
9) Disconnect the harness connectors of the right and left front pillars, and the rear quarter (LH).
10) Remove the console front panel. <Ref. to EI-52, CONSOLE FRONT PANEL, REMOVAL, Center Con-
EI-00501
EI-01818
Нет комментариевНе стесняйтесь поделиться с нами вашим ценным мнением.
Текст