Subaru Impreza 3 / Impreza WRX / Impreza WRX STI. Service manual — part 697
GW-21
Rear Door Glass
GLASS/WINDOWS/MIRRORS
11.Rear Door Glass
A: REMOVAL
1) Remove the rear door trim. <Ref. to EI-46,
REAR DOOR, REMOVAL, Door Trim.>
2) Remove the sealing cover. <Ref. to EB-24, RE-
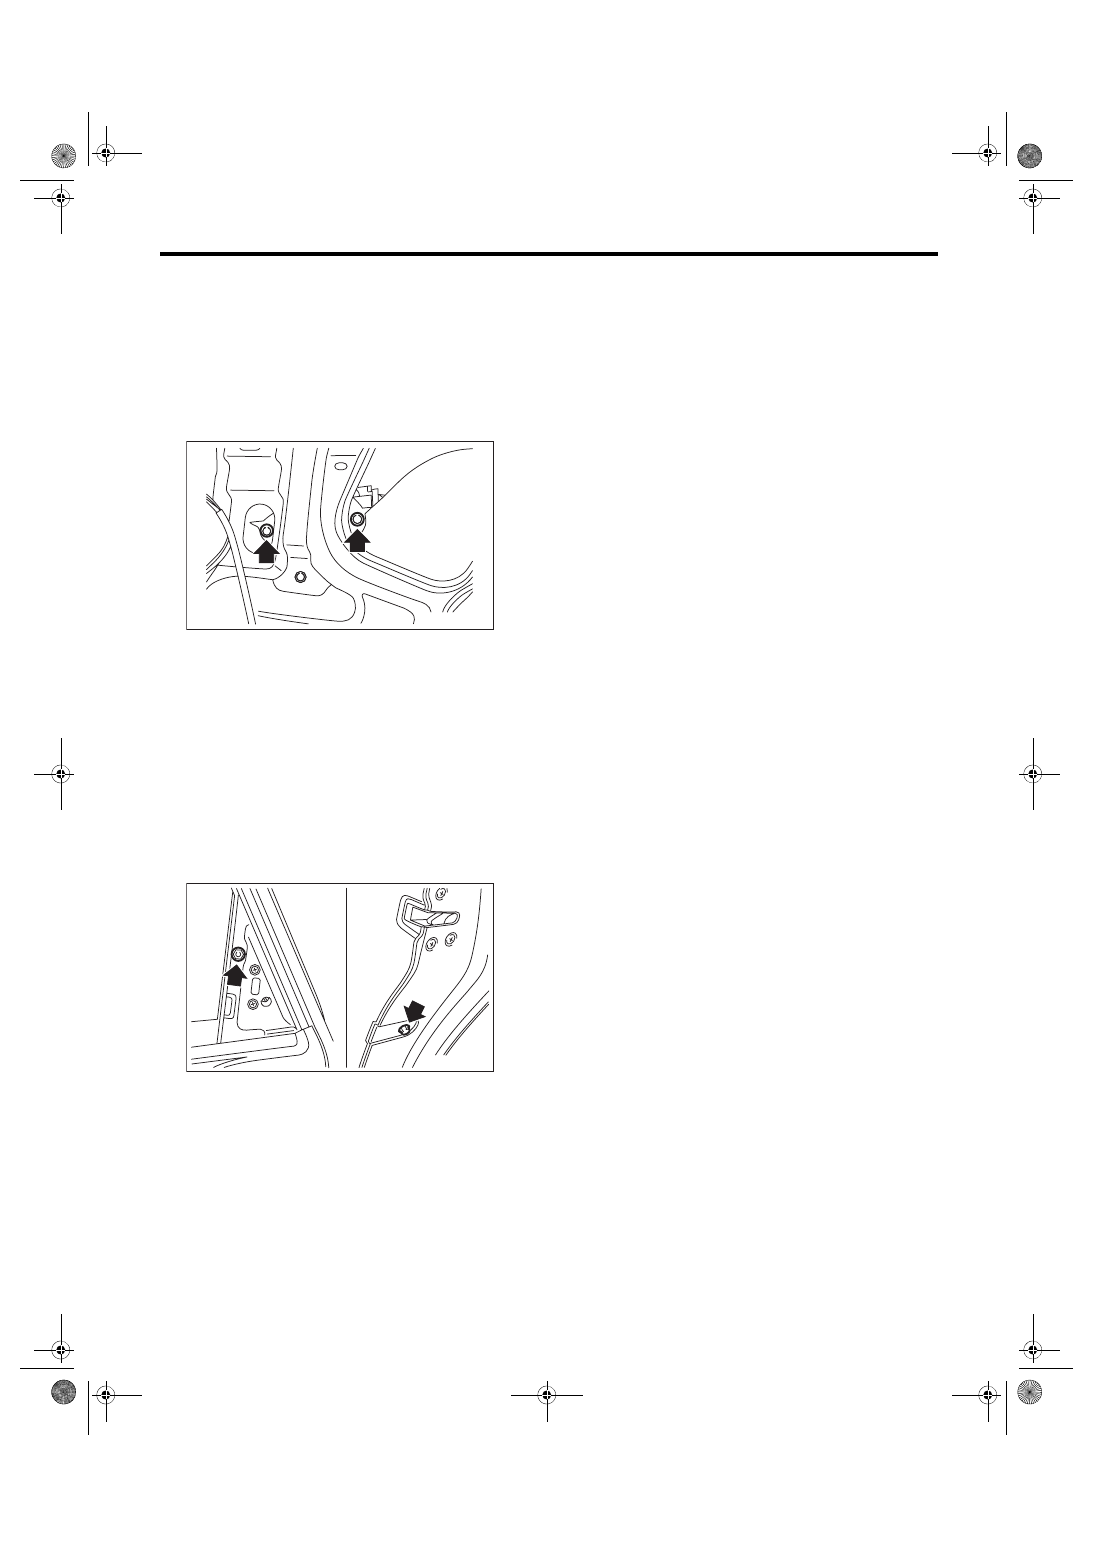
3) Operate the power window switch to move the
glass, and remove the bolts.
4) Remove the glass from the carrier plate, and
while holding the glass, lower the carrier plate
alone to the lowest position.
CAUTION:
Without the carrier plate lowered to the bottom
most position, do not lower the glass by itself
to the lowest position within the door panel.
The glass may come off of the sash, and be-
come damaged.
5) Lower the glass slowly to the bottom most posi-
tion in the door panel.
6) Remove the bolts and nuts, and then remove the
sash. (Remove the upper attachment point first.)
7) Remove the glass run rubber.
8) Remove the door glass while tilting.
CAUTION:
Avoid impact and damage to the glass.
B: INSTALLATION
CAUTION:
Make sure that the glass run rubber is placed
securely in door frame and sash.
Install each part in the reverse order of removal.
Tightening torque:
Refer to “COMPONENT” of “General Descrip-
tion”. <Ref. to GW-5, REAR DOOR GLASS,
COMPONENT, General Description.>
GW-00654
GW-00655
GW-22
Rear Regulator and Motor Assembly
GLASS/WINDOWS/MIRRORS
12.Rear Regulator and Motor As-
sembly
A: REMOVAL
1) Remove the rear door glass. <Ref. to GW-21,
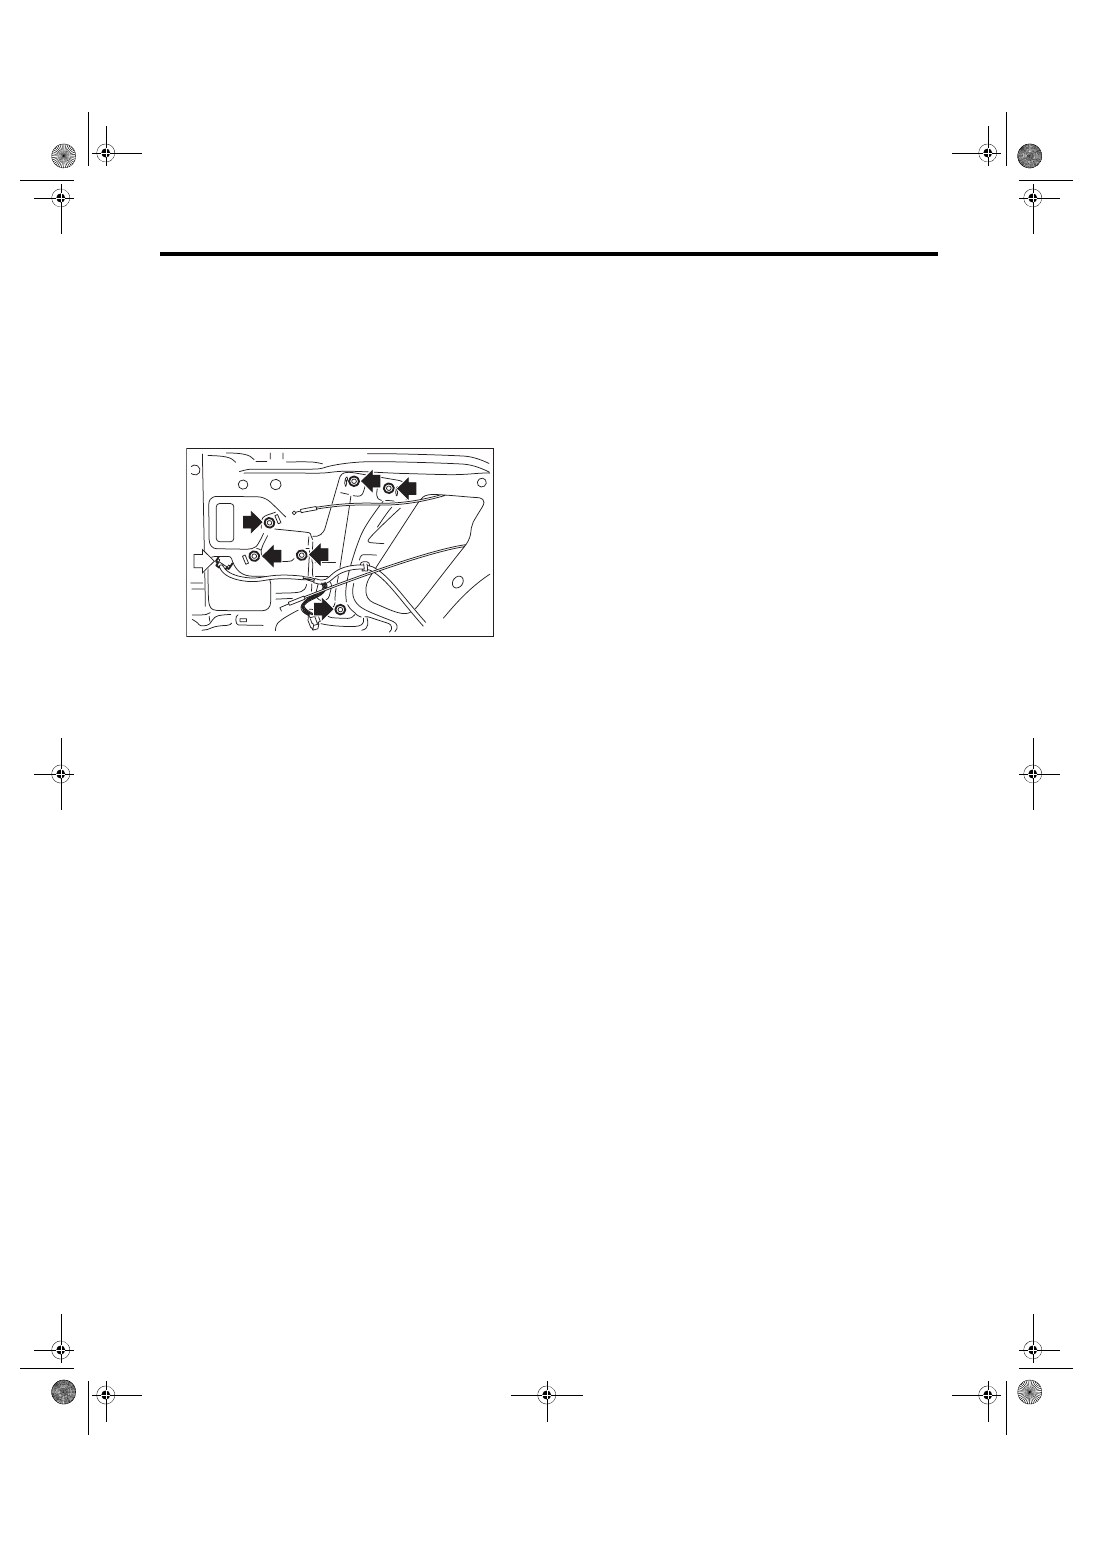
2) Disconnect the motor connector.
3) Remove the bolts, and then remove the rear reg-
ulator and motor assembly.
B: INSTALLATION
Install each part in the reverse order of removal.
Tightening torque:
Refer to “COMPONENT” of “General Descrip-
tion”. <Ref. to GW-5, REAR DOOR GLASS,
COMPONENT, General Description.>
C: INSPECTION
1) Disconnect the motor connector.
2) Apply battery voltage between the motor con-
nector terminals and check the motor operation.
Check to ensure that the motor rotates in reverse
direction when the terminal to which battery voltage
is applied is changed.
3) If the inspection results in improper operation,
replace the rear regulator and motor assembly.
GW-00644
GW-23
Windshield Glass
GLASS/WINDOWS/MIRRORS
13.Windshield Glass
A: REMOVAL
1. WHEN USING WINDSHIELD GLASS
KNIFE
CAUTION:
Apply protective tape, etc, and be careful that
the inner and outer components of the vehicle
are not damaged.
1) Disconnect the ground cable from battery. (Mod-
el with wiper deicer)
2) Remove the front pillar upper trim. <Ref. to EI-
59, REMOVAL, Upper Inner Trim.>
3) Disconnect the wiper deicer connector. (Model
with wiper deicer)
4) Remove the cowl panel. <Ref. to EI-40, RE-
5) Remove the glass molding.
6) Tape the body side of the circumference of wind-
shield glass for protection.
7) Apply sufficient amount of soapy water to the ad-
hesive part.
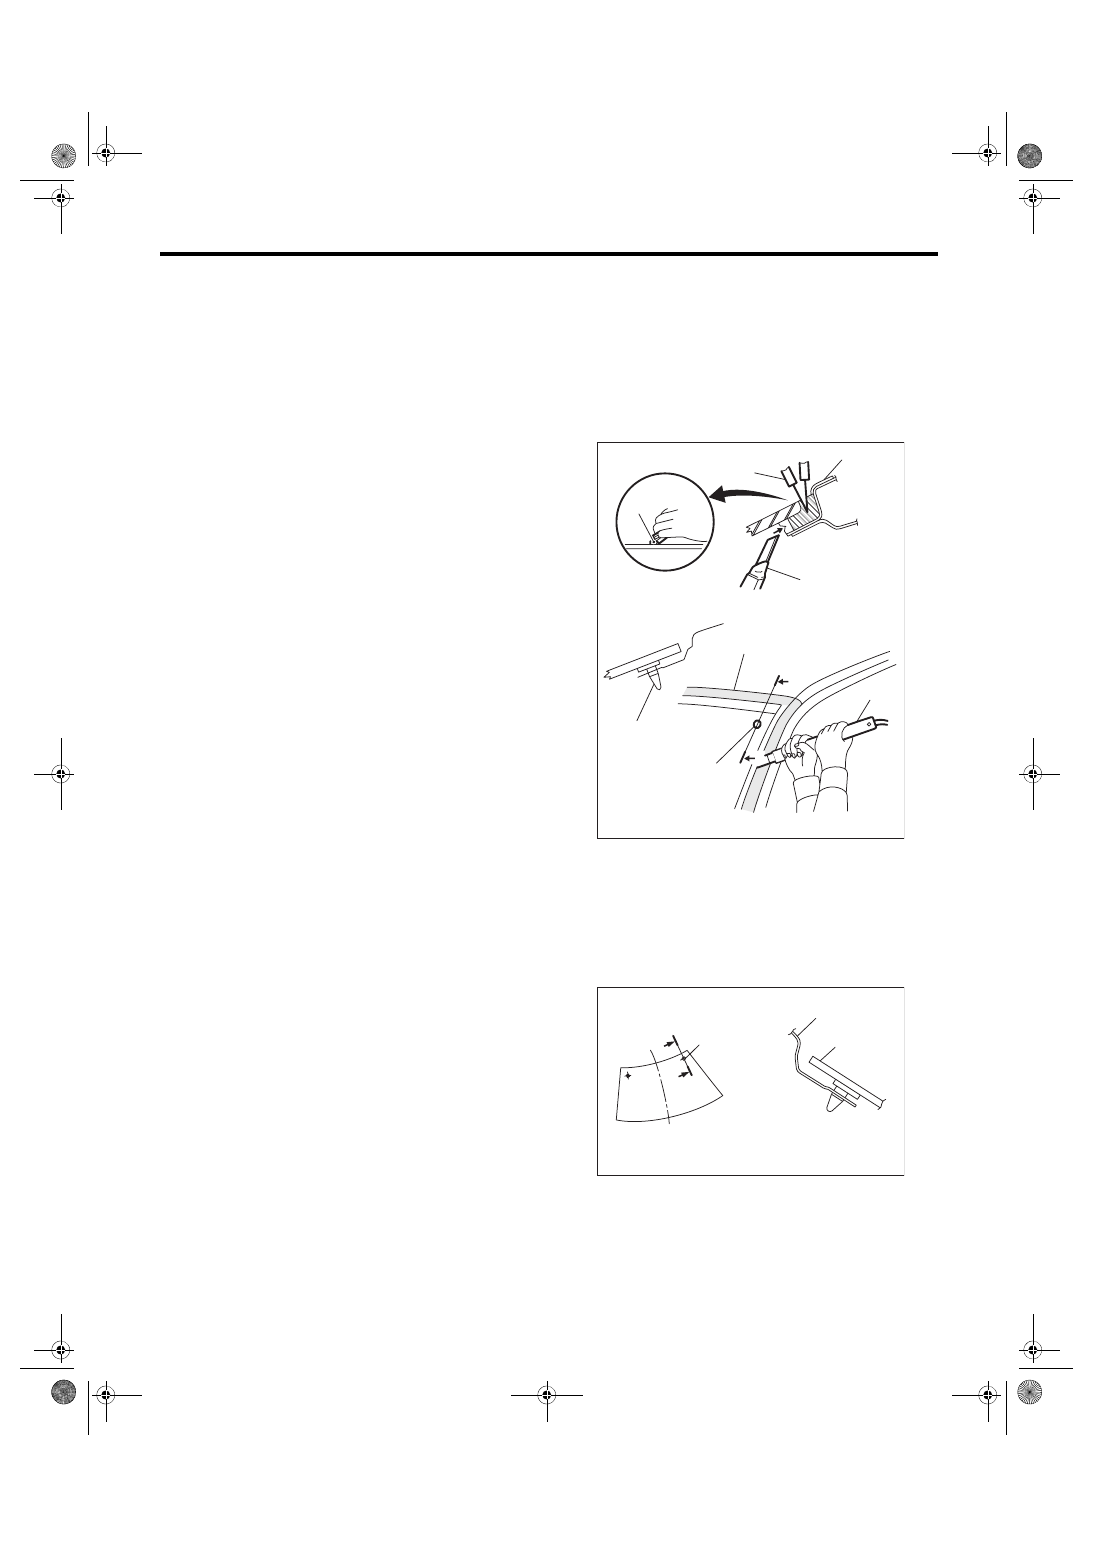
8) Make a slit using a cutter knife to make it easier
to insert the windshield glass knife.
9) Insert the windshield glass knife into adhesive
part.
10) While holding the knife edge and windshield
glass edge at a right angle, move the windshield
glass knife in parallel to the windshield glass edge
along the surface and edge of windshield glass to
cut the adhesive part.
NOTE:
• Do not twist the windshield glass knife.
• Cutting of adhesive part shall be started with wid-
er gap between windshield glass and body.
• The locating pins are bonded to the corners of
glass. Use piano wire to disconnect the pins.
(1) Tape for protection
(2) Locating pin
(3) Cutter knife
(4) Windshield glass knife
(1) Locating pin
(2) Body panel
(3) Windshield glass
GW-00661
(3)
(3)
(3)
(2)
(2)
(1)
(4)
A
A-A
A
(1)
GW-00070
(1)
(2)
(3)
A
A
A-A
GW-24
Windshield Glass
GLASS/WINDOWS/MIRRORS
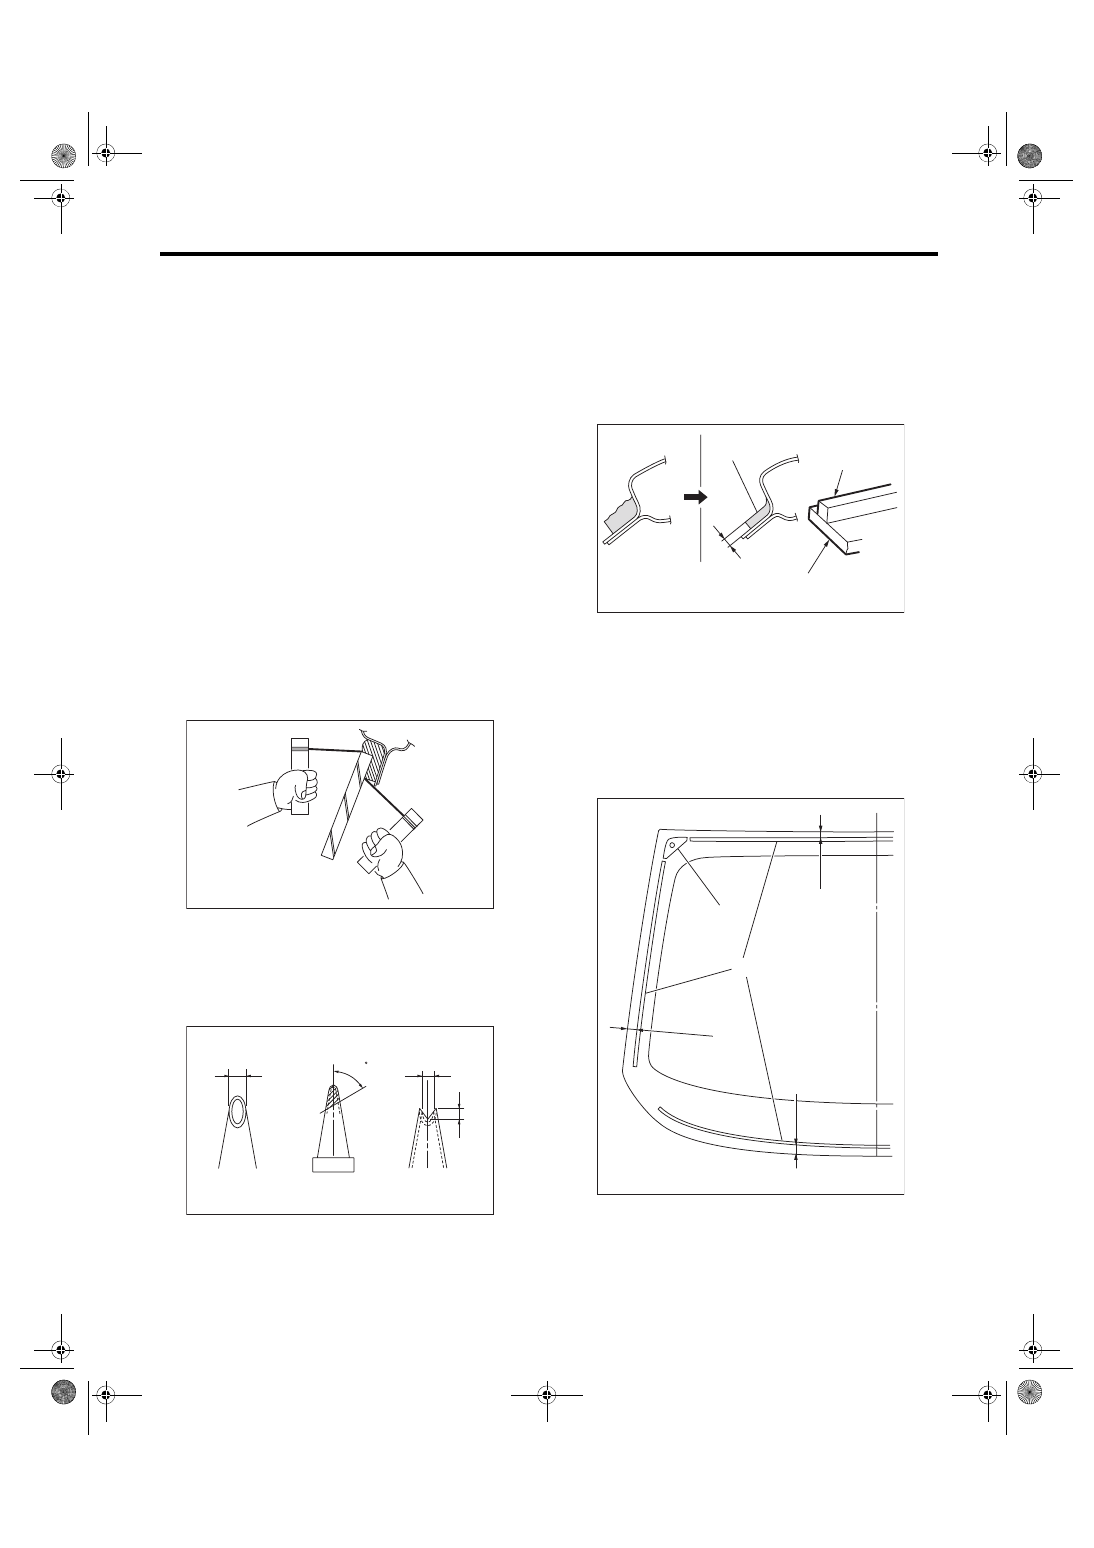
2. WHEN USING PIANO WIRE
CAUTION:
• Do not tightly pull the piano wire against the
windshield glass edge.
• Apply protective tape, etc, and be careful that
the inner and outer components of the vehicle
are not damaged.
• Do not cross piano wires. Otherwise they
may be cut.
1) Disconnect the ground cable from battery. (Mod-
el with wiper deicer)
2) Remove the front pillar upper trim. <Ref. to EI-
59, REMOVAL, Upper Inner Trim.>
3) Disconnect the wiper deicer connector. (Model
with wiper deicer)
4) Remove the cowl panel. <Ref. to EI-40, RE-
5) Remove the glass molding.
6) Tape the body side of the circumference of wind-
shield glass for protection.
7) Make a hole in the adhesive part using drill or
cutter knife.
8) Pass the piano wire through the hole, and attach
both the wire ends securely to pieces of wood.
9) Pull the wire ends alternately to cut off the adhe-
sive part.
B: INSTALLATION
1) Fabricate the cartridge nozzle tip as shown and
set the sealant gun with the adhesive.
2) Clean the external circumference of windshield
glass with alcohol or white gasoline.
3) Remove the adhesive layer on the body using
cutter knife to obtain smooth face of 2 mm (0.08 in)
thick.
CAUTION:
Be careful not to damage the body and paint
surface.
4) Clean the body with alcohol or white gasoline to
eliminate cutting powder, dust and dirt completely
from body.
5) Install the dam rubber.
(1) 10 mm (0.39 in)
(2) 8 mm (0.31 in)
GW-00039
GW-00494
(1)
(2)
(2)
60
(1) Adhesive
(2) 2 mm (0.08 in)
(3) Dam rubber
(4) Glass
(1) Locating pin
(2) Dam rubber
(3) 11 mm (0.43 in)
(4) 14.5 mm (0.57 in)
GW-00071
(4)
(2)
(1)
(3)
(1)
(3)
(3)
(2)
(4)
GW-00672
Нет комментариевНе стесняйтесь поделиться с нами вашим ценным мнением.
Текст