Subaru Impreza 3 / Impreza WRX / Impreza WRX STI. Service manual — part 695
GW-13
Front Regulator and Motor Assembly
GLASS/WINDOWS/MIRRORS
5. Front Regulator and Motor
Assembly
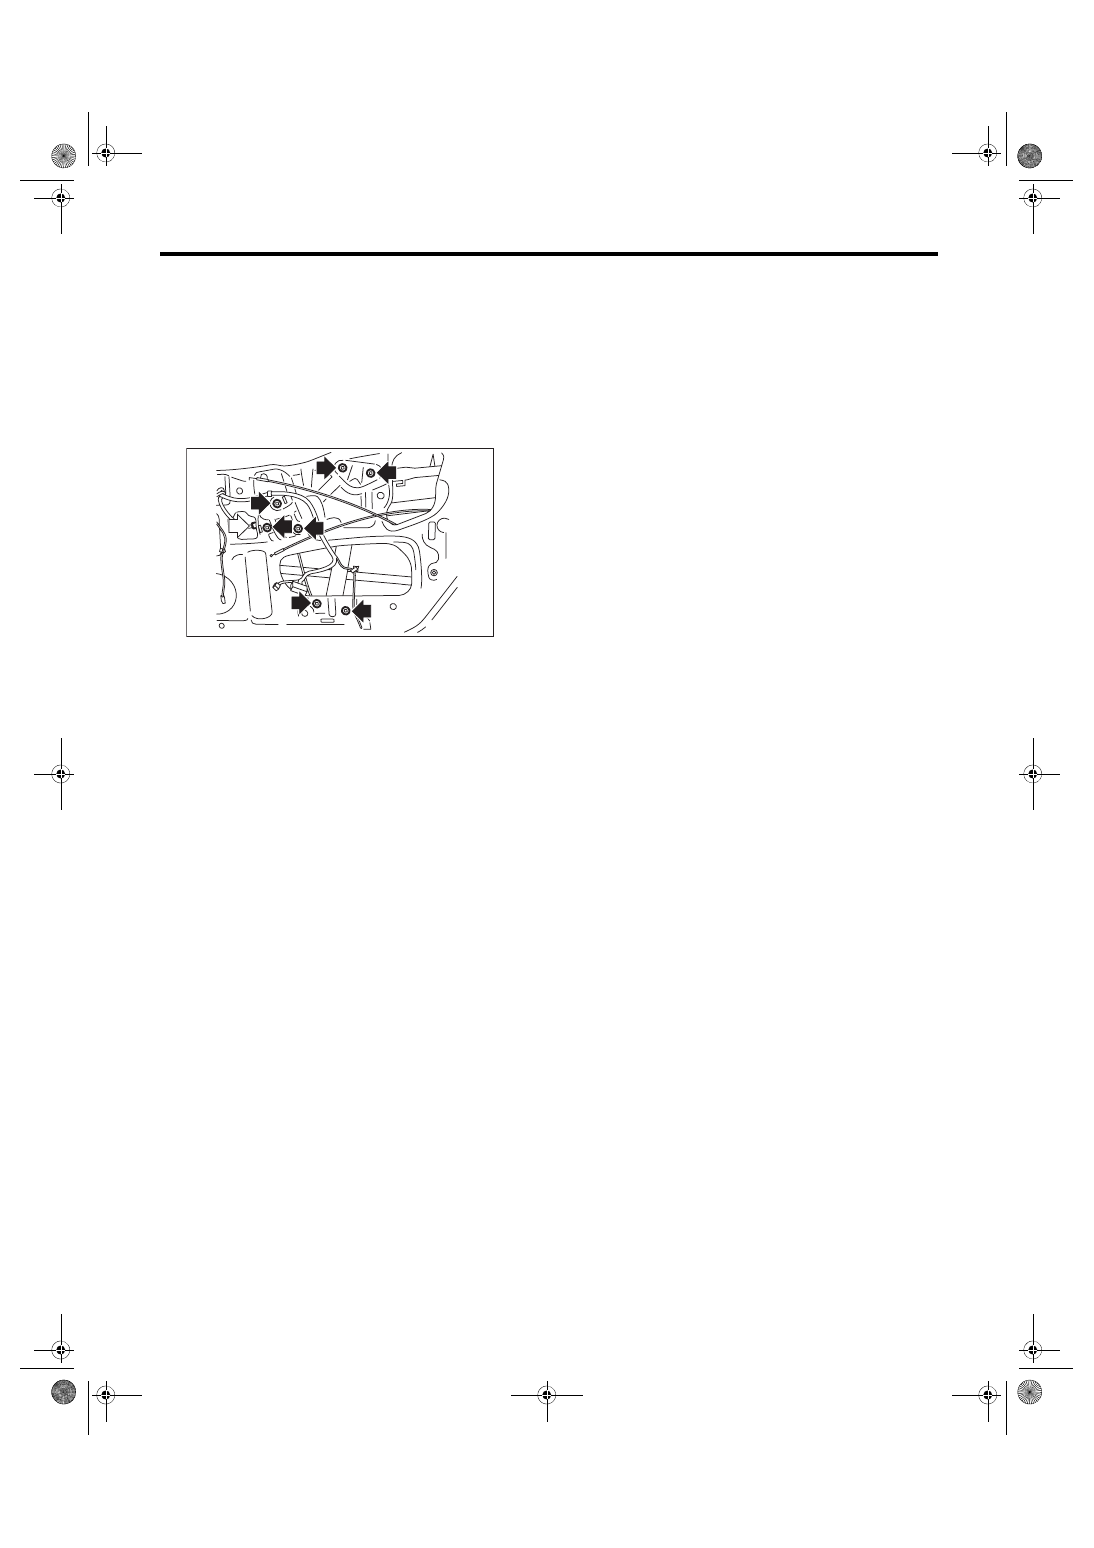
A: REMOVAL
1) Remove the front door glass. <Ref. to GW-12,
2) Disconnect the motor connector.
3) Remove the bolts, and then remove the front
regulator and motor assembly.
B: INSTALLATION
Install each part in the reverse order of removal.
Tightening torque:
Refer to “COMPONENT” of “General Descrip-
tion”. <Ref. to GW-4, FRONT DOOR GLASS,
COMPONENT, General Description.>
C: INSPECTION
1) Disconnect the motor connector.
2) Apply battery voltage between the motor con-
nector terminals and check the motor operation.
Check to ensure that the motor rotates in reverse
direction when the terminal to which battery voltage
is applied is changed.
3) If the inspection results in improper operation,
replace the front regulator and motor assembly.
GW-00697
GW-14
Remote Control Mirror System
GLASS/WINDOWS/MIRRORS
6. Remote Control Mirror System
A: WIRING DIAGRAM
Refer to “Remote Control Mirror System” in the wiring diagram. <Ref. to WI-134, WIRING DIAGRAM, Re-
B: INSPECTION
NOTE:
Window Defogger System” for details. <Ref. to GW-33, INSPECTION, Rear Window Defogger System.>
C: NOTE
For procedure of each component in the remote control mirror system, refer to the respective section.
• Scalp cap: <Ref. to GW-15, Scalp Cap.>
• Outer mirror assembly: <Ref. to GW-16, Outer Mirror Assembly.>
• Outer mirror: <Ref. to GW-19, Outer Mirror.>
• Remote control mirror switch: <Ref. to GW-20, Remote Control Mirror Switch.>
Symptoms
Repair order
All function does not operate.
1. Check the fuse.
2. Check the remote control mirror switch.
3. Check the wiring harness.
One side of the mirror motor does not operate.
1. Check the remote control mirror switch.
2. Check the mirror motor.
3. Check the wiring harness.
Mirror heater does not operate.
1. Check the defogger switch.
2. Check the mirror heater.
3. Check the wiring harness.
GW-15
Scalp Cap
GLASS/WINDOWS/MIRRORS
7. Scalp Cap
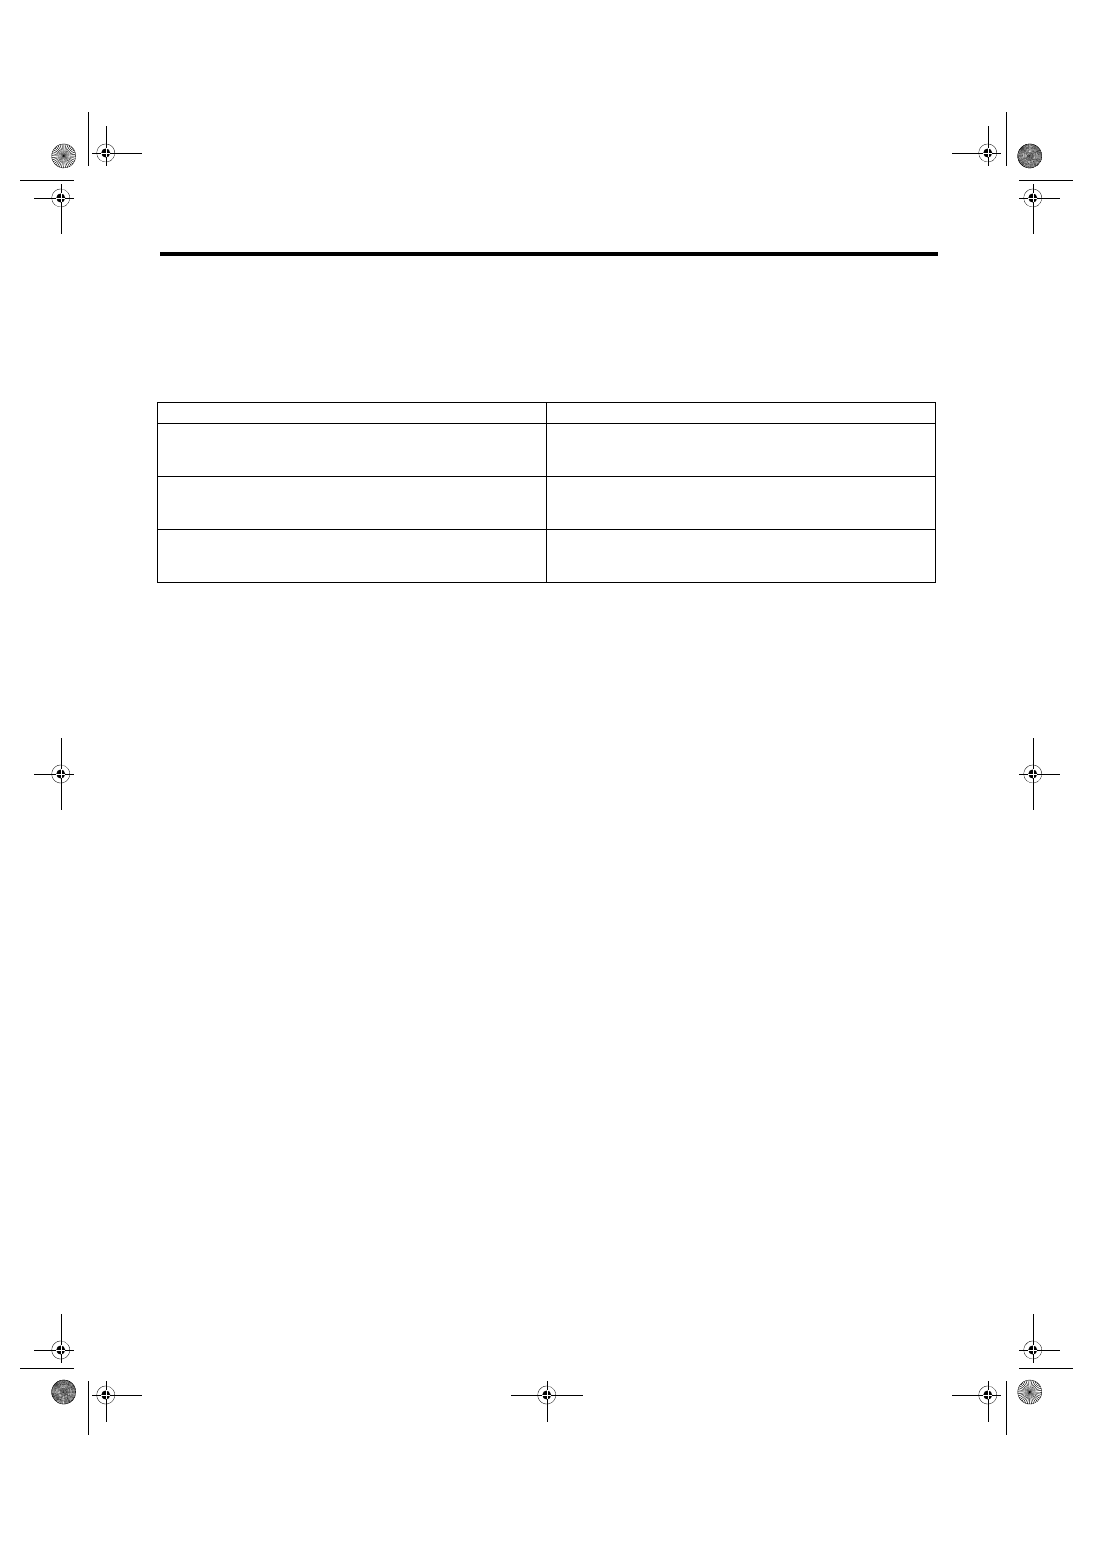
A: REPLACEMENT
1) Remove the mirror. <Ref. to GW-19, REPLACE-
2) Press-in the clips (A) from inside of outer mirror.
3) Pull the scalp cap away from the outer mirror, re-
lease upper side clips (A), and then remove the
scalp cap.
4) Install the scalp cap securely.
GW-00568
(A)
(A)
(A)
GW-00569
(A)
GW-16
Outer Mirror Assembly
GLASS/WINDOWS/MIRRORS
8. Outer Mirror Assembly
A: REMOVAL
1) Remove the front door trim. <Ref. to EI-45,
FRONT DOOR, REMOVAL, Door Trim.>
2) Disconnect the outer mirror connector.
3) Remove the bolts to remove outer mirror assem-
bly.
B: INSTALLATION
Install each part in the reverse order of removal.
Tightening torque:
4.5 N·m (0.46 kgf-m, 3.3 ft-lb)
C: INSPECTION
1. CHECK MOTOR OPERATION
1) Disconnect the outer mirror connector.
2) Apply battery voltage between the outer mirror
connector terminals and check the mirror opera-
tion.
• Model without mirror heater
• Model with mirror heater
3) If it does not operate normally, replace the outer
mirror assembly.
2. CHECK OUTER MIRROR ASSEMBLY
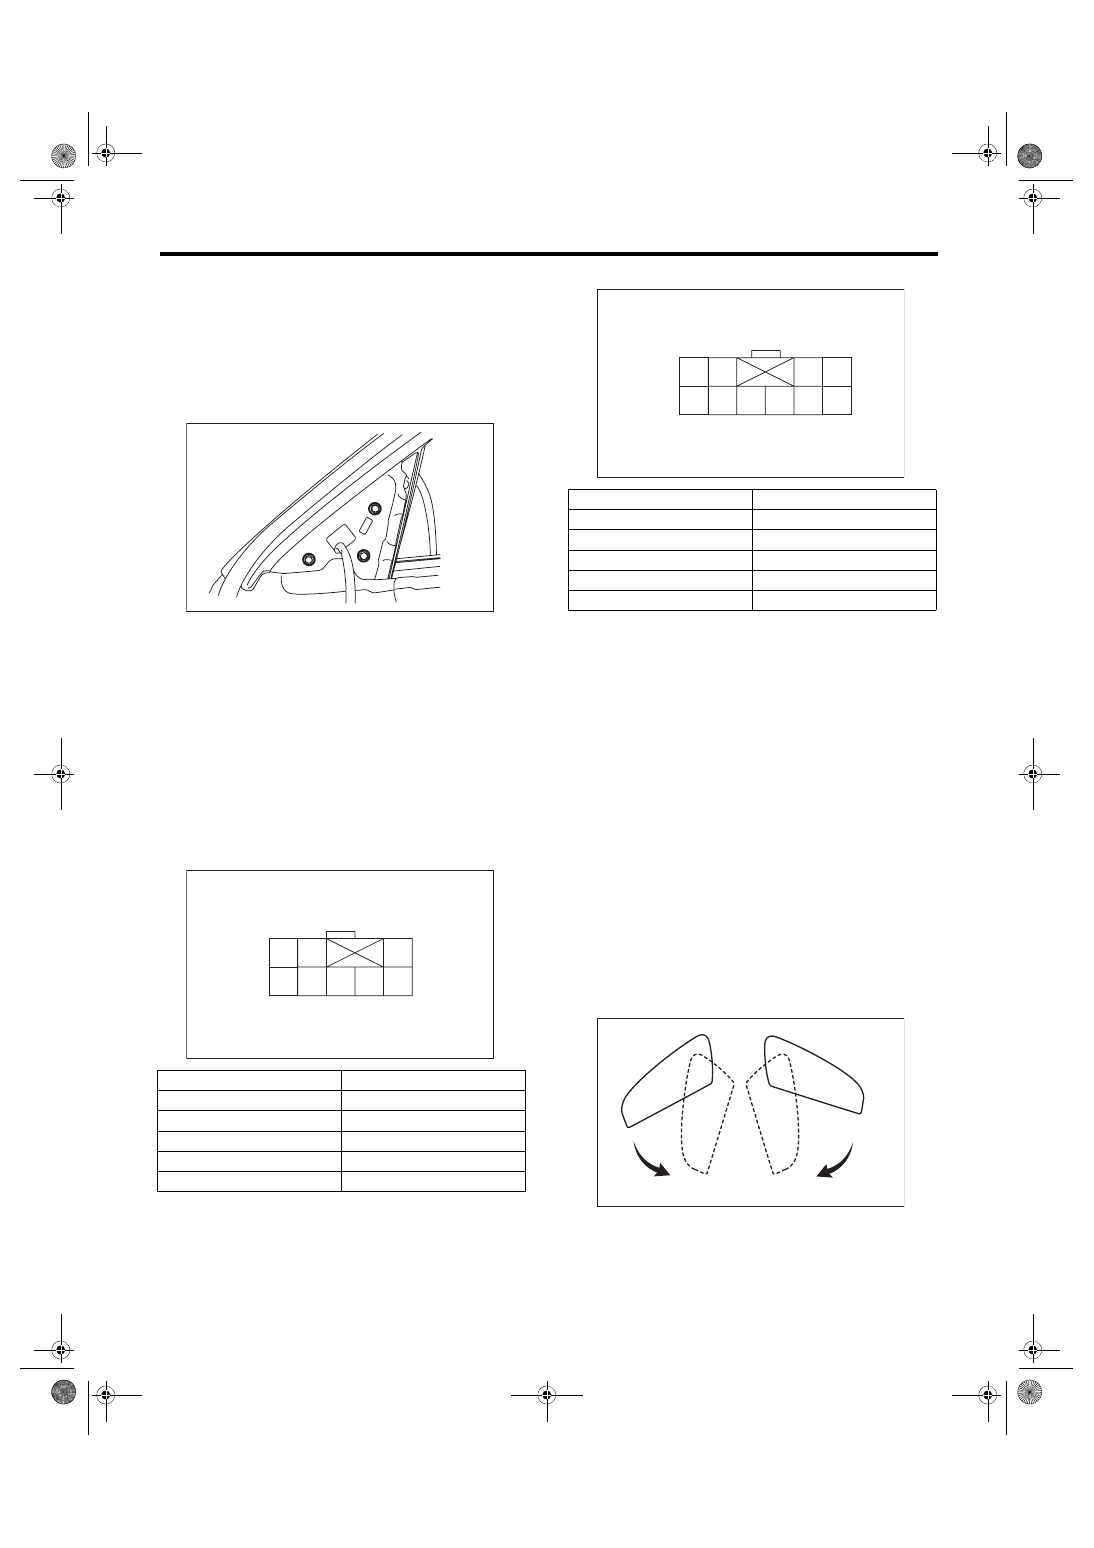
OPERATION
Check the folding operation as follows with outer
mirror attached to the front door.
NOTE:
• Because the installation angle for outer mirror
assembly varies on driver’s side and passenger’s
side, the outer mirror assembly on the driver’s side
operates a little bit slower when operated by the
folding switch.
• Noise or unfolding operation may occur in the
steps 3), 5) and 6). This is not a malfunction.
• Since manually switching the folding or running
position may cause loose fit after inspection, be
sure to operate the switch electrically.
1) Check that the left and right outer mirror assem-
blies with the running position are folded by press-
ing the folding switch.
Switch position
Terminal No.
OFF
—
UP
6 (+) and 3 (–)
DOWN
3 (+) and 6 (–)
LEFT
7 (+) and 3 (–)
RIGHT
3 (+) and 7 (–)
GW-00641
2
5 6 7 8
3
1
4
GW-00395
Switch position
Terminal No.
OFF
—
UP
7 (+) and 3 (–)
DOWN
3 (+) and 7 (–)
LEFT
8 (+) and 3 (–)
RIGHT
3 (+) and 8 (–)
GW-00642
2
6 7 8 9
3
1
5
4
10
GW-01343
Нет комментариевНе стесняйтесь поделиться с нами вашим ценным мнением.
Текст