Subaru Impreza 3 / Impreza WRX / Impreza WRX STI. Service manual — part 696
GW-17
Outer Mirror Assembly
GLASS/WINDOWS/MIRRORS
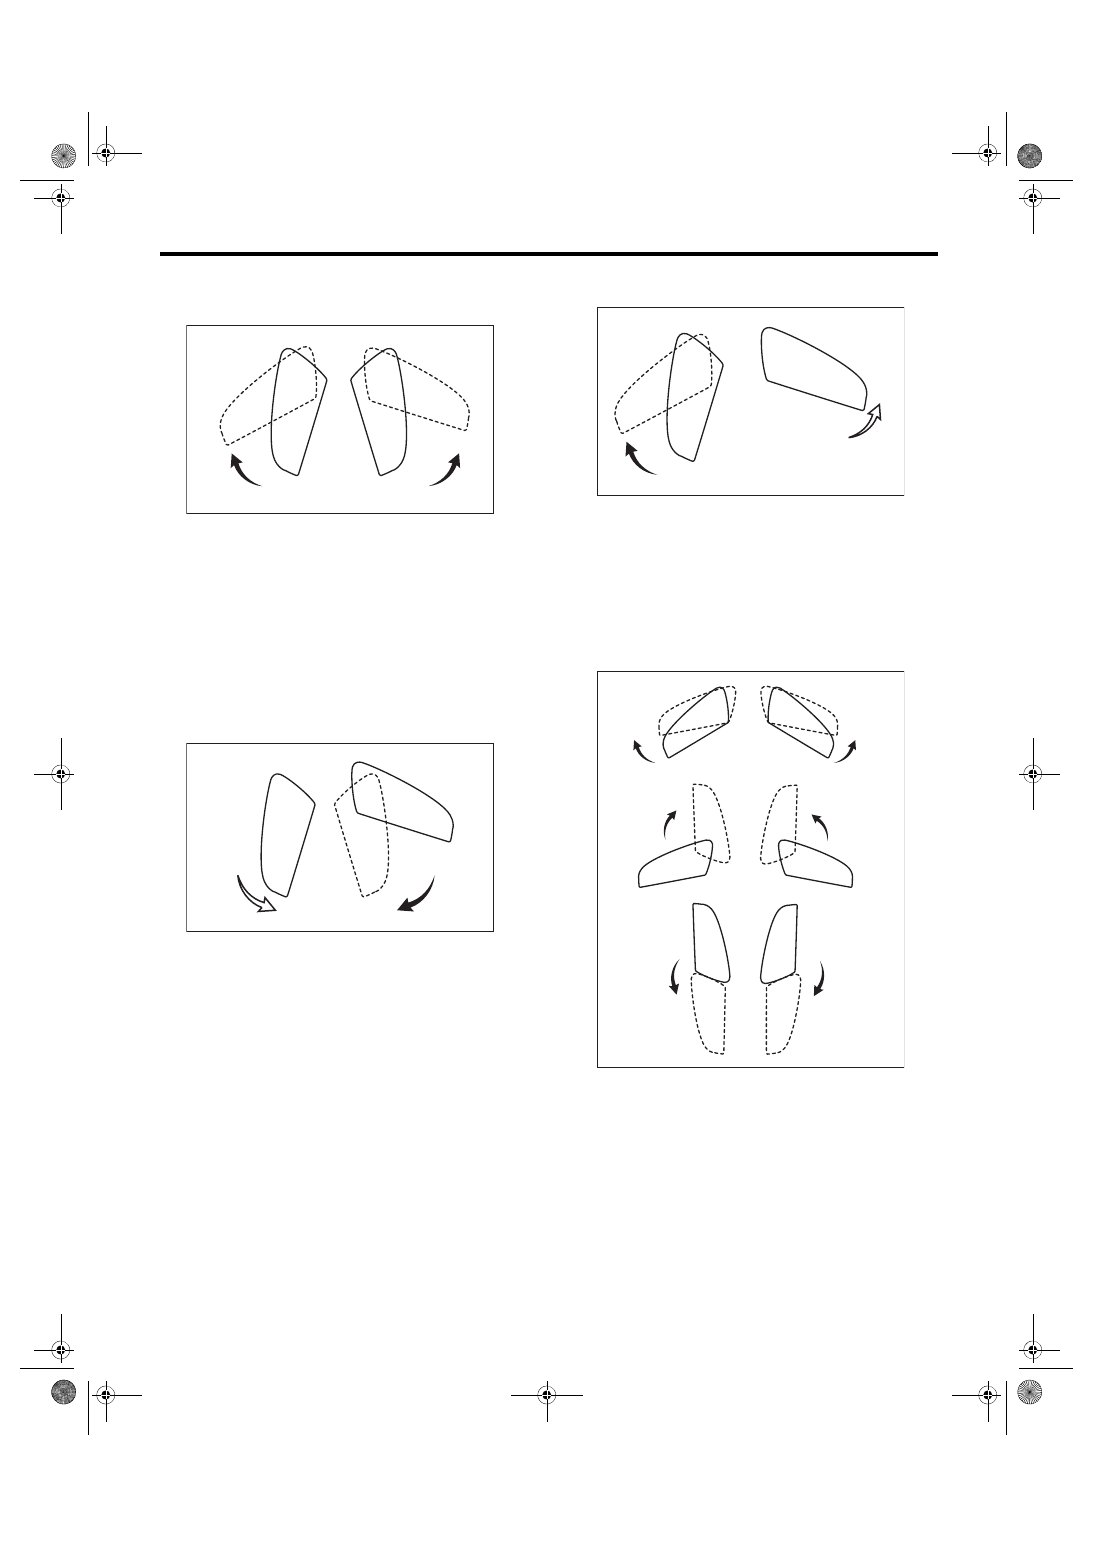
2) Check that the left and right outer mirror assem-
blies with the folding position are unfolded by
pressing the folding switch.
3) Check the folding operation on one side.
(1) Manually set the outer mirror assembly on
one side from running position to folding posi-
tion.
(2) Check that the outer mirror assembly on the
other side is folded by pressing the folding
switch.
(3) Check that loose fit condition does not exist
both in running position and in folding position
by operating the folding switch.
(4) Perform the inspection on left and right
sides.
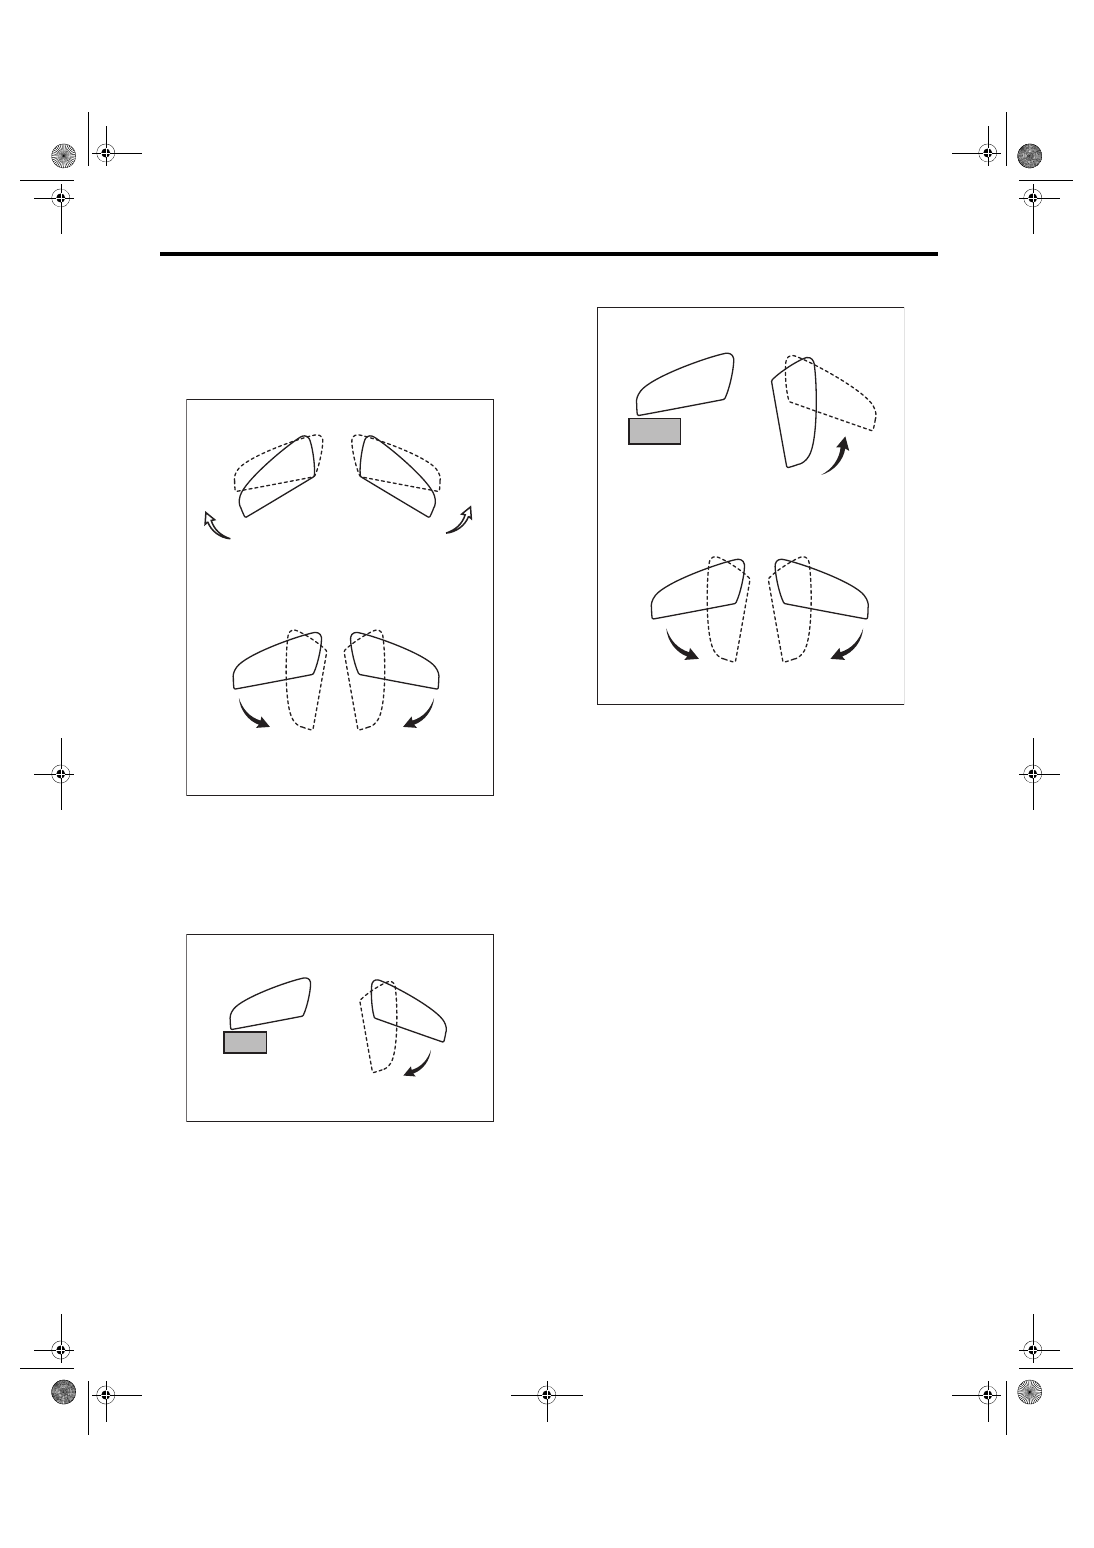
4) Check the unfolding operation on one side
(1) Manually set the outer mirror assembly on
one side from folding position to running posi-
tion.
(2) Check that the outer mirror assembly on the
other side is returned to the running position by
pressing the folding switch.
(3) Check that loose fit condition does not exist
both in running position and in folding position
by operating the folding switch.
(4) Perform the inspection on left and right
sides.
5) Check the operation with the folding switch OFF
(1) With IG OFF, push the outer mirror assem-
bly from running position to the front by hand.
(2) With ACC ON or IG ON, it is unfolded to the
front and stops.
(3) With the outer mirror assembly unfolded to
the front and stopped, turn on the folding
switch, and check that the outer mirror assem-
bly is folded.
GW-01344
GW-01345
(1)
(2)
GW-01346
(1)
(2)
GW-01347
(1)
(2)
(3)
(1)
(2)
(3)
GW-18
Outer Mirror Assembly
GLASS/WINDOWS/MIRRORS
6) Check the operation with the folding switch ON
(1) With IG OFF, push the outer mirror assem-
bly from running position to the front by hand.
(2) When the ignition switch is turned from IG
OFF to ACC ON or IG ON, check that the outer
mirror assembly starts folding from where it is
pushed and goes all the way.
7) Check operation with obstacles
(1) Set an obstacle on the mirror side of the out-
er mirror assembly.
(2) Operate the folding switch, and check that
the outer mirror assembly with an obstacle is
blocked and stopped and the other one is fold-
ed.
(3) After removing the obstacle, turn the folding
switch to OFF and set the running position.
(4) When the folding switch is turned on again,
check that the outer mirror assembly is set to
the folding position.
(5) Perform the inspection on left and right
sides.
GW-01348
(1)
(1)
(2)
(2)
GW-01349
GW-01350
GW-19
Outer Mirror
GLASS/WINDOWS/MIRRORS
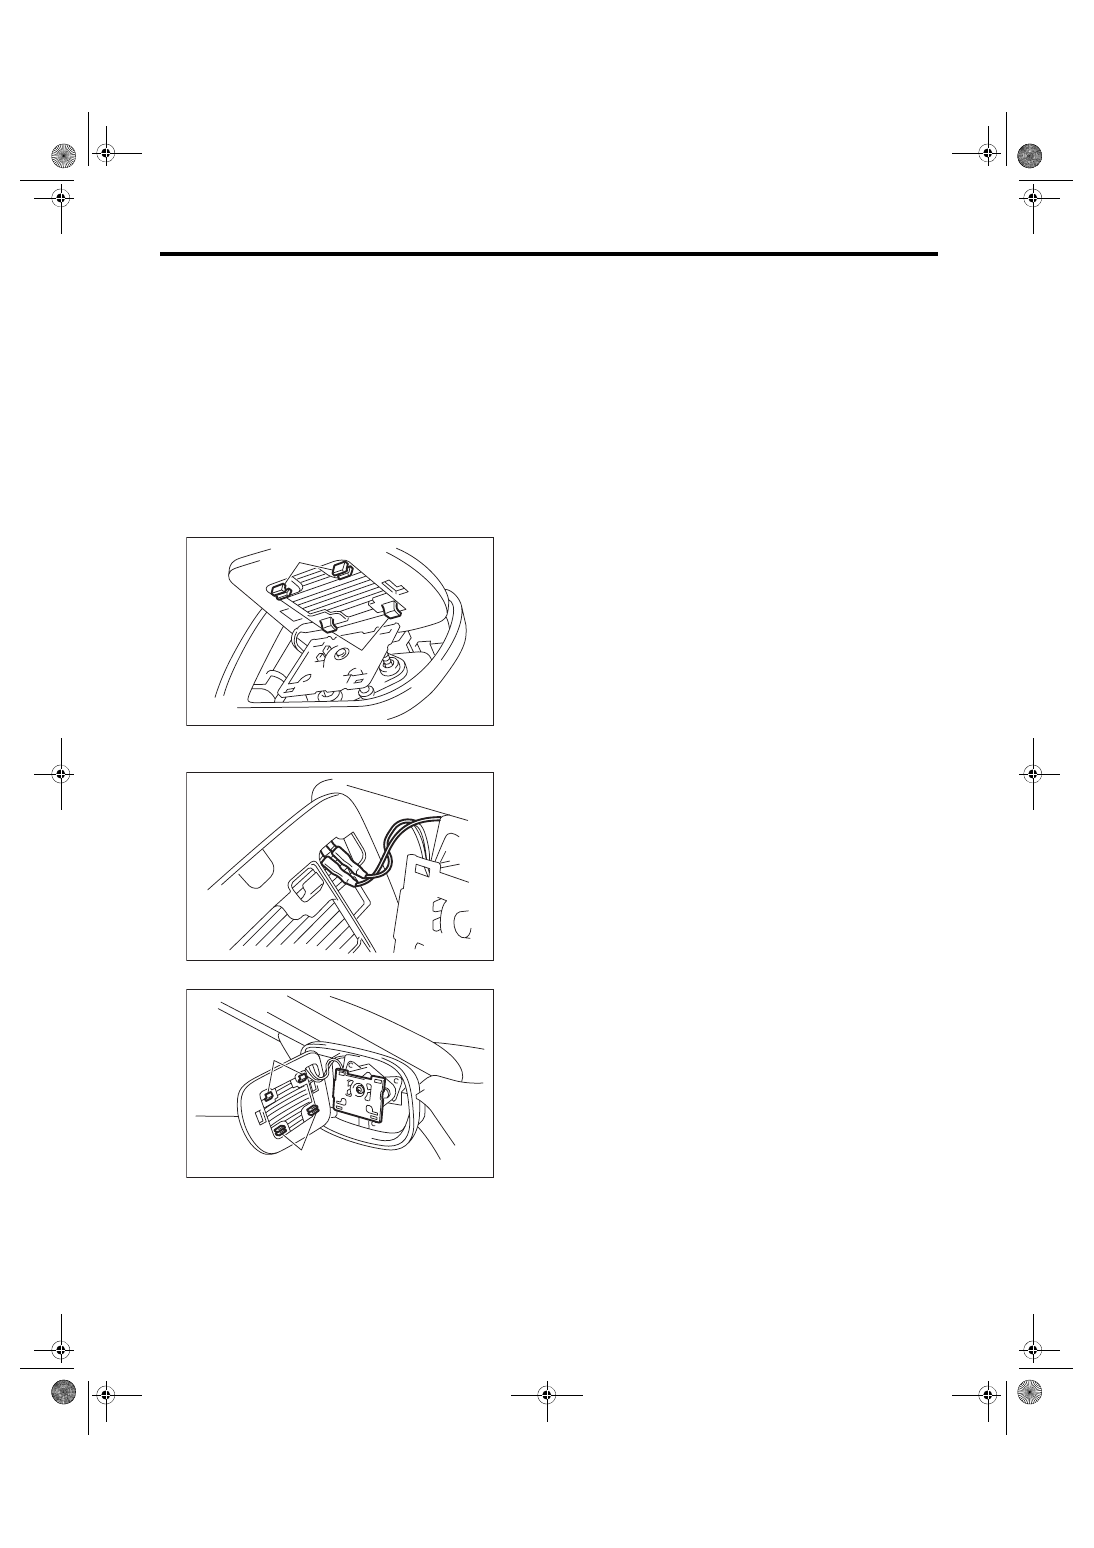
9. Outer Mirror
A: REPLACEMENT
CAUTION:
• When removing the mirror, be careful not to
damage the back surface of mirror with a flat tip
screwdriver.
• When installing the mirror, insert the hooks
and clips securely.
1) Face the mirror upward.
2) Disconnect the ground cable from battery. (Mod-
el with mirror heater)
3) Use a flat tip screwdriver to remove clips (A).
4) Lift the lower mirror up to remove hooks (B).
5) Disconnect the mirror heater connector from
side of the mirror. (Model with mirror heater)
6) Catch the hooks (B) and install clips (A).
GW-00279
(A)
(B)
GW-00280
GW-00450
(B)
(A)
GW-20
Remote Control Mirror Switch
GLASS/WINDOWS/MIRRORS
10.Remote Control Mirror
Switch
A: REMOVAL
1) Remove the instrument panel lower cover. <Ref.
to EI-49, REMOVAL, Instrument Panel Lower Cov-
2) Remove the remote control mirror switch from
instrument panel lower cover.
B: INSTALLATION
Install each part in the reverse order of removal.
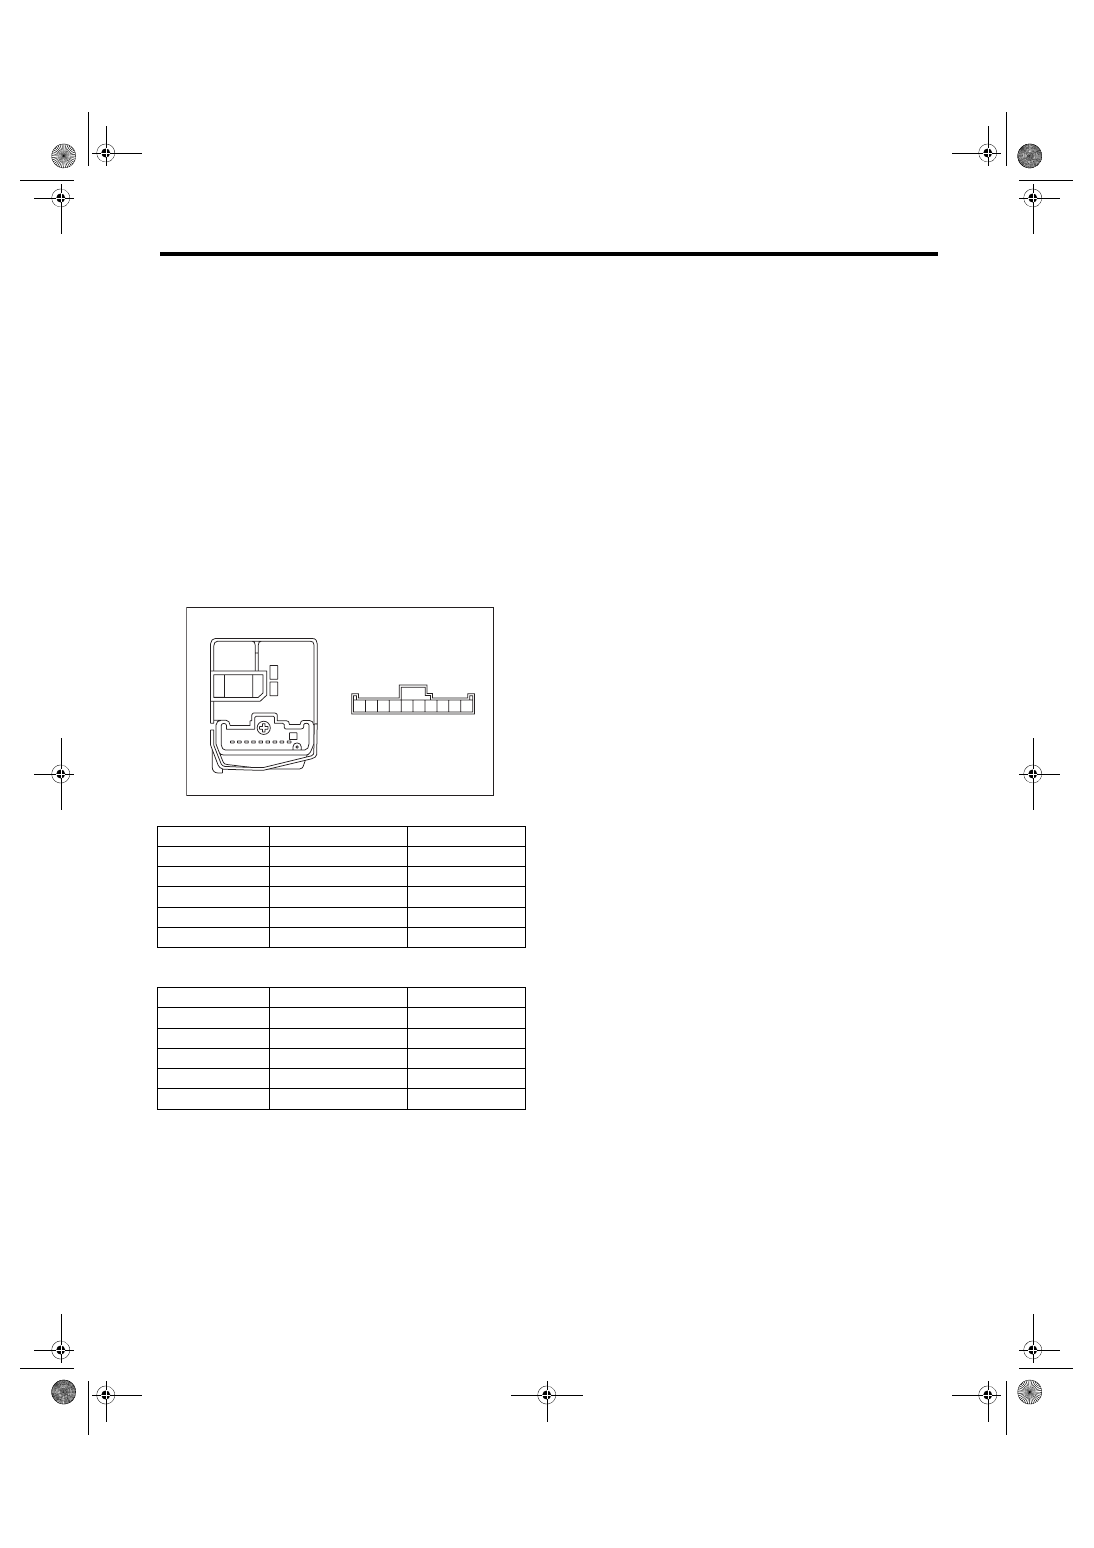
C: INSPECTION
1) Disconnect the remote control mirror switch con-
nector.
2) Check the resistance between remote control
mirror switch terminals.
• Switch the change over switch to the right side.
• Switch the change over switch to the left side.
3) Replace the remote control mirror switch if the
inspection result is not within the standard value.
Switch position
Terminal No.
Standard value
OFF
—
1 MΩ or more
UP
8 and 3, 6 and 7
Less than 1 Ω
DOWN
8 and 6, 3 and 7
Less than 1 Ω
LEFT
8 and 2, 6 and 7
Less than 1 Ω
RIGHT
8 and 6, 2 and 7
Less than 1 Ω
Switch position
Terminal No.
Standard value
OFF
—
1 MΩ or more
UP
8 and 4, 6 and 7
Less than 1 Ω
DOWN
8 and 6, 4 and 7
Less than 1 Ω
LEFT
8 and 5, 6 and 7
Less than 1 Ω
RIGHT
8 and 6, 5 and 7
Less than 1 Ω
1
2
3
4
5
6
7
8
9
10
GW-00643
Нет комментариевНе стесняйтесь поделиться с нами вашим ценным мнением.
Текст