Subaru Impreza 3 / Impreza WRX / Impreza WRX STI. Service manual — part 754
EB-27
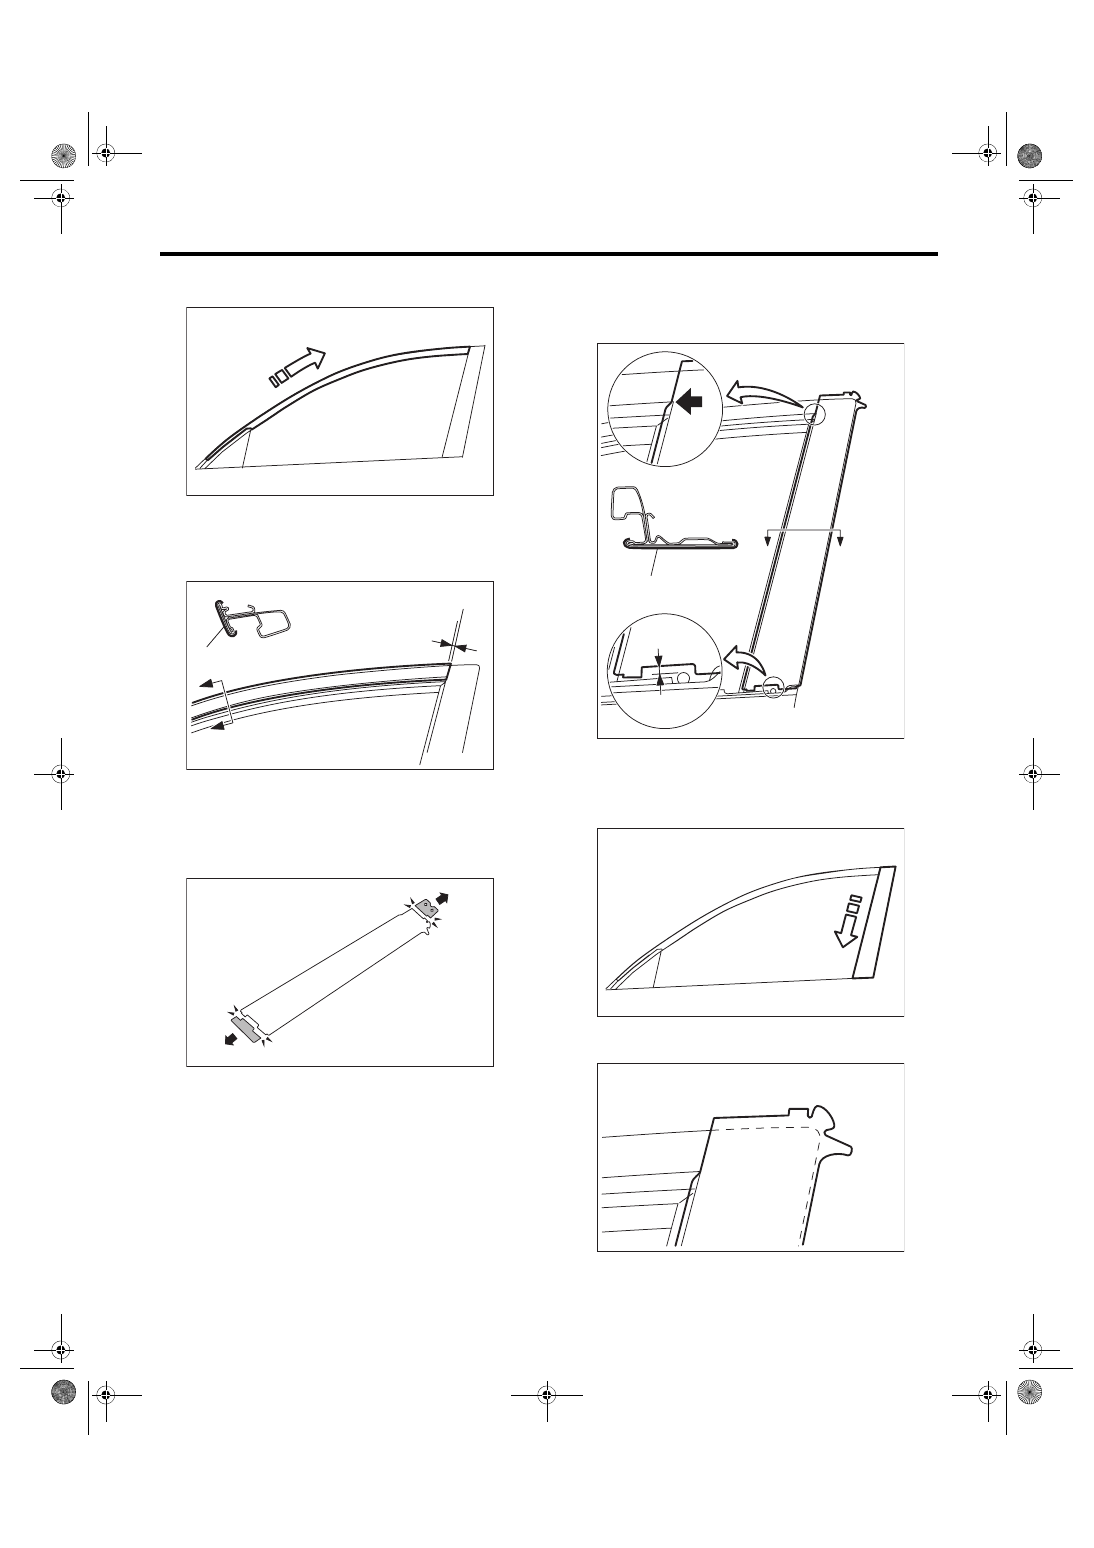
Door Sash Tape
EXTERIOR BODY PANELS
2) Apply tape from the front of the vehicle towards
the rear.
NOTE:
Apply the tape so that the end of the tape is within
2.5±1.5 mm (0.1±0.06 in) from a line extending
from the front door rear sash.
3) Cut away both ends of the front door sash tape -
rear.
4) Match the sash corner and the cut area of the
tape as shown in the figure. (Position of the arrow)
5) The lower end of the tape is to be aligned so that
a space of approximately 3.7 mm (0.15 in) remains,
so that the attachment holes of the weather strip
outer are not blocked. (Position of the arrow)
6) Apply tape from the top of the vehicle towards
the bottom.
7) Fold the corners at the door upper end area in
the order of (1) - (3).
(1) Front door sash tape - front
(2) Line extending from the front door rear sash
EB-00405
EB-00402
(2)
(1)
B-B
B-B
2.5 1.5 mm
+_
EB-00403
(1) Front door sash tape - rear
EB-00404
C-C
C-C
3.7 mm
(1)
EB-00406
EB-00408
(1)
(2)
(3)
EB-28
Door Sash Tape
EXTERIOR BODY PANELS
8) Thereafter, install door parts in the reverse order
of disassembly.
9) Install while paying attention to make a uniform
clearance around the front door panel. For the di-
mension of clearance, refer to “SPECIFICATION”
in “General Description”. <Ref. to EB-2, SPECIFI-
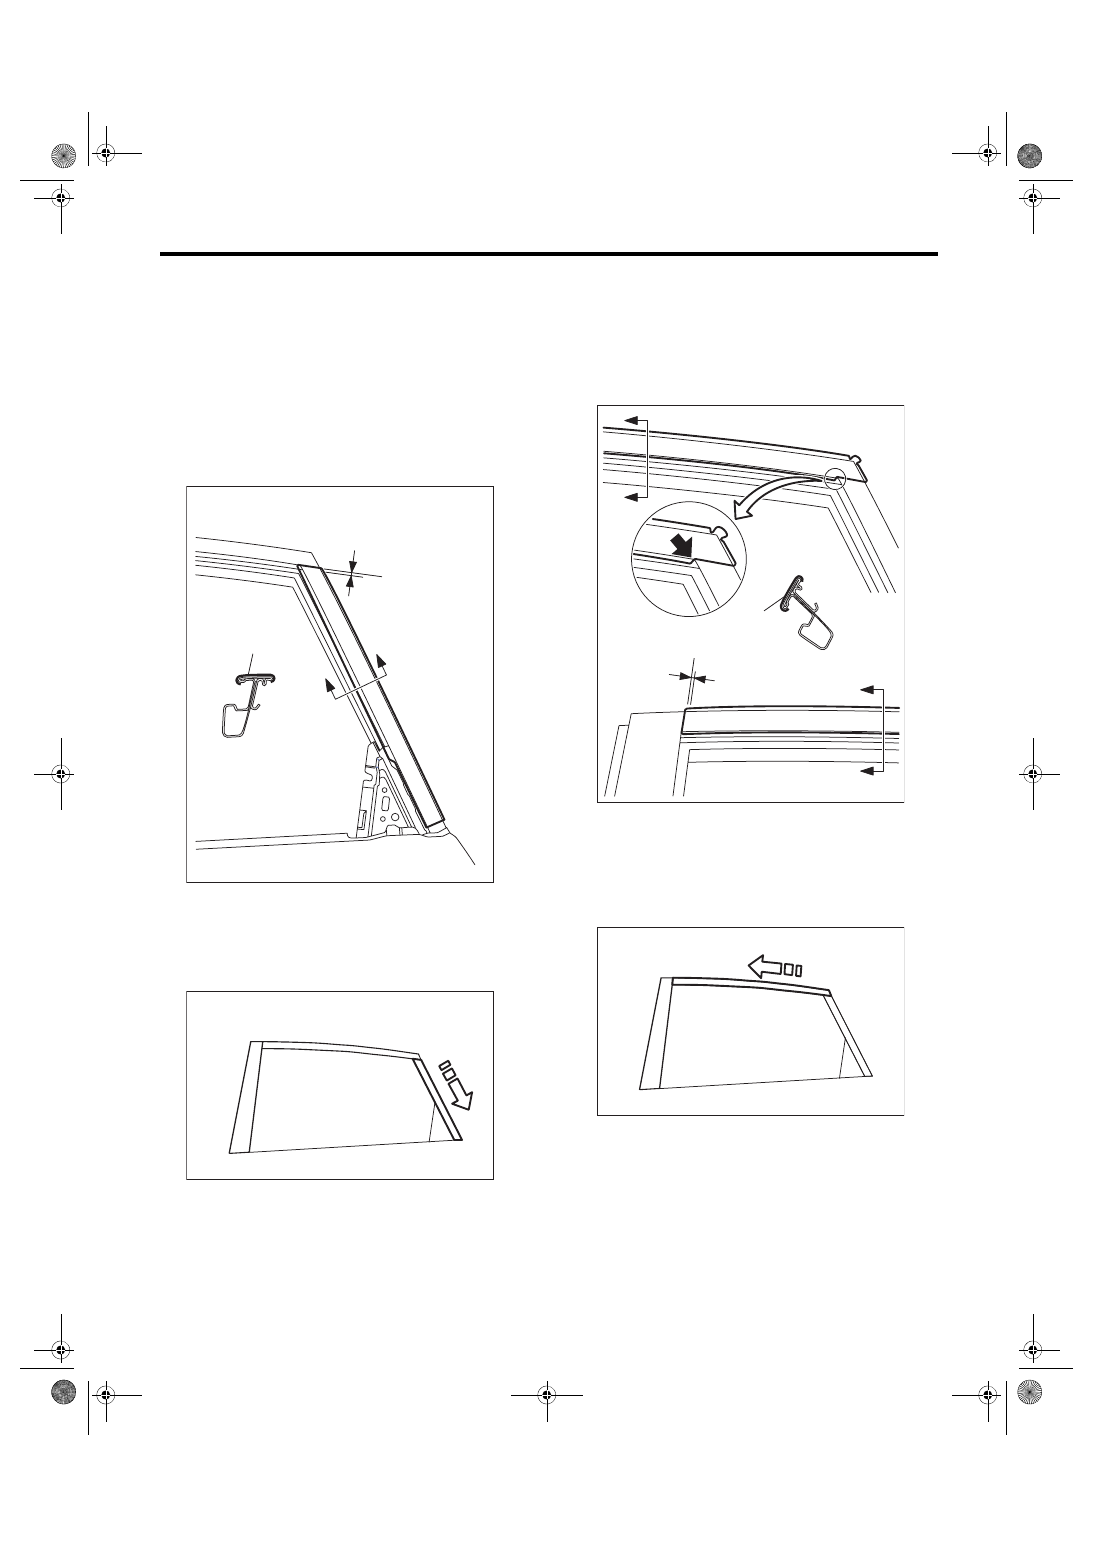
2. REAR DOOR
1) Apply the tape so that the end of the tape is with-
in 2.5±1.5 mm (0.1±0.06 in) of a line extending from
the rear door front sash.
2) Apply tape from the top of the vehicle towards
the bottom.
3) Match the rear door upper sash corner and the
cut area of the tape as shown in the figure. (Posi-
tion of the arrow)
NOTE:
Apply the tape so that the end of the tape is within
2.5±1.5 mm (0.1±0.06 in) of a line extending from
the rear door front sash.
4) Apply tape from the rear of the vehicle towards
the front.
(1) Rear door sash tape - rear
(2) Line extending from the rear door upper sash
(1)
B-B
B-B
(2)
2.5 1.5 mm
+_
EB-00418
EB-00414
(1) Rear door sash tape - medium
(2) Line extending from the front sash of the rear
door
(2)
E-E
E-E
E-E
(1)
2.5 1.5 mm
+_
EB-00416
EB-00413
EB-29
Door Sash Tape
EXTERIOR BODY PANELS
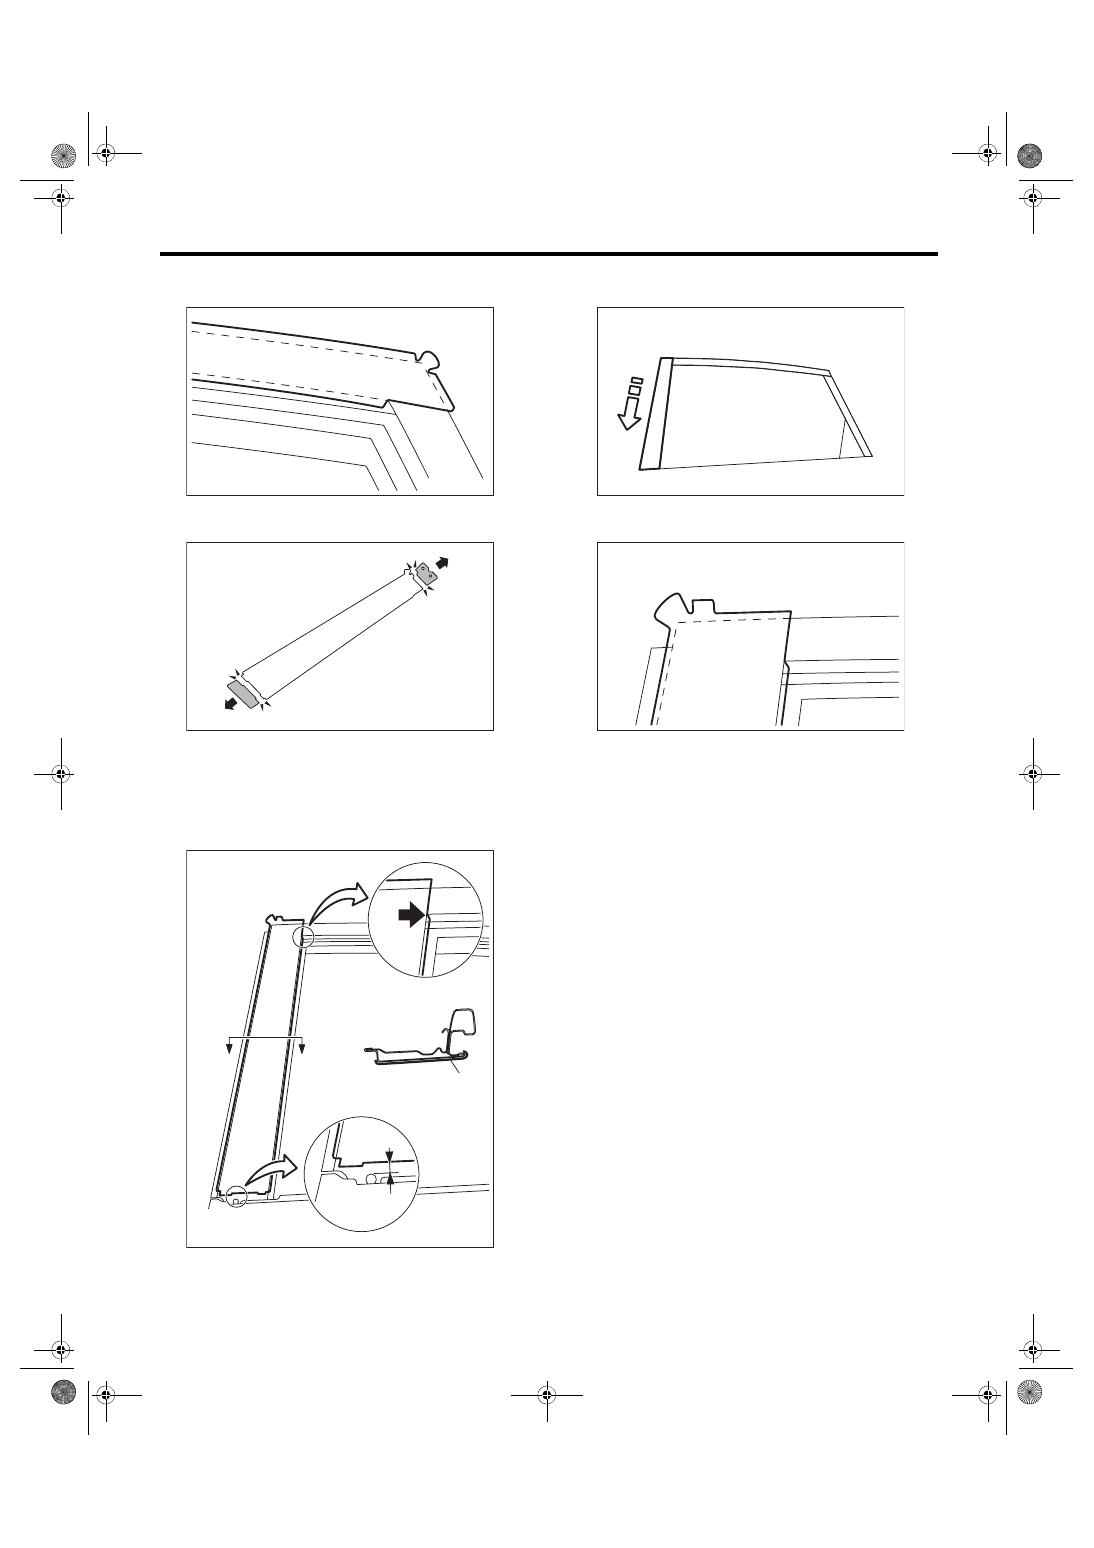
5) Fold the corners at the door upper end area in
the order of (1) - (3).
6) Cut away both ends of the rear door sash tape -
front.
7) Match the sash corner and the cut area of the
tape as shown in the figure. (Position of the arrow)
8) The lower end of the tape is to be aligned so that
a space of approximately 3.7 mm (0.15 in) remains,
so that the attachment holes of the weather strip
outer are not blocked. (Position of the arrow)
9) Apply tape from the top of the vehicle towards
the bottom.
10) Fold the corners at the door upper end area in
the order of (1) - (2).
11) Thereafter, install door parts in the reverse or-
der of disassembly.
12) Install while paying attention to make a uniform
clearance around the rear door panel. For the di-
mension of clearance, refer to “SPECIFICATION”
in “General Description”. <Ref. to EB-2, SPECIFI-
(1) Rear door sash tape - front
EB-00417
(1)
(2)
(3)
EB-00410
D-D
D-D
3.7 mm
(1)
EB-00411
EB-00412
EB-00415
(1)
(2)
EB-30
Rear Gate
EXTERIOR BODY PANELS
10.Rear Gate
A: REMOVAL
1. REAR GATE PANEL
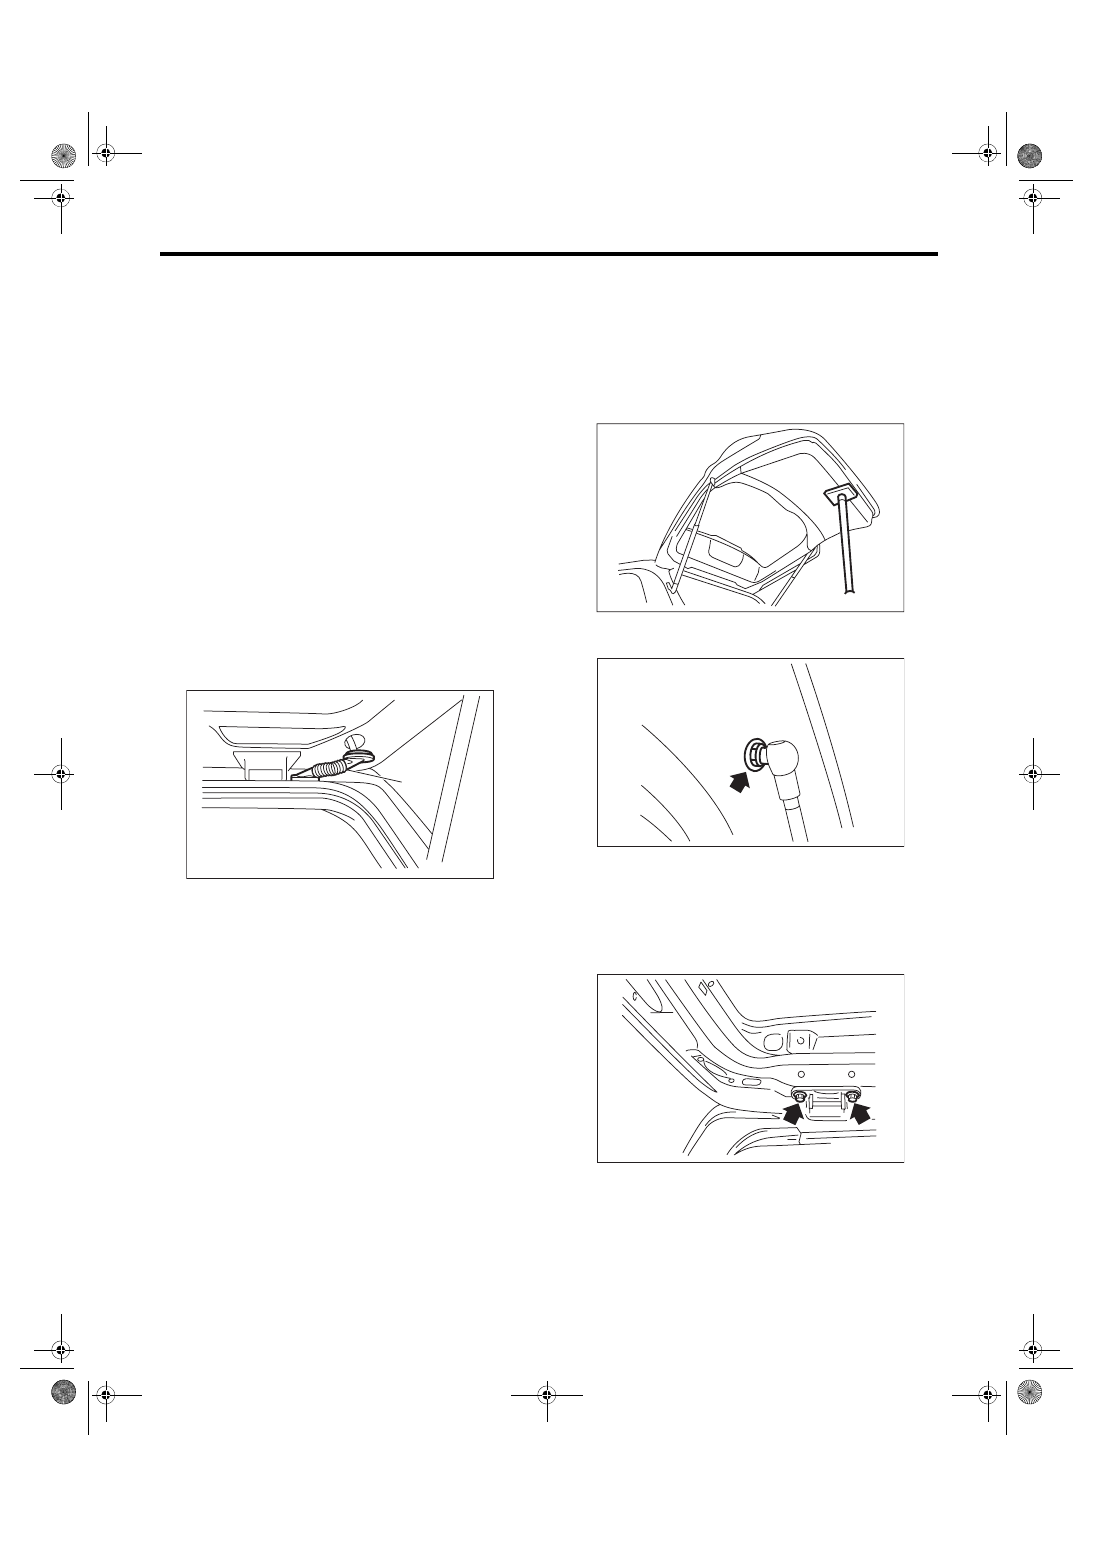
1) Disconnect the ground cable from battery.
2) Remove the rear gate trim. <Ref. to EI-69, RE-
3) Remove the rear finisher light assembly. <Ref.
to LI-29, REMOVAL, Rear Finisher Light Assem-
4) Remove the rear gate garnish. <Ref. to EI-72,
5) Remove the rear wiper arm. <Ref. to WW-20,
6) Remove the rear wiper motor. <Ref. to WW-21,
7) Remove the rear gate latch and actuator assem-
bly. <Ref. to SL-37, REMOVAL, Rear Gate Latch
8) Remove the roof spoiler. <Ref. to EI-41, RE-
9) Remove the rubber duct (A) connection.
10) Remove harness clip of each connector from
the rear gate panel.
11) Pull out the harness and washer hose from the
rear gate.
12) Before removing the rear gate damper stay,
prevent the rear gate from closing using prop or the
like.
CAUTION:
If the prop comes off, operators may get injured
and vehicle may get damaged. Make sure to
support the rear gate with secure material to
prevent injury or damage.
13) Remove the mounting bolt of rear gate damper
stay.
14) Remove the rear gate hinge bolt, and remove
the rear gate panel.
CAUTION:
Rear gate panels are heavy. When removing
and installing them, always work in a team of
two or more persons.
15) Remove the rear gate hinge from the vehicle.
EB-00428
(A)
EB-00389
EB-00282
EB-00023
Нет комментариевНе стесняйтесь поделиться с нами вашим ценным мнением.
Текст