Subaru Legacy (2005 year). Service manual — part 93
LU(H4SO 2.0)-17
LUBRICATION
Oil Pan and Strainer
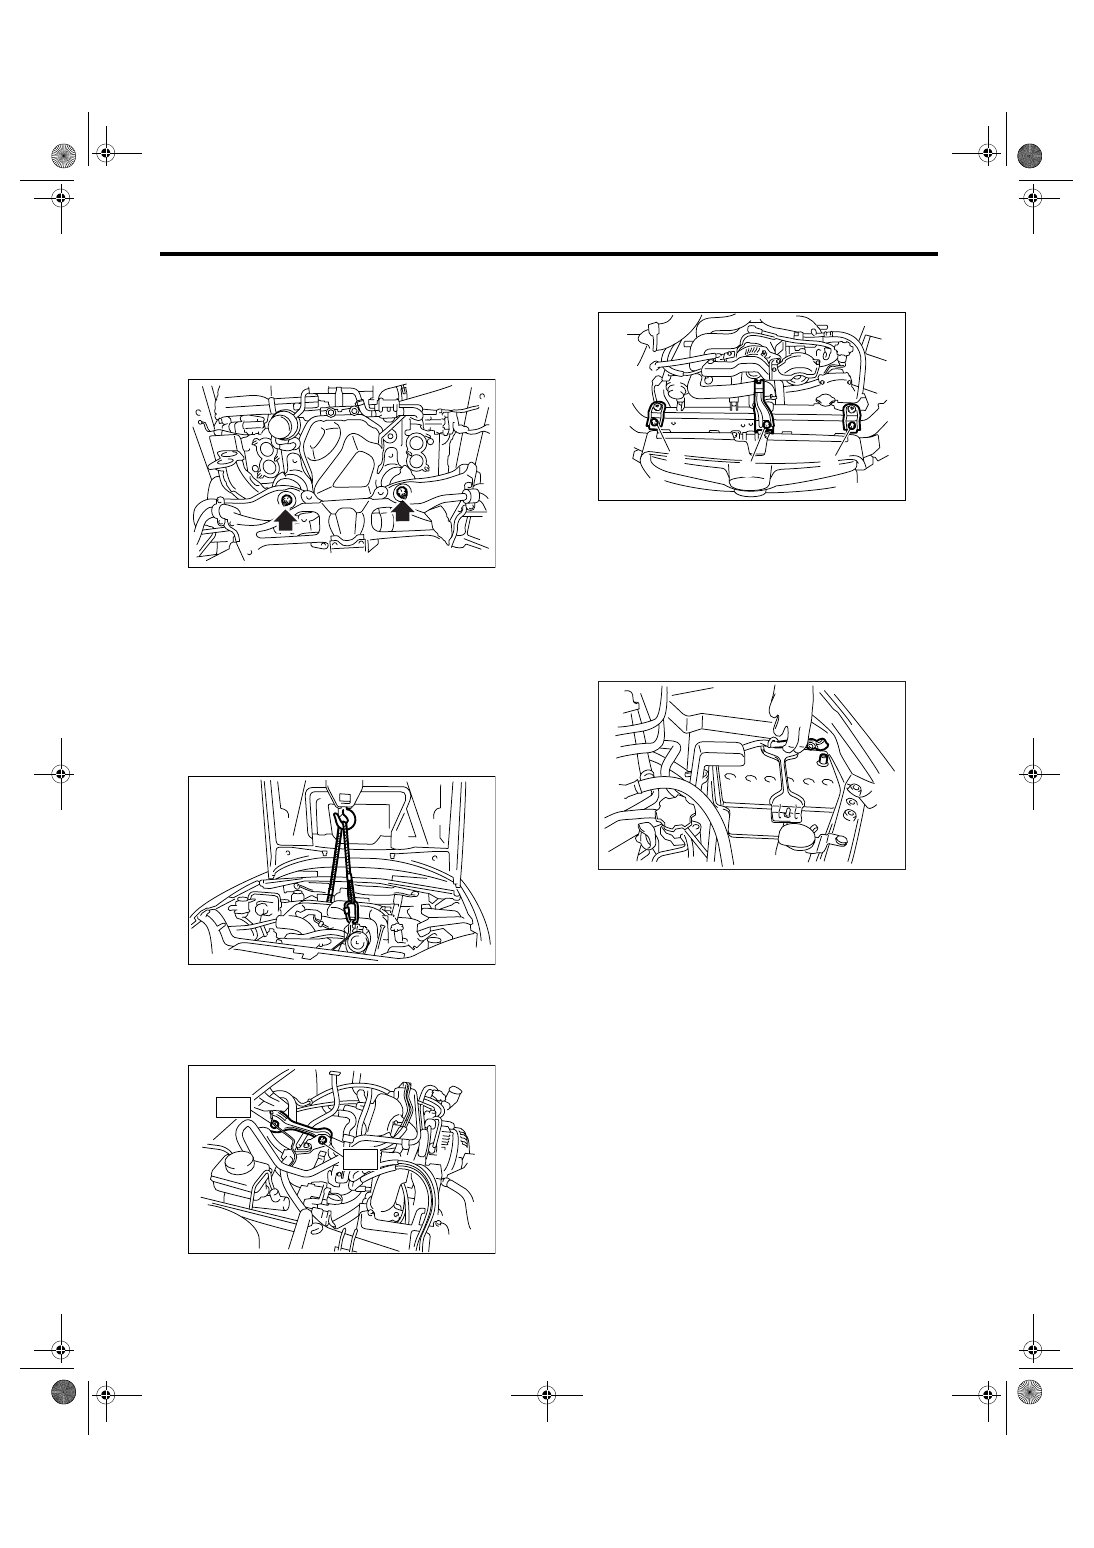
6) Lower the engine onto front crossmember.
7) Tighten the nuts which install front cushion rub-
ber onto front crossmember.
Tightening torque:
85 N
⋅
m (8.7 kgf-m, 62.7 ft-lb)
8) Install the front and center exhaust pipe. <Ref. to
EX(H4SO 2.0)-7, INSTALLATION, Front Exhaust
Pipe.> <Ref. to EX(H4SO 2.0)-9, INSTALLATION,
Center Exhaust Pipe.>
9) Install the under cover.
10) Lower the vehicle.
CAUTION:
When lowering the vehicle, lower the lift-up de-
vice and wire ropes at the same time.
11) Remove the lifting device and wire ropes.
12) Install the pitching stopper.
Tightening torque:
T1: 50 N
⋅
m (5.1 kgf-m, 36.9 ft-lb)
T2: 58 N
⋅
m (5.9 kgf-m, 42.8 ft-lb)
13) Install the hood stay holder (A) and radiator up-
per brackets (B).
14) Install the air intake chamber.
<Ref. to IN(H4SO 2.0)-7, INSTALLATION, Air In-
take Chamber.>
15) Install the air intake duct and air cleaner case.
<Ref. to IN(H4SO 2.0)-8, INSTALLATION, Air In-
take Duct.> <Ref. to IN(H4SO 2.0)-5, INSTALLA-
TION, Air Cleaner Case.>
16) Install the front wheels.
17) Connect the ground cable to battery.
18) Fill the engine oil. <Ref. to LU(H4SO 2.0)-9, IN-
SPECTION, Engine Oil.>
C: INSPECTION
Visually check that the oil pan, oil strainer, oil
strainer stay and baffle plate are not damaged.
LU-00223
LU-00222
LU-00233
T2
T1
LU-00232
(A)
(B)
(B)
IN-00203
LU(H4SO 2.0)-18
LUBRICATION
Oil Pressure Switch
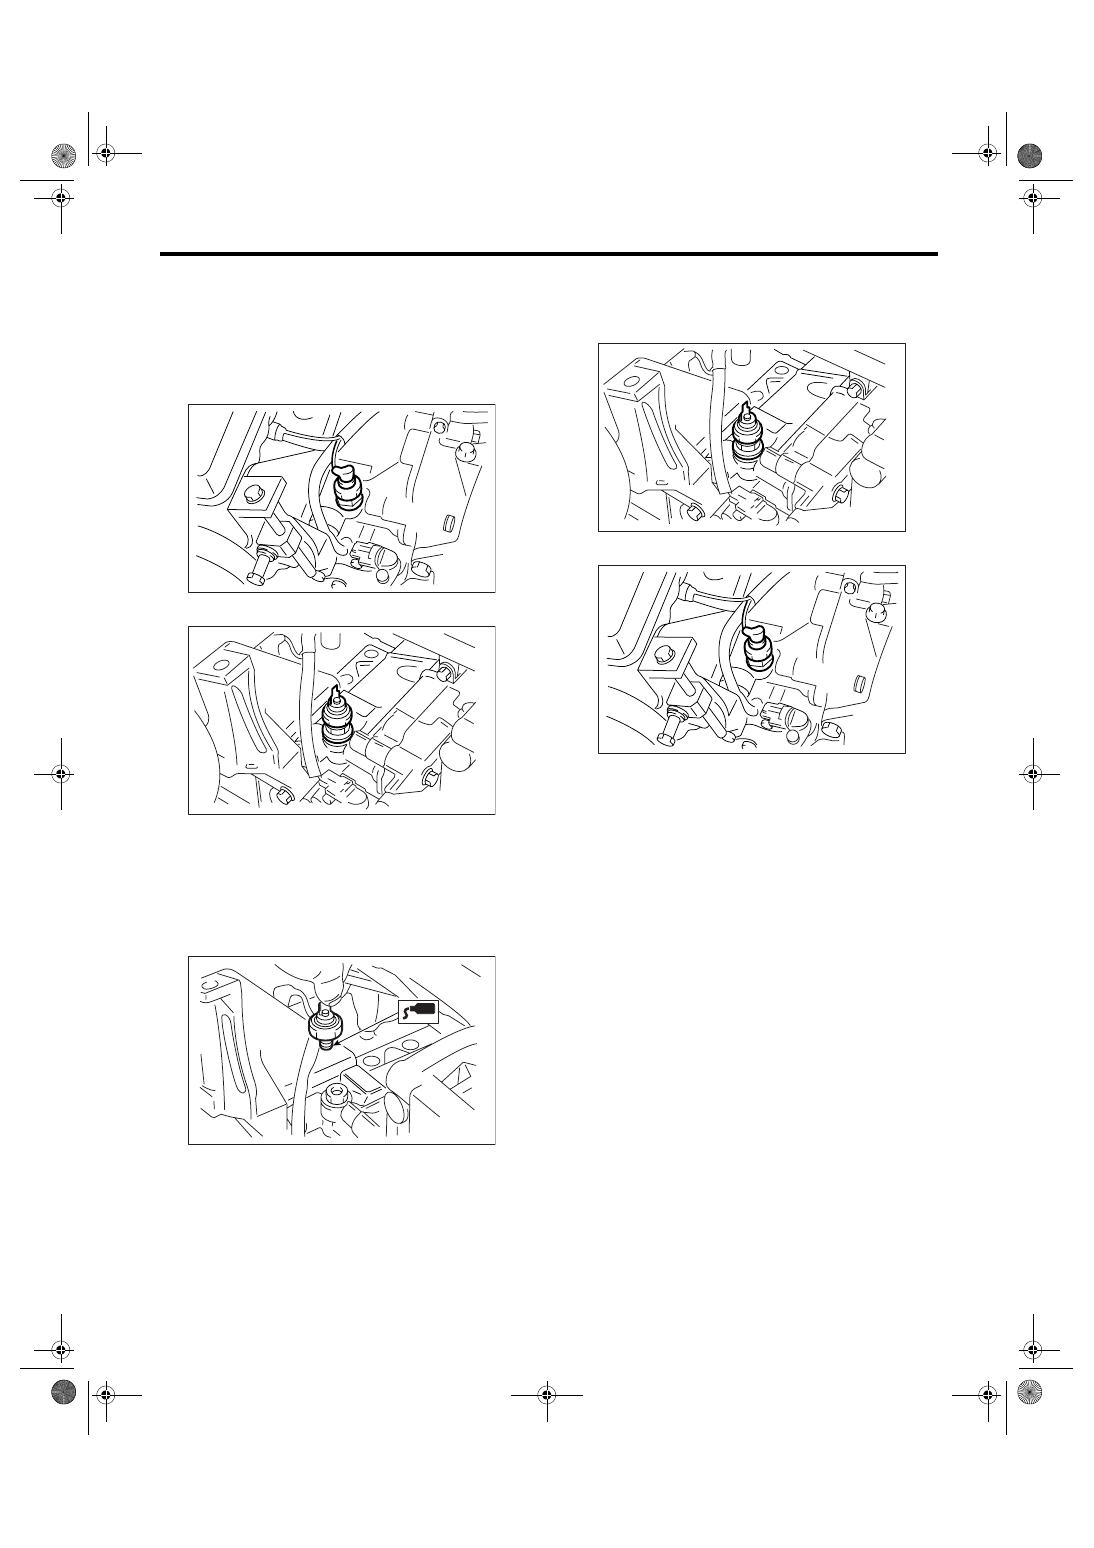
6. Oil Pressure Switch
A: REMOVAL
1) Remove the generator from bracket.
<Ref. to SC(H4SO 2.0)-14, REMOVAL, Genera-
tor.>
2) Disconnect the terminal from oil pressure switch.
3) Remove the oil pressure switch.
B: INSTALLATION
1) Apply liquid gasket to oil pressure switch
threads.
Liquid gasket:
THREE BOND 1324 (Part No. 004403042) or
equivalent
2) Install the oil pressure switch onto engine block.
Tightening torque:
25 N
⋅
m (2.5 kgf-m, 18.4 ft-lb)
3) Connect the terminal to oil pressure switch.
4) Install the generator to bracket.
<Ref. to SC(H4SO 2.0)-14, INSTALLATION, Gen-
erator.>
C: INSPECTION
Check the oil pressure switch installation portion for
oil leakage and oil seepage.
LU-00036
LU-00037
LU-00038
LU-00037
LU-00036
LU(H4SO 2.0)-19
LUBRICATION
Engine Oil Filter
7. Engine Oil Filter
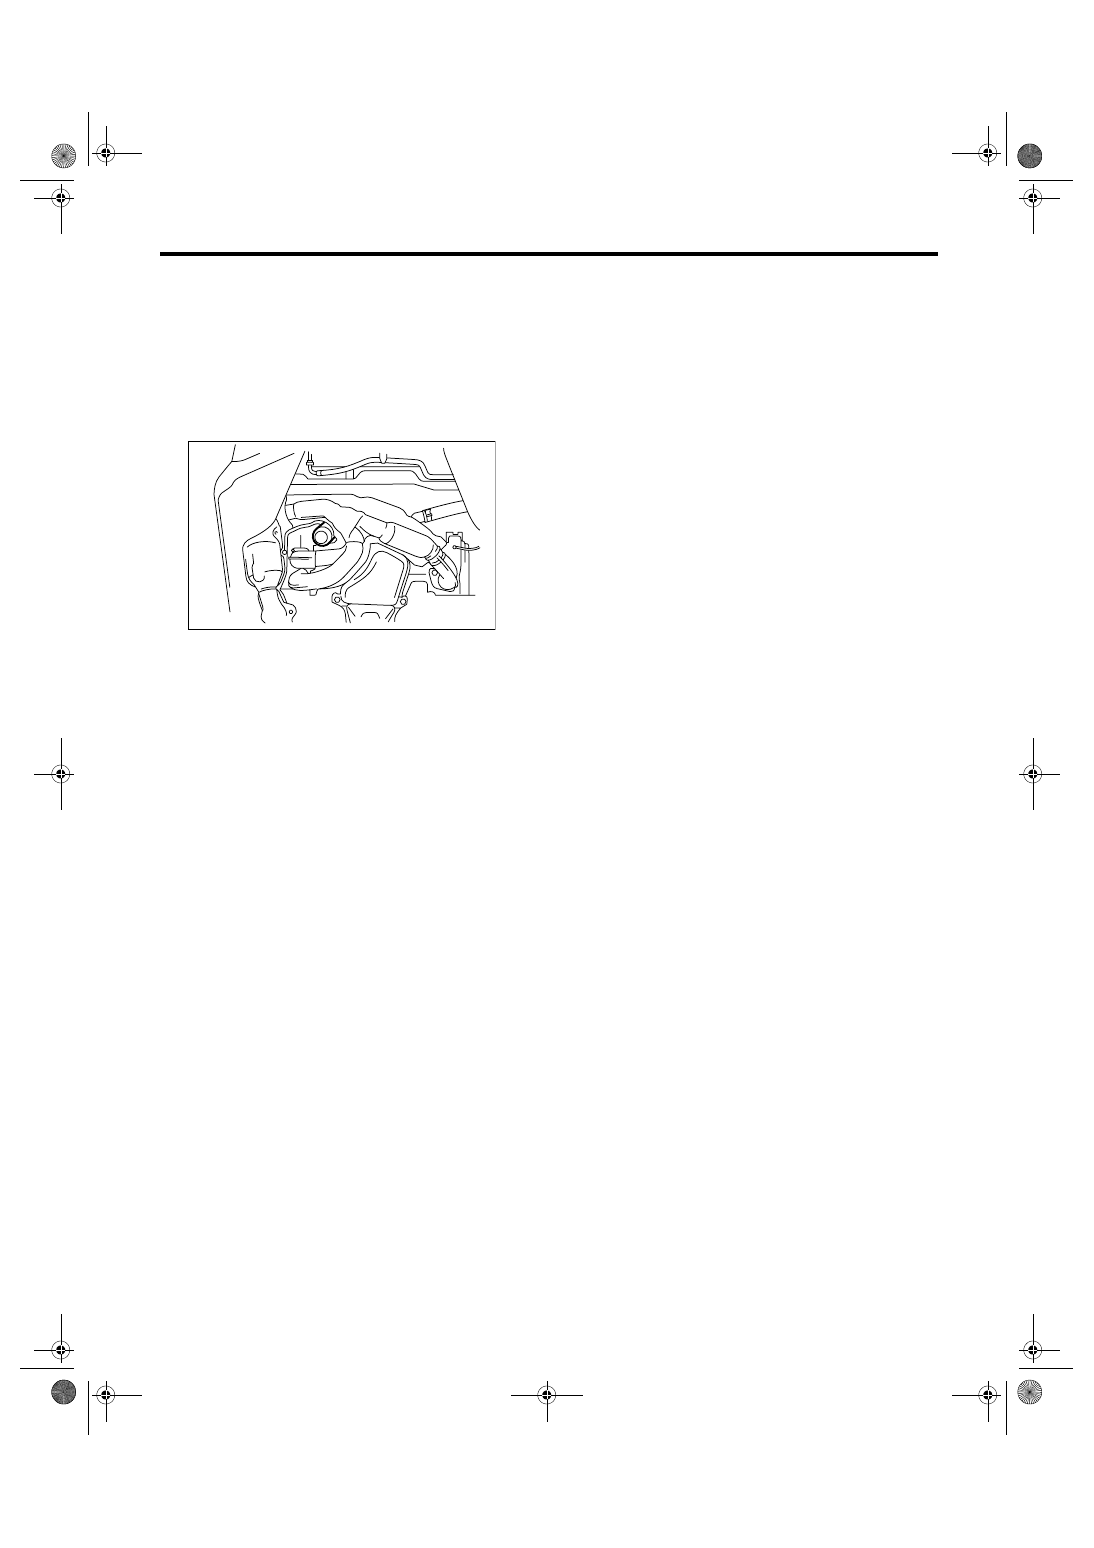
A: REMOVAL
1) Lift-up the vehicle.
2) Remove the oil filter using ST.
ST
18332AA000
OIL FILTER WRENCH (Outer
diameter: 68 mm (2.68 in))
ST
18332AA010
OIL FILTER WRENCH (Outer
diameter: 65 mm (2.56 in))
B: INSTALLATION
1) Clean the oil filter installing surface on cylinder
block.
2) Apply a thin coat of engine oil to the seal rubber
of new oil filter.
3) Install the oil filter turning it by hand, being care-
ful not to damage the seal rubber.
4) Tighten more after the seal rubber contacts cyl-
inder block.
NOTE:
• In case of oil filter in outer diameter 68 mm (2.68
in), tighten by approx. one turn.
• In case of oil filter in outer diameter 65 mm (2.56
in), tighten by approx. 2/3 to 3/4 turn.
• Do not tighten excessively because oil may leak.
C: INSPECTION
1) After installing the oil filter, run engine and make
sure that no oil is leaking around the seal rubber.
NOTE:
The filter element and filter case are permanently
jointed; therefore, interior cleaning is not neces-
sary.
2) Check the engine oil level. <Ref. to LU(H4SO
2.0)-9, INSPECTION, Engine Oil.>
LU-00234
LU(H4SO 2.0)-20
LUBRICATION
Engine Lubrication System Trouble in General
8. Engine Lubrication System Trouble in General
A: INSPECTION
Before performing diagnosis, make sure that the engine oil level is correct and no oil leakage exists.
Symptom
Possible cause
Corrective action
1. Warning light does
not go off.
1) Oil pressure switch
failure
Cracked diaphragm or oil leakage within switch
Replace.
Broken spring or seized contacts
Replace.
2) Low oil pressure
Clogging of oil filter
Replace.
Malfunction of oil by-pass valve in oil filter
Clean or replace.
Malfunction of oil relief valve in oil pump
Clean or replace.
Clogged oil passage
Clean.
Excessive tip clearance and side clearance of oil
pump rotor and gear
Replace.
Clogged oil strainer or broken pipe
Clean or replace.
3) No oil pressure
Insufficient engine oil
Replenish.
Broken pipe of oil strainer
Replace.
Stuck oil pump rotor
Replace.
2. Warning light does
not turn on.
1) Malfunction of combination meter.
Replace.
2) Poor contact of switch contact points
Replace.
3) Disconnection of wiring
Repair.
3. Warning light flickers
momentarily.
1) Poor contact at terminals
Repair.
2) Defective wiring harness
Repair.
3) Low oil pressure
Check for the same
possible causes as
listed in 1) — 2).
Нет комментариевНе стесняйтесь поделиться с нами вашим ценным мнением.
Текст