Subaru Legacy (2005 year). Service manual — part 91
LU(H4SO 2.0)-9
LUBRICATION
Engine Oil
3. Engine Oil
A: INSPECTION
1) Park the vehicle on a level surface.
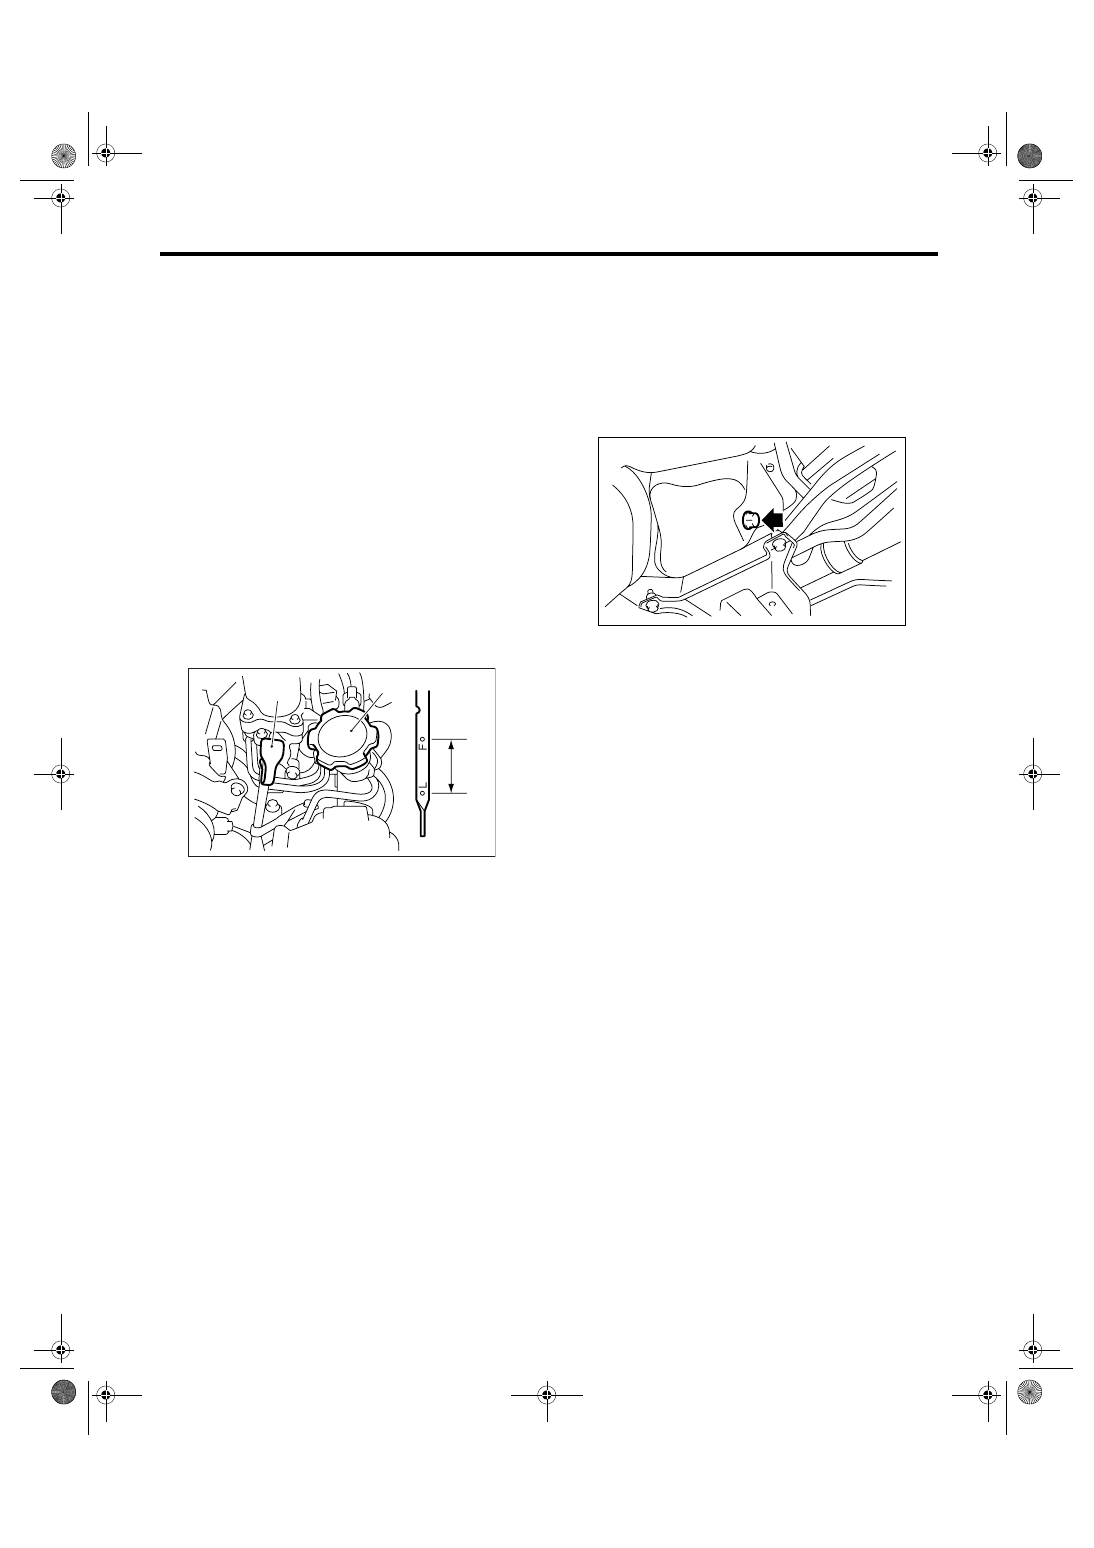
2) Remove the oil level gauge and wipe it clean.
3) Reinsert the oil level gauge all the way. Be sure
that the oil level gauge is correctly inserted and
properly orientated.
4) Remove the oil level gauge again and check the
engine oil level. If the engine oil level is below the
“L” line, add oil to bring the level up to the “F” line.
5) After turning off the engine, wait a few minutes
for the oil to return to the oil pan before checking
the level.
6) Just after driving or while the engine is warm, en-
gine oil level shows in the range between “F” line
and notch mark. This is caused by thermal expan-
sion of engine oil.
NOTE:
To prevent overfilling of engine oil, do not add oil
above the “F” line when the engine is cold.
B: REPLACEMENT
1) Open the engine oil filler cap for quick draining of
engine oil.
2) Lift-up the vehicle.
3) Drain the engine oil by loosening the engine oil
drain plug.
NOTE:
Prepare the container for draining of engine oil.
4) Tighten the engine oil drain plug after draining
engine oil.
NOTE:
Use a new drain plug gasket.
Tightening torque:
44 N
⋅
m (4.5 kgf-m, 32.5 ft-lb)
5) Use the engine oil of proper quality and viscosi-
ty, fill the engine oil through oil filler duct to upper
level on oil level gauge. Make sure that the vehicle
is parked on a level surface when checking oil lev-
el.
Recommended oil:
Refer to “SPECIFICATION” for the recom-
mended oil. <Ref. to LU(H4SO 2.0)-2, SPECI-
FICATION, General Description.>
Engine oil capacity (when replacing engine oil):
4.0
2 (4.2 US qt, 3.5 Imp qt)
6) Close the engine oil filler cap.
7) Start the engine and warm it up for a time.
(A) Oil level gauge
(B) Engine oil filler cap
(C) Upper level
(D) Lower level
(E) Approx. 1.0
2 (1.1 US qt, 0.9 Imp qt)
LU-00213
(C)
(B)
(A)
(E)
(D)
LU-00230
LU(H4SO 2.0)-10
LUBRICATION
Engine Oil
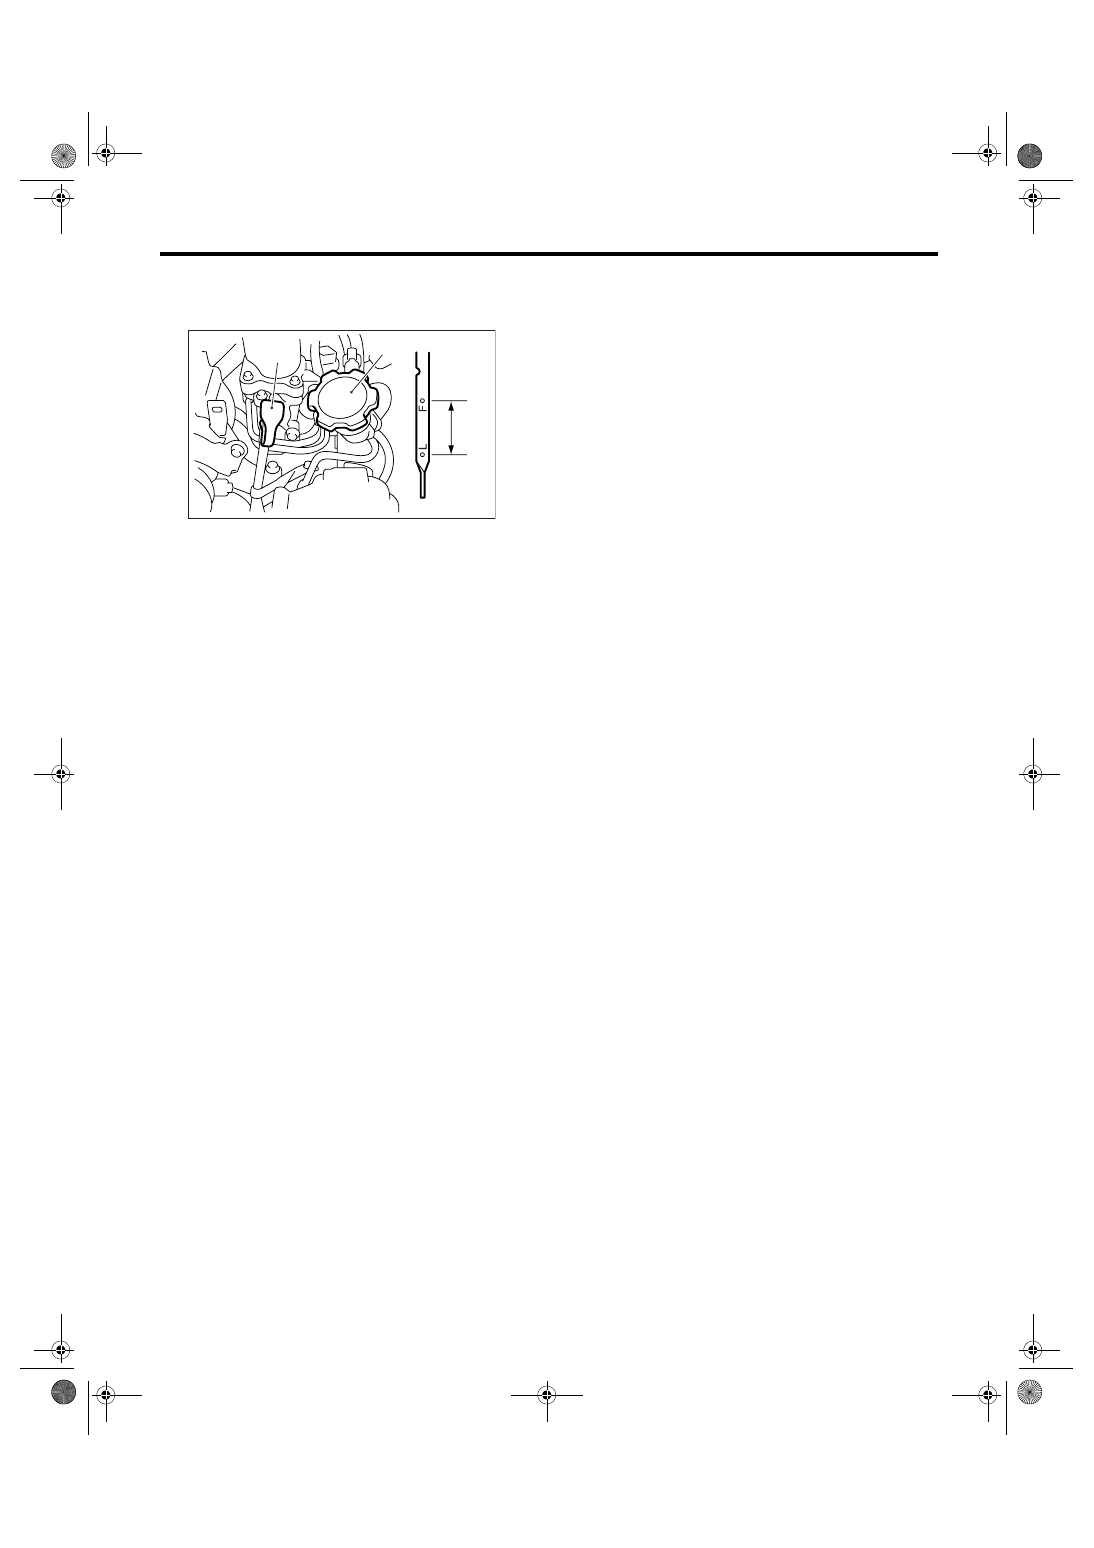
8) After the engine stops, recheck the oil level. If
necessary, add the engine oil up to the upper level
on oil level gauge.
(A) Oil level gauge
(B) Engine oil filler cap
(C) Upper level
(D) Lower level
(E) Approx. 1.0
2 (1.1 US qt, 0.9 Imp qt)
LU-00213
(C)
(B)
(A)
(E)
(D)
LU(H4SO 2.0)-11
LUBRICATION
Oil Pump
4. Oil Pump
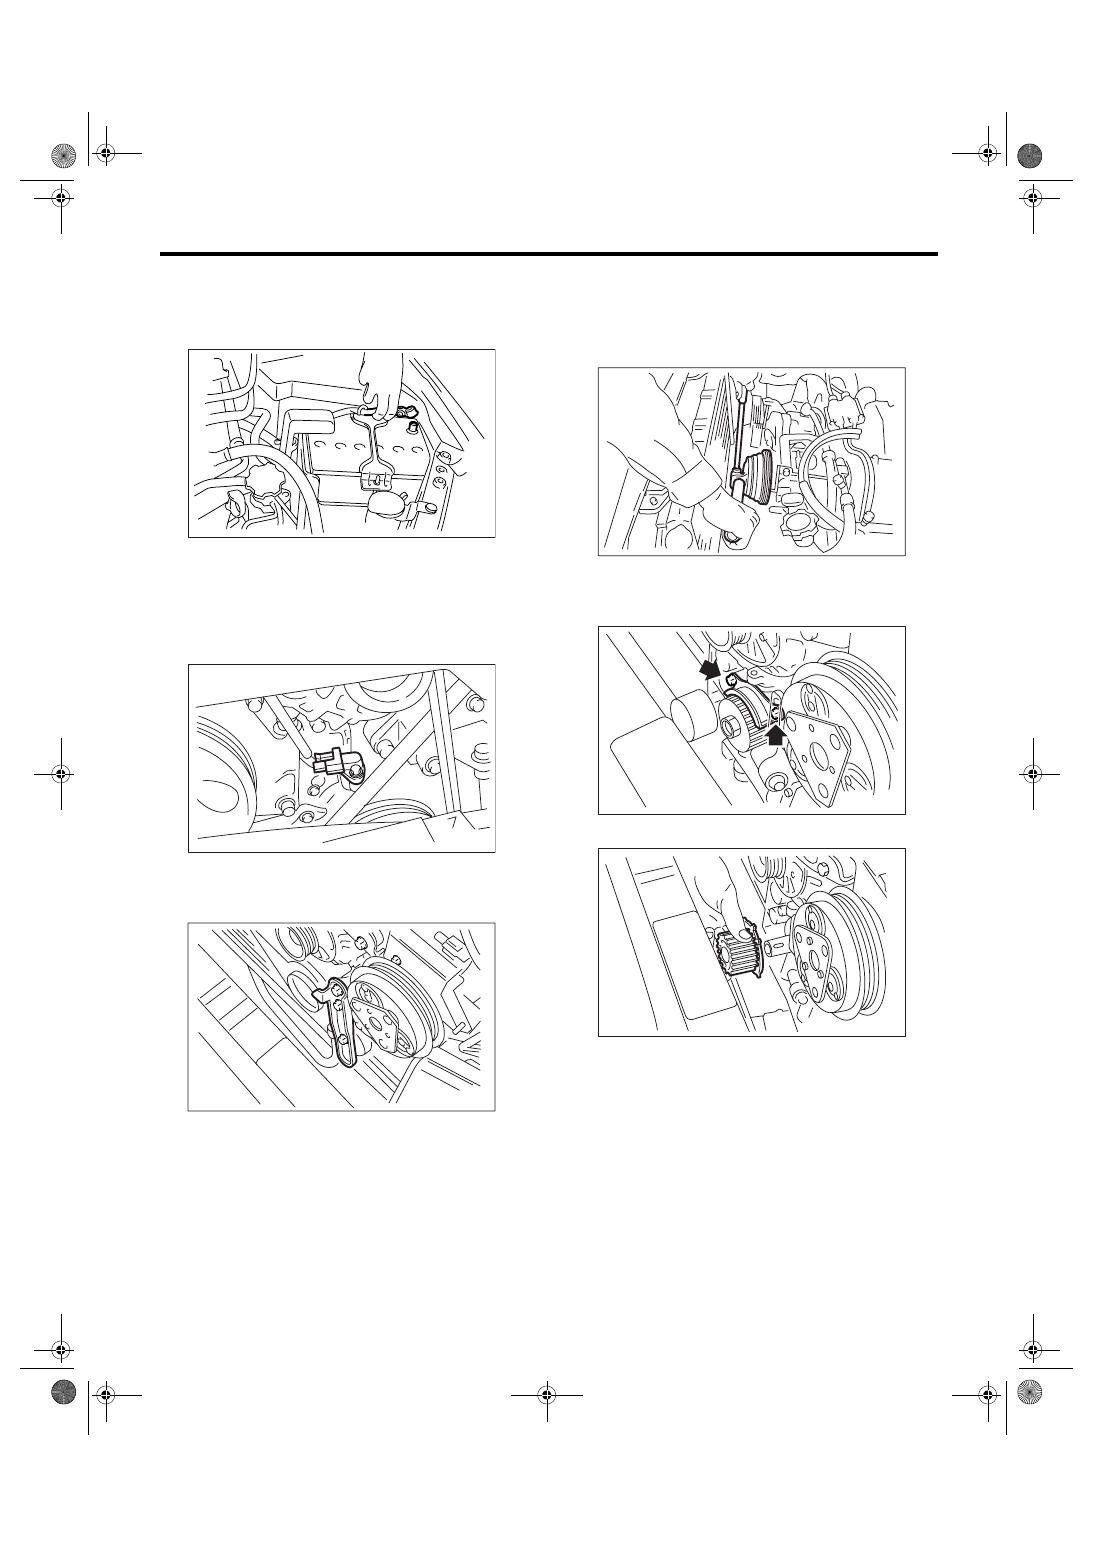
A: REMOVAL
1) Disconnect the ground cable from battery.
2) Lift-up the vehicle.
3) Remove the under cover.
4) Lower the vehicle.
5) Remove the radiator. <Ref. to CO(H4SO 2.0)-
20, REMOVAL, Radiator.>
6) Remove the crankshaft position sensor.
7) Remove the V-belt. <Ref. to ME(H4SO 2.0)-37,
REMOVAL, V-belt.>
8) Remove the belt tensioner.
9) Remove the crank pulley using ST.
ST
499977400
CRANK PULLEY WRENCH
(2.0 L model)
ST
499977100
CRANK PULLEY WRENCH
(2.5 L model)
10) Remove the water pump. <Ref. to CO(H4SO
2.0)-15, REMOVAL, Water Pump.>
11) Remove the timing belt guide. (MT model)
12) Remove the crank sprocket.
IN-00203
LU-00046
LU-00011
LU-00012
LU-00013
LU-00014
LU(H4SO 2.0)-12
LUBRICATION
Oil Pump
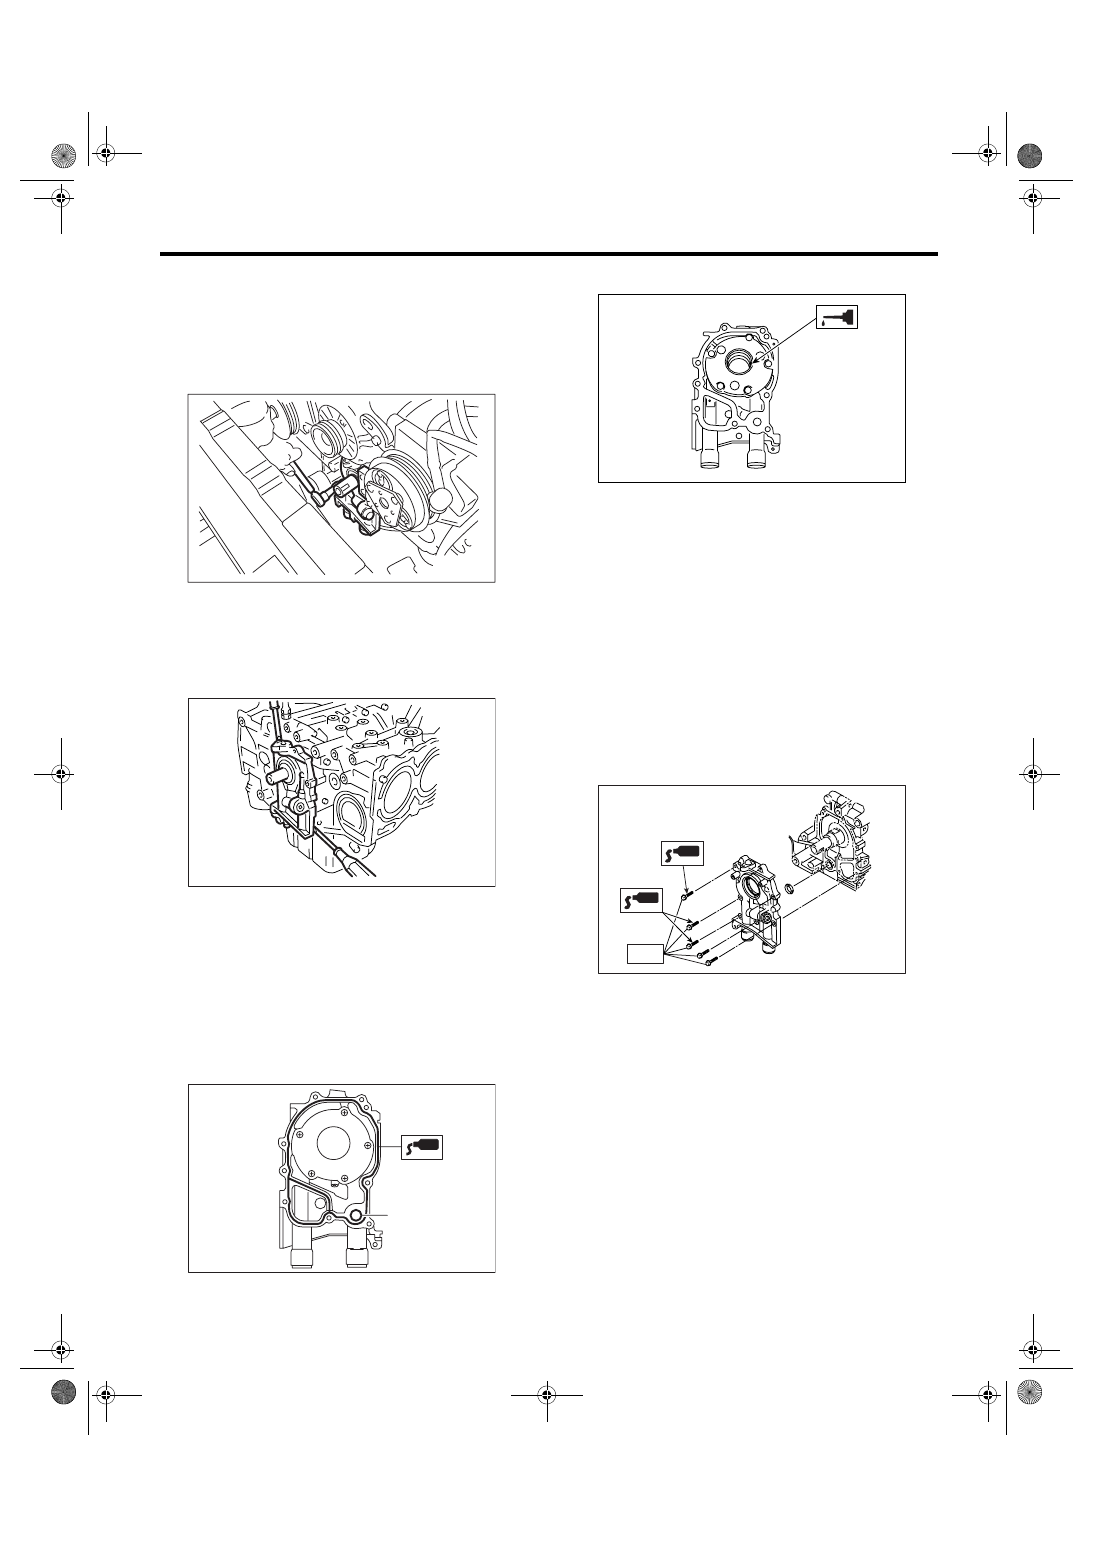
13) Remove the bolt which installs oil pump to cyl-
inder block.
NOTE:
When disassembling and checking the oil pump,
loosen the relief valve plug before removing oil
pump.
14) Remove the oil pump by using flat tip screw-
driver.
CAUTION:
Be careful not to scratch mating surfaces of
cylinder block and oil pump.
B: INSTALLATION
Install in the reverse order of removal.
Perform the following.
1) Apply liquid gasket to mating surfaces of oil
pump.
Liquid gasket:
THREE BOND 1215 (Part No. 004403007) or
equivalent
2) Replace the O-ring (A) with a new one.
3) Apply a coat of engine oil to the inside of oil seal.
4) Position the oil pump, aligning the notched area
with the crankshaft, and push the oil pump straight.
CAUTION:
• Make sure the oil seal lip is not folded.
• Do not forget to install the O-ring and seal
when installing the oil pump.
5) Install the oil pump.
6) Apply liquid gasket to the threaded portion of
three bolts. (if reusing the bolts)
Liquid gasket:
THREE BOND 1215 (Part No. 004403007) or
equivalent
Tightening torque:
6.4 N
⋅
m (0.65 kgf-m, 4.7 ft-lb)
C: DISASSEMBLY
Remove the screw which secures oil pump cover
and then disassemble oil pump. Inscribe alignment
marks on inner and outer rotors so that they can be
replaced in their original positions during reassem-
bly.
LU-00015
LU-00016
LU-00017
( A )
ME-00312
LU-02103
T
Нет комментариевНе стесняйтесь поделиться с нами вашим ценным мнением.
Текст