Infiniti Q45 (FY33). Manual — part 412
SEM623FA
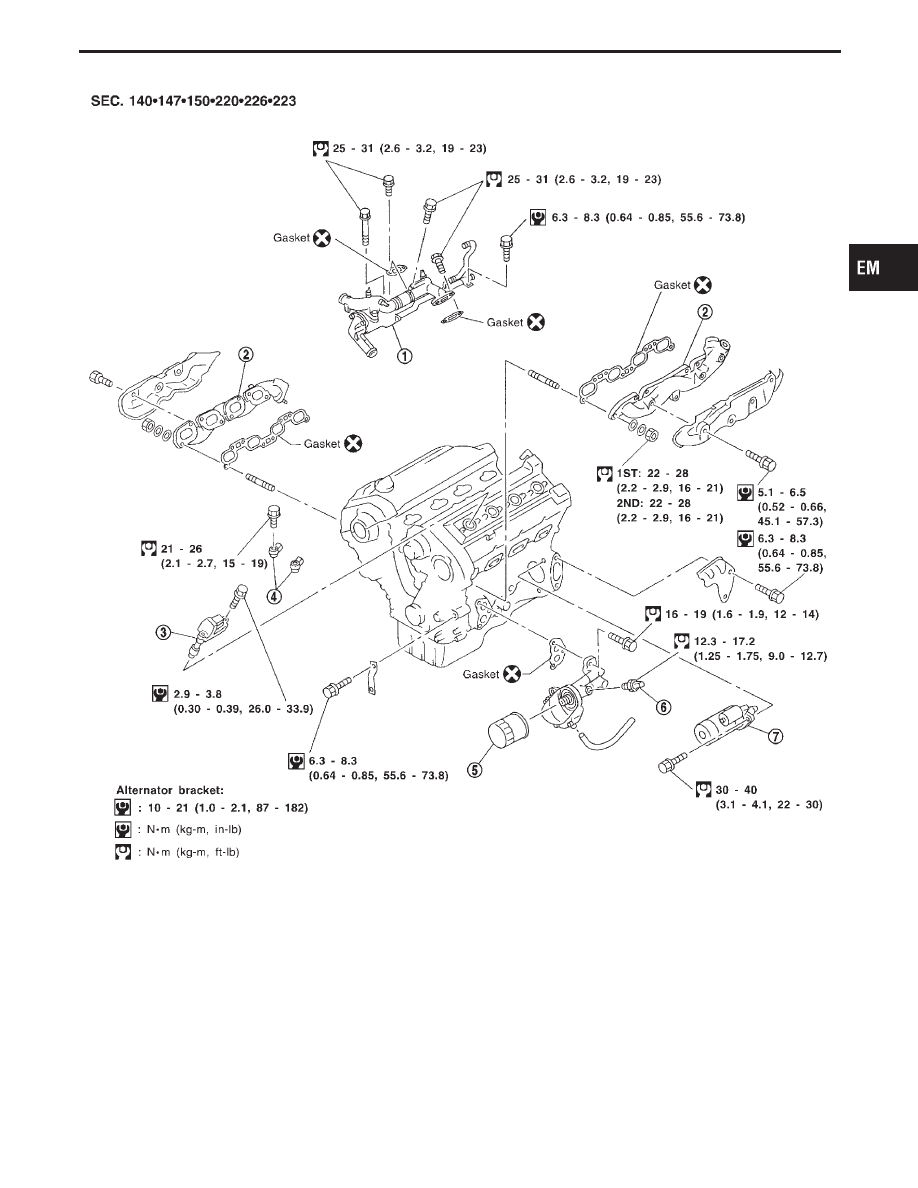
q
1
Water inlet and outlet
q
2
Exhaust manifold
q
3
Ignition coil with power transistor
q
4
Knock sensor
q
5
Oil filter
q
6
Oil pressure switch
q
7
Starter motor
GI
MA
LC
EC
FE
AT
PD
FA
RA
BR
ST
RS
BT
HA
EL
IDX
OUTER COMPONENT PARTS
EM-9
SMA891C
Measurement of Compression Pressure
1.
Warm up engine.
2.
Turn ignition switch off.
3.
Release fuel pressure.
Refer to “Releasing Fuel Pressure” in EC section.
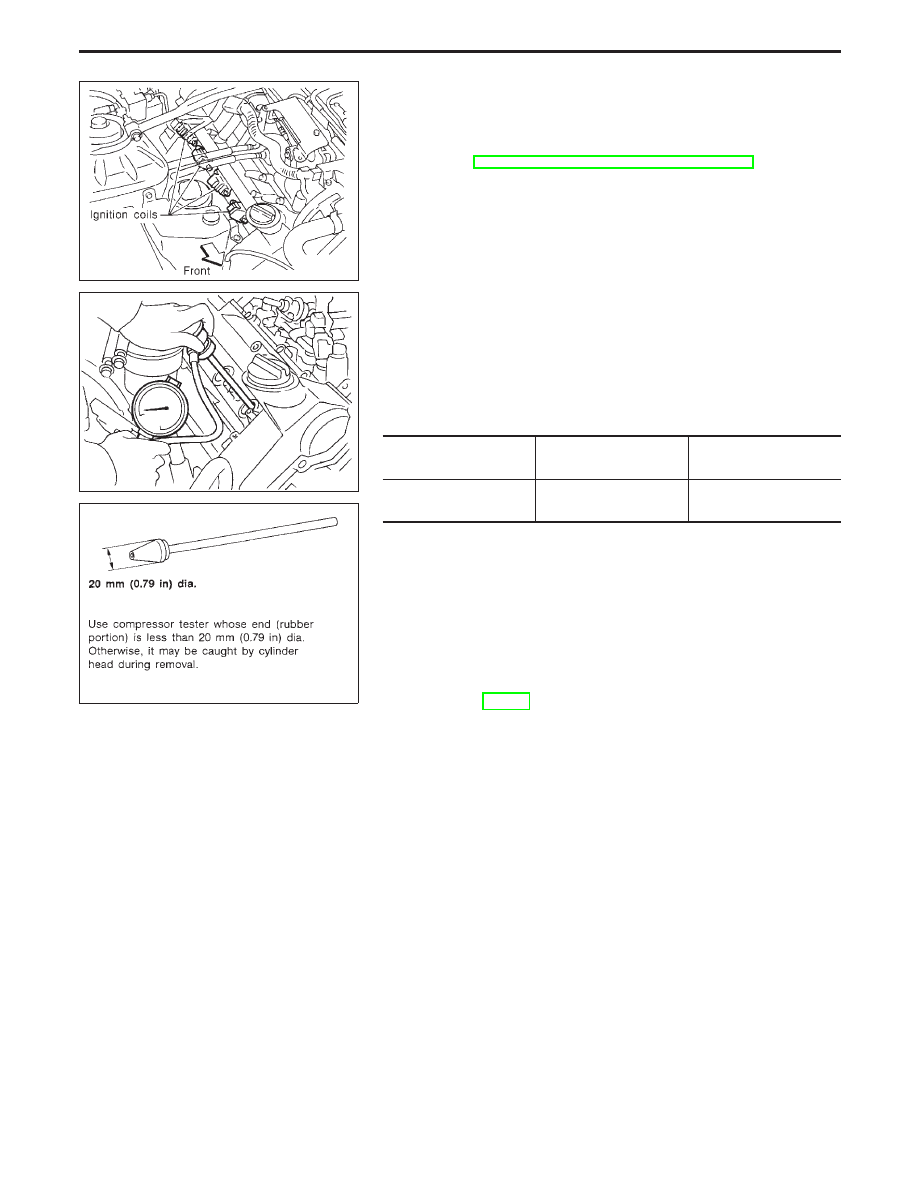
4.
Disconnect
ignition
coil
with
power
transistor
harness
connectors, then remove ignition coils.
5.
Remove all spark plugs.
SEM410F
SEM387C
6.
Attach a compression tester to No. 1 cylinder.
7.
Depress accelerator pedal fully to keep throttle valve wide
open.
8.
Crank engine and record highest gauge indication.
9.
Repeat the measurement on each cylinder as shown above.
I
Always use a fully-charged battery to obtain specified
engine speed.
Unit: kPa (kg/cm
2
, psi)/rpm
Standard
Minimum
Difference limit between
cylinders
1,285
(13.1, 186)/300
991
(10.1, 144)/300
98 (1.0, 14)/300
10. If compression in one or more cylinders is low:
a.
Pour a small amount of engine oil into cylinders through
spark plug holes.
b.
Retest compression.
I
If adding oil helps compression, piston rings may be worn
or damaged. If so, replace piston rings after checking pis-
ton.
I
If pressure stays low, a valve may be sticking or seating
improperly. Inspect and repair valve and valve seat. (Refer
to SDS, EM-57.) If valve or valve seat is damaged
excessively, replace them.
I
If compression stays low in two cylinders that are next to
each other:
a.
The cylinder head gasket may be leaking, or
b.
Both cylinders may have valve component damage.
Inspect and repair as necessary.
COMPRESSION PRESSURE
EM-10
SMA890C
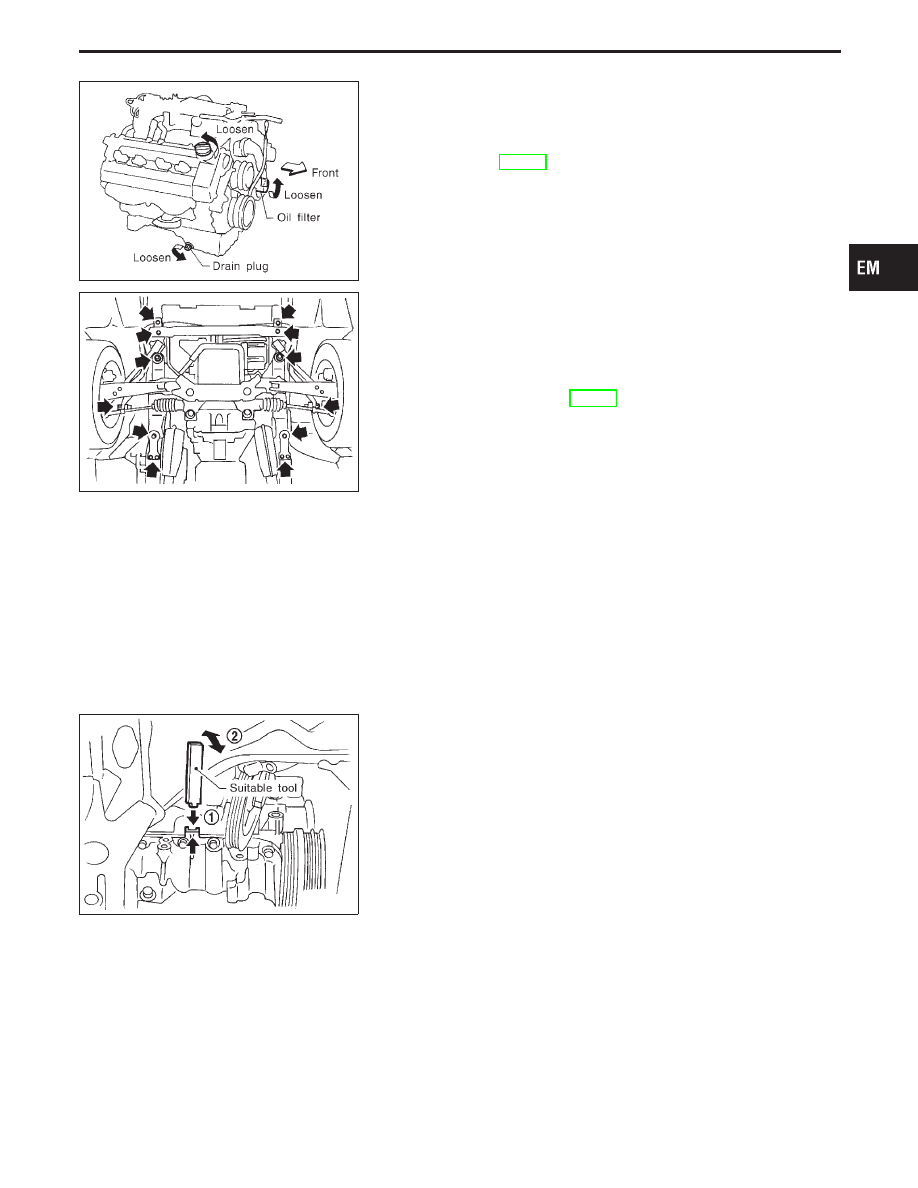
Removal
1.
Raise vehicle and support it with safety stands.
2.
Drain engine oil.
3.
Install engine slingers to cylinder head. Refer to “ENGINE
REMOVAL” (EM-43).
4.
Set a suitable hoist on engine slinger and hold the engine.
SEM411F
5.
Remove the following parts.
I
Fan coupling with fan
I
Power steering oil pump
I
Drive belts
I
Front stabilizer bar securing bolts and nuts from side member.
I
Both left and right side engine mounting bolts. Refer to
“ENGINE REMOVAL” (EM-43).
6.
Disconnect steering shaft lower joint.
7.
Remove power steering tube bracket securing bolts at front
suspension member.
8.
Remove front suspension member securing nuts while sup-
porting with a jack.
9.
Lower front suspension member.
10. Remove air conditioner compressor and bracket.
SEM412F
11. Remove oil pan.
a.
Remove oil pan and oil pan-to-transmission bolts.
b.
Insert an appropriate size tool into the notch of oil pan as
shown in the figure.
I
Be careful not to damage aluminum mating surface.
I
Do not insert screwdriver, or oil pan flange will be
deformed.
c.
Pry off oil pan by moving the tool up and down.
d.
Remove oil pan.
12. Pull out oil pan from the front while lowering the front suspen-
sion member.
GI
MA
LC
EC
FE
AT
PD
FA
RA
BR
ST
RS
BT
HA
EL
IDX
OIL PAN
EM-11
SEM413F
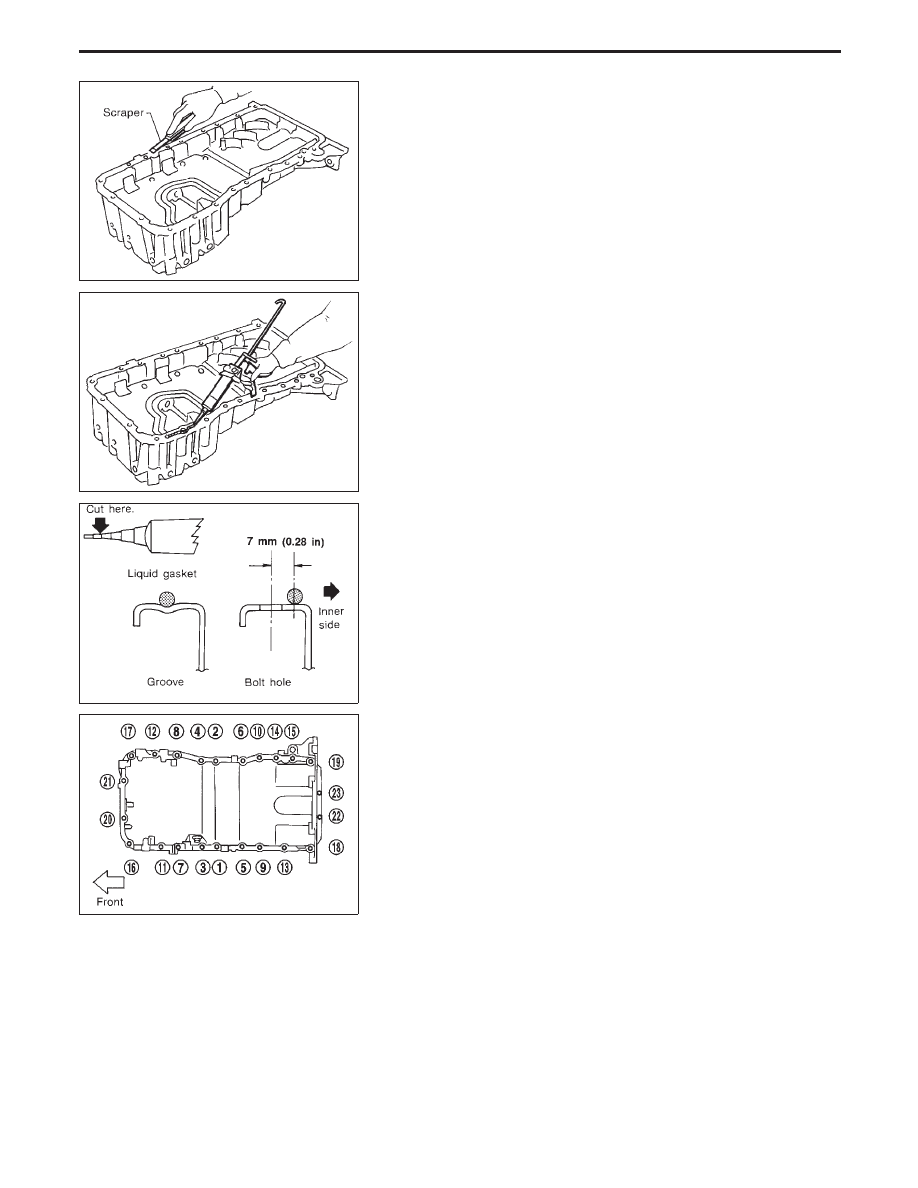
Installation
1.
Use a scraper to remove all traces of liquid gasket from mat-
ing surfaces.
I
Also remove traces of liquid gasket from mating surface of
cylinder block.
I
Remove old liquid gasket from the bolt hole and thread.
SEM414F
2.
Apply a continuous bead of liquid gasket to mating surface of
oil pan.
I
Use Genuine RTV silicone sealant part No. 999MP-A7007
or equivalent.
SEM015E
3.
Apply liquid gasket to inner sealing surface as shown in the
figure.
I
Be sure liquid gasket diameter is 2.5 to 3.5 mm (0.098 to
0.138 in).
I
Attaching should be done within 5 minutes after coating.
SEM415F
4.
Install oil pan.
I
Wait at least 30 minutes before refilling engine oil.
I
Tighten bolts in numerical order as shown in the figure.
a.
Tighten bolts (
q
1
-
q
21
) to 16 to 19 N
⋅
m (1.6 to 1.9 kg-m, 12 to
14 ft-lb).
b.
Tighten bolts (
q
22
-
q
23
) to 6.4 to 7.4 N
⋅
m (0.65 to 0.75 kg-m, 56.4
to 65.1 in-lb).
OIL PAN
EM-12
Нет комментариевНе стесняйтесь поделиться с нами вашим ценным мнением.
Текст