Mitsubishi Eclipse / Eclipse Spyder (2000-2002). Service and repair manual — part 144
MULTIPORT FUEL INJECTION (MFI) DIAGNOSIS
TSB Revision
MULTIPORT FUEL INJECTION (MFI) <2.4L ENGINE>
13A-275
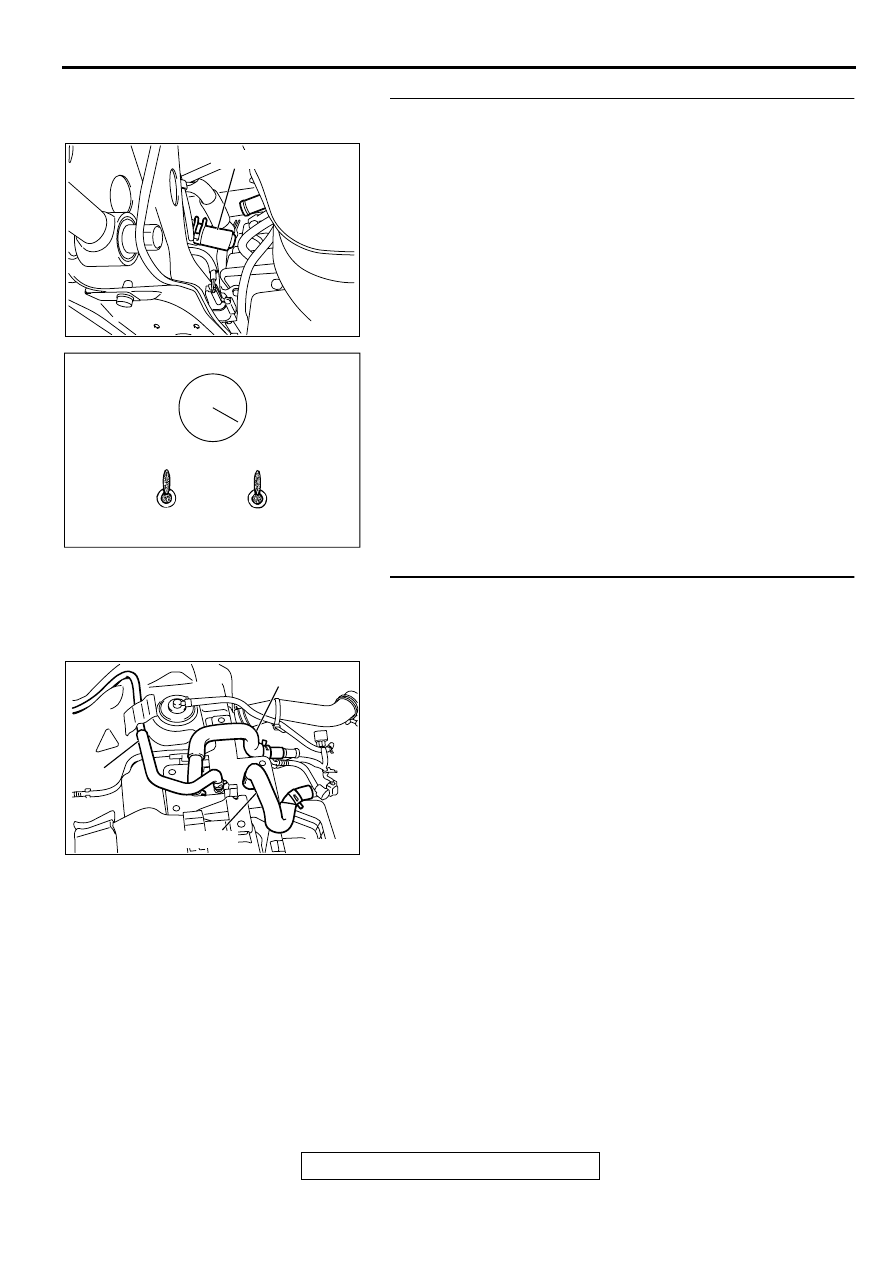
STEP 22. Check for clogging in the evaporator line from
hose G to hose N.
(1) Disconnect hose G from the evaporative emission canister
side, and unplug the hose G.
(2) On the EVAP pressure pump, set the pressure/hold valve to
OPEN, and set the vent valve to CLOSED. Turn the pump
timer to ON. You can reset the timer as required. (These
settings are listed under "Leak Test" in the pump
instructions.)
(3) Air should pass through hose G.
Q: Does air pass through hose G?
YES : Go to Step 23.
NO : Go to Step 29.
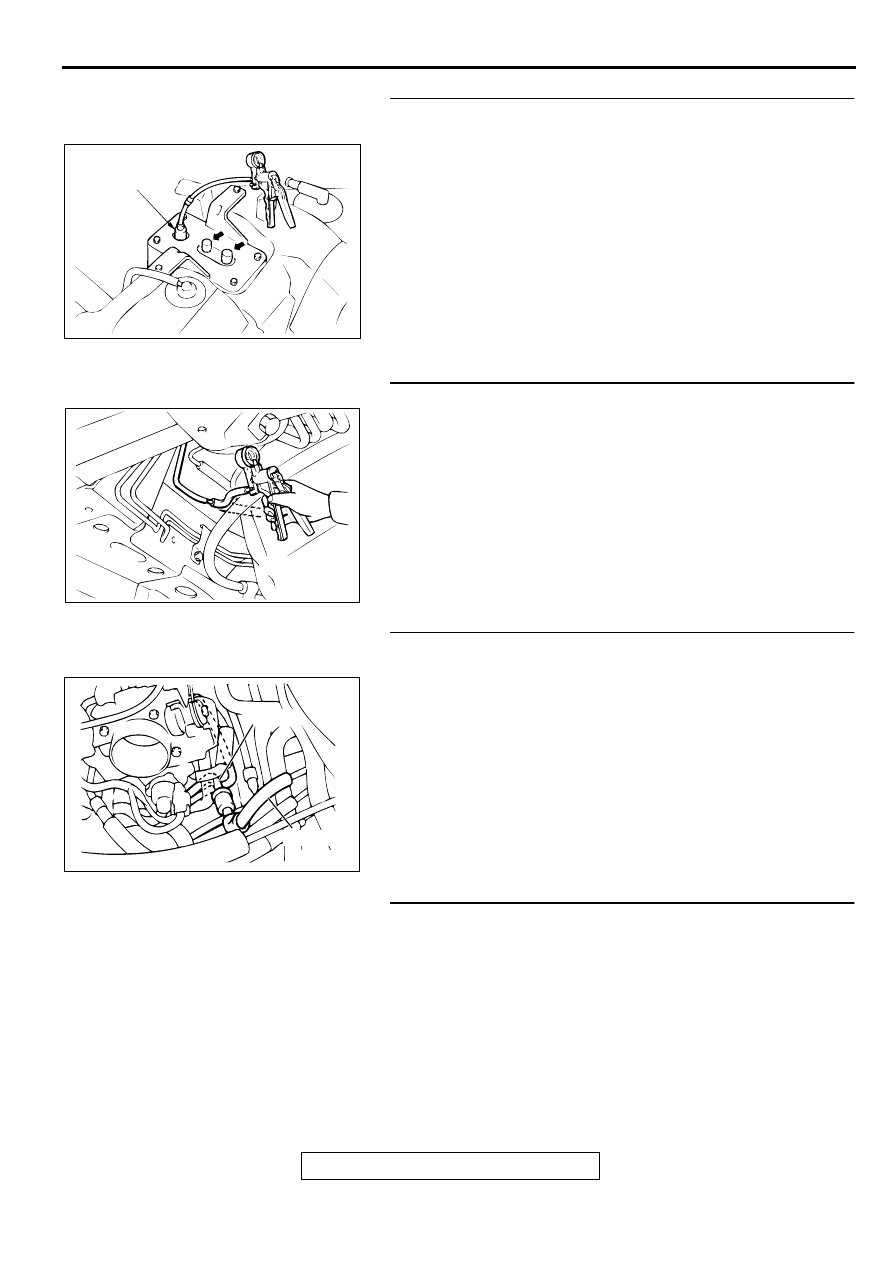
STEP 23. Check for clogging in the evaporator line from
hose F.
(1) Remove the fuel tank. (Refer to GROUP 13C, Fuel Tank
(2) The clogging test with a hand vacuum pump on each hose
from hose F.
Q: Are there any clogs?
YES : Replace that hose, and perform the OBD-II drive
cycle
NO : Go to Step 24.
AC002036 AC
HOSE G
OPEN
OPEN
CLOSED
CLOSED
Pressure
Hold
Vent
ACX01806
AC002037AE
HOSE D
HOSE F
HOSE E
MULTIPORT FUEL INJECTION (MFI) DIAGNOSIS
TSB Revision
MULTIPORT FUEL INJECTION (MFI) <2.4L ENGINE>
13A-276
STEP 24. Check for clogging in the evaporative emission
canister.
(1) Connect a hand vacuum pump to the vent nipple of the
evaporative emission canister.
(2) Plug the other two nipples or loop a hose between the other
nipples.
(3) Apply a vacuum, when each nipple is unplugged, the
vacuum should fluctuate.
Q: Does the vacuum pump gauge reading fluctuate?
YES : Reinstall the fuel tank. Then go to Step 34.
NO : Replace the evaporative emission canister, reinstall
the fuel tank. Then perform the OBD-II drive cycle
.
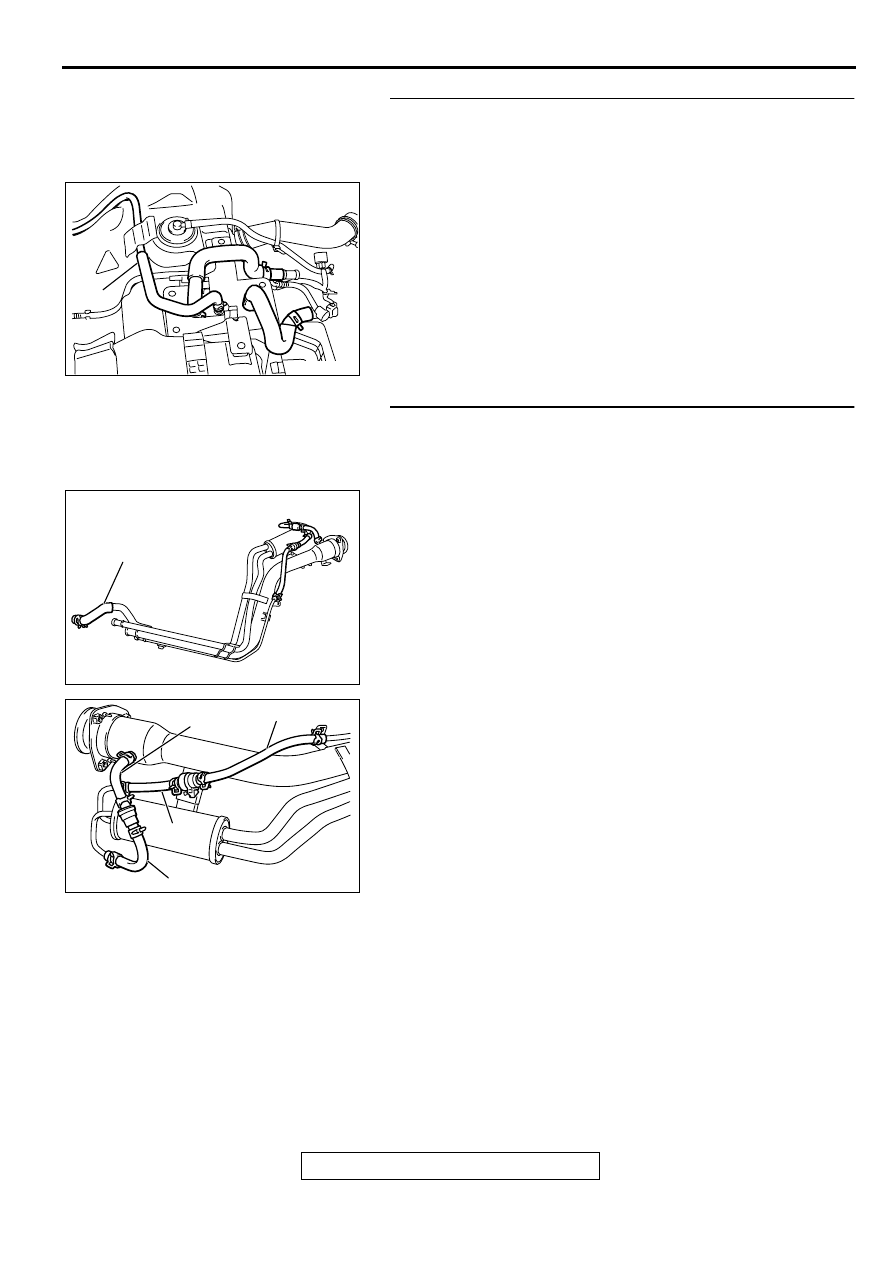
STEP 25. Check for clogging in the evaporator line hose D.
(1) Disconnect hose D at the intake manifold side, and then
connect a hand vacuum pump to hose D at the floor pipe
side.
(2) Apply vacuum.
NOTE: The vacuum should be 40 kPa (5.8 psi) or less.
(3) Use scan tool MB991502 to activate the evaporative
emission purge solenoid valve. The vacuum should leak.
Q: Is the vacuum maintained inside the evaporator line?
YES : Go to Step 26.
NO : Go to Step 28.
STEP 26. Check for clogging in the evaporator line hose B
to hose C.
(1) The clogging test with a hand vacuum pump on each hose
from hose B to hose C.
Q: Are there any clogs?
YES : Replace that hose, and perform the purge flow check.
(Refer to GROUP 17, Purge Control System Check
NO : Go to Step 27.
STEP 27. Check for clogging in the chamber.
(1) Connect a hand vacuum pump to the nipple.
(2) Plug the other nipple.
(3) Apply vacuum. When the nipple is unplugged, the vacuum
should fluctuate.
Q: Does the vacuum pump gauge reading fluctuates?
YES : Go to Step 34.
NO : Replace the chamber, and perform OBD-II drive cycle
.
AC000191AB
VENT
NIPPLE
AC000227
HOSE D
AC
AC000223
HOSE B
AC
HOSE C
MULTIPORT FUEL INJECTION (MFI) DIAGNOSIS
TSB Revision
MULTIPORT FUEL INJECTION (MFI) <2.4L ENGINE>
13A-277
STEP 28. Check for clogging in the evaporator line from
hose D.
(1) Remove the fuel tank. (Refer to GROUP 13C, Fuel Tank
(2) The clogging test with a hand vacuum pump on each hose
from hose D.
Q: Are there any clogs?
YES : Replace that hose, and perform the OBD-II drive
cycle
NO : Go to Step 29.
STEP 29. Check for clogging in the evaporator line hose G,
J, K, L and hose M.
(1) Remove the filler neck assembly. (Refer to GROUP 13C,
Fuel tank
(2) The clogging test with a hand vacuum pump on each hose
from hose G, J, K, L and hose M.
Q: Are there any clogs?
YES : Replace that hose, reinstall the filler neck assembly
and filler neck protector, and perform the OBD-II drive
cycle
NO : Go to Step 30.
AC002037AG
HOSE D
AC002032
AB
HOSE G
AC
AC002039
AB
HOSE L
AC
HOSE K
HOSE M
HOSE J
MULTIPORT FUEL INJECTION (MFI) DIAGNOSIS
TSB Revision
MULTIPORT FUEL INJECTION (MFI) <2.4L ENGINE>
13A-278
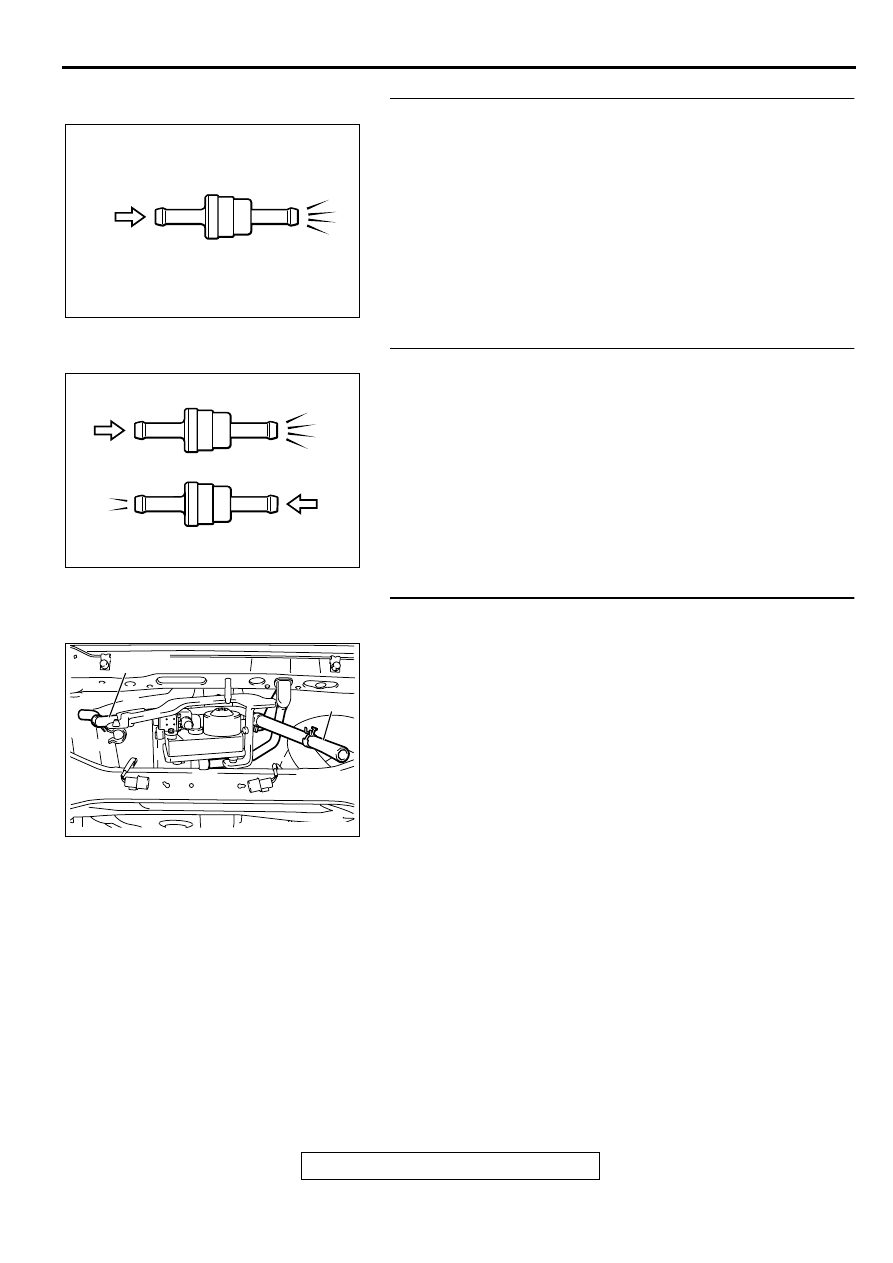
STEP 30. Check the check valve A.
(1) Only when you blow the check valve from the direction
shown, it should pass air.
(2) When you blow the check valve, on air should leak from the
check valve body.
Q: Is there any failure?
YES : Replace it, then perform the OBD-II drive cycle
.
NO : Go to Step 31.
STEP 31. Check the check valve B.
(1) When you blow the check valve from the arrow direction
shown above, it should pass more air.
(2) When you blow the check valve from the arrow direction
shown below, it should pass less air.
(3) When you blow the check valve, on air should leak from the
check valve body.
Q: Is there any failure?
YES : Replace it, then perform the OBD-II drive cycle
.
NO : Go to Step 32.
STEP 32. Check for clogging in the evaporator line from
hose H to hose I.
(1) The clogging test with a hand vacuum pump on each hose
from hose H to hose I.
Q: Are there any clogs?
YES : Replace that hose, reinstall the fuel tank, and perform
the OBD-II drive cycle
.
NO : Go to Step 33.
AC002076 AB
CHECK VALVE A
AC002078
CHECK VALVE B
AB
AC002033 AD
HOSE H
HOSE I
Нет комментариевНе стесняйтесь поделиться с нами вашим ценным мнением.
Текст