Mitsubishi Eclipse / Eclipse Spyder (2000-2002). Service and repair manual — part 142

MULTIPORT FUEL INJECTION (MFI) DIAGNOSIS
TSB Revision
MULTIPORT FUEL INJECTION (MFI) <2.4L ENGINE>
13A-267
STEP 3. Check the evaporative emission purge solenoid
valve using the scan tool MB991502. (Actuator test item
08.)
(1) Turn the ignition switch to the "ON" position.
(2) Connect the hand vacuum pump to the nipple of the
evaporative emission purge solenoid from which the hoses
have been disconnected.
(3) Apply a vacuum on the hand vacuum pump, and confirm
that the applied vacuum does not fluctuate.
If the vacuum fluctuates, refer to
, diagnosis step
for evaporative emission purge solenoid trouble code DTC
P0443.
(4) While maintaining the vacuum, carry out the actuator test
with scan tool MB991502.
Q: Does the vacuum pump gauge indicate the atmospheric
pressure when the evaporative emission purge solenoid
is activated?
The evaporative emission purge solenoid valve
operates normally, and the vacuum pump gauge
reading returns to the atmospheric pressure : Go to
Step 34.
The evaporative emission purge solenoid valve
operates normally, but the vacuum pump gauge does
not indicate the atmospheric pressure : Replace the
evaporative emission purge solenoid. Then go to Step
34.
The evaporative emission purge solenoid valve does
not operate normally : Refer to
, diagnosis step
for evaporative emission purge solenoid trouble code
DTC P0443.
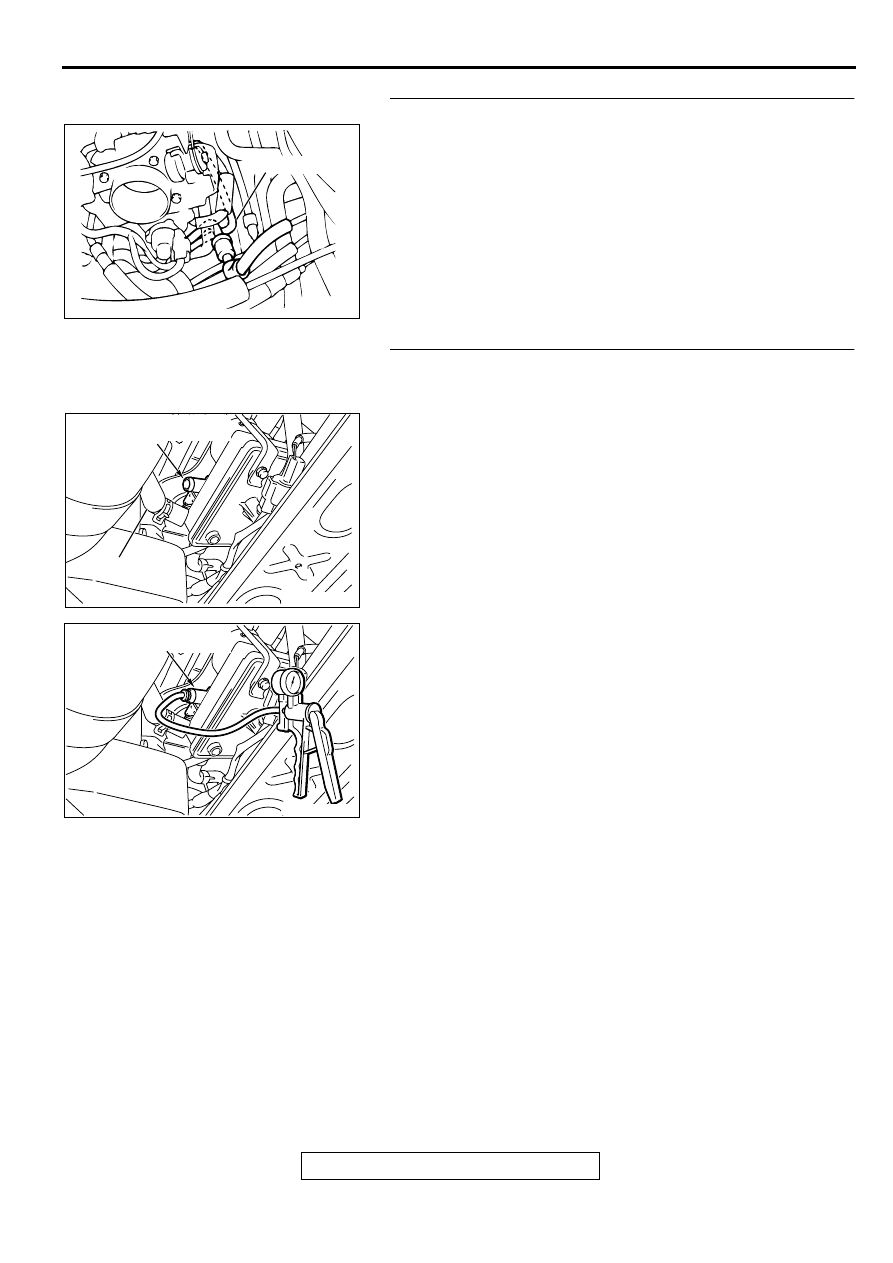
STEP 4. Check for clogging in the evaporator line hose A
and evaporative emission purge solenoid valve.
(1) Use scan tool MB991502 to activate the evaporative
emission purge solenoid valve.
Q: Are there any clogs?
YES : Go to Step 5.
NO : Go to Step 6.
AC000224
HOSE A
AB
MULTIPORT FUEL INJECTION (MFI) DIAGNOSIS
TSB Revision
MULTIPORT FUEL INJECTION (MFI) <2.4L ENGINE>
13A-268
STEP 5. Check for clogging in the evaporator line hose A.
(1) Sequentially apply vacuum with a hand vacuum pump
connected to hose A.
Q: Are there any clogs?
YES : Replace that hose, and perform the purge flow check.
(Refer to GROUP 17, Engine Emission Control
−
Evaporative Emission Control System
−
Purge
Control System Check
NO : Go to Step 34.
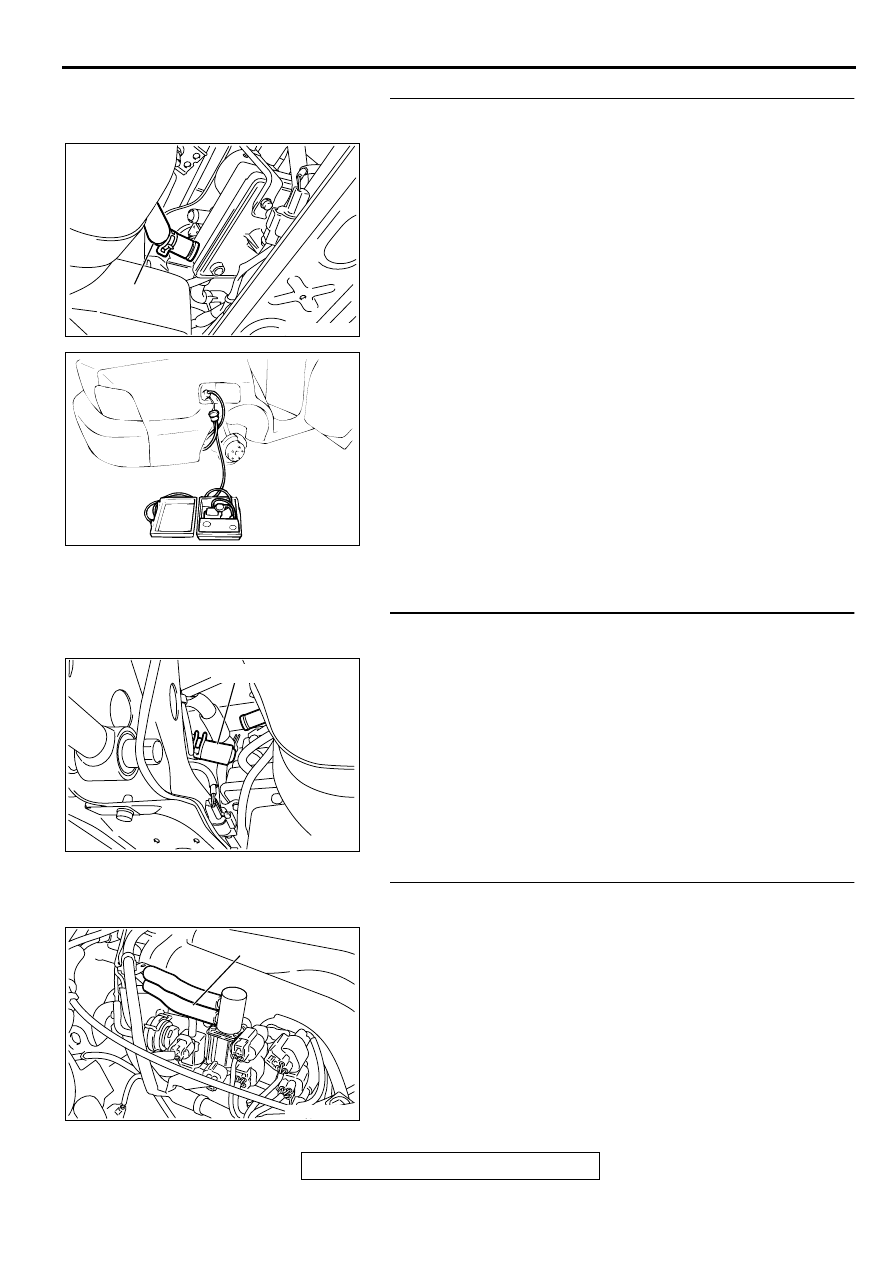
STEP 6. Check the evaporative emission ventilation
solenoid using the scan tool MB991502. (Actuator test item
29)
(1) Turn the ignition switch to the "ON" position, remove the
module bracket mounting volts and disconnect hose E from
the evaporative emission ventilation solenoid side.
(2) Connect the hand vacuum pump to the nipple of the
evaporative emission ventilation solenoid from which the
hoses have been disconnected.
(3) Apply a vacuum on the hand vacuum pump, and confirm
that pressure is applied.
If the vacuum is maintained, refer to
,
evaporative emission ventilation solenoid trouble code DTC
P0446.
(4) Drive the evaporative emission ventilation solenoid with the
scan tool MB991502 actuator test, and confirm that the
vacuum does not fluctuate when the vacuum is applied with
the hand vacuum pump.
Q: Does the vacuum pump gauge reading return to the
atmospheric pressure when the evaporative emission
ventilation solenoid valve is activated?
The evaporative emission ventilation solenoid valve
operates normally and the vacuum pump gauge reading
does not fluctuate : Go to Step 7.
The evaporative emission ventilation solenoid valve
operates normally, but the vacuum can not be
maintained : Replace the evaporative emission ventilation
solenoid. Then go to Step 34.
The evaporative emission ventilation solenoid valve
does not operate normally : Refer to
diagnosis step for evaporative emission ventilation
solenoid trouble code DTC P0446.
AC000223
HOSE A
AB
AC002030
EVAPORATIVE EMISSION
VENTILATION SOLENOID
HOSE E
AC
AC002031AB
EVAPORATIVE EMISSION
VENTILATION SOLENOID
MULTIPORT FUEL INJECTION (MFI) DIAGNOSIS
TSB Revision
MULTIPORT FUEL INJECTION (MFI) <2.4L ENGINE>
13A-269
STEP 7. Pressure test for evaporator line from hose B to
hose N.
(1) Disconnect hose E from the filler neck assembly side, and
plug the hoses from which the hoses have been
disconnected.
(2) Confirm that the evaporative emission system pressure
pump (Miller number 6872A) is operating properly. Perform
the self-test as described in the manufacturer's instructions.
(3) Connect an evaporative emission system pressure pump to
the fuel filler neck.
(4) Pressure test the system to determine whether any leaks
are present.
NOTE: "Pressure test" in this procedure refers to the I/
M240 Simulation Test (8 simple steps) described in the
evaporative emission system pressure pump (Miller number
6872A) manufacturer's instructions located in the lid of the
pump box.
Q: Are there any leaks in the evaporator line?
YES : Go to Step 8.
NO : Go to Step 21.
STEP 8. Pressure test for evaporator line from hose G to
hose N.
(1) Disconnect hose G from the evaporative emission canister
side, and plug the hose from which the pipes have been
disconnected.
(2) Perform the pressure test again.
Q: Is the pressure maintained inside the evaporator line?
YES : Go to Step 9.
NO : Go to Step 13.
STEP 9. Check for leaks in the evaporator line hose B and
hose C.
(1) The leakage test with a hand vacuum pump on each hose
from hose B and hose C.
Q: Can the leaks be pinpointed?
YES : Replace that hose. Then go to Step 34.
NO : Go to Step 10.
AC002028
HOSE E
AC
AC000186
AC002036 AC
HOSE G
AC002074
HOSE C
AC
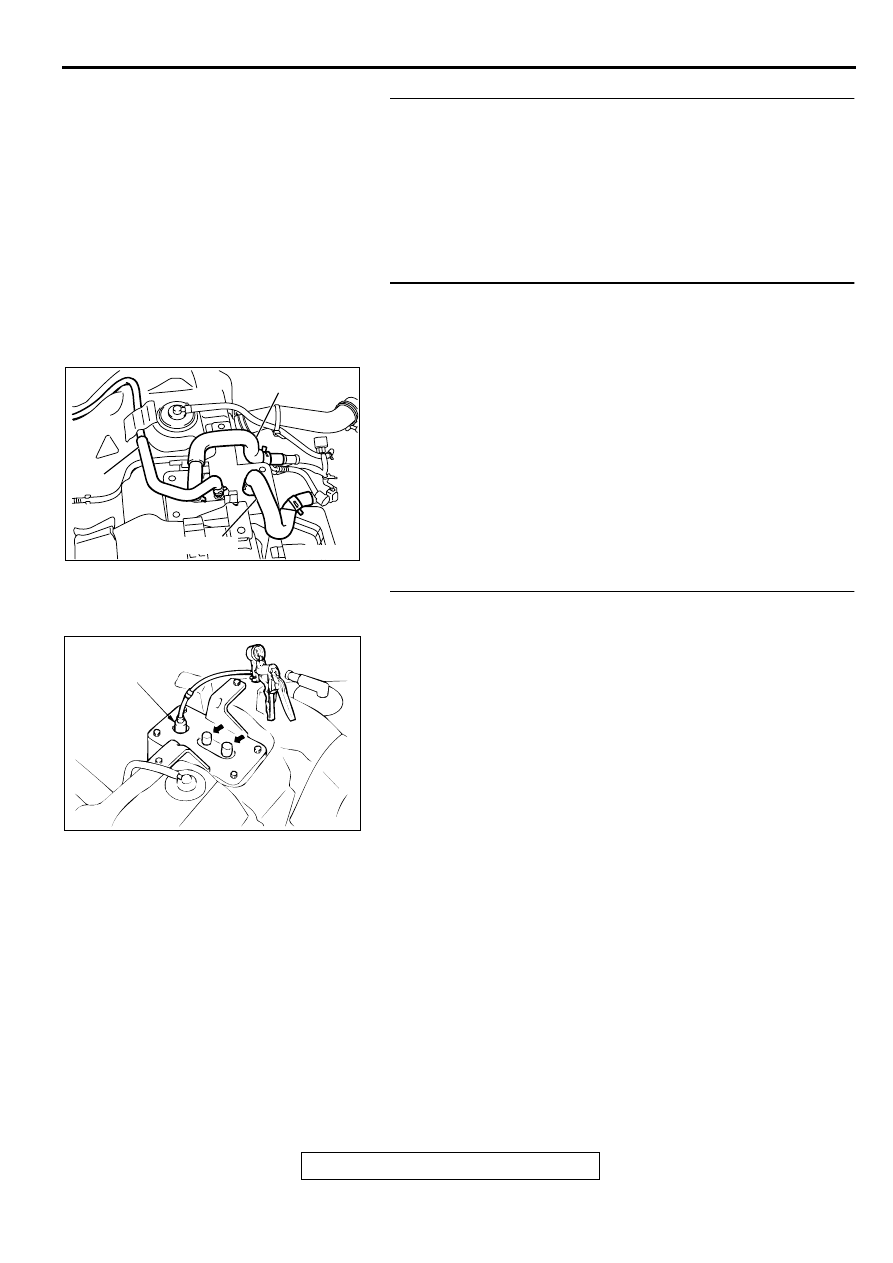
MULTIPORT FUEL INJECTION (MFI) DIAGNOSIS
TSB Revision
MULTIPORT FUEL INJECTION (MFI) <2.4L ENGINE>
13A-270
STEP 10. Check for leaks in the chamber.
(1) Connect a hand vacuum pump to the nipple.
(2) Plug the other nipple.
(3) Apply vacuum with the hand vacuum pump, and confirm
that the applied vacuum does not fluctuate.
Q: Does the vacuum reading flucture?
YES : Replace the chamber, then go to Step 34.
NO : Go to Step 11.
STEP 11. Check for leaks in the evaporator line from hose
D to hose F.
(1) Remove the fuel tank. (Refer to GROUP 13C, Fuel Tank
(2) The leakage test with a hand vacuum pump on each hose
from hose D to hose F.
Q: Can the leaks be pinpointed?
YES : Replace that hose, reinstall the fuel tank. Then go to
Step 34.
NO : Go to Step 12.
STEP 12. Check for leaks in the evaporative emission
canister.
(1) Connect a hand vacuum pump to the vent nipple of the
evaporative emission canister.
(2) Plug the other two nipples or loop a hose between the other
nipples.
(3) Apply a vacuum with the hand vacuum pump, and confirm
that the applied vacuum does not fluctuate.
Q: Does the vacuum pump gauge reading fluctuate?
YES : Replace the evaporative emission canister, and
reinstall the fuel tank. Then go to Step 34.
NO : Reinstall the fuel tank, then go to Step 34.
AC002037AE
HOSE D
HOSE F
HOSE E
AC000191AB
VENT
NIPPLE
Нет комментариевНе стесняйтесь поделиться с нами вашим ценным мнением.
Текст