Mitsubishi Colt Ralliart. Manual — part 580
SIDE IMPACT SENSOR
SUPPLEMENTAL RESTRAINT SYSTEM (SRS)
52B-158
INSTALLATION SERVICE POINTS
>>A<< PRE-INSTALLATION INSPECTION
Even new side impact sensor requires inspection
before installation (Refer to the previous item
"INSPECTION"
>>B<< SIDE IMPACT SENSOR
INSTALLATION
WARNING
The side impact sensor, unless properly
installed, does not operate properly, thereby
resulting in serious injury or death of the
vehicle's occupants.
>>C<< POST-INSTALLATION
INSPECTION
1. Connect the negative battery cable.
2. Turn the ignition key to "ON" position.
3. Does the SRS warning lamp illuminate for about 7
seconds, and then remain extinguished for at
least 5 seconds after turning OFF?
4. If no, refer to troubleshooting (Refer to
INSPECTION
M1524004700433
WARNING
If any problems, replace the sensor.
1.
Check the side impact sensor and bracket for dents,
cracks or deformation.
2. Check the connector for damage, and terminal
for deformation.
3. Check the centre pillar and the quarter inner
panel for deformation or corrosion.
NOTE: For the checks other than the items above,
refer to Troubleshooting (Refer to
AC510172
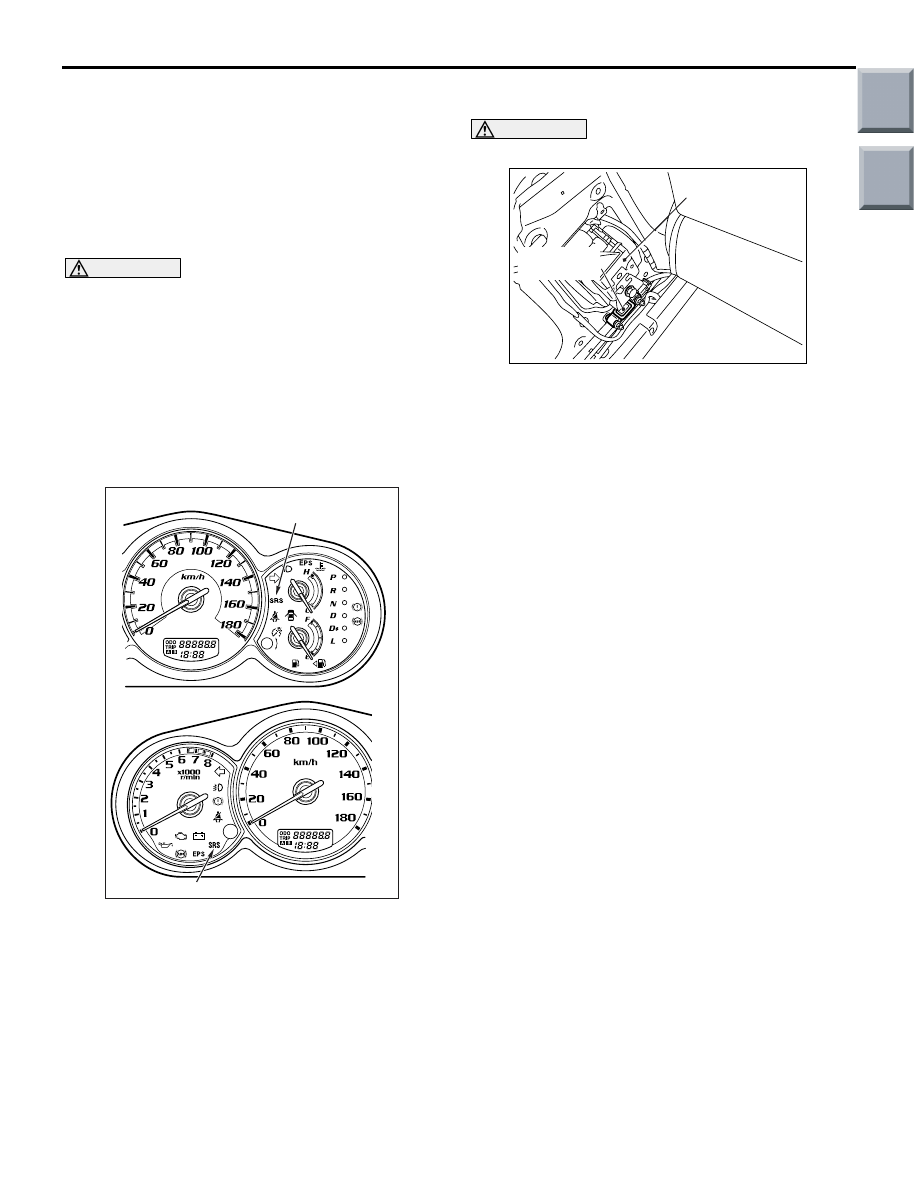
<VR-X>
<Except-VR-X>
SRS warning lamp
SRS warning lamp
AC
AC311530
Side impact
sensor (front)
AC
Front seat belt
retractor
Main
Index
Group
TOC
SEAT BELTS WITH PRE-TENSIONER
SUPPLEMENTAL RESTRAINT SYSTEM (SRS)
52B-159
SEAT BELTS WITH PRE-TENSIONER
REMOVAL AND INSTALLATION
M1524004100851
WARNING
•
Never attempt to disassemble or repair the seat belt pre-tensioner. If faulty, replace it.
•
Be extremely careful when handling the seat with pre-tensioner. Do not subject it to
shocks, drop it, bring it close to strong magnets or allow contact with water, grease or oil.
Always replace it with a new part if any dents, cracks or deformation is found.
•
Do not place anything on top of the seat belt pre-tensioner.
•
Do not expose the seat belt pre-tensioner to temperatures over 90
°
C.
•
After operating the seat belt pre-tensioner, replace the seat belt pre-tensioner with a new
part.
•
Gloves and protective goggles should be worn when handling a seat belt pre-tensioner
once it has been used.
•
If disposing of a seat belt with pre-tensioner which has not yet been operated, its seat belt
pre-tensioner should be operated first before disposal (Refer to
).
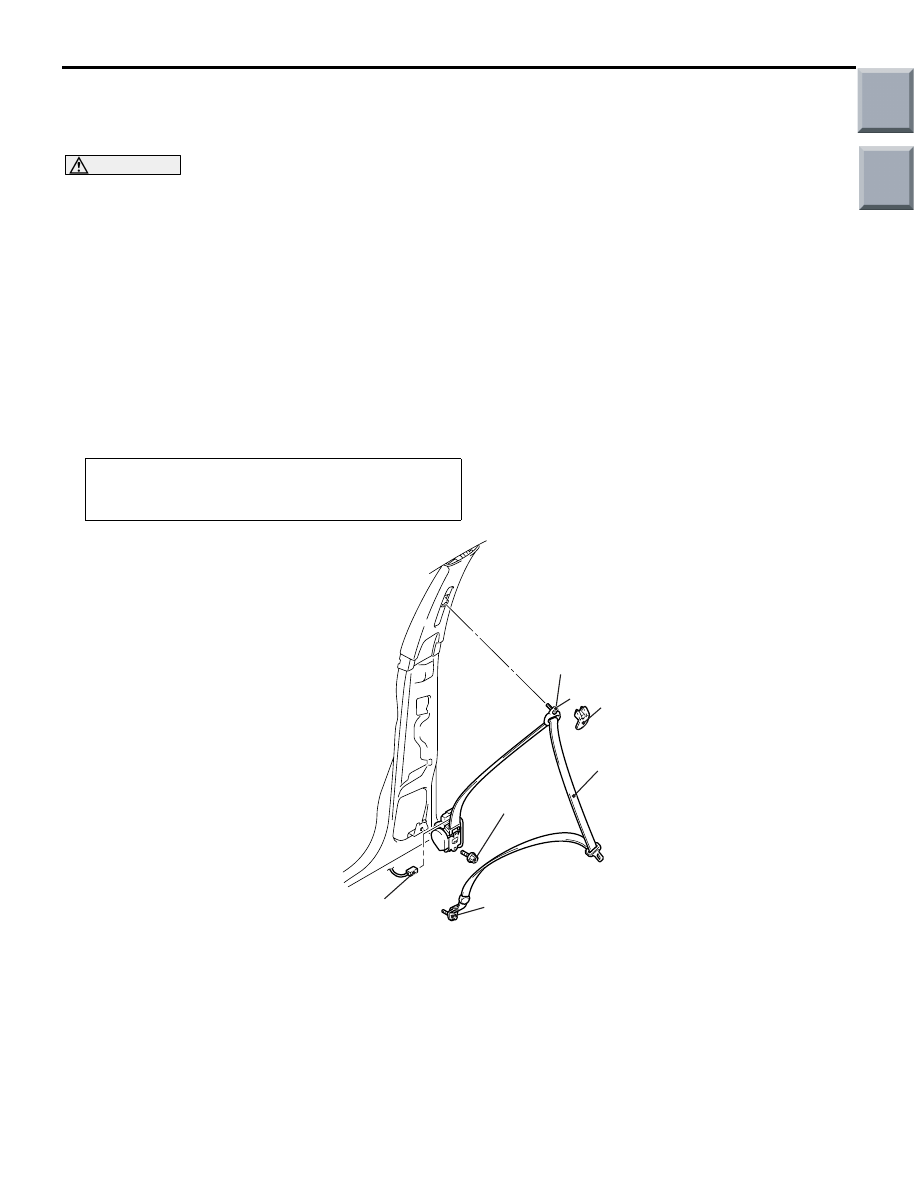
NOTE: The figure shows the seat belt with pre-ten-
sioner (RH).
Pre-removal Operation
• Turn the ignition key to the "LOCK" (OFF) position.
• Disconnect the Negative Battery Terminal.
AC208786
4
2
1
5
3
44 ± 10 N·m
44 ± 10 N·m
AC
Removal steps
1. Sash guide cover
2. Seat belt shoulder anchor bolt
3. Seat belt lower anchor bolt
•
Centre pillar trim, lower (Refer to
GROUP 52A, Trims
<<
A
>>
4. Pre-tensioner connector connection
5. Seat belt with pre-tensioner
Installation steps
>>
A
<< • Pre-installation inspection
5. Seat belt with pre-tensioner
>>
B
<< 4. Pre-tensioner connector connection
•
Centre pillar trim, lower (Refer to
GROUP 52A, Trims
3. Seat belt lower anchor bolt
2. Seat belt shoulder anchor bolt
1. Sash guide cover
•
Negative battery cable connection
>>
C
<< • Post-installation inspection
Installation steps (Continued)
Main
Index
Group
TOC

SEAT BELTS WITH PRE-TENSIONER
SUPPLEMENTAL RESTRAINT SYSTEM (SRS)
52B-160
REMOVAL SERVICE POINTS
<<A>> PRE-TENSIONER CONNECTOR
DISCONNECTION
1. Use a flat-tipped screwdriver to pull out forward
and unlock the locking button of the harness side
connector.
2. Disconnect the pre-tensioner harness side
connector.
INSTALLATION SERVICE POINTS
>>A<< PRE-INSTALLATION INSPECTION
WARNING
When discarding the seat belt with pre-ten-
sioner, operate the pre-tensioner as speci-
fied in the service procedure (Refer to
1. Even new seat belt with pre-tensioner require
inspection before installation.
2. Connect the negative battery cable.
CAUTION
To prevent damage to M.U.T.-III, always turn the
ignition, switch to the “LOCK” (OFF) position
before connecting or disconnecting M.U.T.-III.
3. Connect M.U.T.-III to the diagnosis connector.
4. Turn the ignition switch to the ON position.
5. Check diagnosis codes using M.U.T.-III to ensure
that the SRS operates properly.
At this time, check that no diagnosis code except
26 and 28 are set.
DANGER
Wait at least 60 seconds after the disconnec-
tion of the battery cable before any further
job (Refer to
6. Disconnect the negative battery cable and
insulate with tape.
>>B<< PRE-TENSIONER CONNECTOR
CONNECTION
Connect the pretensioner connector then securely
lock the locking button of the harness-side connec-
tor.
AC208430AB
Pre-tensioner
connector
Locking
button
Harness side
connector
Flat-tipped
screwdriver
AC206895
AC
Diagnosis
connector
MB991827
MB991824
MB991910
Main
Index
Group
TOC

SEAT BELTS WITH PRE-TENSIONER
SUPPLEMENTAL RESTRAINT SYSTEM (SRS)
52B-161
>> C<< POST-INSTALLATION
INSPECTION
1. Connect the negative battery cable.
2. Turn the ignition key to "ON" position.
3. Does the "SRS" warning lamp illuminate for
approximately seven seconds, and go out?
4. If no, refer to troubleshooting (Refer to
INSPECTION
M1524004200342
WARNING
•
If any component damage is found during
the following inspection, replace the seat
belt with pre-tensioner with a new one.
Dispose of the old one according to the
specified procedure (Refer to
).
•
Never attempt to measure the circuit
resistance of the seat belt pre-tensioner
even if you are using the specified tester.
If the circuit resistance is measured with a
tester, accidental seat belt pre-tensioner
operation will result in serious personal
injury.
1. Check the pre-tensioner deployment section for
dents and deformation.
2. Check the harness and connector for damage and
the terminals for deformation.
AC510172
<VR-X>
<Except-VR-X>
SRS warning lamp
SRS warning lamp
AC
Main
Index
Group
TOC
Нет комментариевНе стесняйтесь поделиться с нами вашим ценным мнением.
Текст