Mitsubishi Colt Ralliart. Manual — part 7

OIL PAN
ENGINE MECHANICAL <4A9>
11A-25
REMOVAL SERVICE POINT
<<A>> ENGINE OIL PAN REMOVAL
1. Remove the engine oil pan mounting bolts.
AC102324 AB
MD998727
MD998727
2. Use special tool oil pan FIPG cutter (MD998727)
to remove the engine oil pan.
INSTALLATION SERVICE POINTS
>>A<< O-RING/ENGINE OIL SCREEN
ASSEMBLY INSTALLATION
AC311273
AC
O-ring
Engine oil screen
assembly
Groove portion
Confirm that the O-ring is securely fitted in the
engine oil screen assembly groove without causing
any torsion or damage. Then install the engine oil
screen assembly.
>>B<< ENGINE OIL PAN INSTALLATION
1. Remove sealant from the engine oil pan and
cylinder block surfaces.
CAUTION
As oil leak is likely to occur at both ends of the
rear side of the engine oil pan, be sure to apply
the specified sealant as shown.
AC403646
AC
5.5 mm
5.5 mm
Engine oil pan
Both engine oil pan rear side edge parts
φ 2 mm
φ 4 mm
2. Apply a bead of the specified sealant to the
cylinder block mating surface of the engine oil
pan, and install the engine oil pan to the cylinder
block within 3 minutes.
Specified sealant: LOCTITE 5971 or exact
equivalent
CAUTION
Then wait at least one hour. Never start the
engine or let engine oil or coolant touch the seal-
ant surface during that time.
3. Tighten the engine oil pan mounting bolts to the
specified torque.
Tightening torque: 7.6
± 0.6 N⋅m

CRANKSHAFT OIL SEAL
ENGINE MECHANICAL <4A9>
11A-26
CRANKSHAFT OIL SEAL
REMOVAL AND INSTALLATION
M1112003101384
AC312977
AC403073
AC601259AB
1
2
N
100 ± 5 N·m
7.6 ± 0.6 N·m
7
N
3
4
100 ± 5 N·m
5
6
<M/T>
<CVT>
Crankshaft front oil seal removal
steps
•
Crankshaft damper pulley (Refer to
>>
C
<<
1.
Crankshaft front oil seal
Crankshaft rear oil seal removal
steps <M/T>
•
Transmission assembly (Refer to
GROUP 22A, Transmission
Assembly
).
•
Clutch cover and clutch disc (Refer
to GROUP 21B, Clutch
•
Engine oil pan (Refer to
).
<<
A
>>
>>
B
<<
2.
Flywheel bolt
>>
B
<<
3.
Flywheel assembly
>>
A
<<
7.
Crankshaft rear oil seal case
assembly
Crankshaft rear oil seal removal
steps <CVT>
•
Transmission assembly (Refer to
GROUP 23A, Transmission
Assembly
).
•
Engine oil pan (Refer to
).
<<
A
>>
>>
B
4.
Drive plate bolt
>>
B
5.
Adapter plate
>>
B
6.
Drive plate assembly
>>
A
7.
Crankshaft rear oil seal case
assembly

CRANKSHAFT OIL SEAL
ENGINE MECHANICAL <4A9>
11A-27
REMOVAL SERVICE POINT
<<A>> FLYWHEEL BOLT/DRIVE PLATE
BOLT REMOVAL
AK305392AF
MD998781
Cylinder block
Flywheel assembly or
Drive plate assembly
1. Use special tool flywheel stopper (MD998781) to
secure the flywheel assembly or drive plate
assembly.
2. Remove the flywheel bolts or drive plate bolts.
INSTALLATION SERVICE POINTS
>>A<< CRANKSHAFT REAR OIL SEAL
CASE ASSEMBLY INSTALLATION
1. Remove sealant from the cylinder block surfaces.
AC403772
AB
A
A
(Engine oil)
Section A - A
Crankshaft rear
oil seal case assembly
2. Apply a small amount of engine oil to all areas
around the oil seal lip.
AC311772
AB
2 mm
Cylinder block
A
A
B
B
Section A - A
Section B - B
2 mm
1 mm
3.5 mm
3. Apply a bead of specified sealant to the
crankshaft rear oil seal case assembly mating
surface of the cylinder block as shown.
Specified sealant: LOCTITE 5971 or exact
equivalent
CAUTION
Install the crankshaft rear oil seal case assembly
not to damage the crankshaft rear oil seal.
4. Within 3 minutes after applying the specified
sealant, install the crankshaft rear oil seal case
assembly to the cylinder block, and tighten the
mounting bolts to the specified torque.
Tightening torque: 7.6
± 0.6 N⋅m
CRANKSHAFT OIL SEAL
ENGINE MECHANICAL <4A9>
11A-28
>>B<< DRIVE PLATE
ASSEMBLY/ADAPTER PLATE/DRIVE
PLATE BOLT/FLYWHEEL
ASSEMBLY/FLYWHEEL BOLT
INSTALLATION
1. Remove the sealant, the engine oil, and other
adhering materials from the flywheel assembly or
drive plate assembly installation face, adapter
plate, crankshaft screw hole, and flywheel bolts or
drive plate bolts.
2. Install the flywheel assembly or drive plate
assembly to the crankshaft.
AK305392AF
MD998781
Cylinder block
Flywheel assembly or
Drive plate assembly
3. Use special tool flywheel stopper (MD998781) to
secure the flywheel assembly or drive plate
assembly in the same manner as removal.
4. Apply a small amount of engine oil to the face of
the flywheel bolts or drive plate bolts and the
crankshaft screw holes.
AK102300
5. Apply specified sealant to the flywheel bolt or
drive plate bolt threads.
Specified sealant: LOCTITE 2701 or equiva-
lent
6. Tighten the flywheel bolts or drive plate bolts to
the specified torque in a crisscross pattern.
Tightening torque: 100
± 5 N⋅m
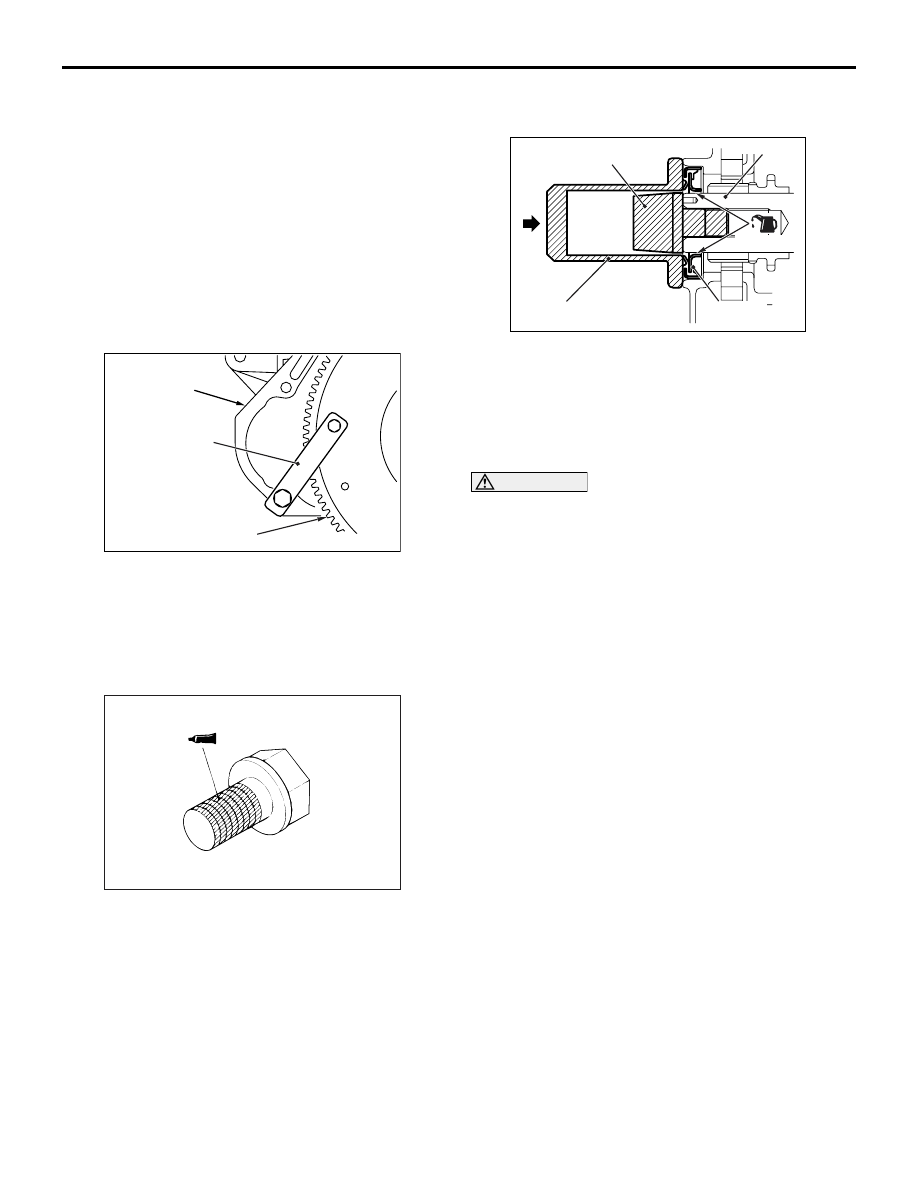
>>C<< CRANKSHAFT FRONT OIL SEAL
INSTALLATION
AC311773
AB
MB990699
(Engine oil)
Oil seal
MB991993
Crankshaft
1. Apply a small amount of engine oil to the outer
circumference of special tool crankshaft front oil
seal guide (MB991993) and install it to the
crankshaft.
2. Apply a small amount of engine oil to the entire
inner circumference of the oil seal lip.
CAUTION
Install the crankshaft front oil seal not to damage
the crankshaft front oil seal.
3. Using special tool differential oil seal installer
(MB990699), drive the oil seal so that it is flush
with the timing chain case assembly.
Нет комментариевНе стесняйтесь поделиться с нами вашим ценным мнением.
Текст