Honda Ridgeline. Manual — part 314
02
SJC8A00B54175137672FAAT00
−
−
−
−
−
−
−
−
YES
NO
YES
NO
YES
NO
YES
NO
Low tire pressure and tire indicators do not
go off, and no DTCs are stored
18-81
18-81
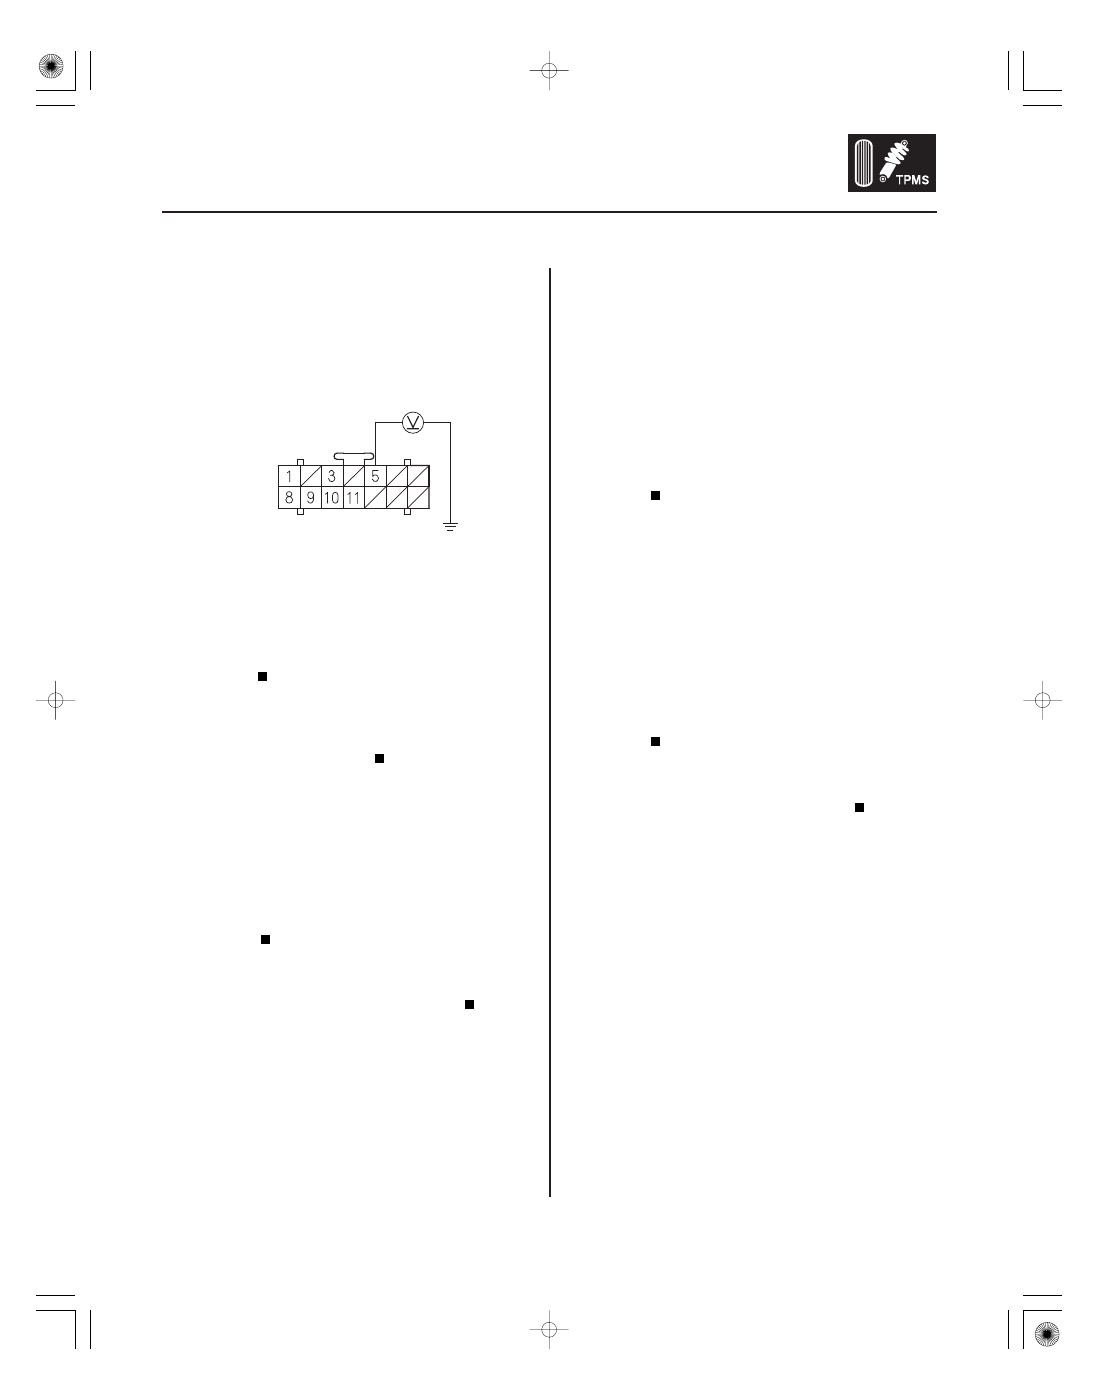
TPMS CONTROL UNIT CONNECTOR A (14P)
IG1 (YEL)
7. Turn the ignition switch ON (II).
8. Measure the voltage between the TPMS control
unit connector A (14P) terminal No. 5 and body
ground.
Repair the open in the ground wire between
terminal No. 3 at the TPMS control unit and body
ground.
Check fuse No. 21 (7.5 A) in the under-dash
fuse/relay box. If the fuse is OK, repair the open in
the wire between the under-dash fuse/relay box
and the TPMS control unit.
9. With the HDS, command the system to turn on
each tire indicator and the low pressure indicator.
Check for loose terminals and poor
connections at the TPMS control unit. If necessary,
substitute a known-good TPMS control unit and
recheck.
Do the input test for the gauge control module
(see page 22-122). If necessary, substitute a known-
good gauge control module and recheck.
1. Turn the ignition switch ON (II).
2. Command the system with the HDS to turn the
TPMS indicators off.
Check for loose terminals and poor
connections at the TPMS control unit. If necessary,
substitute a known-good TPMS control unit and
recheck.
Go to step 3.
3. Turn the ignition switch OFF, then disconnect the
gauge control module connector B (22P).
4. Turn the ignition switch ON (II), and watch the low
pressure and tire indicators.
Check for loose terminals and poor
connections at the TPMS control unit. If necessary,
substitute a known-good TPMS control unit and
recheck.
Do the input test for the gauge control module
(see page 22-122). If necessary, substitute a known-
good gauge control module and recheck.
Wire side of female terminals
Is ther e batter y voltage?
Does the low pr essur e and each tir e indicator
illuminate?
Do the low tir e pr essur e and tir e indicator s go of f ?
Do the low tir e pr essur e and tir e indicator s go of f ?
01
SJC8A00B54175159624FAAT00
−
−
−
−
−
−
−
−
−
−
TPMS indicator does not come on, and no
DTCs are stored
YES
NO
YES
NO
YES
NO
YES
NO
YES
NO
18-82
TPMS
Symptom Troubleshooting (cont’d)
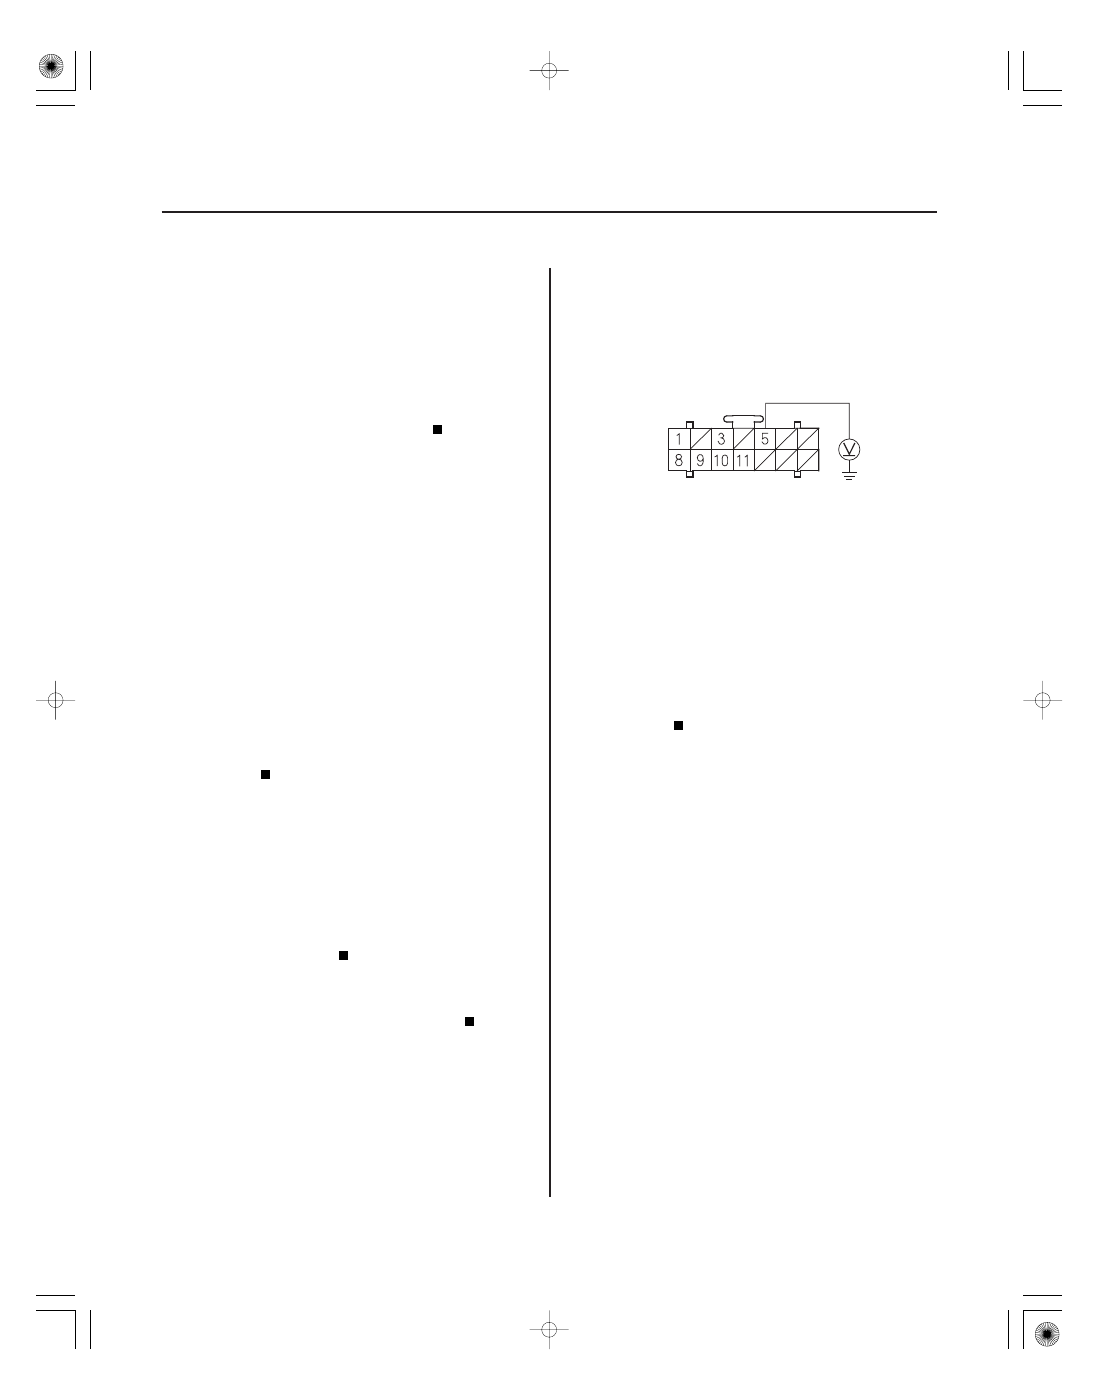
TPMS CONTROL UNIT CONNECTOR A (14P)
IG1 (YEL)
1. Turn the ignition switch ON (II), and watch the
TPMS indicator.
The system is OK at this time.
Go to step 2.
2. Connect the HDS and select TPMS.
Go to step 3.
Go to step 5.
3. Command the system with the HDS to turn the
TPMS indicator on.
Check for loose terminals and poor
connections at the TPMS control unit. If necessary,
substitute a known-good TPMS control unit and
recheck.
Go to step 4.
4. Turn the ignition switch OFF, then turn the ignition
switch ON (II) again and watch the low pressure
and tire indicators.
Substitute a known-good gauge control
module and recheck.
Do the input test for the gauge control module
(see page 22-122). If necessary, substitute a known-
good gauge control module and recheck.
5. Measure the voltage between the TPMS control
unit connector A (14P) terminal No. 5 and body
ground.
Go to step 6.
There is an open between the under-dash
fuse/relay box fuse No. 21 (7.5 A) and the TPMS
control unit. Check the No. 21 fuse (7.5 A). If the
fuse is OK, repair the open in the YEL wire between
the under-dash fuse/relay box and the TPMS
control unit.
Wire side of female terminals
Does the T PMS indicator come on f or at least
2 seconds?
Does the HDS communicate with the T PMS
contr ol unit?
Does the T PMS indicator come on?
Do the indicator s come on f or sever al seconds?
Is ther e batter y voltage?
02
SJC8A00B54175159624FAAT05
−
−
−
−
−
−
−
−
YES
NO
YES
NO
YES
NO
YES
NO
TPMS indicator does not go off, and no DTCs
are stored
18-83
18-83
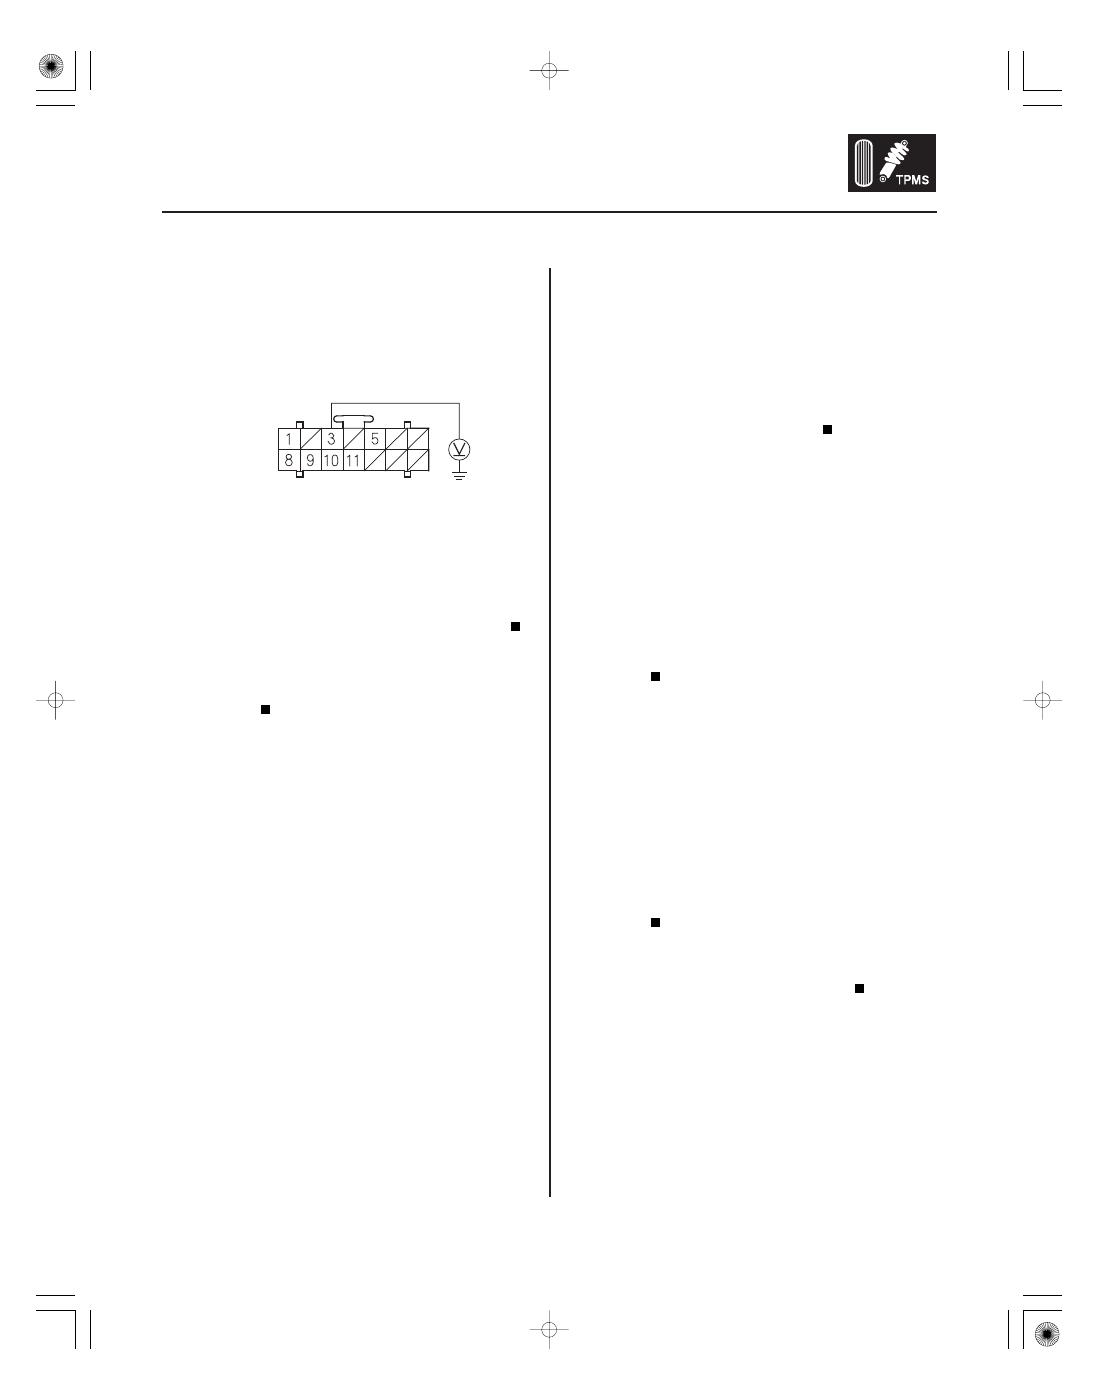
TPMS CONTROL UNIT CONNECTOR A (14P)
GND (BLK)
6. Measure the voltage between the TPMS control
unit connector A (14P) terminal No. 3 and body
ground.
Repair the open in the wire between terminal
No. 3 at the TPMS control unit and body ground.
Check for loose terminals and poor
connections at the TPMS control unit. If necessary,
substitute a known-good TPMS control unit and
recheck.
1. Turn the ignition switch ON (II), and watch the
TPMS indicator.
The system is OK at this time.
Go to step 2.
2. Turn the ignition switch OFF, then disconnect the
TPMS control unit connector B (20P).
3. Turn the ignition switch ON (II), and watch the
TPMS indicator.
Check for loose terminals and poor
connections at the TPMS control unit. If necessary,
substitute a known-good TPMS control unit and
recheck.
Go to step 4.
4. Turn the ignition switch OFF, then disconnect the
gauge control module connector B (22P).
5. Turn the ignition switch ON (II), and watch the
TPMS indicator.
Check for loose terminals and poor
connections at the TPMS control unit. If necessary,
substitute a known-good TPMS control unit and
recheck.
Do the input test for the gauge control module
(see page 22-122). If necessary, substitute a known-
good gauge control module and recheck.
Wire side of female terminals
Is ther e mor e than 0.1 V ?
Does the T PMS indicator s come on f or at least
2 seconds, then go of f ?
Does the T PMS indicator go of f ?
Does the T PMS indicator go of f ?
01
02
SJC8A00B54175159631KBAT00
18-84
TPMS
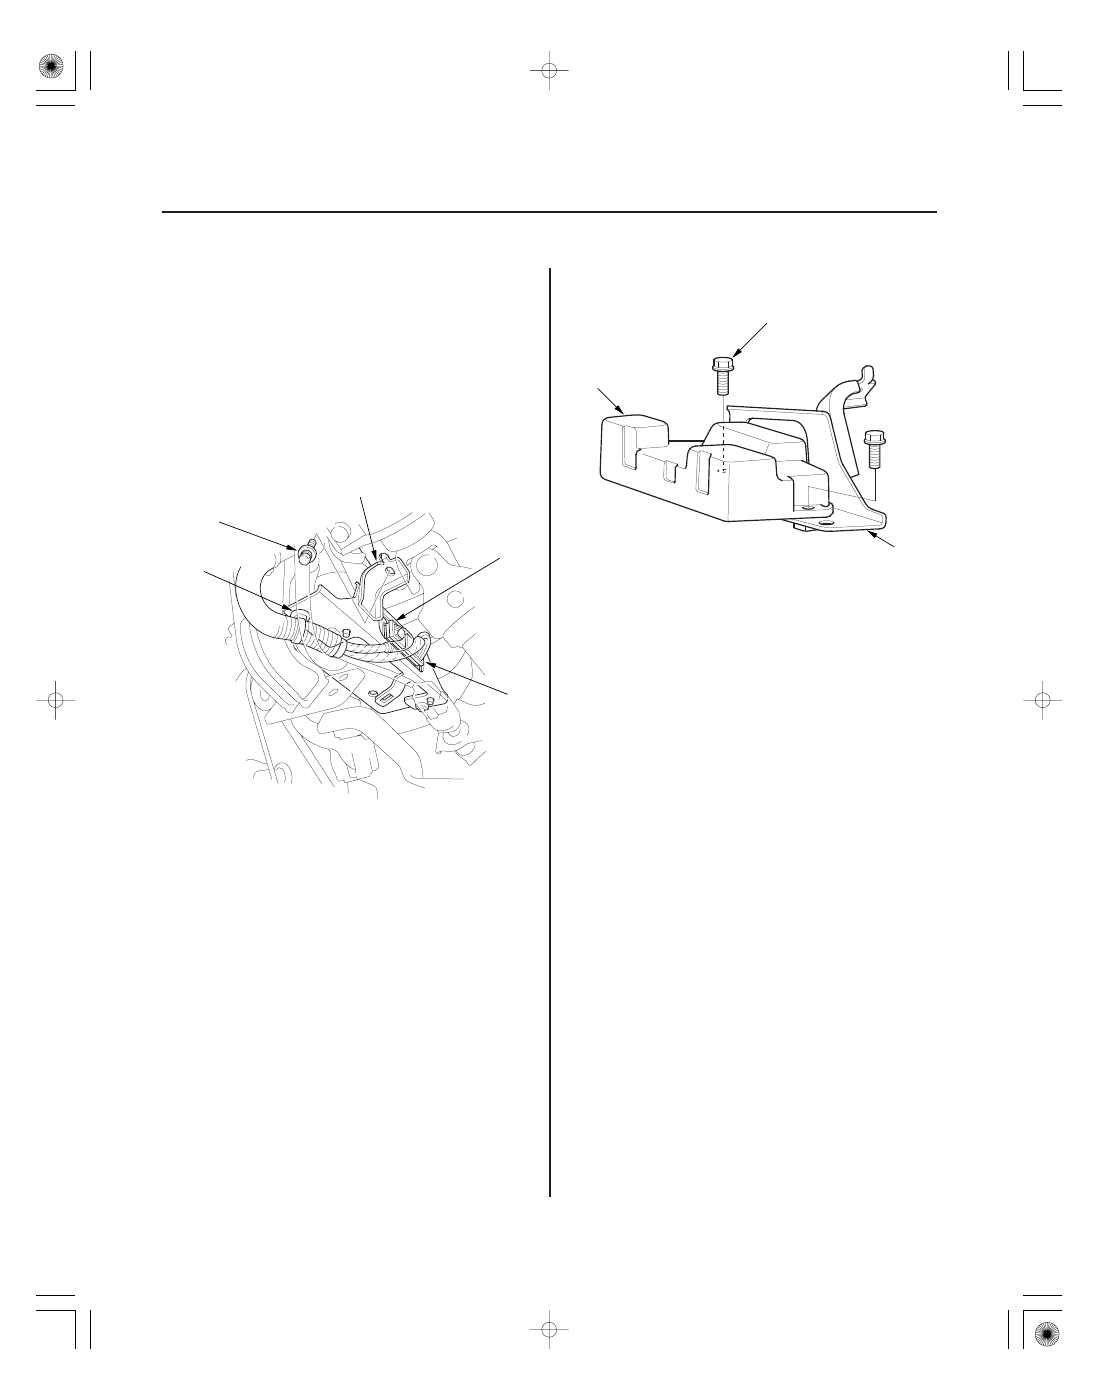
TPMS Control Unit Replacement
6 x 1.0 mm
9.8 N·m
(1.0 kgf·m, 7.2 lbf·ft)
A
B
C
B
A
B
6 x 1.0 mm
9.8 N·m
(1.0 kgf·m, 7.2 lbf·ft)
NOTE: Make sure the TPMS control unit mounting
bracket is not bent or twisted as this may affect its
communication with the initiators and the tire pressure
sensors.
1. Make sure the ignition switch is OFF.
2. Remove the clip (A), and disconnect the TPMS
control unit connectors (B).
NOTE: The TPMS control unit is located under the
steering column.
3. Remove the TPMS control unit with the bracket (C).
4. Remove the TPMS control unit (A) from the bracket
(B).
5. Install the TPMS control unit in the reverse order of
removal.
6. Connect the HDS and memorize the pressure
sensor IDs (see page 18-51). Do not memorize the
IDs automatically.
Нет комментариевНе стесняйтесь поделиться с нами вашим ценным мнением.
Текст