Acura RLX HYBRID (2020 year). Manual in english — page 13
uu
Climate Control System
u
Using Automatic Climate Control
208
Co
ntrols
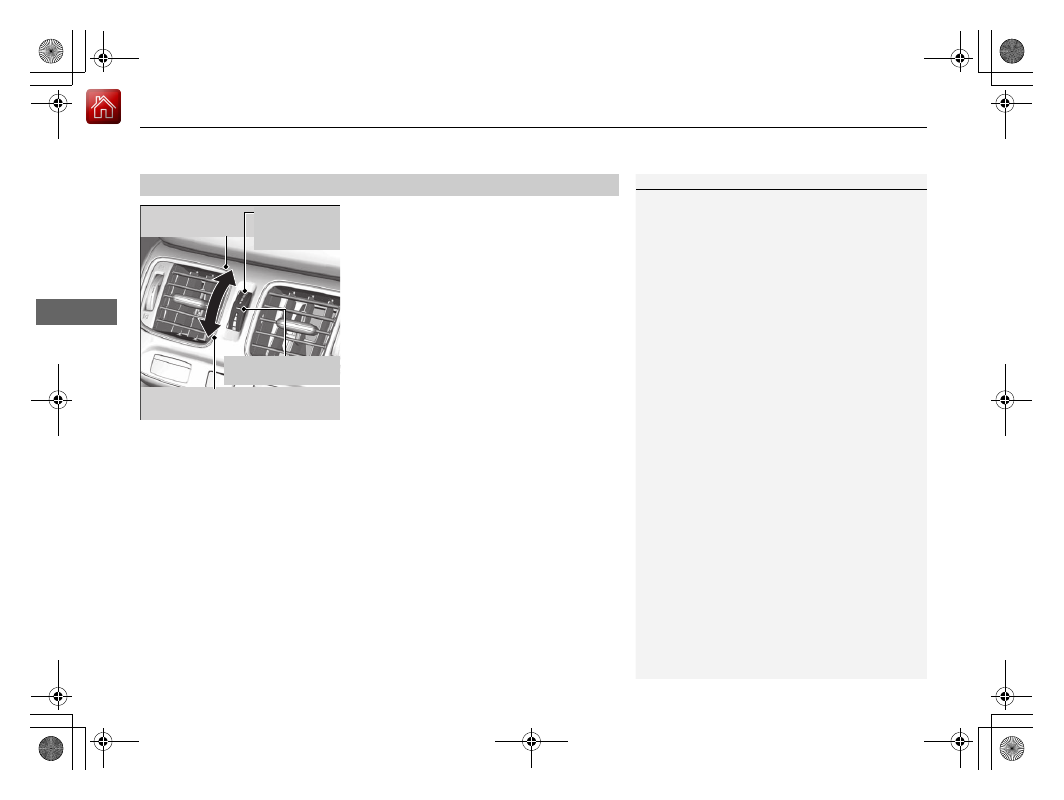
You can set the rear passenger compartment
temperature different than the driver’s, using
the rear temperature control dial.
■
Rear Temperature Control Dial
1
The rear temperature can be adjusted when the
climate control system is on.
Dial up to raise
the temperature.
Dial down to lower
the temperature.
Rear
Temperature
Control Dial
Position of driver’s
temperature
-------------------------------------------------------------------------------------------------------------------------------------------------------------

209
uu
Climate Control System
u
Automatic Climate Control Sensors
Co
ntrols
Automatic Climate Control Sensors
The automatic climate control system is
equipped with sensors. Do not cover or spill
any liquid on them.
Sensor
Sensor
-------------------------------------------------------------------------------------------------------------------------------------------------------------
211
Features
This chapter describes how to operate technology features.
Playing Internet Radio . . . . . .. 266
Playing a USB Flash Drive . . . . . 268
Playing
General Information on the Audio System
Recommended CDs . . . . . . . 278
Compatible iPod, iPhone, and USB Flash
Drives . . . . . . . . . . . 280
Defaulting All the Settings . . . ... 319
Deleting all HDD Data. . . . . .. 320
Using HFL . . . . . . . . . . 324
HFL Menus . . . . . . . . . .. 326
-------------------------------------------------------------------------------------------------------------------------------------------------------------
212
Features
Audio System
About Your Audio System
The audio system features AM/FM radio and SiriusXM
®
Radio service. It can also play
audio CDs, WMA/MP3/AAC files, Hard Disk Drive (HDD) audio, USB flash drives, and
iPod, iPhone and
Bluetooth
®
devices.
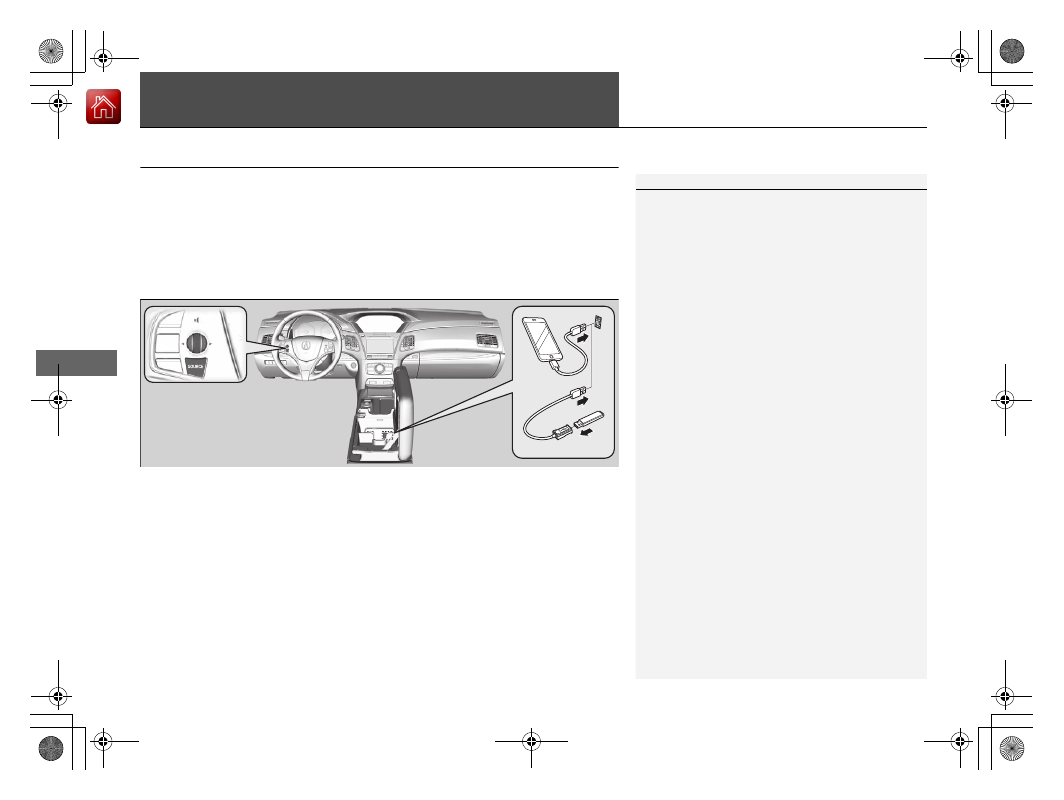
You can operate the audio system from the buttons and switches on the panel, the
remote controls on the steering wheel, or the icons on the On Demand Multi-Use
Display
TM
.
1
SiriusXM
®
Radio is available on a subscription basis
only. For more information on SiriusXM
®
Radio,
contact a dealer.
2
General Information on the Audio System
P. 277
SiriusXM
®
Radio is available in the United States and
Canada, except Hawaii, Alaska, and Puerto Rico.
SiriusXM
®
is a registered trademark of SiriusXM
Radio, Inc.
Video CDs, DVDs, and 3-inch (8-cm) mini CDs are not
supported.
iPod, iPhone and iTunes are trademarks of Apple Inc.
State or local laws may prohibit the operation of
handheld electronic devices while operating a
vehicle.
When the screen is viewed through polarized
sunglasses, a rainbow pattern may appear on the
screen due to optical characteristics of the screen. If
this is disturbing, please operate the screen without
polarized sunglasses.
Remote Controls
iPod
USB Flash Drive
-------------------------------------------------------------------------------------------------------------------------------------------------------------
213
uu
Audio System
u
USB Port
Features
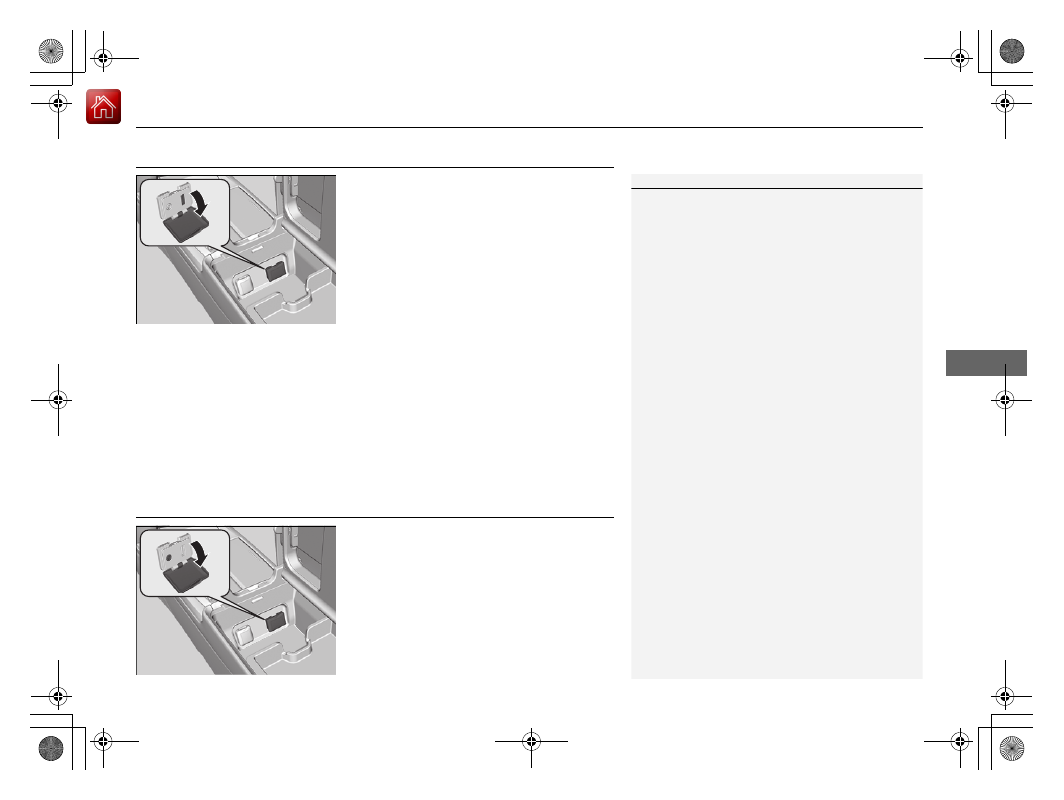
USB Port
Install the iPod USB connector or the USB flash
drive to the USB port.
Auxiliary Input Jack
Use the jack to connect standard audio
devices.
1.
Open the
AUX
cover.
2.
Connect a standard audio device to the
input jack using a 1/8 inch (3.5 mm) stereo
miniplug.
u
The audio system automatically switches
to the AUX mode.
1
•
Do not leave the iPod or USB flash drive in the
vehicle. Direct sunlight and high temperatures may
damage it.
•
We recommend using an extension cable with the
USB port.
•
Do not connect the iPod or USB flash drive using a
hub.
•
Do not use a device such as a card reader or hard
disk drive, as the device or your files may be
damaged.
•
We recommend your data backed up before using
the device in your vehicle.
•
Displayed messages may vary depending on the
device model and software version.
If the audio system does not recognize the iPod, try
reconnecting it a few times or reboot the device. To
reboot, follow the manufacturer’s instructions
provided with the iPod or visit
1
You can return to the AUX mode by selecting
Change Source
on the
Audio menu
screen or
Source
on the On Demand Multi-Use Display
TM
.
-------------------------------------------------------------------------------------------------------------------------------------------------------------
214
uu
Audio System
u
Audio System Theft Protection
Features
Audio System Theft Protection
The audio system is disabled when it is disconnected from the power source, such as
when the 12-volt battery is disconnected or goes dead. In certain conditions, the
system may display a code entry screen. If this occurs, reactivate the audio system.
■
Reactivating the audio system
1.
Set the power mode to ON.
2.
Turn on the audio system.
3.
Press and hold the audio system power button for more than two seconds.
u
The audio system is reactivated when the audio control unit establishes a
connection with the vehicle control unit. If the control unit fails to recognize
the audio unit, you must go to a dealer and have the audio unit checked.
-------------------------------------------------------------------------------------------------------------------------------------------------------------
215
uu
Audio System
u
Audio Remote Controls
Features
Audio Remote Controls
Allows you to operate the audio system while driving. The information is shown on
the multi-information display or head-up display.
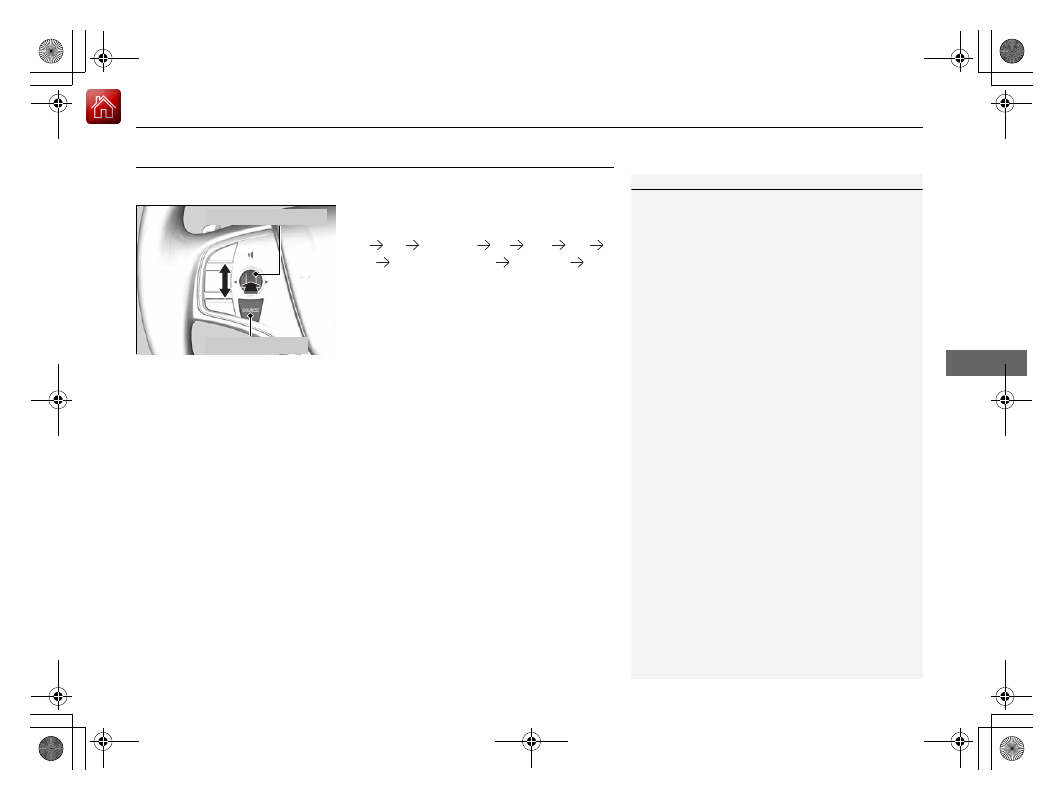
SOURCE Button
Cycles through the audio modes as follows:
FM
AM
SiriusXM
®
CD
HDD
USB
iPod
Bluetooth
®
Audio
Pandora
®
*
AUX
Left Selector Wheel
Roll Up:
To increase the volume.
Roll Down:
To decrease the volume.
Push:
To mute. Push again to unmute.
•
When listening to the radio
Move to the right:
To select the next preset radio station.
Move to the left:
To select the previous preset radio station.
Move to the right and hold:
To select the next strong station.
Move to the left and hold:
To select the previous strong station.
•
When listening to a CD, HDD, iPod, USB flash drive, or
Bluetooth
®
Audio
Move to the right:
To skip to the next song.
Move to the left:
To go back to the beginning of the current or previous song.
Move to the right and hold:
To go to the group up. (
Bluetooth
®
Audio only)
Move to the left and hold:
To go to the group down. (
Bluetooth
®
Audio only)
•
When listening to a CD, HDD or USB flash drive
Move to the right and hold:
To skip to the next folder.
Move to the left and hold:
To go back to the previous folder.
•
When listening to Pandora
®
*
Move to the right:
To skip to the next song.
Move to the right and hold:
To select the next station.
Move to the left and hold:
To select the previous station.
1
Some mode appears only when an appropriate
device or medium is used.
Left Selector Wheel
SOURCE
Button
* Not available on all models
-------------------------------------------------------------------------------------------------------------------------------------------------------------
216
Features
Audio System Basic Operation
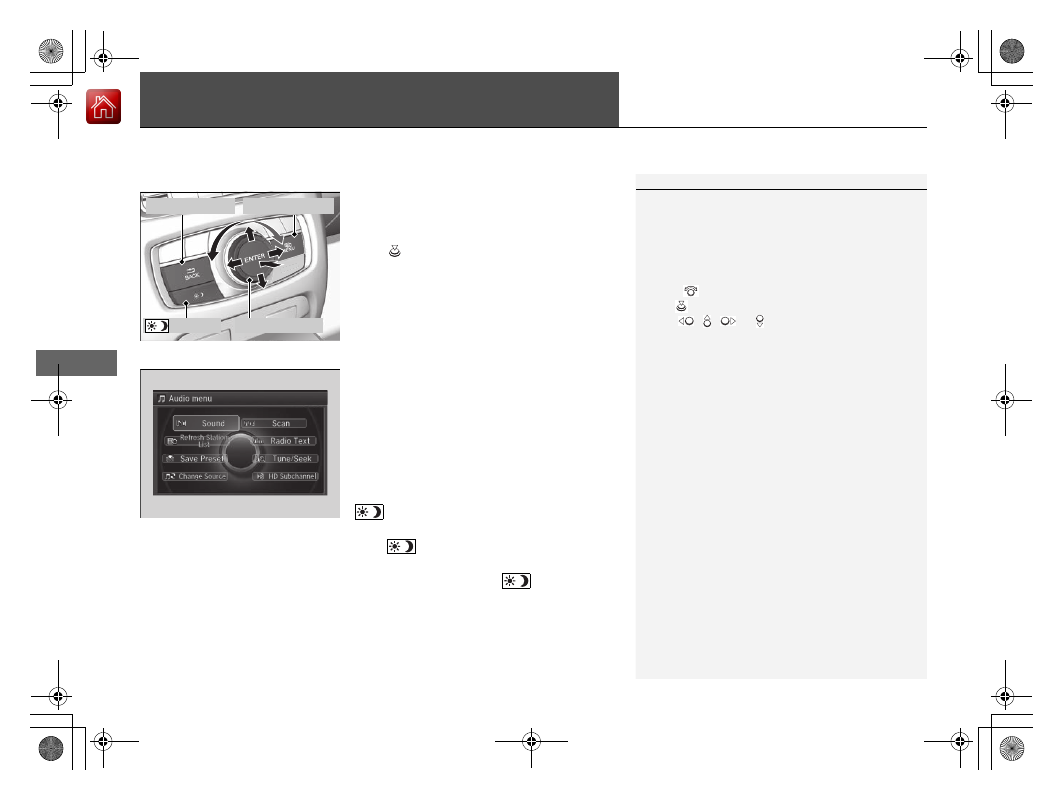
To use the audio system function, the power mode must be in ACCESSORY or ON.
Use the interface dial or
MENU
button to
access some audio functions.
Press
to switch between the normal and
extended display for some functions.
Interface dial:
Rotate left or right to scroll
through the available choices. Press to set
your selection. Move right, left, up or down to
select a secondary menu.
MENU button:
Press to select any mode. The
available mode includes
Sound
,
Change
Source
,
Refresh Station List
,
Save Preset
,
Radio Text
,
Music Search
, and play modes.
Play modes can be also selected from
Scan
,
Random/Repeat
, and so on.
BACK button:
Press to go back to the
previous display.
(Day/Night) button:
Press to change
the audio/information screen brightness.
Press
once and make an adjustment
using the interface dial.
u
Each time you press
, the mode
switches between the daytime mode,
nighttime mode and off mode.
1
Voice Control System
The navigation system is voice operable.
2
These indications are used to show how to operate
the interface dial.
Rotate
to select.
Press
to
enter.
Move
,
,
or
to select a secondary menu.
Audio Menu Items
2
Sound
P. 230
2
Refresh Station List
P. 239
2
Save Preset
P. 238, 244
2
Radio Text
P. 240
2
Music Search
2
2
Random/Repeat
When you unlock the doors with your remote, the
driver’s ID (
Driver 1
or
Driver 2
) is detected, and the
audio system settings and preset memory are turned
to the respective mode automatically when you set
the power mode to ON.
Interface Dial
MENU
Button
BACK
Button
Button
-------------------------------------------------------------------------------------------------------------------------------------------------------------
217
uu
Audio System Basic Operation
u
On Demand Multi-Use Display
TM
Continued
Features
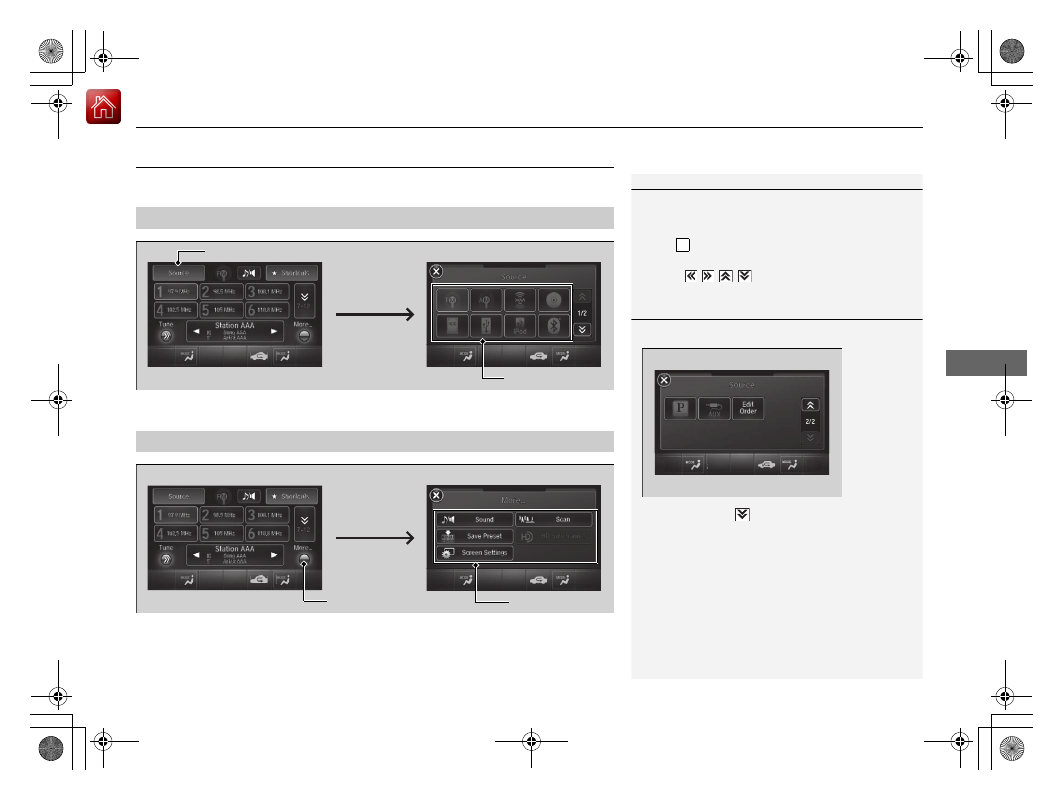
On Demand Multi-Use Display
TM
Use the On Demand Multi-Use Display
TM
to operate the audio system.
Select
Source
, then select an icon on the source list to switch the audio source.
Select
More
to display the menu items.
■
Selecting an Audio Source
1
Icons that appear on the screen vary by the source
selected.
Select
to go back to the previous screen.
Use the
/
/
/
icons to turn the page.
X
1
You can change the order of source icons displayed.
1. Select
Source
, ,
then
Edit Order
.
2. Select two icons, then select
Done
.
The locations of these icons are switched.
To go back to the original display order, select
Default
.
Source
Edit
Order
■
Displaying the Menu Items
Select
Source
.
Source List Icons
Select
More
.
Menu Items
-------------------------------------------------------------------------------------------------------------------------------------------------------------
uu
Audio System Basic Operation
u
On Demand Multi-Use Display
TM
218
Features
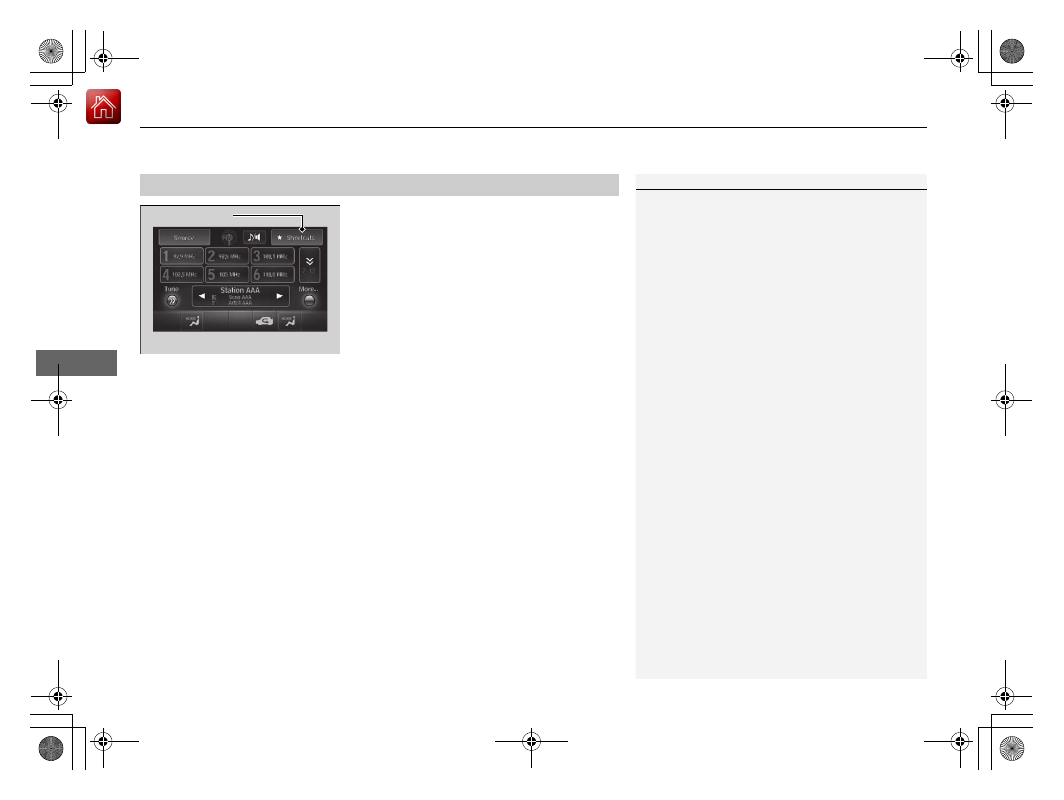
You can preset the settings of four categories
(
Places
,
Phone
,
Climate
,
Audio
) from
Shortcuts
.
■
Shortcuts
1
The preset memory is cleared when it is disconnected
from the power source, such as when the 12-volt
battery is disconnected or goes dead.
Shortcuts
Icon
-------------------------------------------------------------------------------------------------------------------------------------------------------------
Continued
219
uu
Audio System Basic Operation
u
On Demand Multi-Use Display
TM
Features
■
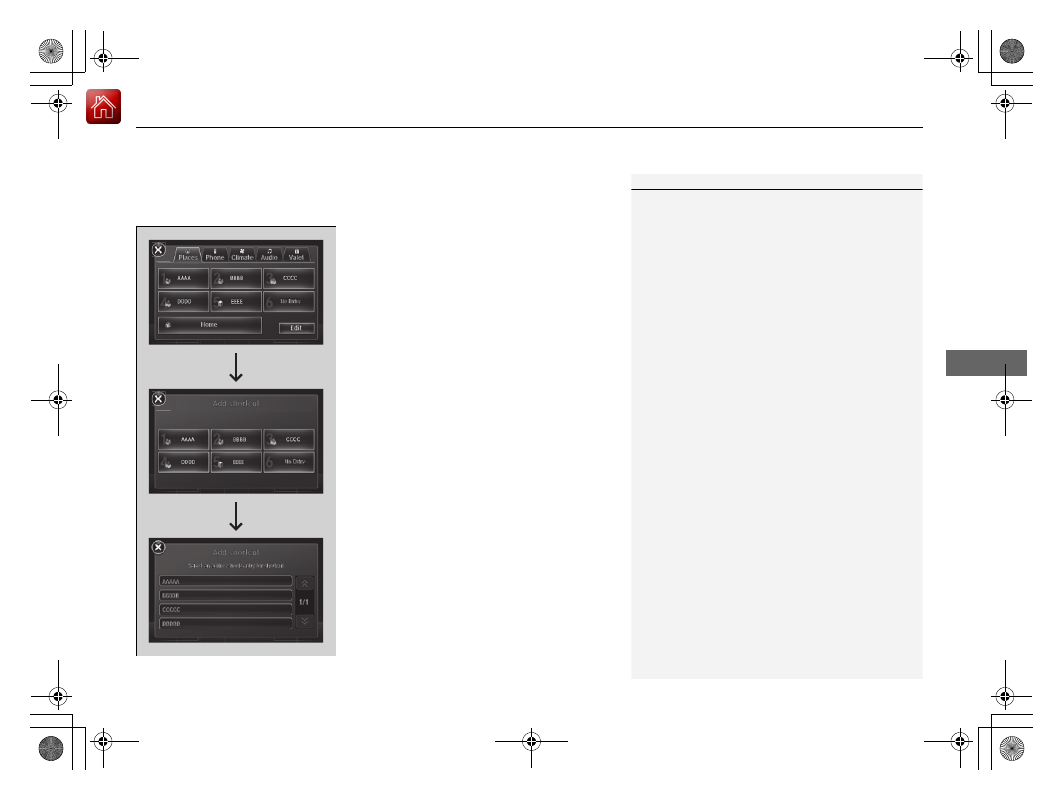
Places
You can store up to six addresses, and the home address for your preset
destinations.
To store an address on the selected preset
number:
1.
Select
Shortcuts
.
2.
Select
Places
.
3.
Select
Edit
or
No Entry
.
u
If you select
No Entry
, go to step 6.
4.
Select
Add
.
u
All the six preset icons appear.
5.
Select the preset number to which you
want to store an address.
6.
The screen changes to a list of addresses
stored in your address book.
7.
Select an address you want to store as a
preset.
To enter one of the preset addresses, or
Home
as your destination:
1.
Select
Shortcuts
.
2.
Select
Places
.
3.
Select a preset number or
Home
.
u
The system starts to calculate the route
to your selected destination.
1
See the Navigation System Manual for how to store
address book entries, and enter your home address.
-------------------------------------------------------------------------------------------------------------------------------------------------------------
220
uu
Audio System Basic Operation
u
On Demand Multi-Use Display
TM
Features
To delete a preset address:
1.
Select
Shortcuts
.
2.
Select
Places
.
3.
Select
Edit
.
4.
Select
Delete
.
5.
Select the preset number with the destination you want to delete.
-------------------------------------------------------------------------------------------------------------------------------------------------------------
Continued
221
uu
Audio System Basic Operation
u
On Demand Multi-Use Display
TM
Features
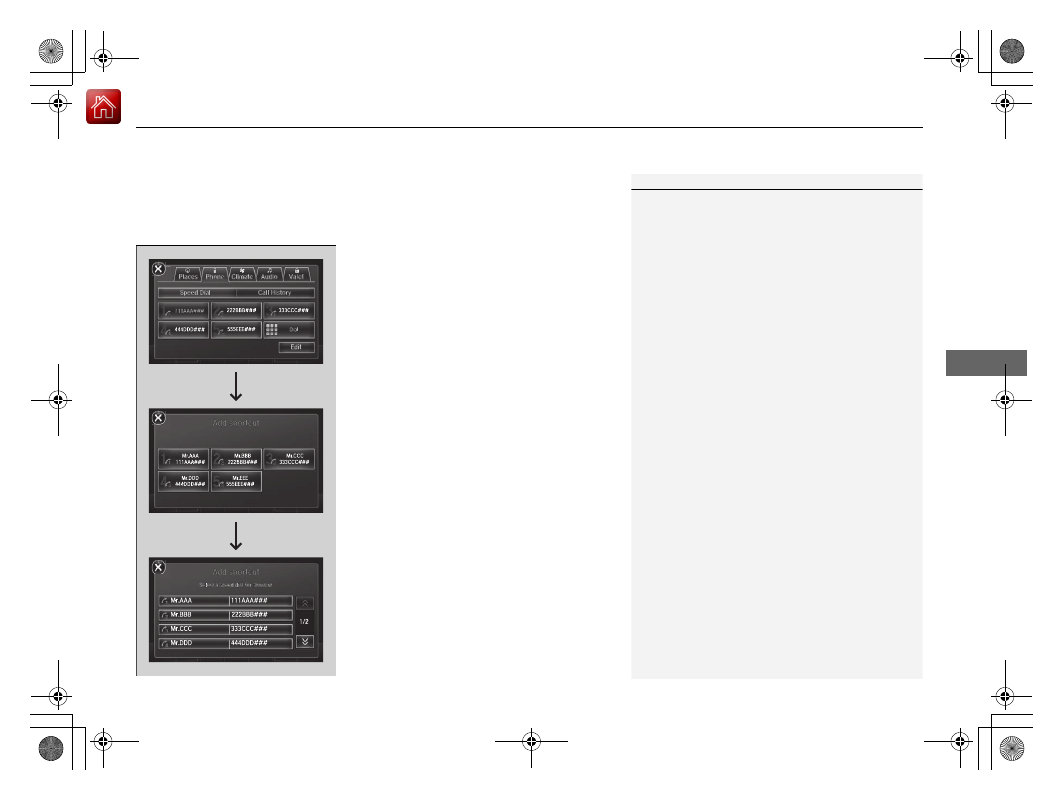
■
Phone
You can preset five speed dial entries, and make a call from one of the preset
numbers, or call history when the phone is paired and connected to the vehicle’s
Bluetooth
®
HandsFreeLink
®
(HFL) system.
2
To preset a speed dial:
1.
Select
Shortcuts
.
2.
Select
Phone
.
3.
Select
Speed Dial
.
4.
Select
Edit
or
No Entry
.
u
If you select
No Entry
, go to step 6.
5.
Select
Add
.
u
Five presets appear. Select a
No Entry
preset or an existing preset.
u
The screen changes to a list of previously
stored speed dial entries.
6.
Select a number you want to store as a
shortcut.
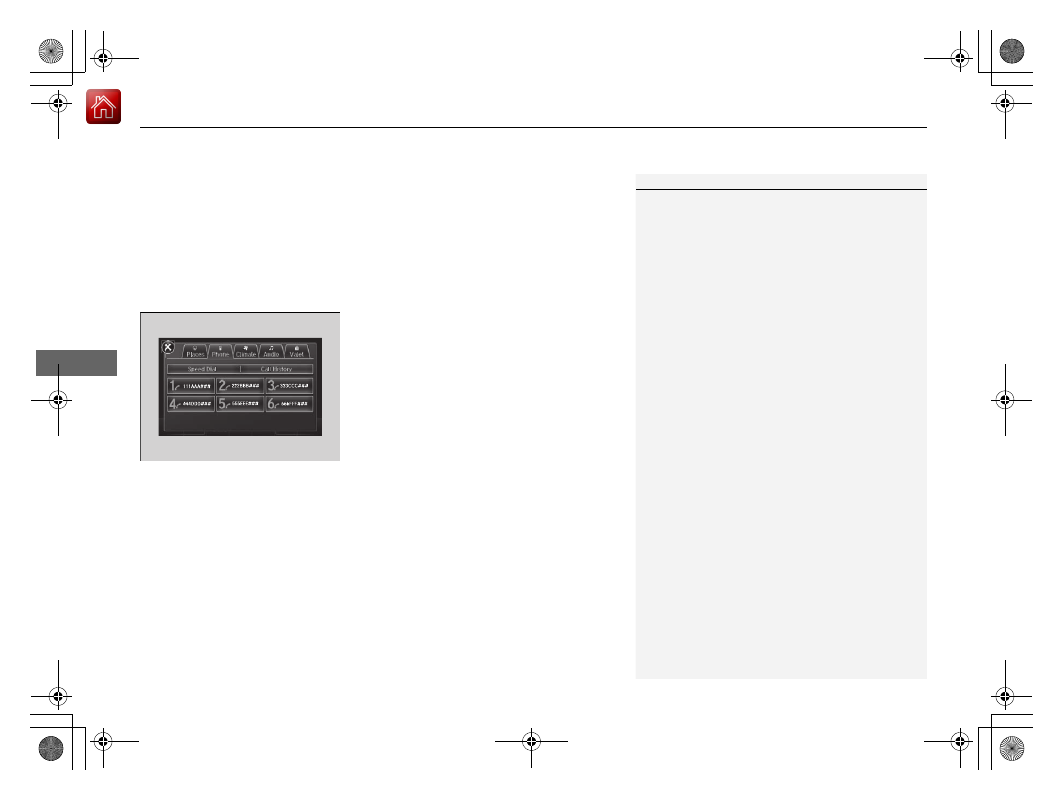
To make a call from a speed dial entry:
1.
Select
Shortcuts
.
2.
Select
Phone
.
3.
Select
Speed Dial
.
4.
Select a preset number.
u
Dialing starts automatically.
1
Dial
icon
You can make a call using the keyboard on the On
Demand Multi-Use Display
TM
to input numbers.
2
To make a call using a phone number
P. 351
-------------------------------------------------------------------------------------------------------------------------------------------------------------
uu
Audio System Basic Operation
u
On Demand Multi-Use Display
TM
222
Features
To delete a speed dial:
1.
Select
Shortcuts
.
2.
Select
Phone
.
3.
Select
Speed Dial
.
4.
Select
Edit
.
5.
Select
Delete
.
6.
Select the preset number with the phone number you want to delete.
To make a call from call history:
1.
Select
Shortcuts
.
2.
Select
Phone
.
3.
Select
Call History
.
4.
Select a phone number.
u
Dialing starts automatically.
1
The call history displays the last six dialed, received, or
missed calls.
-------------------------------------------------------------------------------------------------------------------------------------------------------------
Continued
223
uu
Audio System Basic Operation
u
On Demand Multi-Use Display
TM
Features
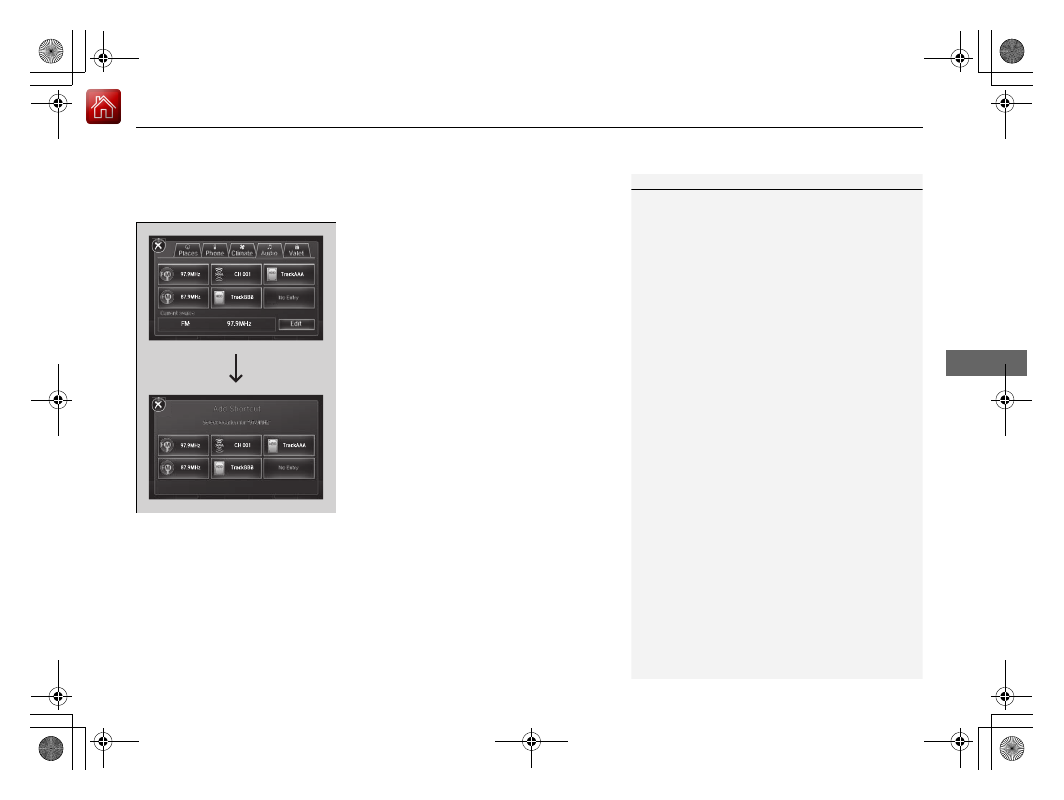
■
Audio
You can store up to six radio stations, and HDD audio album/play lists when playing
AM, FM, or SiriusXM
®
radio, or HDD audio.
To preset a station or song:
1.
Tune to a radio station or select a song from
HDD audio.
2
P. 237
2
2
Playing Hard Disk Drive (HDD) Audio
P. 248
2.
Select
Shortcuts
.
3.
Select
Audio
.
4.
Select
Edit
or
No Entry
.
u
If you select
No Entry
, go to step 6.
5.
Select
Add
.
6.
Select the preset icon you want to store the
station or song to.
To play a preset station or song:
1.
Select
Shortcuts
.
2.
Select
Audio
.
3.
Select a preset icon.
To delete a preset station or song:
1.
Select
Shortcuts
.
2.
Select
Audio
.
3.
Select
Edit
.
4.
Select
Delete
.
5.
Select the preset icon with the radio station
or a song you want to delete.
1
You can also preset a station or song by pressing and
holding the preset icon you want to store that station
or song after step 3.
-------------------------------------------------------------------------------------------------------------------------------------------------------------
uu
Audio System Basic Operation
u
On Demand Multi-Use Display
TM
224
Features
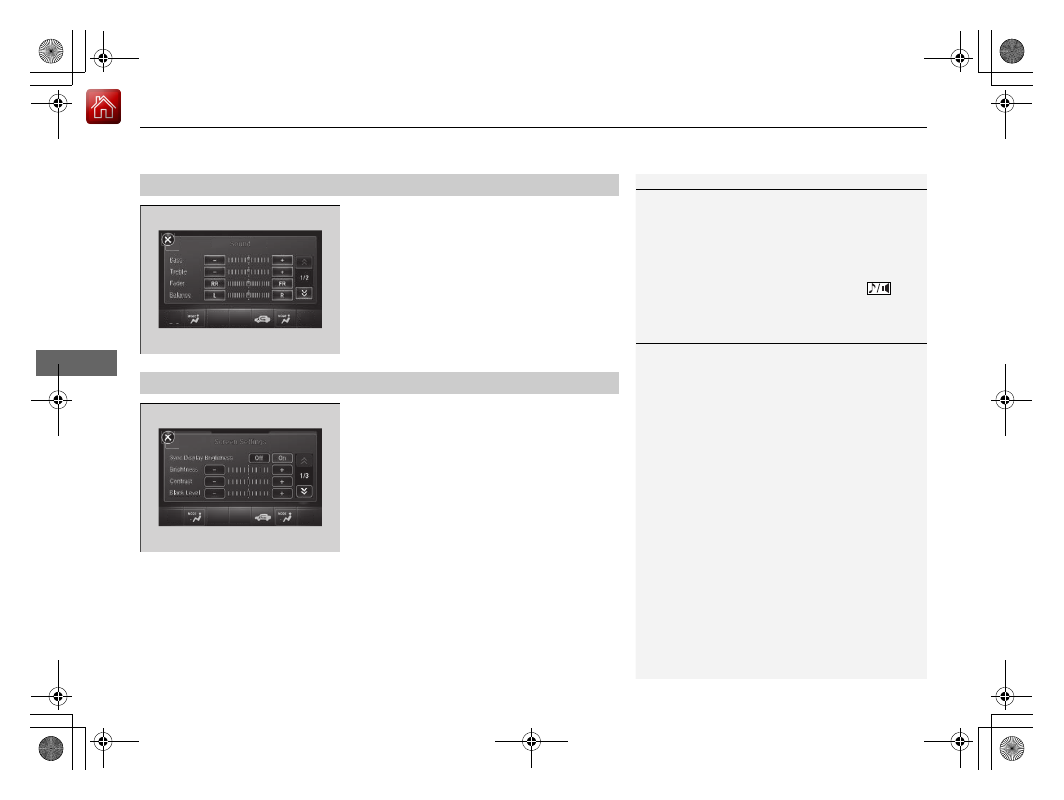
1.
Select
More
, then
Sound
.
2.
Use
(
+
,
(
-
or other icons to adjust the
setting.
1.
Select
More
, then
Screen Settings
.
2.
Use
(
+
,
(
-
or other icons to adjust the
setting.
■
Adjusting the Sound
1
Select
Off
,
Low
,
Mid
or
High
for the SVC setting.
2
P. 230
Instead of using
(
+
,
(
-
or icons, you can also touch
the point where your desired setting is.
You can also adjust the sound by selecting
on
the On Demand Multi-Use Display
TM
.
■
Changing the Screen Settings
1
The following are adjustable screen settings:
•
Sync Display Brightness
Selects whether the screen brightness synchronizes
with the instruments panel brightness.
•
Brightness
•
Contrast
•
Black Level
•
Display
Changes between the daytime or nighttime modes.
•
Beep
Mutes a beep that sounds every time you touch the
screen.
•
Keyboard
Changes the on-screen keyboard from the
alphabetical order to the qwerty type.
•
Vibration
Turns on and off the vibration when you touch the
screen.
•
Fade Timer
Sets the screen black out timing.
Instead of using
(
+
,
(
-
or icons, you can also touch
the point where your desired setting is.
-------------------------------------------------------------------------------------------------------------------------------------------------------------
Нет комментариевНе стесняйтесь поделиться с нами вашим ценным мнением.
Текст