Acura RL (1996-2004 year). Manual — part 451
Clutch
Disassembly
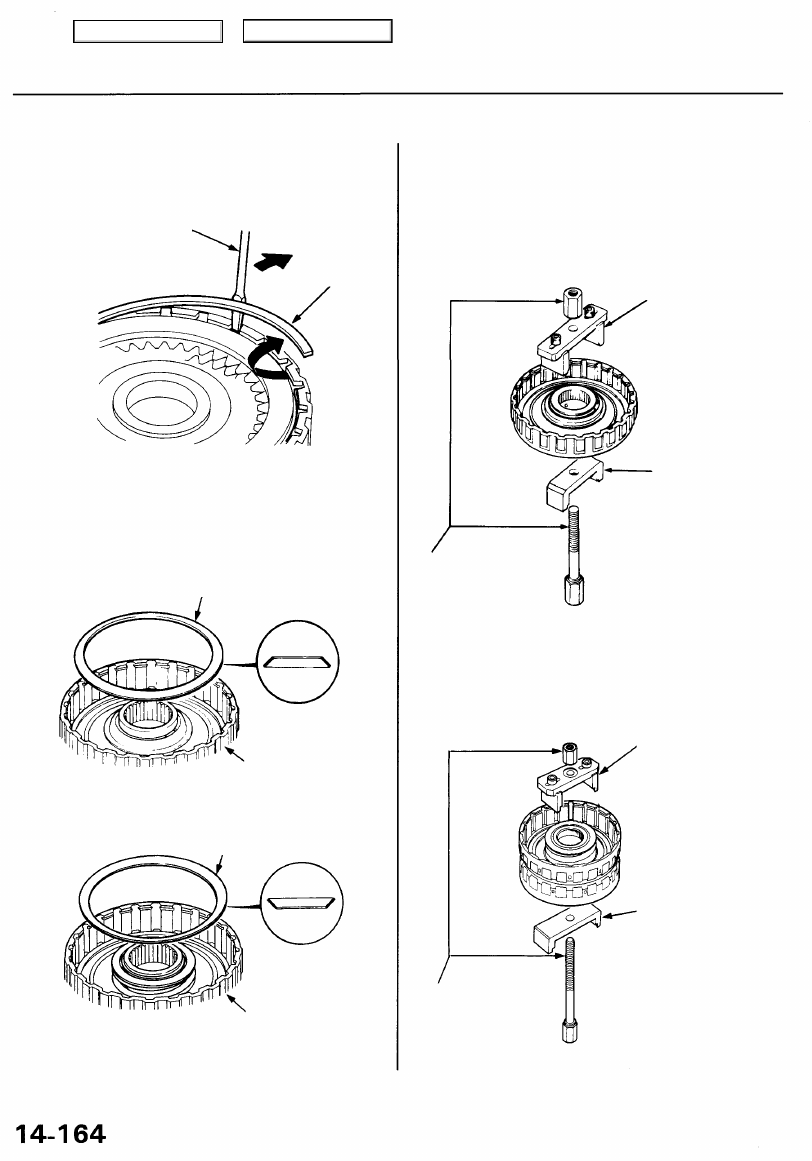
1. Remove the snap ring, then remove the clutch end
plate, clutch discs, and plates.
SCREWDRIVER
SNAP RING
2. Remove the disc spring.
NOTE: The 3rd and the 4th clutches do not have disc
springs.
2ND and 1ST-HOLD CLUTCHES:
CLUTCH DRUM
REVERSE and 1ST CLUTCHES:
CLUTCH DRUM
3. Install the special tools as shown.
2nd, 3rd, 1st-hold, and reverse clutches:
CLUTCH SPRING
COMPRESSOR
BOLT ASSEMBLY
or
1st and 4th clutches:
CLUTCH SPRING
COMPRESSOR
BOLT ASSEMBLY
or
CLUTCH SPRING
COMPRESSOR
ATTACHMENT
CLUTCH SPRING
COMPRESSOR
ATTACHMENT
or
CLUTCH SPRING
COMPRESSOR
ATTACHMENT
CLUTCH SPRING
COMPRESSOR
ATTACHMENT
or
DISC SPRING
DISC SPRING
Main Menu
Table of Contents
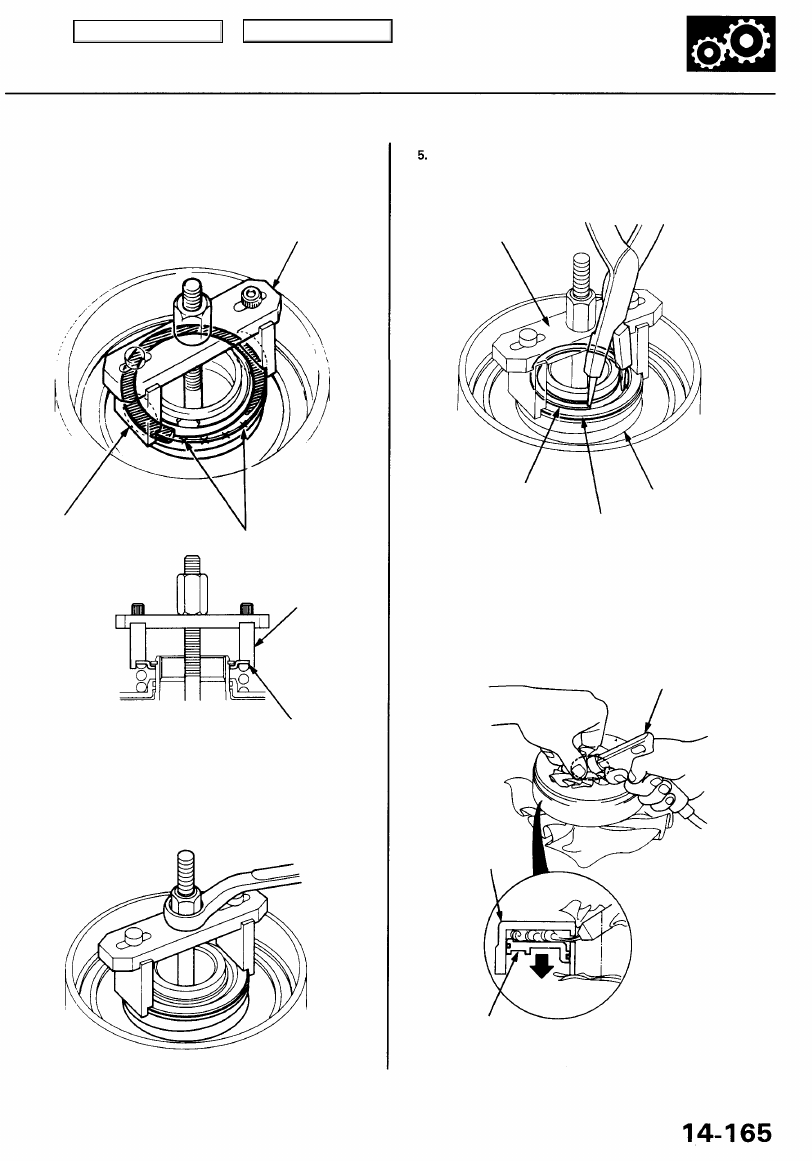
CAUTION: If either end of the special tool is set over an
area of the spring retainer which is unsupported by the
return spring, the retainer may be damaged. Be sure the
special tool is adjusted to have full contact with the
spring retainer.
Set here.
SPECIAL TOOL
SPRING RETAINER
4. Compress the return spring with the special tool.
Remove the snap ring. Then remove the special tools,
spring retainer and return spring.
SPECIAL TOOL
SNAP RING
SPRING RETAINER
6. Wrap a shop rag around the clutch drum, and apply
air pressure to the oil passage to remove the piston.
Place a finger tip on the other end while applying
air pressure.
CLUTCH
DRUM
PISTON
OSHA - APPROVED
30 psi NOZZLE
Do not set here.
SPECIAL TOOL
RETURN SPRING
Main Menu
Table of Contents

Clutch
Reassembly
NOTE:
• Clean all parts thoroughly in solvent or carburetor
cleaner, and dry them with compressed air.
• Blow out all passages.
• Lubricate all parts with ATF before assembly.
1. Inspect the check valve; if it's loose, replace the piston.
CHECK VALVE
PISTON
2. Install new O-rings on the piston.
O-RINGS
PISTON
PISTON
O-RING
O-RING
3. Install the piston in the clutch drum by applying
pressure to the piston and rotate it to ensure proper
seating.
NOTE: Lubricate the piston O-ring with ATF before
installation.
CAUTION: Do not pinch the O-ring by installing the
piston with too much force.
CLUTCH DRUM
4. Install the return spring and spring retainer, and posi-
tion the snap ring on the retainer.
SNAP RING
SPRING RETAINER
RETURN SPRING
CLUTCH DRUM
PISTON
Main Menu
Table of Contents

5. Install the special tools as shown.
2nd, 3rd, 1st-hold and reverse clutches:
CLUTCH SPRING
COMPRESSOR
BOLT ASSEMBLY
or
1st and 4th clutches:
CLUTCH SPRING
COMPRESSOR
BOLT ASSEMBLY
or
CLUTCH SPRING
COMPRESSOR
ATTACHMENT
CLUTCH SPRING
COMPRESSOR
ATTACHMENT
or
CLUTCH SPRING
COMPRESSOR
ATTACHMENT
CLUTCH SPRING
COMPRESSOR
ATTACHMENT
or
CAUTION: If either end of the special tool is set
over an area of the spring retainer which is unsup-
ported by the return spring, the retainer may be
damaged. Be sure the special tool is adjusted to
have full contact with the spring retainer.
SPECIAL TOOL
Set here.
Do not set here.
SPECIAL TOOL
SPRING RETAINER
6. Compress the return spring with the special tool.
Main Menu
Table of Contents
Нет комментариевНе стесняйтесь поделиться с нами вашим ценным мнением.
Текст