Acura RL (1996-2004 year). Manual — part 323
Cruise Control
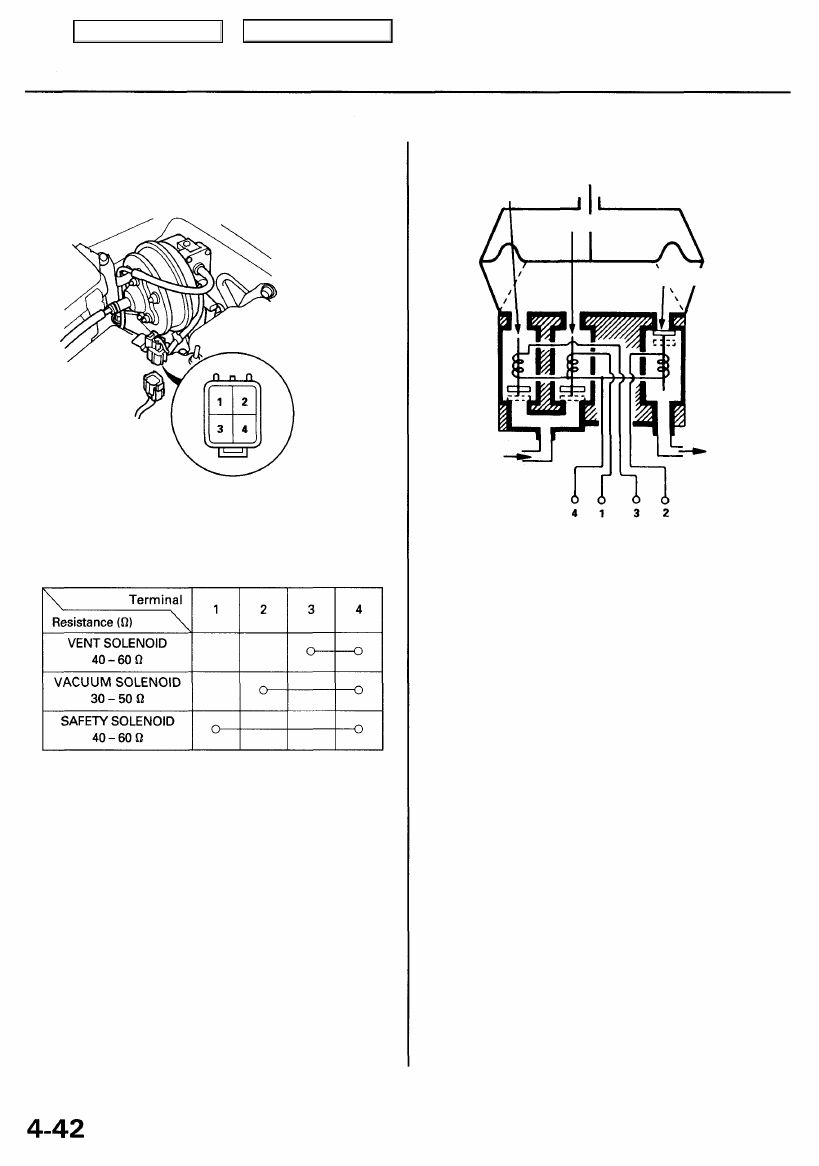
Actuator Solenoid Test
1. Disconnect the 4P connector from the actuator.
Terminal side of
male terminals
2. Check for resistance between the terminals accord-
ing to the table.
NOTE: Resistance will vary slightly with tempera-
ture; specified resistance is at 70°F (20°C).
VENT VALVE
From VENT
HOSE
To VACUUM
TANK
VACUUM VALVE
SAFETY VALVE
Main Menu
Table of Contents
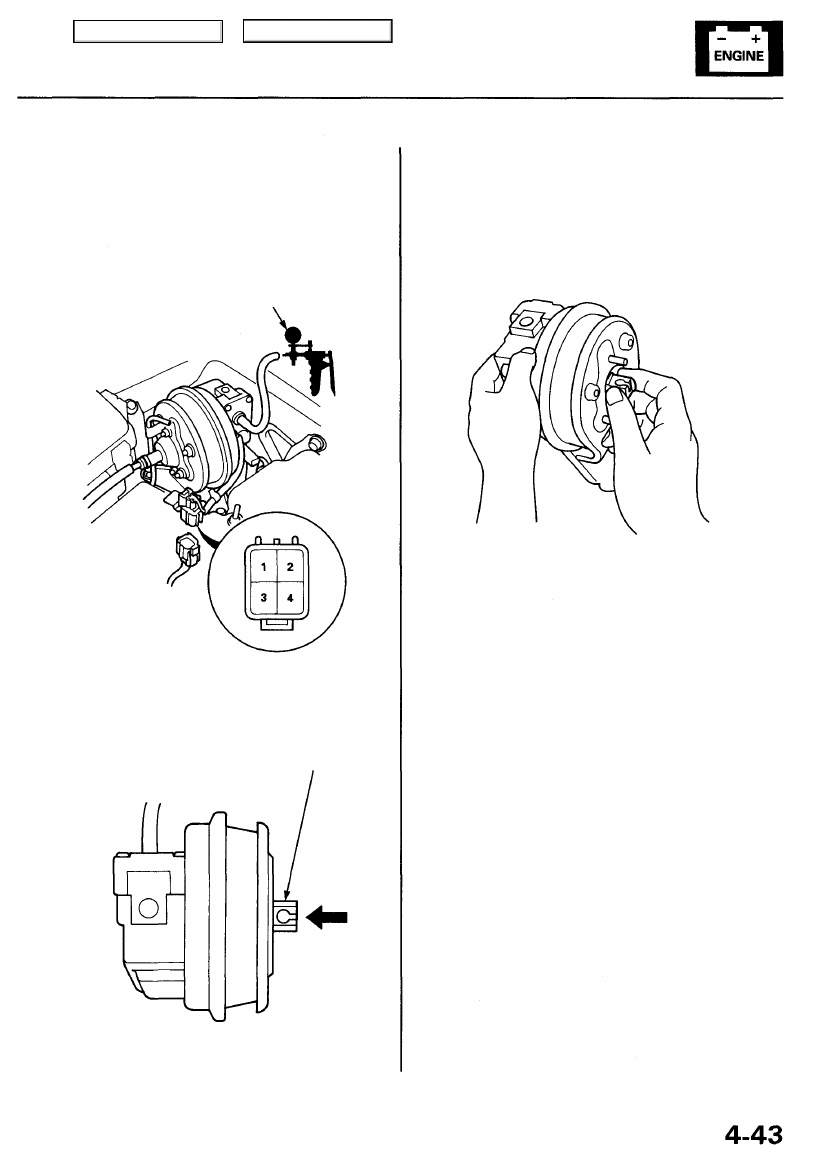
Actuator Test
1. Disconnect the actuator cable from the actuator rod,
and disconnect the 4P connector.
2. Connect battery power to the No. 4 terminal and
ground to the No. 1, No. 2, and No. 3 terminals.
3. Connect a vacuum pump to the check valve. Then
apply vacuum to the actuator.
VACUUM PUMP GAUGE
Terminal side of male terminals
4. The actuator rod should pull in completely. If the
rod pulls in only part-way or not at all, check for a
leaking vacuum line or defective solenoid.
ACTUATOR ROD
5.
6.
7.
8.
9.
With voltage and vacuum still applied, try to pull
the actuator rod out by hand. You should not be
able to pull it out. If you can, it is defective.
Disconnect ground from the No. 3 terminal. The
actuator rod should return. If it does not return, and
the vent hose and filter are not plugged, the
solenoid valve assembly is defective.
Repeat steps 2 through 5, and disconnect ground
from the No. 1 terminal. The actuator rod should
return. If it does not return, and the vent hose and
filter are not plugged, the solenoid valve assembly
is defective.
If you replace the solenoid valve assembly, be sure
to use new O-rings on each solenoid.
Disconnect power and ground from the 4P connec-
tor. Disconnect the vent hose from the actuator. Con-
nect a vacuum pump to the actuator vent hose port,
and apply vacuum. The actuator rod should pull in
completely. If not, the vacuum valve is stuck open.
Replace the actuator.
Main Menu
Table of Contents
Cruise Control
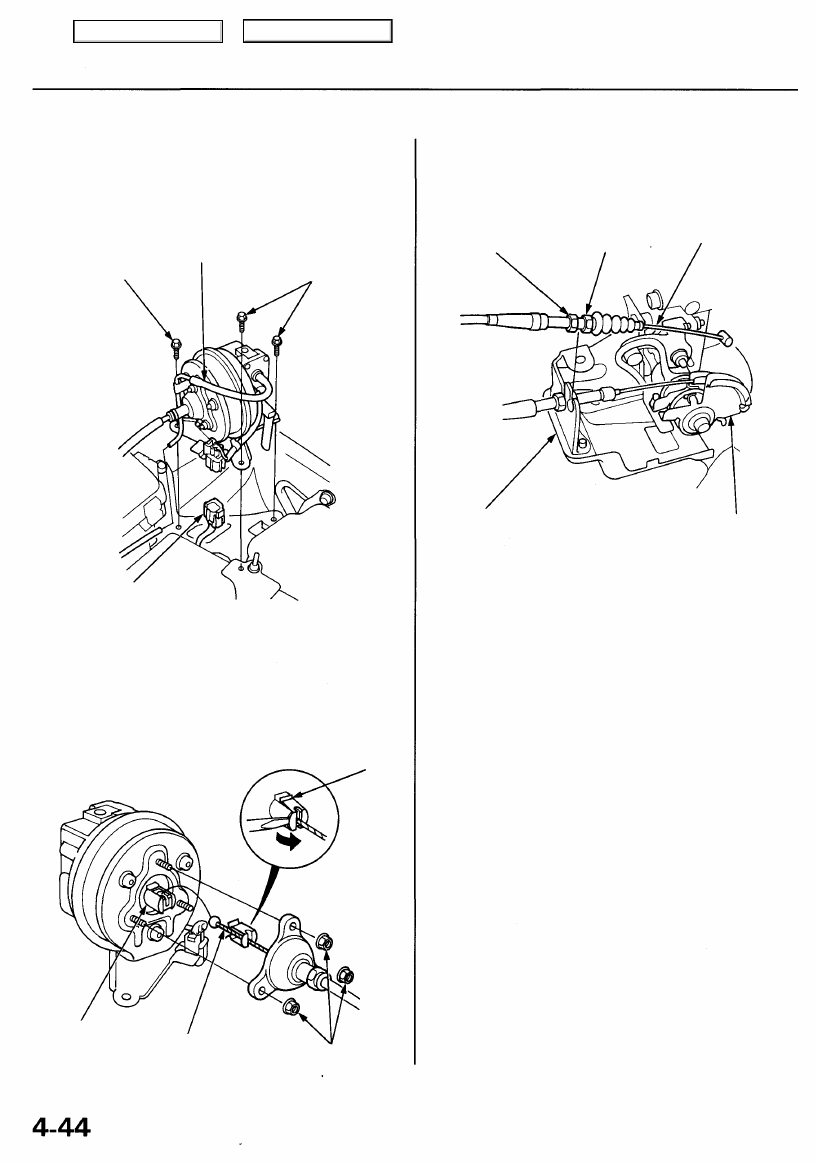
Actuator/Cable Replacement
1. Disconnect the 4P connector from the actuator.
2. Remove the three mounting bolts and the actuator
with the bracket.
4P CONNECTOR
3. Remove the vacuum hose.
4. Remove the three nuts.
5. Disconnect the actuator cable from the actuator rod
by releasing the clip from the rod with a screwdriver
as shown.
CLIP
ACTUATOR
ROD
ACTUATOR
CABLE
NUTS
6. Loosen the locknut, then disconnect the actuator
cable from the throttle linkage.
ADJUSTING
NUT
LOCKNUT
ACTUATOR
CABLE
CABLE
BRACKET
THROTTLE
LINKAGE
7. Install in the reverse order of removal, and adjust
free play at the throttle linkage after connecting the
actuator cable.
MOUNTING BOLTS
VACUUM HOSE
MOUNTING BOLT
Main Menu
Table of Contents
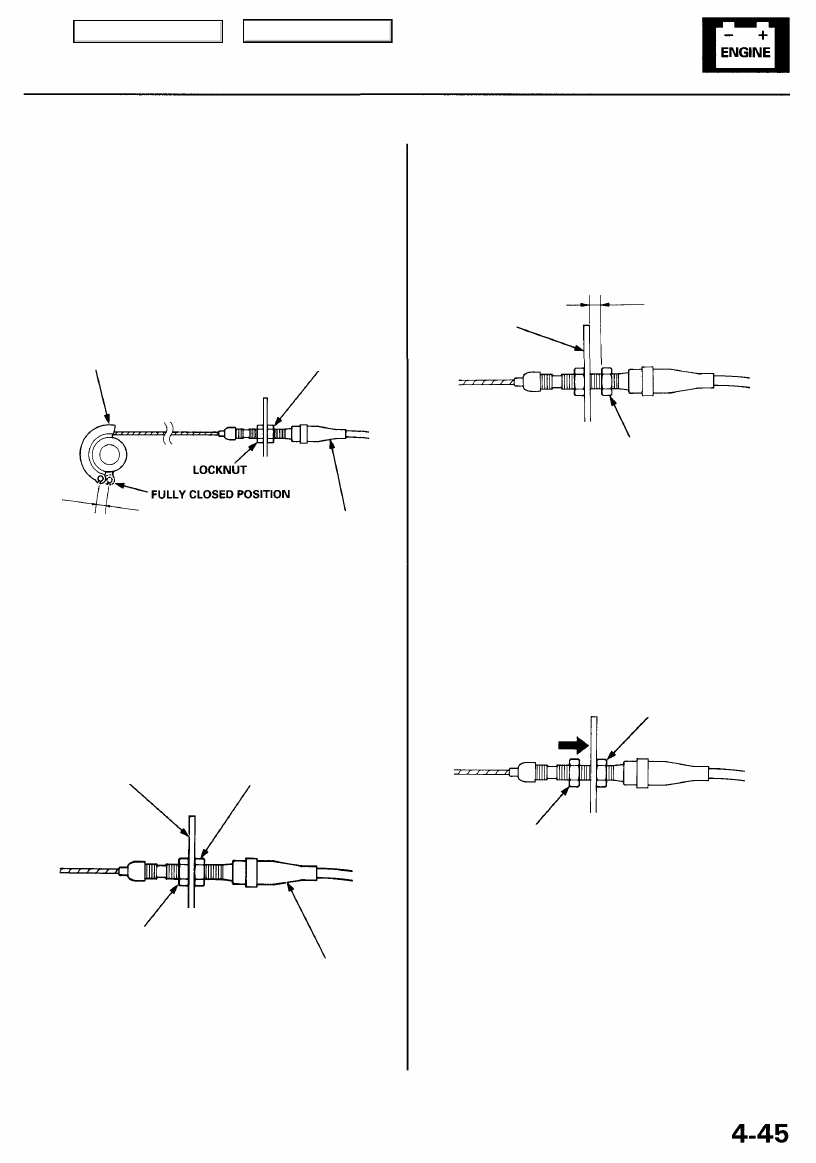
Actuator Cable Adjustment
1. Check that the actuator cable moves smoothly with
no binding or sticking.
2. Measure the amount of movement of the output
linkage until the engine speed starts to increase. At
first, the output linkage should be located at the
fully closed position. Free play should be 5 ± 0.5 mm
(0.20
±
0.02 in).
OUTPUT
LINKAGE
ADJUSTING
NUT
FREE PLAY: 5 ± 0.5 mm (0.20 ± 0.02 in)
ACTUATOR
CABLE
3. If the free play is not within specs, move the cable to
the point where the engine speed starts to increase,
and tighten the locknut and adjusting nut.
CABLE
BRACKET
ADJUSTING
NUT
LOCKNUT
ACTUATOR
CABLE
4.
Turn the adjusting nut until it is 5 ± 0.5 mm (0.20 ±
0.02 in) away from the bracket.
5
±
0.5 mm (0.20 ± 0.02 in)
CABLE
BRACKET
ADJUSTING
NUT
5.
Pull the cable so that the adjusting nut touches the
bracket, and tighten the locknut.
ADJUSTING
NUT
LOCKNUT
Main Menu
Table of Contents
Нет комментариевНе стесняйтесь поделиться с нами вашим ценным мнением.
Текст