Acura TL (1995-1998) body repair. Manual — part 15
Roof Panel
Replacement (cont'd)
Level and finish burrs on the welded flanges with a
disc sander.
To prevent eye injury, wear goggles
or safety glasses whenever sanding, cutting or
grinding.
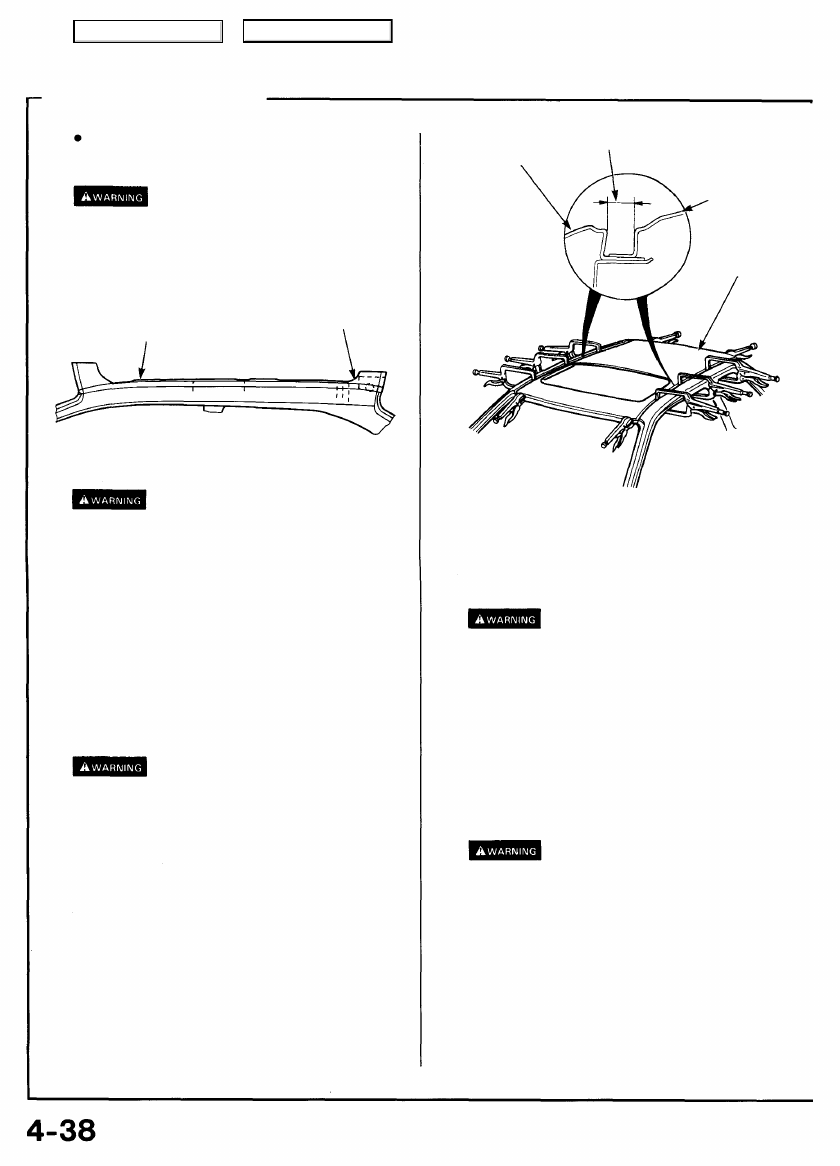
• Even out the roof side rail welded flange with a
hammer and dolly for a close fit with the roof panel
welded flange.
REAR INNER PANEL
ROOF SIDE RAIL
5. Apply paint to the underside of the new roof panel.
• See Paint Repair section.
• Ventilate when spraying paint. Most paint
contains substances that are harmful if inhaled
or swallowed. Read the paint label before
opening the paint container.
• Avoid contact with skin. Wear an approved
respirator, gloves, eye protection and appropriate
clothing when painting.
• Paint is flammable. Store it in a safe place, and
keep it away from sparks, flames or cigarettes.
6. Set the new roof panel.
• Sand off the undercoat from both sides of the flange
sections to be spot welded to expose the steel plate.
To prevent eye injury, wear goggles
or safety glasses whenever sanding, cutting or
grinding.
• Clamp the roof panel with vice-grips.
NOTE:
• Check that the flange surfaces fit closely. Be careful
not to twist or deform the roof panel.
• Check the width of the groove for the roof moldings
on both sides.
• Apply the spot sealer to the welding surface when
spot welding.
14 mm (0.6 in)
OUTER PANEL
ROOF PANEL
NEW ROOF
PANEL
• Check the body dimension (see
).
7. Tack weld the new roof panel.
To prevent eye injury and burns
when welding, wear an approved welding helmet,
gloves and safety shoes.
• Spot weld the clamped sections to temporarily install
the roof panel.
• Set the windshield and rear window, and check the
roof panel for proper installation.
• Install the roof molding and check the width of the
groove.
8. Perform the main welding.
To prevent eye injury and burns
when welding, wear an approved welding helmet,
gloves and safety shoes.
• Spot weld the roof rails at the front and rear.
• Spot weld the roof arch.
• Make 20% to 30% more spot welds than there were
holes drilled.
Main Menu
Table of Contents
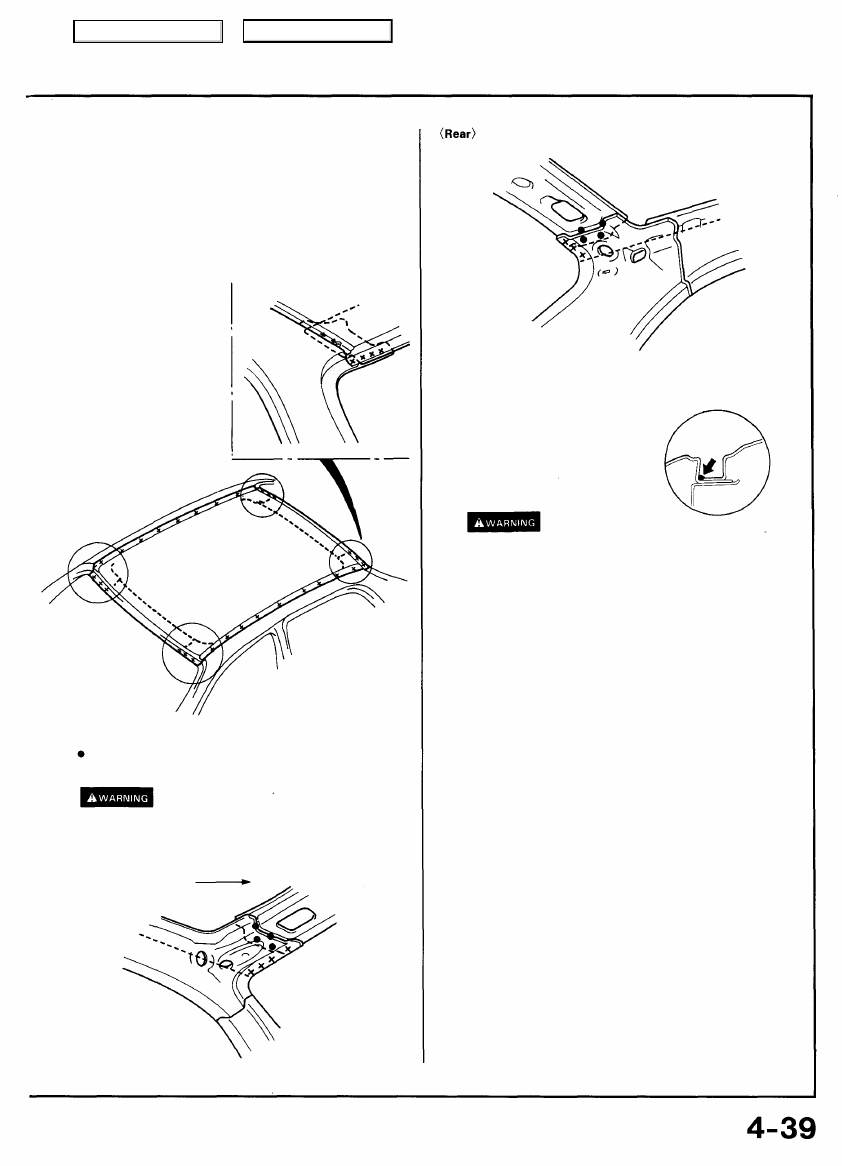
• Smooth the spot weld areas under the windshield and
rear window with a hammer and dolly.
NOTE: After welding the pillars, grind and finish the
welded areas flat and blend them into the roof panel.
Weld the roof rail from the inside by MIG welding as
shown.
To prevent eye injury and burns
when welding, wear an approved welding helmet,
gloves and safety shoes.
<Front>
Forward
9. Apply and level the sealer to the welded areas.
10. Apply the paint.
See Paint Repair section.
• Ventilate when spraying paint. Most paint
contains substances that are harmful if inhaled
or swallowed. Read the paint label before
opening the paint container.
• Avoid contact with skin. Wear an approved
respirator, gloves, eye protection and appropriate
clothing when painting.
• Paint is flammable. Store it in a safe place, and
keep it away from sparks, flames or cigarettes.
11. Apply an anti-rust agent to the inside of the roof side rail.
12. Install the related parts.
Install in the reverse order of removal.
13. Check and clean.
• Check the windshield and rear window for water
leaks.
• Make sure the moonroof operates smoothly.
• Clean the passenger compartment thoroughly.
Main Menu
Table of Contents
Rear Side Outer Panel
Description
The rear side outer panel is a conspicuous part of the vehicle. It is especially important for body line continuing from the door.
Therefore, pay particular attention to it when conducting work. This part also is next to the trunk lid, door and rear window and other
parts and must be aligned with them.
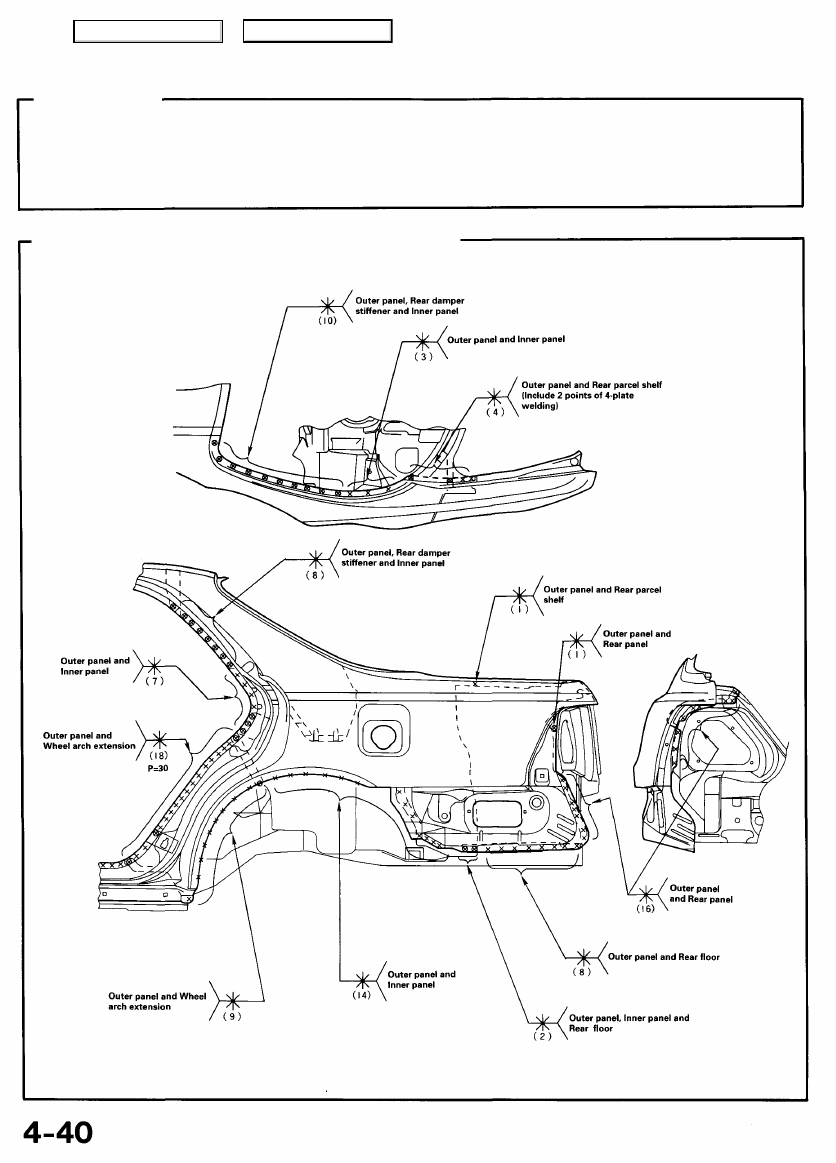
Mass Production Body Welding Diagram
Main Menu
Table of Contents
Replacement
1. Remove the related parts.
• Rear bumper
• Rear window
• Taillight
• Rear pillar trim panel
• Trunk side panel
• Rear seat
• Rear seat belt
• Fuel fill pipe (left side only)
Do not smoke while working near
the fuel system. Keep open flame away from the fuel
system. If necessary, remove the fuel tank and/or
lines before welding nearby. Drain fuel into an
approved container.
2. Pull out and straighten the damaged area.
NOTE: Carefully check the inner pillar and trunk gutter
for position and damage. Pull out the inner panel by
cutting the outer if necessary.
• Jack-up the body and place safety stands at the four
designated support points.
• Pull out the damaged rear side outer panel with the
frame straightener, then pull out and straighten the
center pillar inner panel and rear wheelhouse.
NOTE: Be careful not to pull out more than necessary.
• After pulling, check the inner pillar and trunk gutter
position using the body dimensional drawings (see
).
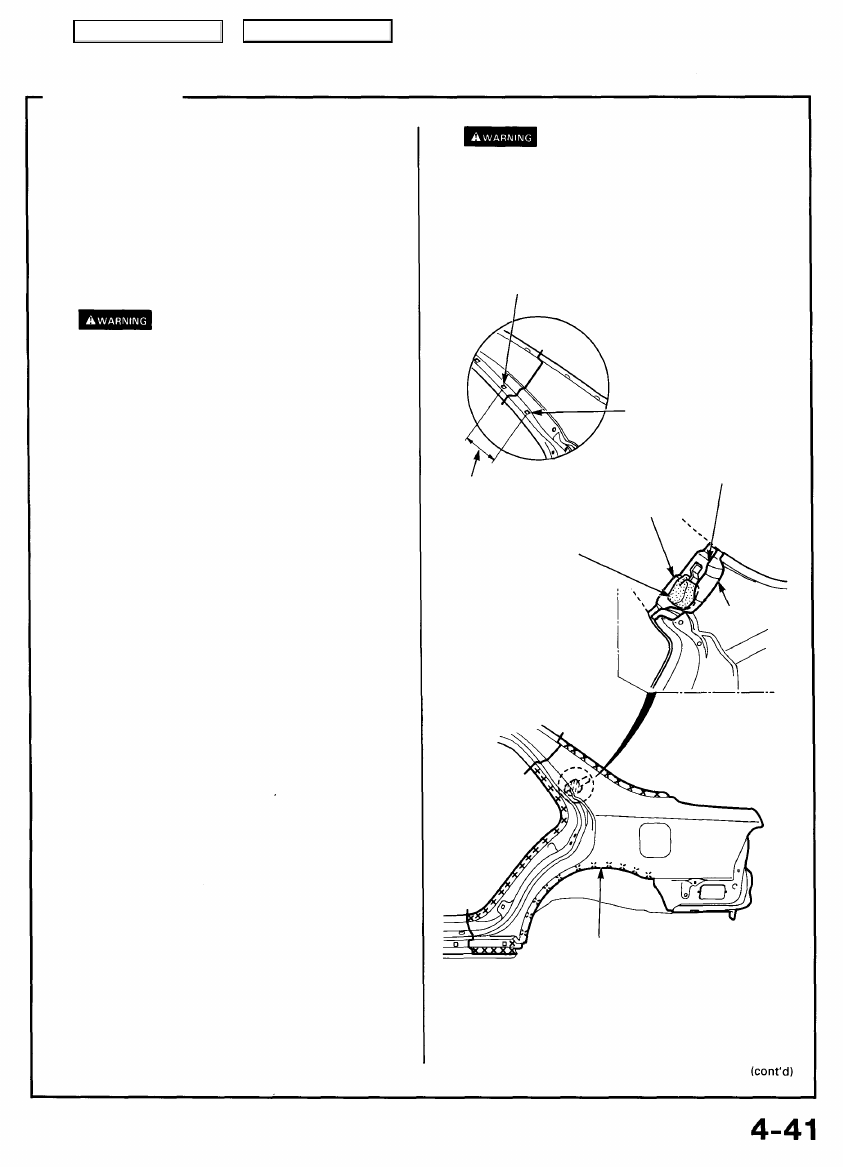
3. Cut and pry off the rear side outer panel.
• Cut at the rear pillar and side sill with a handsaw.
• Cut the panel from the body with a chisel leaving the
weld flange at the inner panel intact.
NOTE: Do not cut or damage the inner panel and rear
damper stiffener.
• Cut at the side sill or wheel arch according to the
extent of the damage.
• Center punch around the spot weld imprints on the
remaining flange.
• Drill out the spot welds with the spot cutter.
• Pry off the welded flange sections using a chisel.
Do not smoke while working near
the fuel system. Keep open flame away from the fuel
system. If necessary, remove the fuel tank and/or
lines before welding nearby. Drain fuel into an
approved container.
PLASTIC GROMMET
MOUNTING HOLE
PLASTIC GROMMET
MOUNTING HOLE
REAR DAMPER
STIFFENER
Cut area.
INNER
PANEL
REAR DAMPER
SEPARATOR
OUTER PANEL
NOTE: Do not cut or damage the rear damper stiffener
and rear damper separator.
OUTER PANEL
Main Menu
Table of Contents
Нет комментариевНе стесняйтесь поделиться с нами вашим ценным мнением.
Текст