Great Wall Hover. Manual — part 5

Exhaust system
N.m Specific torque
Used component which can not be used any more.
end washer assembly
exhaust pipe outlet nut
front section of exhaust pipe
hexagon flange nut
cleaner cushion
assembly 1
fastening bolt of hoop
cleaner heat insulation cover clip
cleaner discharge pipe
catalytic converter
three-hole rubber block
cleaner cushion assembly 2
hexagon flange nut
muffler assembly
muffler port decoration cover
hexagon flange nut
rear section assembly
of exhaust pipe
wahser assembly
100
9
63
5
23
m u f f l e r d a m p i n g
ruber block assembly
Warning : All components of the exhaust air system should be
disassembled 30 minutes after shut down to avoid the human
injury caused by hot parts.
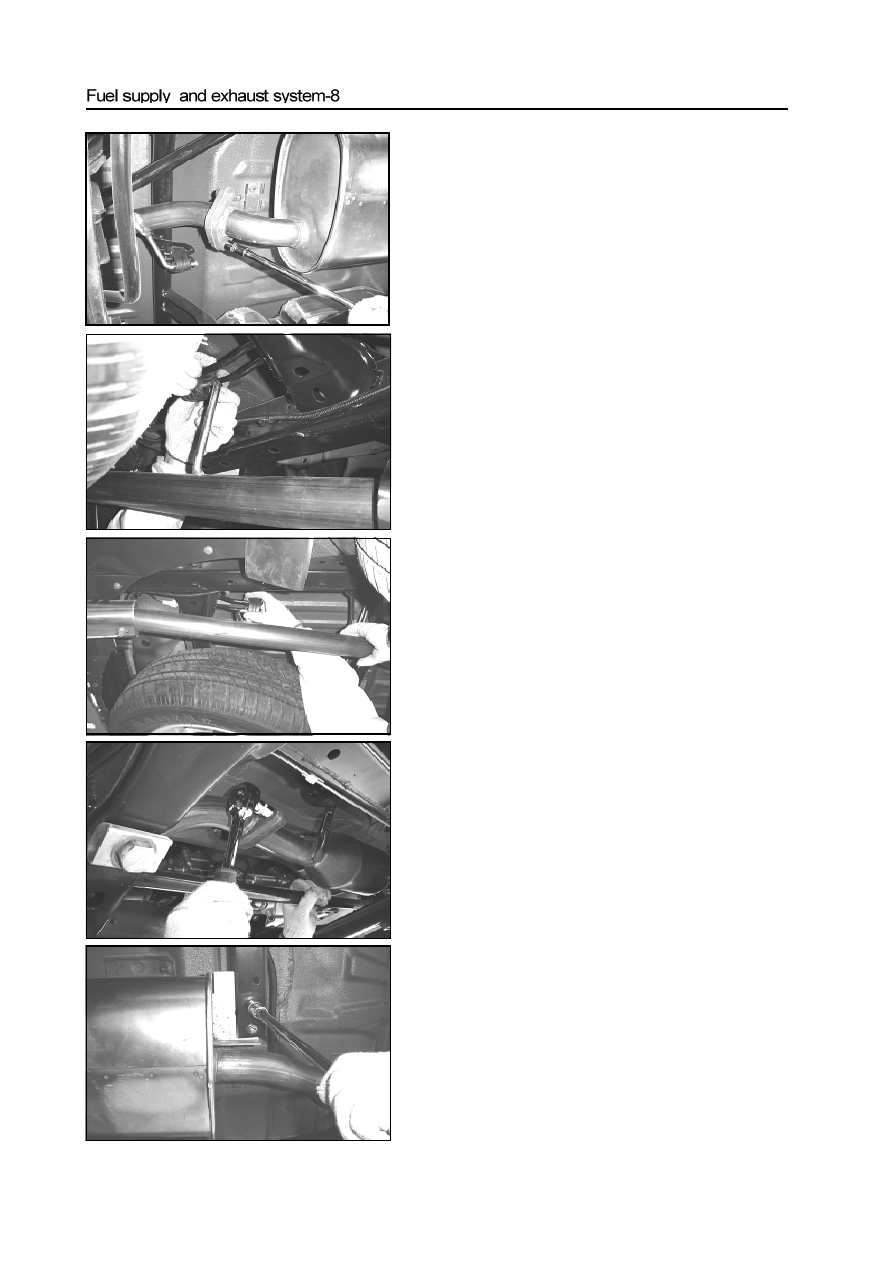
Removal of exhaust pipe assembly
Removal of exhaust tail tube
1. Firstly, use the M15 box spanner, ratchet wrench and extension
bar to remove the connecting nut of the rear flange of muffler
assembly and rear section flange of exhaust pipe, take out
the seal bush between the flanges.
2. Remove the three-hole rubber block on the back of the rear
section of exhaust pipe.
3. Remove the three-hole rubber block on the front of the rear
section of exhaust pipe.
Caution: The bush between the rear flange of muffler and
rear section flange mainly has the function of sealing; it
may cause the great pressure and distortion after one
installation, the sealing effect is worse, and the bush cannot
be used repeatedly.
Removal of the muffler
1. If necessary, dismantle the back section of exhaust pipe
according to the method of dismantling the exhaust pipe, if
not necessary, only remove the coupling nut between the
muffler and back flange of the exhaust pipe;
2. Use the M15 sleeve, ratchet wrench or open-end (box) span-
ner to remove the coupling nut between the front flange of
muffler assembly and the rear flange of the cleaner; when
implementing this operation, there must be somebody to pull
the muffler to prevent it from falling only to cause damage;
brick of the muffler;
3. Use the M13 sleeve, ratchet wrench to loosen the four nuts
fixing the shock absorption rubber
4. Then the muffler assembly can be removed.
Caution: The cleaner cushion assembly 2 between the
cleaner and the front section of the exhaust pipe mainly plays
a role of sealing; there may be great pressure and distortion
after one installation and the sealing effect is worse, this
bush cannot be used repeatedly.
Removal of cleaner
1
. If necessary, remove the rear section of the exhaust pipe and
the muffler according to the dismantling methods of the
exhaust pipe and muffler; if not necessary, just loosen the two
nuts fixing the shock absorption rubber brick of the muffler;
2. Remove the coupling nut between the front flange and the rear
flange of the front section of exhaust pipe;
3. If the muffler has been removed, the cleaner can be taken out
directly; if the muffler is not removed, push the cleaner
backwards tenderly, keep certain space between the cleaner
and the muffler to make the welding bolt of the cleaner to
quit;
4. At this time, the cleaner can be removed.
Caution: The cleaner cushion assembly 1 between the cleaner
and the front section of the exhaust pipe mainly plays a role of
sealing there may be great pressure and distortion after one
installation, and the sealing effect is worse, this bush cannot
be used repeatedly.
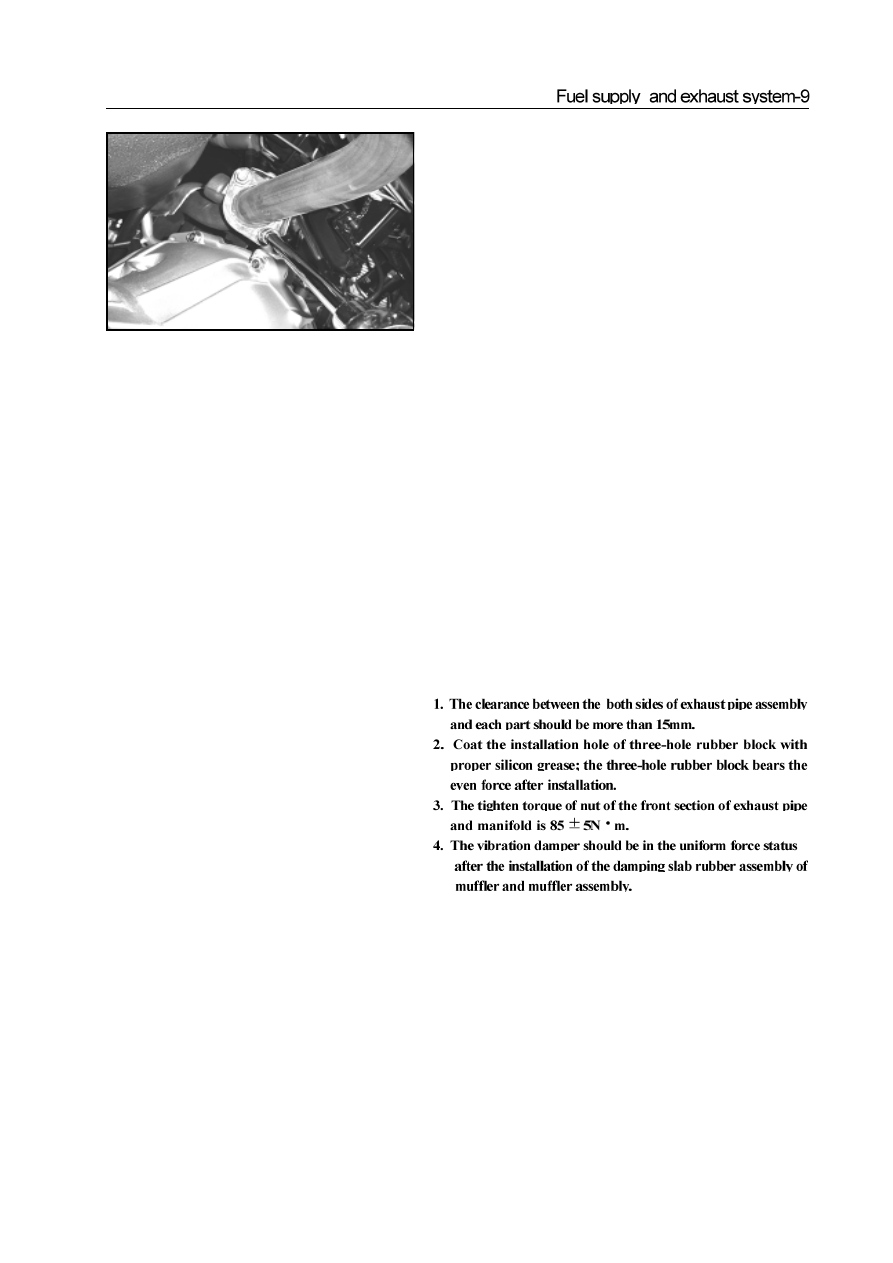
Disassembly of front section of exhaust pipe
1. Remove the cleaner according to method of removal of cleaner;
2. Use the M18 box spanner, heavy-duty extension bar, ratchet
wrench to loose and remove the nut of exhaust pipe outlet,
then takes off the front section of exhaust pipe;
Caution: The two flat flanges use the interface cushion to
ensure the sealing, which is stainless steel punching unit,
and can be used for only once.
Installation of exhaust pipe assembly
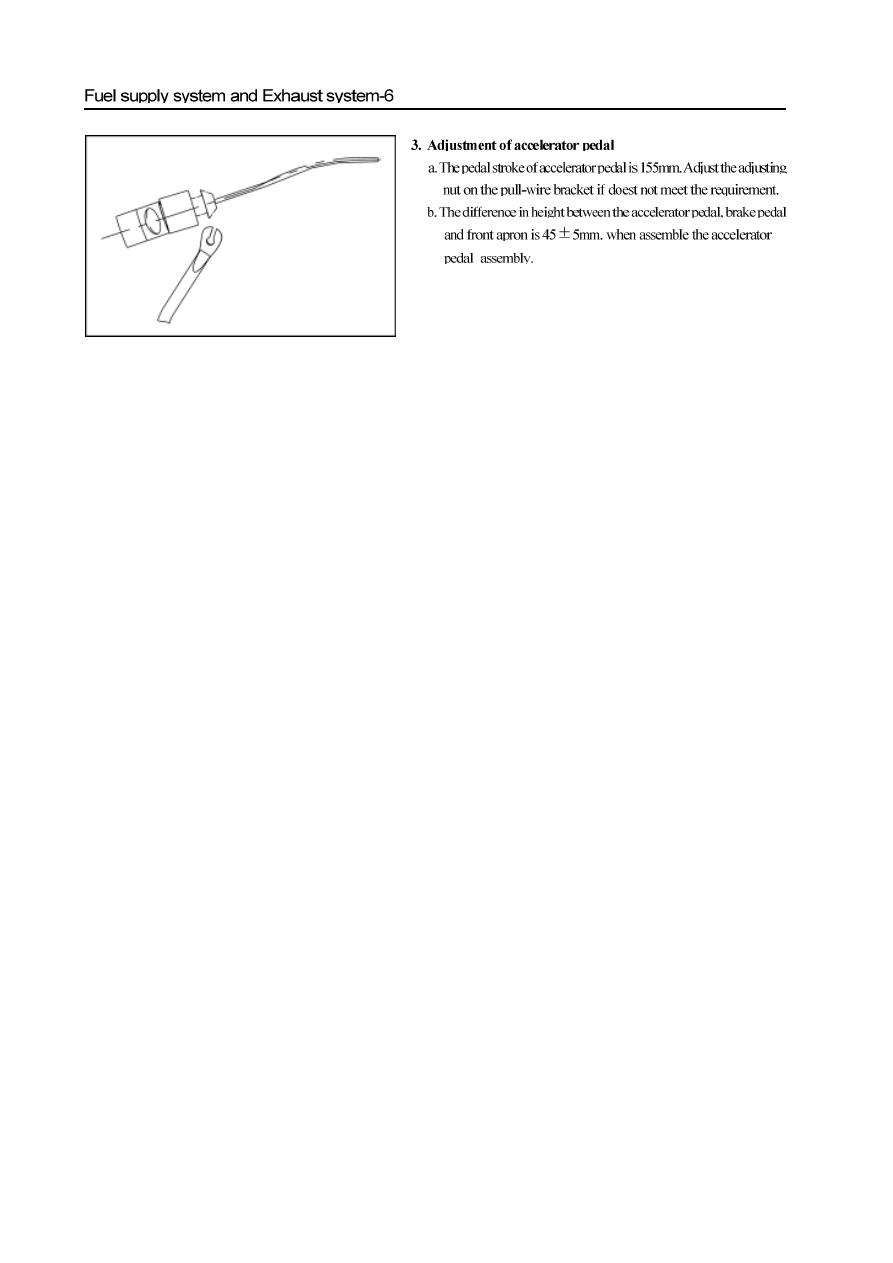
Нет комментариевНе стесняйтесь поделиться с нами вашим ценным мнением.
Текст