Great Wall Hover. Manual — part 6
Clutch-1
Chapter 3
Clutch
Troubleshooting. . . . . . . . . . . . . . . . . . 2
Inspection and adjustment of clutch pedal. . . . . . . . ..3
Bleed air of clutch. . . . . . . . . . . . . . . . . .3
Disassembly of clutch master cylinder and clutch cylinder . . ..5
Cautions for installation of clutch operation device. . . . . .5
Disassembly of clutch assembly. . . . . . . . . . . . .6
Inspection of clutch component. . . . . . . . . . . . .7
Installation of clutch. . . . . . . . . . . . . . . . ..9
Clutch-2
Troubleshooting
failure cause inspection
content
Shift difficulty or can not shift
Large free stroke of clutch pedal clutch Pipe
has air
Failure of clutch cylinder
Failure of clutch master cylinder
The installation position of clutch disc is not
in position; large deviation; oil on the friction
lining or broken
The clutch disc is dirty or with foreign
material
Failure of clutch cover
Adjust the free stroke of pedal
Discharge the air in clutch system
Replace
replace
Inspect the clutch disc; replace
Repair if necessary
Replace
Disengagement of transmission
The clutch guide bearing is worn.
Replace the guide bearing
Slide of clutch
insufficient free stroke of clutch pedal
oil on the clutch disc friction lining or broken
failure of press disc
separation rocker arm assembly is blocked
Adjust the free stroke of pedal
Inspect the clutch disc and replace it
Replace the clutch cover
Check the separation rocker arm assembly
clutch clamping
stagnation/vibration
oil on the clutch disc friction lining or broken
failure of press disc clutch membrane spring
is bend
loose of engine bracket
Inspect the clutch disc and replace
Replace the clutch cover
Correct the clutch membrane
Repair if necessary
Soft of clutch pedal
clutch pipe has air
failure of clutch cylinder
failure of clutch master cylinder
Discharge the air in clutch
replace
replace
Loud noise of clutch
Component in clutch housing is loose
Throw-out bearing is worn or dirty
guide bearing is worn
separation rocker arm assembly or pull-rod is
blocked
Repair if necessary
replace
replace
Repair if necessary
Clutch-3
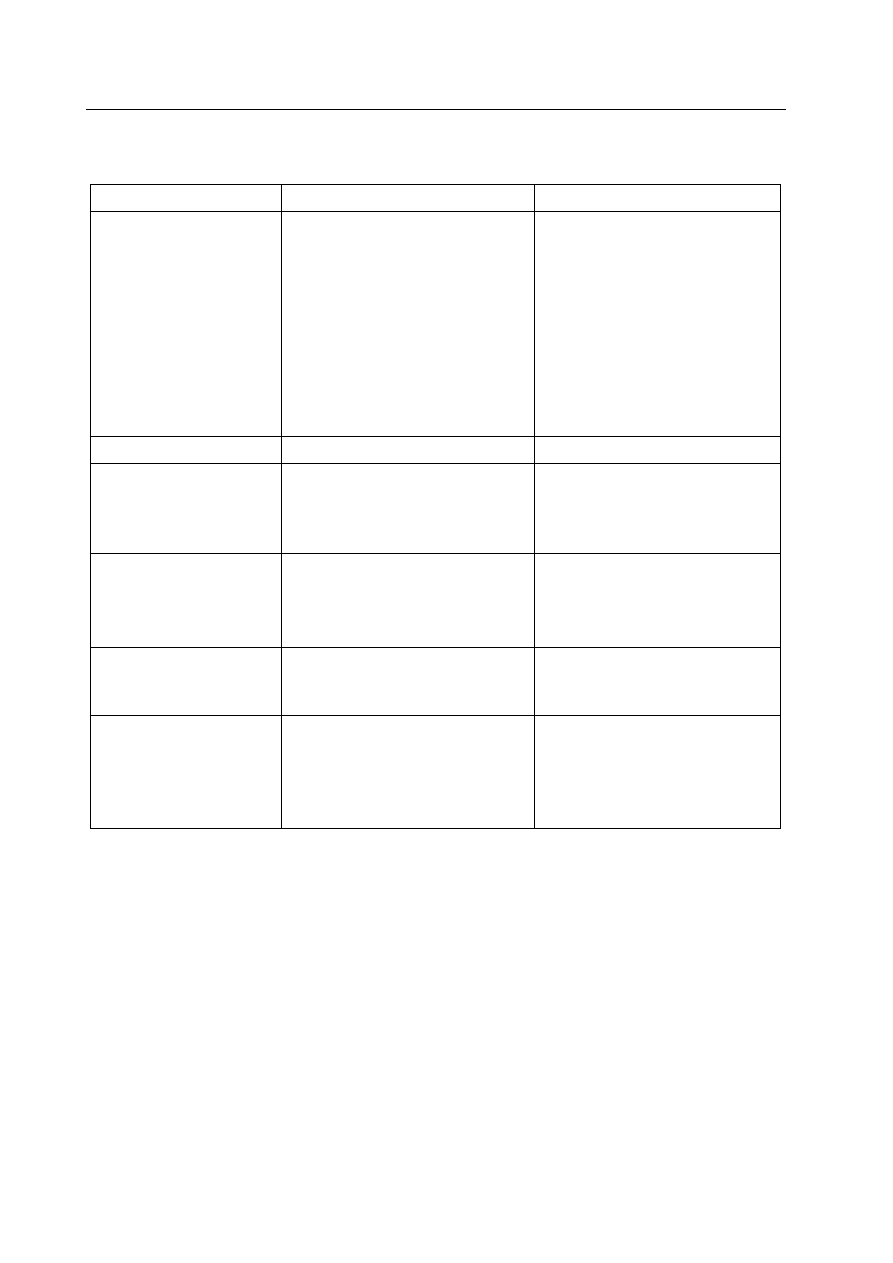
Inspection and adjustment of clutch pedal
1. Check the correctness of pedal height and stroke of push rod
The pedal height starting from the meter: LHD 157.5mm
The push pole travel at the top of the pedal: RHD 151.0mm
If not correct, adjust the pedal height and push rod stroke.
2. Adjust the pedal height and stroke of push bar if necessary
a. Screw off the locknut, rotate the locking bolt until to the correct
height.
Screw on the locknut.
b. Screw off the locknut, rotate the push rod until the stroke of push
rod is correct.
Screw on the locknut.
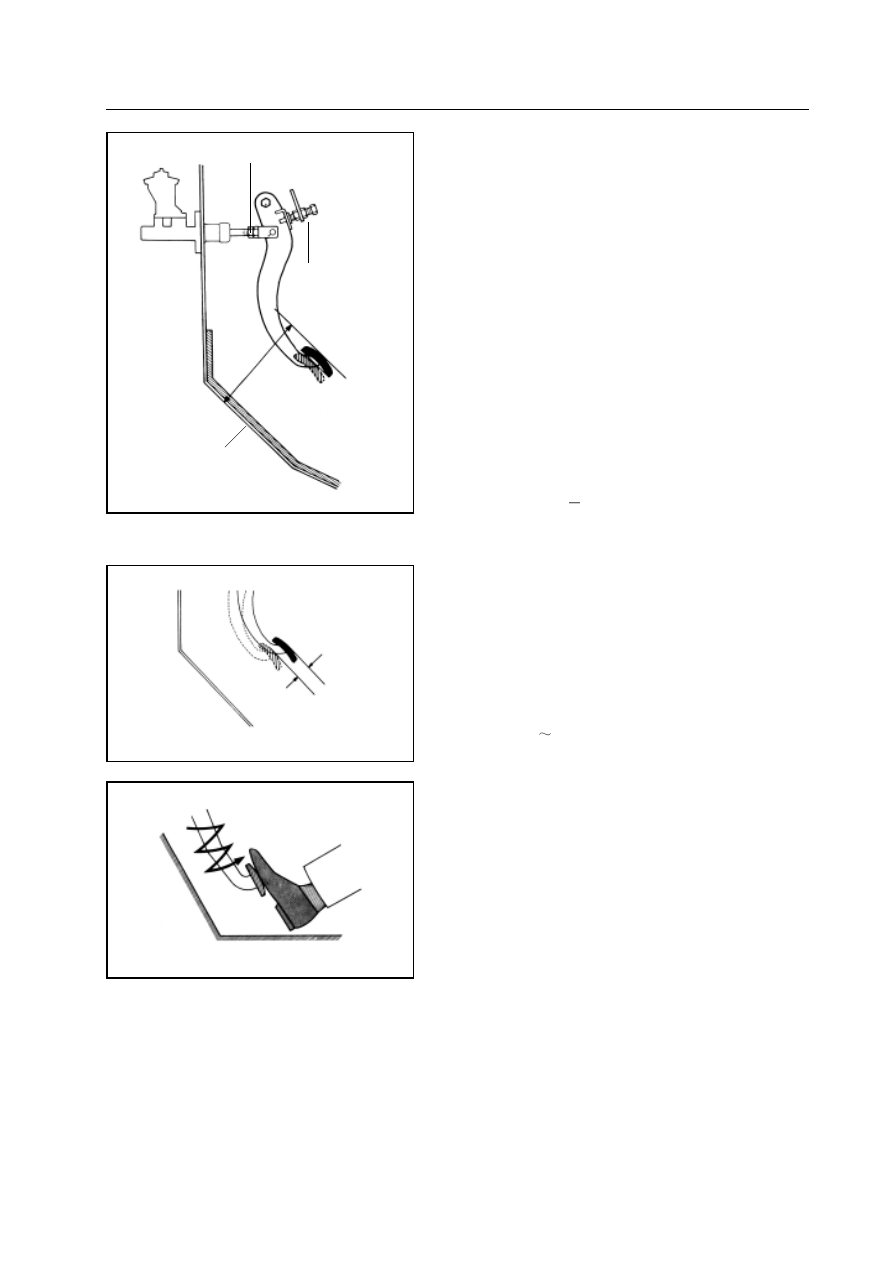
3. Check the correctness of free stroke of pedal
Step on the pedal lightly until fell the clutch start to generate the
resistance.
Free stroke of pedal: 5
15mm
4. Adjust the free stroke of pedal if necessary
a. Screw off the locknut, rotate the push rod until the free stroke is
correct.
b. Tighten the lock nut
c. Check the height of the pedal after adjusts the free stroke of pedal.
d. On the condition that ensure the free stroke of clutch pedal assembly:
The height difference between the brake pedal, clutch pedal and the
front apron is 0
8mm.
Air discharge of clutch
Remarks: It should discharge the air if there is residual air in the
clutch system.
Caution: Do not leave the clutch liquid on the painted surface,
otherwise it should be washed off immediately.
Fill the brake fluid in the clutch storage tank
Check the liquid tank frequently. Filling if necessary.
the adjustment
point of push rod
stroke
t h e a d j u s t m e n t
point of pedal height
pedal height
front wall
free stroke
push rod stroke
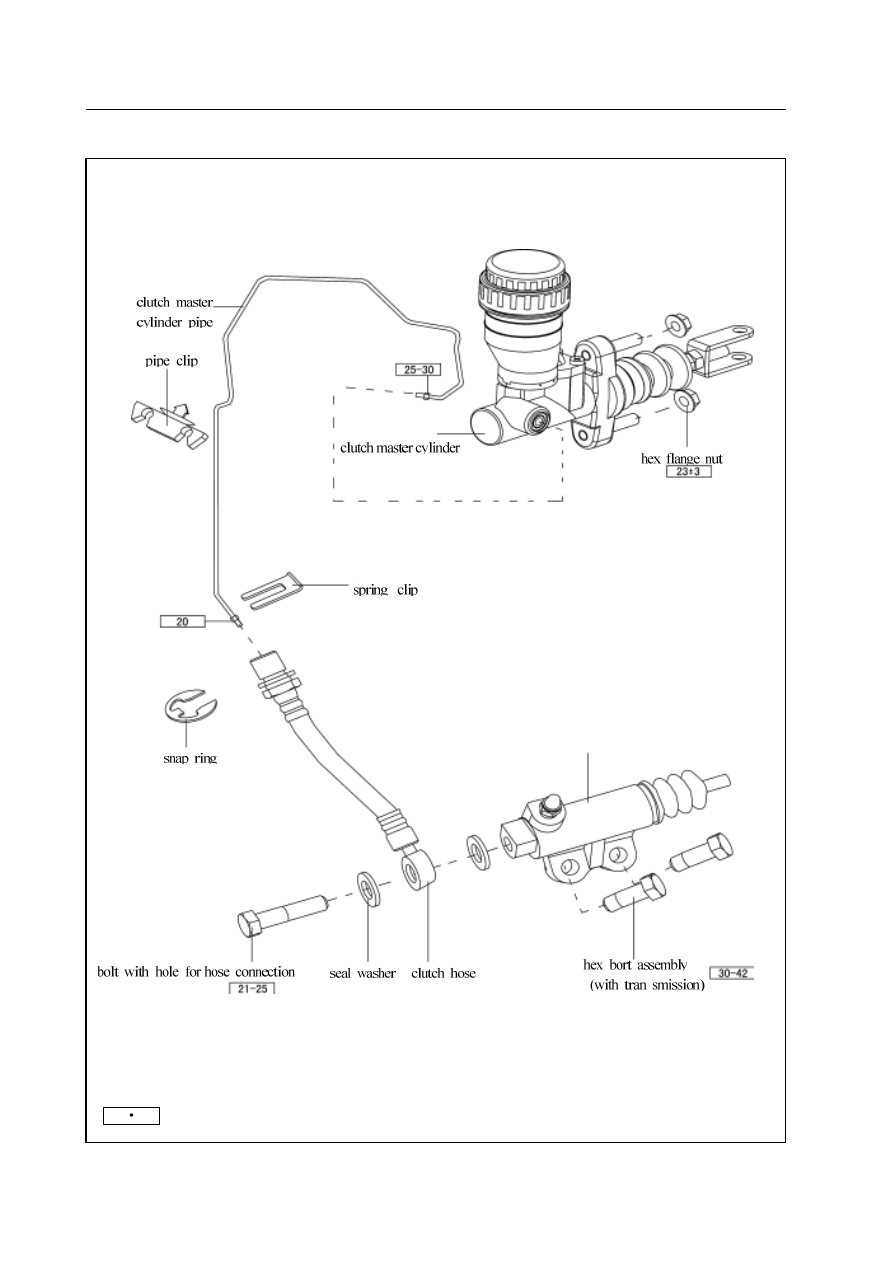
Clutch-4
Cluch control mechanism
clutch master cylinder
N
m: specified torque
Нет комментариевНе стесняйтесь поделиться с нами вашим ценным мнением.
Текст