Defender 300Tdi (1996+). Manual — part 85
76
CHASSIS AND BODY
24
REPAIR
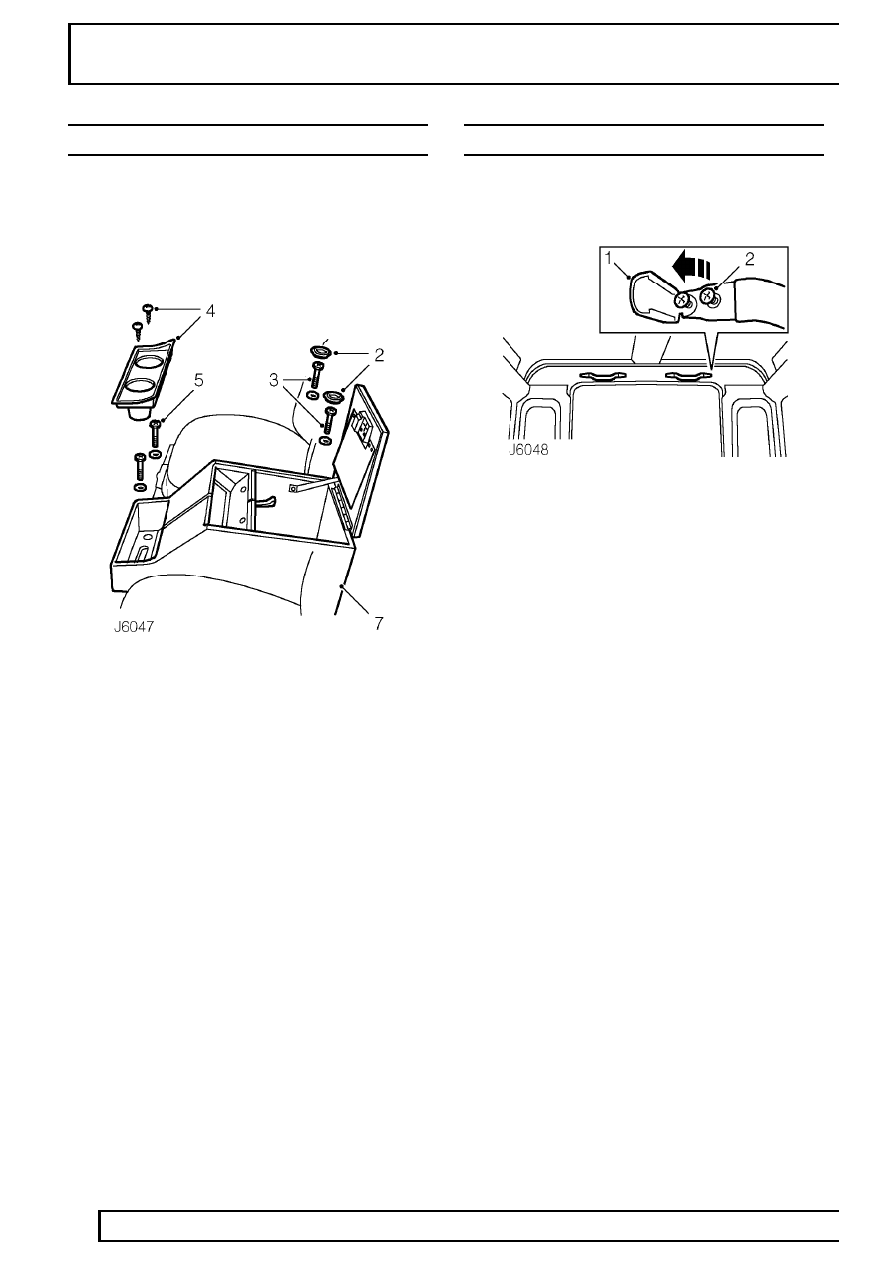
CUBBY BOX - 90/110 STATION WAGON
Service repair no - 76.25.04
Remove
1. Remove radio/cassette player, if fitted.
2. Open cubby box lid and remove 2 caps
concealing fixing bolts.
3. Remove fixing bolts and washers.
4. Remove 2 screws and lift cup holder from cubby
box.
5. Unscrew 2 bolts securing front of cubby box to
floor mounting.
6. Lift cubby box and, if applicable, release
radio/cassette player leads.
7. If fitted, disconnect multi-plug from EGR control
unit, located on base of cubby box.
8. Remove cubby box.
Refit
9. Position cubby box to mounting and, if
applicable, insert radio/ cassette player leads.
10. Secure front of cubby box to floor and fit cup
holder.
11. Open cubby box lid, secure in position, and fit
bolt caps.
12. Fit radio/cassette player, if fitted.
REAR GRAB HANDLE - 90/110 STATION WAGON
Service repair no - 76.58.35
Remove
1. Carefully prise top and bottom edges of finisher
caps from grab handle and then hinge outwards
to gain access to fixing screws.
2. Remove 4 fixing screws and detach grab handle
from rear end trim panel.
Refit
3. Position grab handle on rear end trim panel and
secure with 4 fixing screws.
4. Press finisher caps over screws.
CHASSIS AND BODY
25
REPAIR
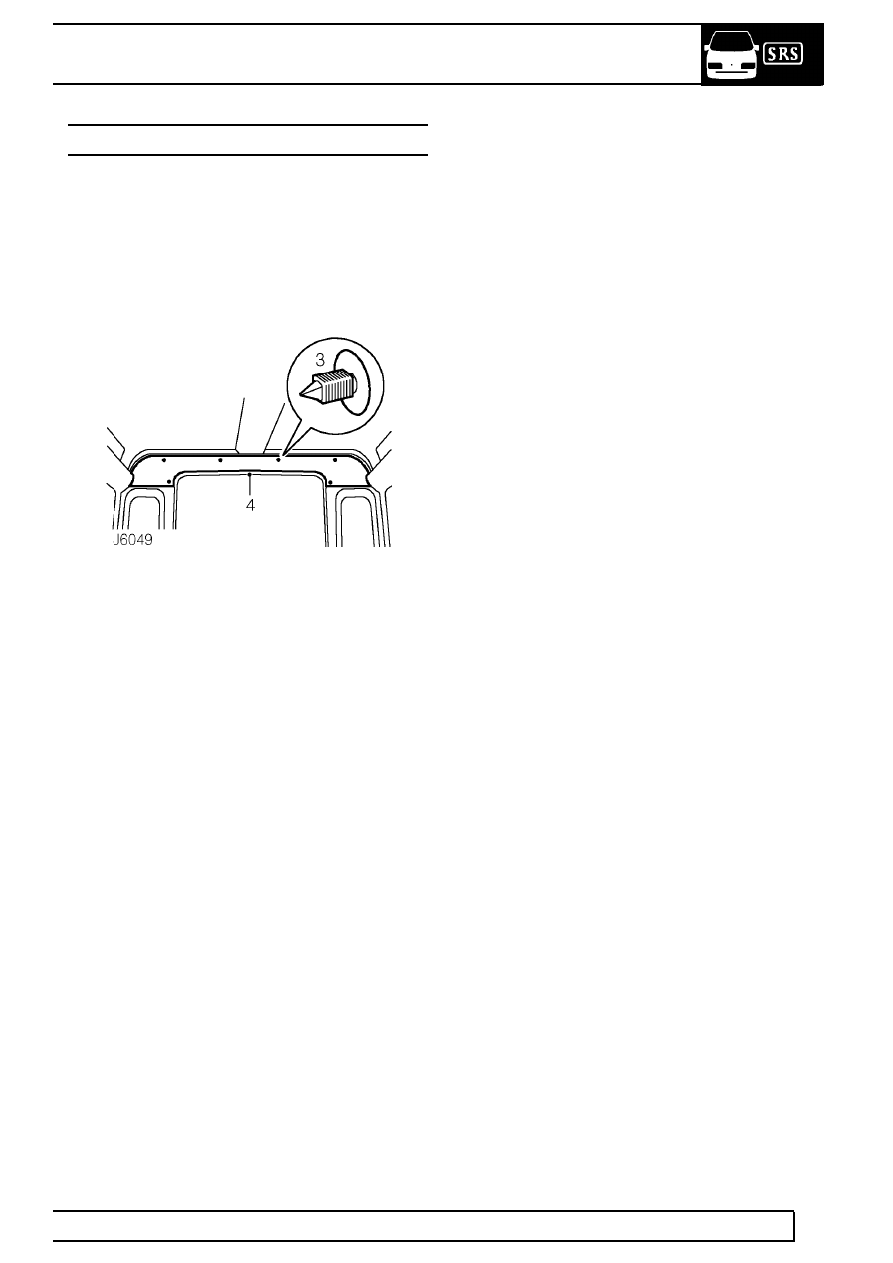
REAR END LINING - 90/110 STATION WAGON
Service repair no - 76.64.12
Remove
1. Remove rear end trim panel
See Rear end
trim panel .
2. Remove rear grab handles
See Rear grab
handle .
3. Carefully prise out 6 trim studs securing rear end
lining to mounting brackets.
4. Remove rear end lining.
Refit
5. Position rear end lining on mounting brackets
and secure with 6 trim studs.
6. Fit rear grab handles
See rear grab handle .
7. Fit rear end trim panel
See rear end trim .
76
CHASSIS AND BODY
26
REPAIR
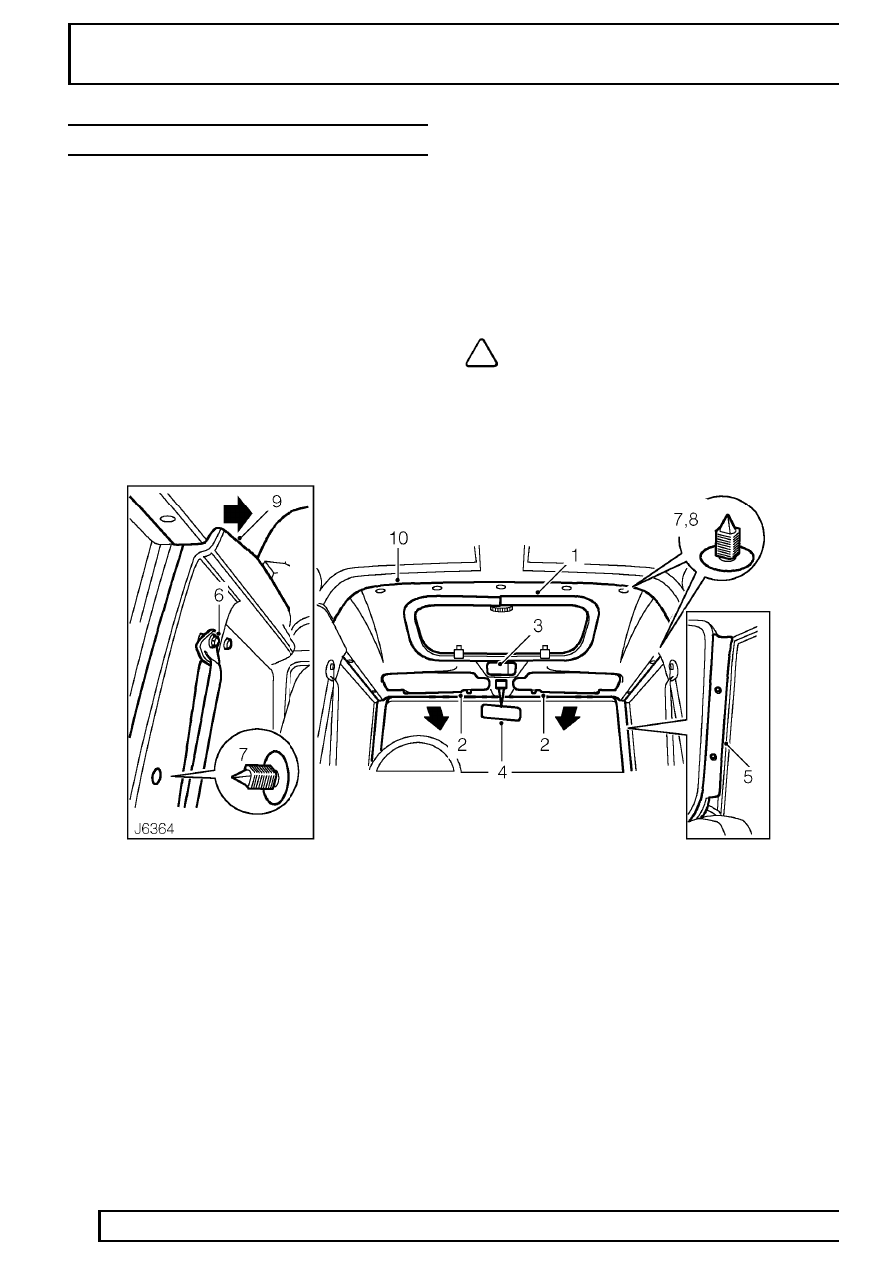
FRONT HEADLINING - 90 STATION WAGON
Service repair no - 76.64.10
Remove
1. Remove sun roof headlining finisher.
2. Remove sun visors
See Sun visors .
3. Remove interior lamp
See ELECTRICAL,
Repair, Interior lamp .
4. Remove interior mirror and mounting plate
See
Interior mirror .
5. Remove 4 retaining screws and detach both ’A’
post trims.
6. Remove caps and unscrew front seat belt fixing
bolts from ’B’ posts.
7. Carefully prise side trim panel cap fastener from
’B’ posts.
8. Carefully prise 2 cap fasteners, from both sides,
securing headlining to body at door aperture.
9. Carefully prise out 5 cap fasteners securing front
and rear headlinings to roof.
10. From both sides, pull side trim panel inwards
enough to release rear corners of front
headlining.
11. Lower headlining and remove from vehicle.
NOTE: Take care not to bend the
headlining on removal and refitting.
Refit
12. With assistance, raise headlining to roof.
13. Carefully pull side trim panel inwards, on both
sides, and slide headlining behind trim panel.
14. Position front headlining into recess of rear
headlining and secure both to roof mounting
brackets with 5 cap fasteners.
15. Secure both sides of front headlining to body at
door apertures with cap fasteners.
16. Fit side cap fasteners at ’B’ posts.
17. Secure seat belts to ’B’ posts and tighten bolts to
32 Nm (24 lbf/ft). Fit caps to bolts.
18. Fit ’A’ post trims.
19. Fit interior mirror
See Interior mirror .
20. Fit interior lamp
See ELECTRICAL, Repair,
Interior lamp .
21. Fit sun visors
See Sun visors .
22. Fit sun roof headlining finisher.
CHASSIS AND BODY
27
REPAIR
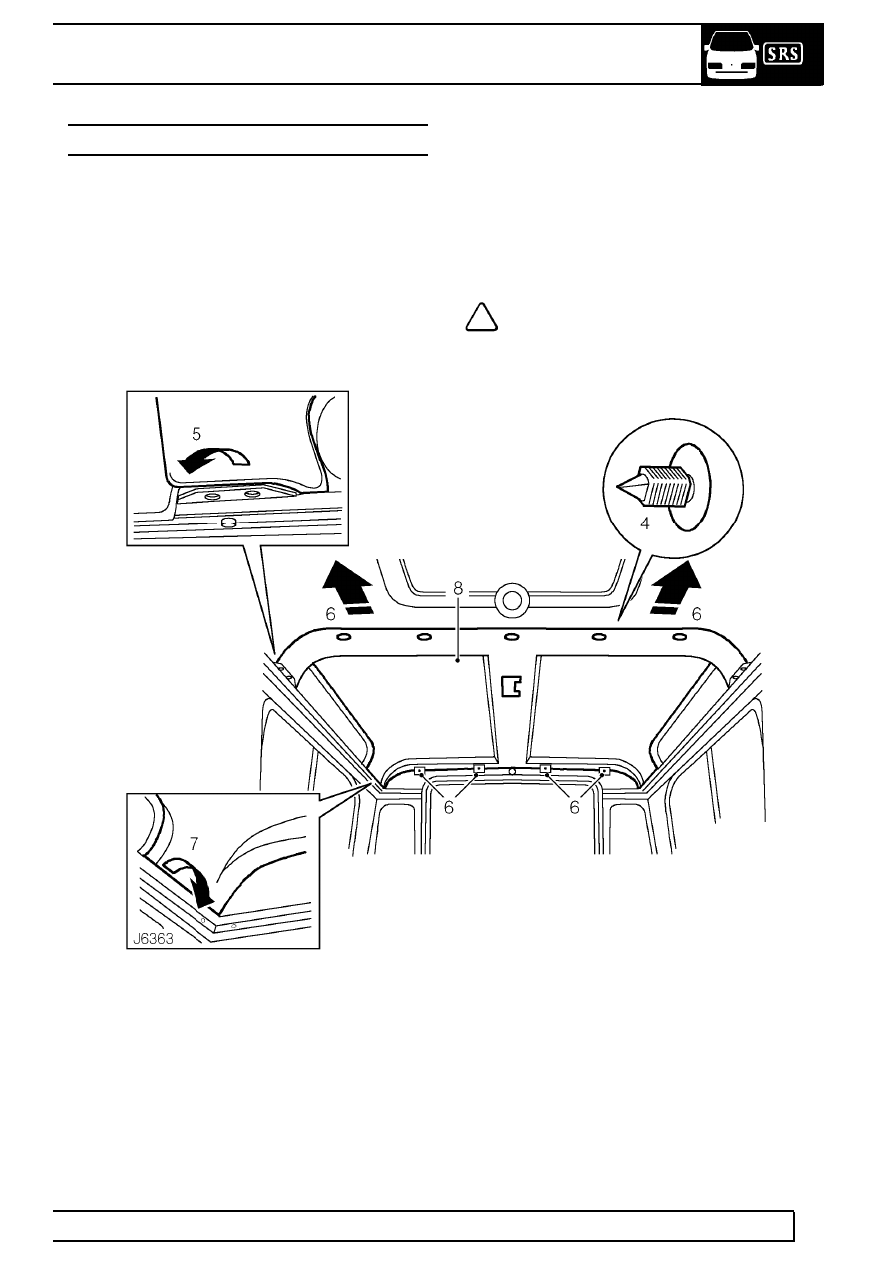
REAR HEADLINING - 90 STATION WAGON
Service repair no - 76.64.11
Remove
1. Remove side trim panels
See Side trim panel .
2. Remove rear end lining
See Rear end lining .
3. Remove rear interior lamp
See ELECTRICAL,
Repair, Interior lamp .
4. Carefully prise out 5 trim studs securing rear and
front headlining to roof mounting brackets.
5. Release front corners of headlining from cant
rail, on both sides.
6. Pull headlining forwards sufficiently to clear rear
end lining mounting brackets.
7. Release rear corners of headlining from cant rail,
on both sides.
8. Lower rear headlining from roof and remove
from vehicle.
NOTE: Take care not to bend headlining
on removal and refitting.
Refit
9. With assistance, position rear headlining to roof
and locate rear corners in cant rail.
10. Push headlining rearwards and position over
rear end lining mounting brackets.
11. Locate front corners of headlining in cant rail.
12. Position front edge of rear headlining over front
headlining and secure with trim studs.
13. Adjust rear headlining to achieve good fit at all
corners.
14. Fit rear interior lamp
See ELECTRICAL,
Repair, Interior lamp .
15. Fit rear end lining
See Rear end lining .
16. Fit side trim panels
See Side trim panel .
Нет комментариевНе стесняйтесь поделиться с нами вашим ценным мнением.
Текст