Defender 300Tdi (1996+). Manual — part 83
76
CHASSIS AND BODY
16
REPAIR
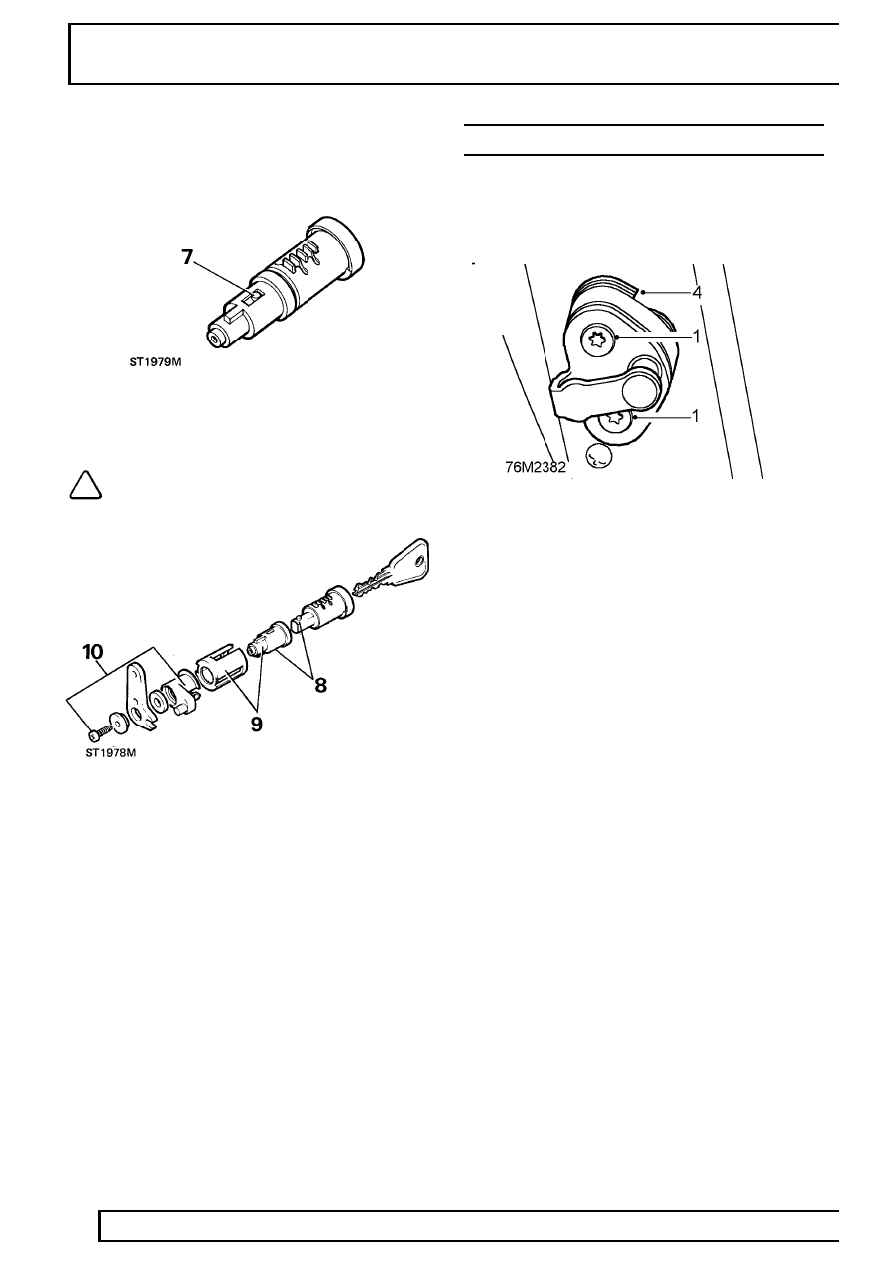
7. To remove barrel from plastic retaining sleeve,
depess spring loaded button and withdraw
sleeve.
Refit
NOTE: If a new barrel is being fitted, check
that number on barrel coincides with
number on accompanying key.
8. Push plastic retaining sleeve over barrel until
spring loaded peg locks it into position.
9. Fit barrel and plastic sleeve assembly to locking
sleeve and insert into exterior handle reversing
instruction 6.
10. Assemble lock lever components as illustrated
and from inside of door panel, fit them to barrel
assembly with single screw.
11. Connect operating rod to lock lever and secure
with spring clip, reversing instruction 4.
12. Fit mounting panel
See Mounting panel - front
door .
DOOR STRIKER - ADJUST
Service repair no - 76.37.23 - front door
Service repair no - 76.37.24 - rear door, 110/130
Adjust
1. Loosen 2 Torq bolts securing striker to body.
2. Adjust alignment of striker vertically and
horizontally, lightly tighten bolts.
3. Close door, check for correct latching with door
lock and for centering on striker.
4. Add or remove packing shims as necessary
behind striker and fully tighten bolts.
5. Carry out further adjustment as necessary. If full
adjustment is not achieved carry out the
following:
6. Remove striker and nut plate.
7. Elongate striker bolt holes in ’B’ or ’C’ post in
direction required.
8. Refit striker and adjust as necessary.
CHASSIS AND BODY
17
REPAIR
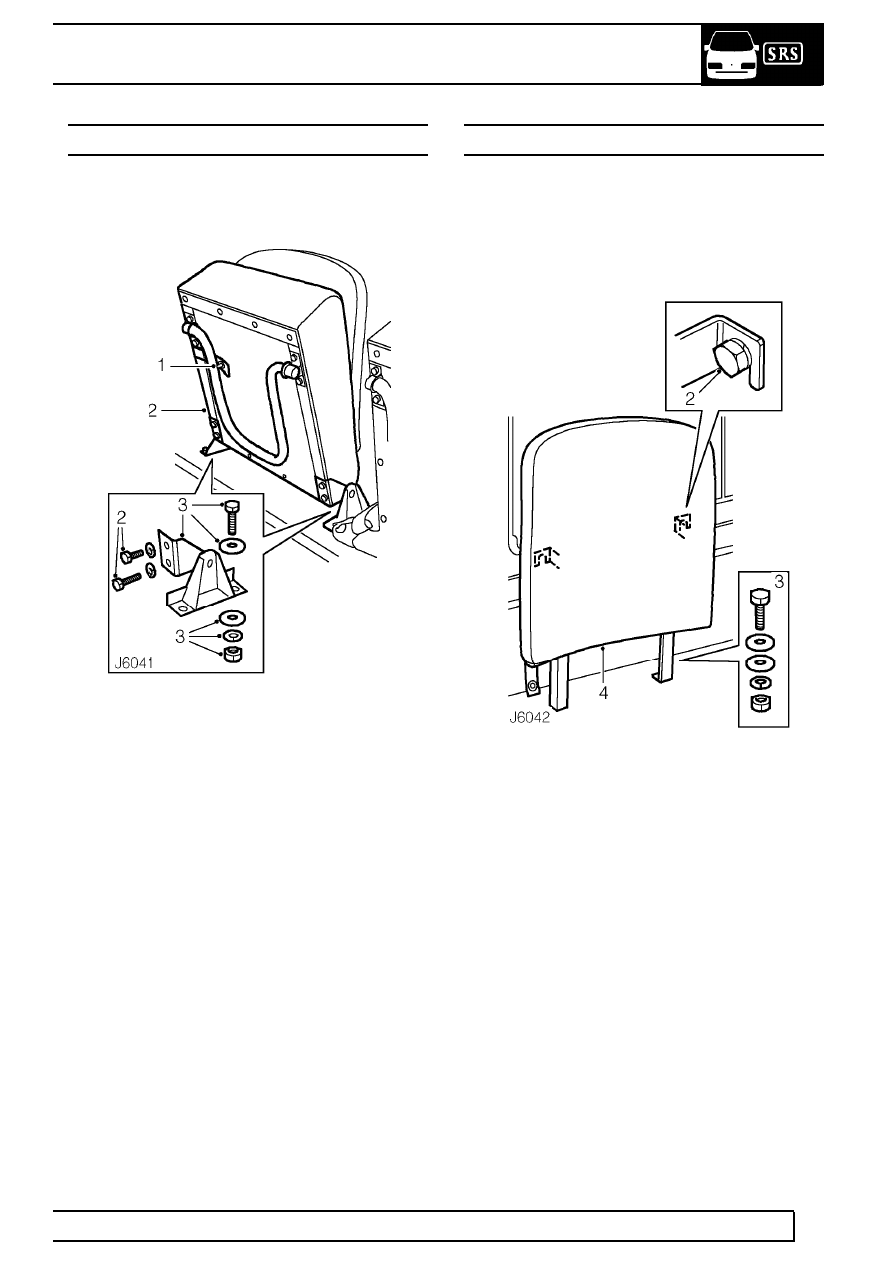
REAR SEAT CUSHION - 90
Service repair no - 78.10.18/99
Remove
1. Release seat cushion stowage strap.
2. Remove 4 bolts and spring washers and lift seat
cushion from pivot brackets.
3. Remove 4 bolts, plain washers, spring washers
and nuts. Detach both pivot brackets from wheel
arch.
Refit
4. Secure pivot brackets to wheel arch and tighten
bolts to
10 Nm (7 lbf/ft).
5. Position seat cushion in pivot brackets and
secure with 4 bolts and spring washers.
6. Fit stowage strap.
REAR SEAT SQUAB - 90
Service repair no - 78.10.58/99
Remove
1. Release seat cushion stowage strap and lower
seat cushion.
2. Slacken 2 bolts securing seat squab brackets to
body side.
3. Remove 2 bolts, plain washers, spring washers
and nuts securing seat squab to wheel arch.
4. Lift seat squab and release brackets from
retaining bolts.
Refit
5. Lower seat squab brackets over retaining bolts,
tighten bolts to
10 Nm (7 lbf/ft).
6. Secure seat squab to wheel arch, tighten bolts to
10 Nm (7 lbf/ft).
7. Raise seat cushion and fit stowage strap.
76
CHASSIS AND BODY
18
REPAIR
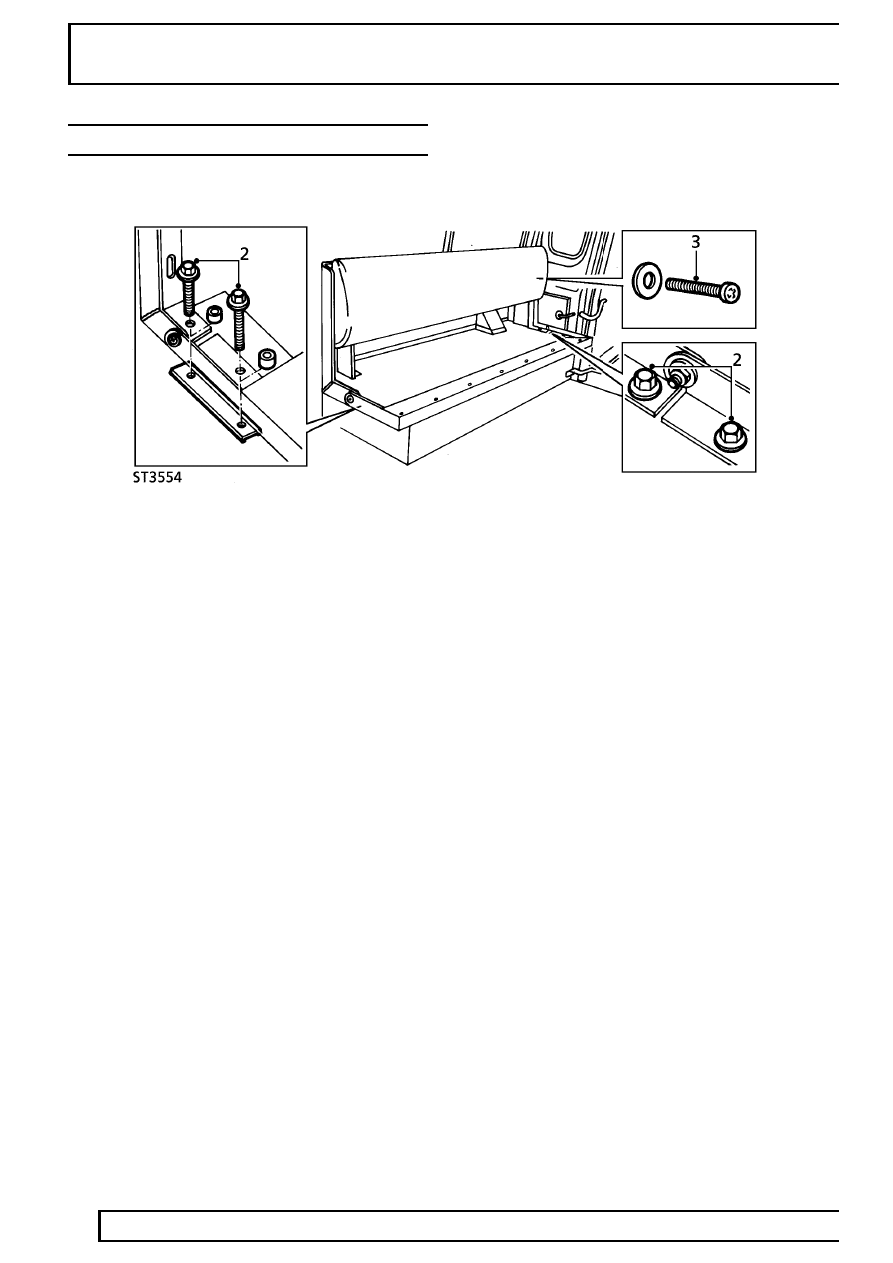
REAR BENCH SEAT
Service repair no - 78.10.57/99
Remove
1. Remove rear bench seat cushion.
2. Remove 4 bolts securing seat frame to body and
collect spacers and brackets containing captive
nuts.
3. Remove screw securing rear end of squab to
body.
4. Remove rear bench seat.
Refit
5. Position rear bench seat to body.
6. Position bracket and spacers, and loosely fit
bolts securing front end of cushion frame to
body.
7. Loosely fit bolts securing rear end of cushion
frame to body while second person holds
bracket in position from under vehicle.
8. Fit screw securing squab to body.Tighten to
10
Nm (7 lbf/ft).
9. Tighten cushion frame to body bolts to
10 Nm (7
lbf/ft).
10. Fit bench seatcushion.
CHASSIS AND BODY
19
REPAIR
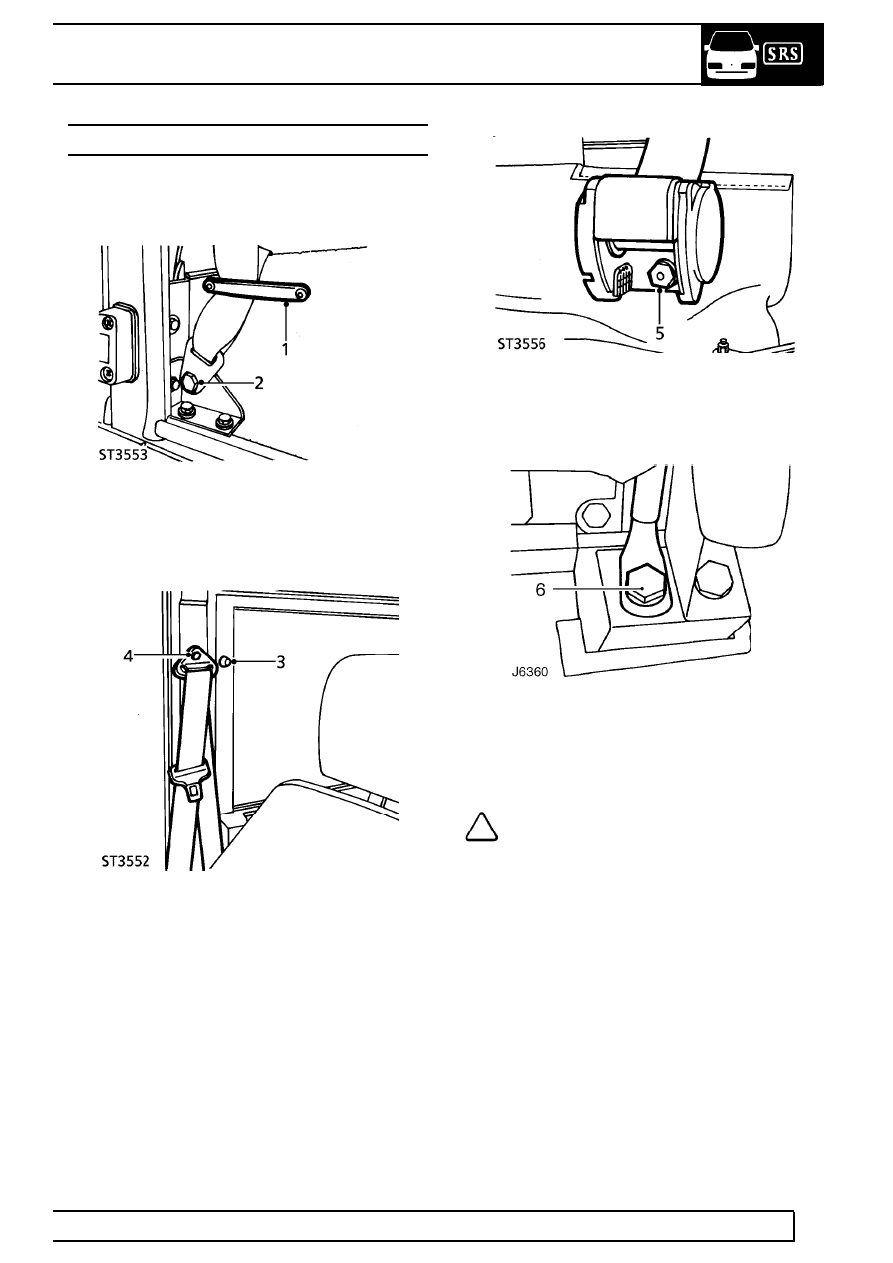
FRONT SEAT BELTS
Service repair no - 76.73.13
Remove
1. Remove plastic seat belt guide from side of front
seat base.
2. Remove seat belt lower anchorage bolt.
3. Remove plastic cap from upper belt guide bolt.
4. Remove bolt securing belt guide to ’B’ post.
5. Move rear carpet aside and remove bolt
securing inertia reel to base of ’B’ post.
6. Remove seat buckle stalk anchorage bolt at
inside rear of front seat.
Refit
NOTE: Tighten all seat belt anchorage
bolts to
32 Nm (24 lbf/ft).
7. Fit seat buckle stalk to mounting at rear of front
seat.
8. Position inertia reel to base of ’B’ post and
secure with bolt.
9. Reposition carpet.
10. Fit upper guide to ’B’ post.
11. Fit plastic cap to guide bolt.
12. Fit seat belt to seat base lower anchorage
bracket.
13. Fit plastic seat belt guide to seat base.
Нет комментариевНе стесняйтесь поделиться с нами вашим ценным мнением.
Текст