Defender 300Tdi (1996+). Manual — part 110
86
ELECTRICAL
20
REPAIR
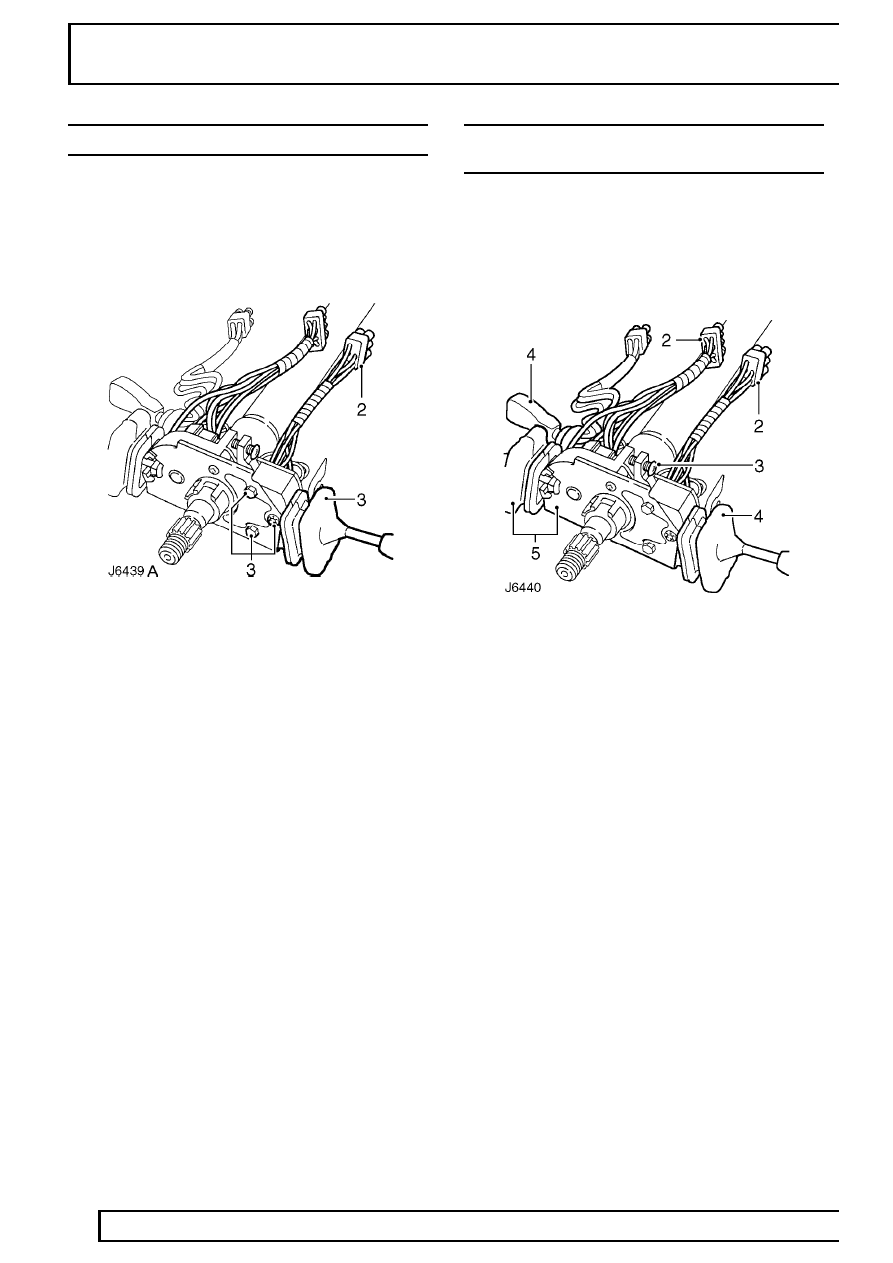
WINDSCREEN WIPER/WASHER SWITCH
Service repair no - 84.15.34
Remove
1. Remove steering column nacelle
See
STEERING, Repair, Steering column nacelle.
2. Disconnect switch multi-plug from main harness.
3. Remove 2 screws and star washer securing
switch to mounting bracket.
4. Remove switch complete with harness.
Refit
5. Fit new switch to mounting bracket.
6. Reconnect switch multi-plug.
7. Fit steering column nacelle
See STEERING,
Repair, Steering column nacelle.
DIRECTION INDICATOR/HEADLAMP/HORN
SWITCH
Service repair no - 86.65.55
Remove
1. Remove steering column nacelle
See
STEERING, Repair, Steering column nacelle.
2. Disconnect 3 steering column switch multi-plugs
from main harness.
3. Slacken clamp screw and withdraw switch
assembly from steering column.
4. Remove fixings and detach windscreen
wiper/washer and main lighting switches from
mounting bracket.
5. Renew complete direction
indicator/headlamp/horn switch and switch
bracket assembly.
Refit
6. Fit main lighting and windscreen wiper/washer
switches to mounting bracket.
7. Position switch assembly on steering column
and fully tighten clamp.
8. Reconnect switch multi-plugs.
9. Fit steering column nacelle
See STEERING,
Repair, Steering column nacelle.

ELECTRICAL
21
REPAIR
MAIN LIGHT SWITCH
Service repair no - 86.65.10
Remove
1. Remove steering column nacelle
See
STEERING, Repair, Steering column nacelle.
2. Disconnect main light switch multi-plug from
main harness.
3. Slacken locknut and release light switch from
slot in mounting bracket.
Refit
4. Fit light switch in mounting bracket.
5. Reconnect switch multi-plug.
6. Fit steering column nacelle
See STEERING,
Repair, Steering column nacelle.
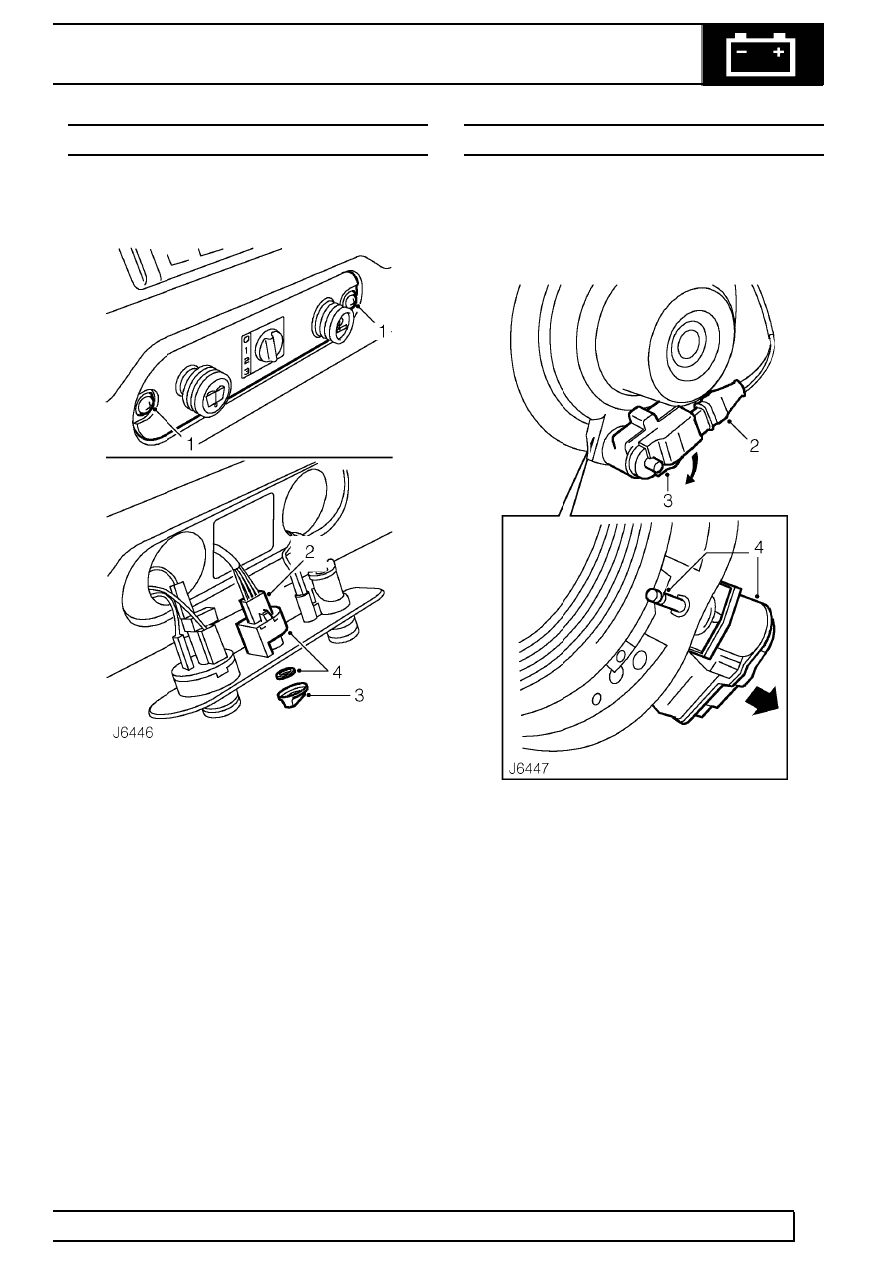
HEATED REAR SCREEN, REAR FOG LAMP AND
HAZARD WARNING SWITCHES
Service repair no - 86.65.36 - Heated rear screen
Service repair no - 86.65.65 - Rear fog lamp
Service repair no - 86.65.50 - Hazard warning
Remove
1. Remove 2 screws and withdraw switch panel
from lower fascia.
2. Disconnect multi-plug from rear of switch.
3. On hazard warning switch only, remove 2
separate leads.
4. Press in spring retainers and withdraw switch
from switch panel.
Refit
5. Fit new switch into switch panel.
6. Reconnect switch multi-plug, and leads if
applicable.
7. Fit switch panel to lower fascia.

86
ELECTRICAL
22
REPAIR
CIGAR LIGHTER
Service repair no - 86.65.60
Remove
1. Remove 2 screws and withdraw switch panel
from lower fascia.
2. Disconnect electrical leads from switch housing,
including illumination bulb.
3. Release 2 retaining tags and remove bulb holder
from switch housing.
4. Remove cigar lighter from switch housing.
5. Press in retaining tags and withdraw housing
from switch panel.
Refit
6. Fit housing to switch panel.
7. Fit bulb holder to switch housing.
8. Connect electrical leads and illumination bulb.
9. Insert cigar lighter into switch housing.
10. Fit switch panel to lower fascia.
REAR SCREEN WIPER/WASHER SWITCH
Service repair no - 84.35.34
Remove
1. Remove 2 screws and withdraw switch panel
from lower fascia.
2. Disconnect electrical leads from rear screen
wiper/washer switch.
3. Insert a small screwdriver in base of switch
knob, press in retaining lug, and remove knob
from switch spindle.
4. Unscrew locking ring, with wavy washer, and
withdraw wiper/washer switch from panel.
Refit
5. Fit switch to switch panel.
6. Press in retaining lug and fit knob onto switch
spindle.
7. Connect electrical leads to switch.
8. Fit switch panel.
ELECTRICAL
23
REPAIR
HEADLAMP LEVELLING SWITCH
Service repair no - 86.65.16
Remove
1. Remove 2 screws and withdraw switch panel
from lower fascia.
2. Disconnect multi-plug from rear of headlamp
levelling switch.
3. Remove knob from switch spindle.
4. Unscrew retaining nut and withdraw switch from
switch panel.
Refit
5. Fit switch into switch panel and secure with
retaining nut.
6. Fit switch knob.
7. Connect switch multi-plug.
8. Fit switch panel.
HEADLAMP LEVELLING UNIT
Service repair no - 86.41.16
Remove
1. Remove headlamp
See Headlamp.
2. Disconnect headlamp levelling unit harness
plug.
3. Rotate levelling unit anti-clockwise to release
retaining lugs from mounting bracket on
headlamp body.
4. Release levelling unit spindle from retaining slot
on headlamp bezel and withdraw unit from
mounting bracket.
Refit
5. Fit levelling unit into mounting bracket and locate
unit spindle into slot in headlamp bezel.
6. Press in unit and rotate clockwise to engage
retaining lugs behind mounting bracket.
7. Connect levelling unit harness plug.
8. Fit headlamp
See Headlamp.
Нет комментариевНе стесняйтесь поделиться с нами вашим ценным мнением.
Текст