Discovery 2. Manual — part 38
ENGINE - V8
REPAIRS 12-2-25
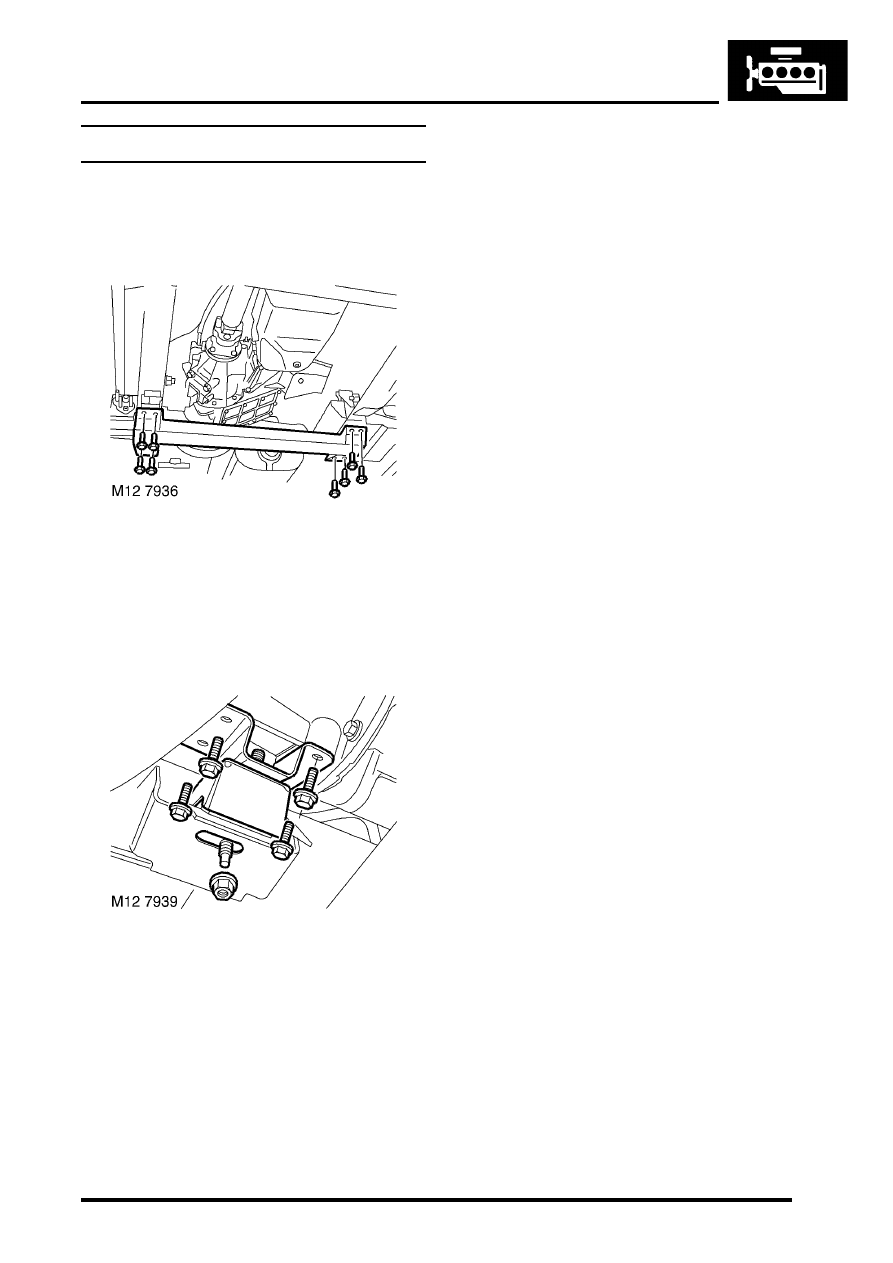
Mounting - rear - RH
$% 12.45.09
Remove
1. Raise vehicle on lift.
2. Remove 8 bolts securing rear cross member
and remove cross member.
3. Support transfer gearbox on jack.
CAUTION: To prevent damage to
components, cushion the jack pad with a
block of wood or hard rubber.
4. Remove nut securing mounting to body
bracket.
5. Remove nut securing mounting to mounting
bracket.
6. Remove 4 bolts securing mounting bracket to
gearbox.
7. Remove mounting and mounting bracket
assembly.
8. Remove mounting rubber.
9. Remove heat shield, if fitted.
Refit
1. If fitted, position heatshield, fit mounting rubber
to mounting bracket, fit nut but do not tighten.
2. Position mounting bracket assembly, fit bolts
securing mounting bracket to gearbox and
tighten to 85 Nm (63 lbf.ft).
3. Fit nut securing mounting to body bracket and
tighten to 48 Nm (35 lbf.ft).
4. Tighten nut securing mounting to gearbox
bracket to 48 Nm (35 lbf.ft).
5. Position rear cross member, fit bolts and
tighten to 26 Nm (19 lbf.ft).
6. Lower vehicle.
ENGINE - V8
12-2-26 REPAIRS
Engine assembly
$% 12.41.01.99
Remove
1. Drain engine oil and remove oil filter.
2. Remove radiator.
3. Remove upper inlet manifold.
SYSTEMS - V8, REPAIRS, Gasket - inlet
manifold - upper - Without Secondary Air
Injection.
4. Remove ignition coil assemblies.
5. Position absorbent material to catch spillage
and disconnect fuel pipe from fuel rail.
CAUTION: Always fit plugs to open
connections to prevent contamination.
6. Release 2 hose clips and remove top hose.
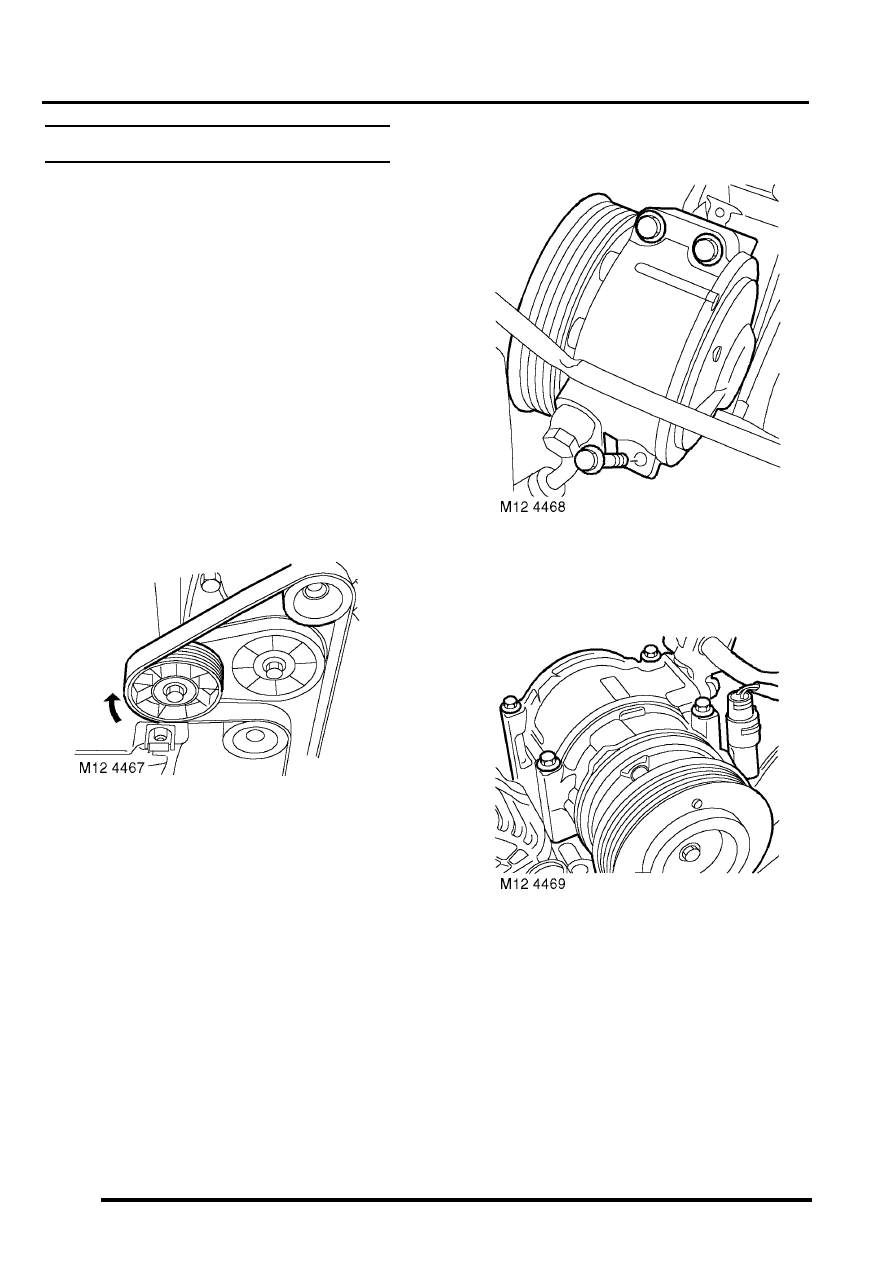
7. Using a 15 mm spanner, release auxiliary drive
belt tension and remove drive belt.
8. Remove 3 bolts securing ACE pump, release
pump and tie aside.
9. Disconnect multiplug from A/C compressor.
10. Remove 4 bolts securing A/C compressor,
release compressor and tie aside.

ENGINE - V8
REPAIRS 12-2-27
11. Remove bolt securing oil cooling pipes to PAS
pump housing and remove saddle clamp.
12. Release PAS pump high and low pressure
pipes and position aside.
CAUTION: Always fit plugs to open
connections to prevent contamination.
13. Release clips securing hose to coolant pump
and coolant rail, release hose and position
aside.
14. Release 2 harness clips from coolant rail.
15. Remove bolt securing coolant rail and position
rail aside.
16. Remove bolt securing engine earth lead and
position earth lead aside.
17. Remove nut securing engine harness positive
lead to battery, release lead and position
aside.
18. Release clips and remove fuse box cover.
19. Remove bolt securing starter lead to fuse box,
release lead and position aside.
20. Disconnect 2 engine harness multiplugs from
fuse box.
ENGINE - V8
12-2-28 REPAIRS
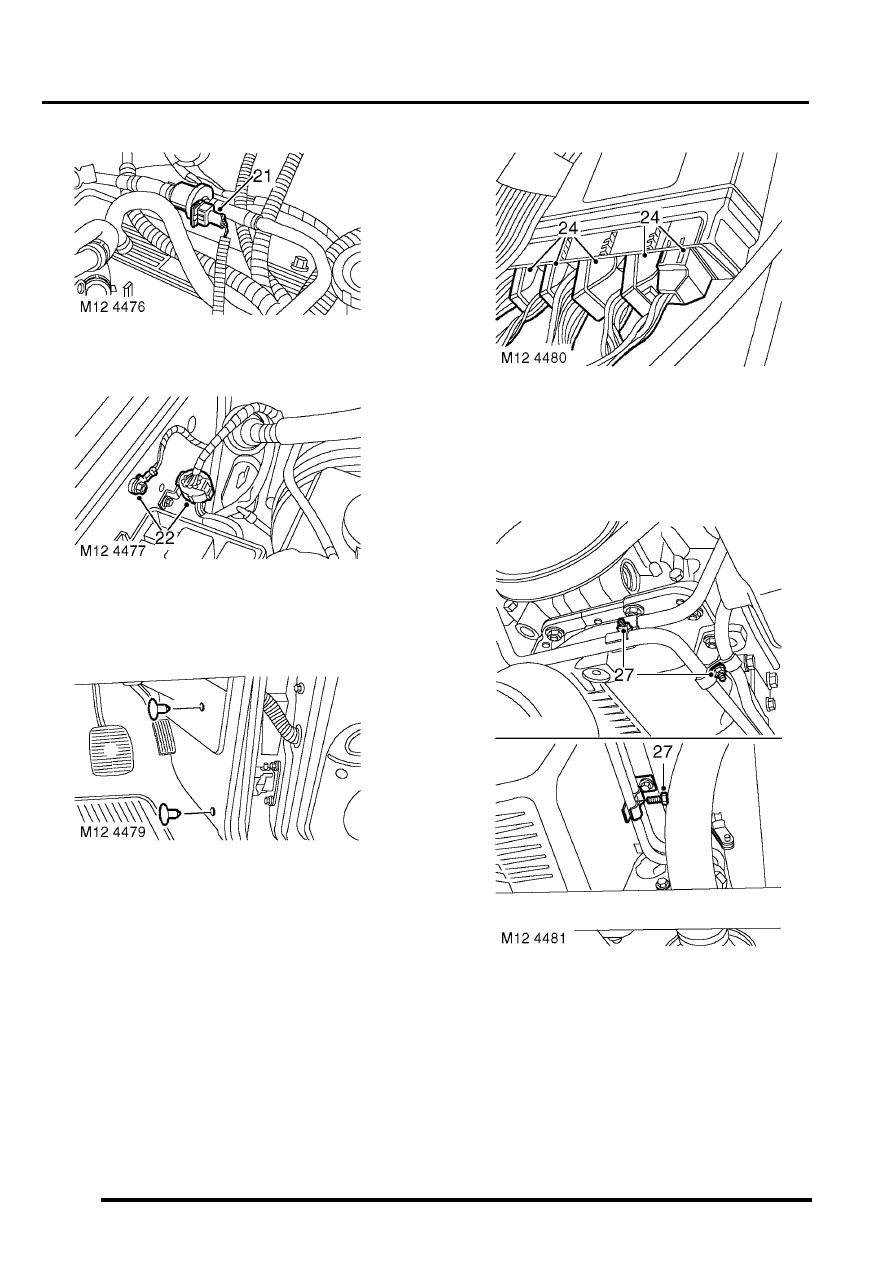
21. Disconnect multiplug from EVAP purge valve.
22. Remove nut securing engine harness earth to
body and disconnect engine harness to main
harness multiplug.
23. Remove trim fixings securing toe board and
remove toe board.
24. Disconnect 5 multiplugs connecting engine
harness to ECM.
25. Release engine harness, pull into engine bay
and coil on top of engine.
26. Raise vehicle on ramp.
27. Remove 3 bolts securing oil cooling pipes to
sump and remove saddle clamps.
28. Tie oil cooling pipes aside.
29. Remove exhaust front pipe.
Нет комментариевНе стесняйтесь поделиться с нами вашим ценным мнением.
Текст