Discovery 2. Manual — part 238
INTERIOR TRIM COMPONENTS
REPAIRS 76-3-15
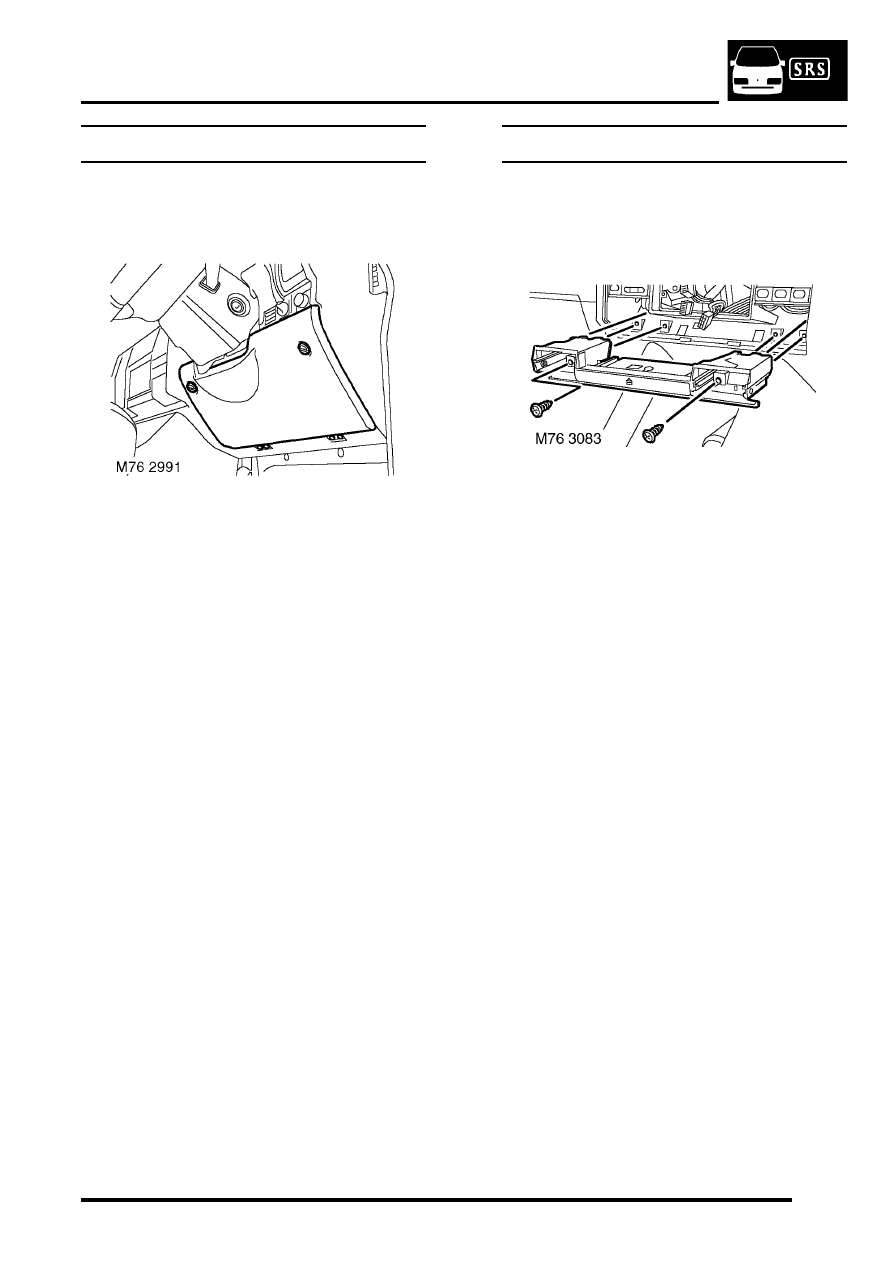
Panel - fascia access - driver's side
$% 76.46.40
Remove
1. Remove 4 bolts securing fascia access panel to
fascia.
2. Release 2 quarter turn screws securing fascia
access panel to fascia.
3. Remove fascia access panel.
Refit
1. Position fascia access panel to fascia and
secure with quarter turn screws.
2. Position base of fascia access panel to fascia
and secure with bolts.
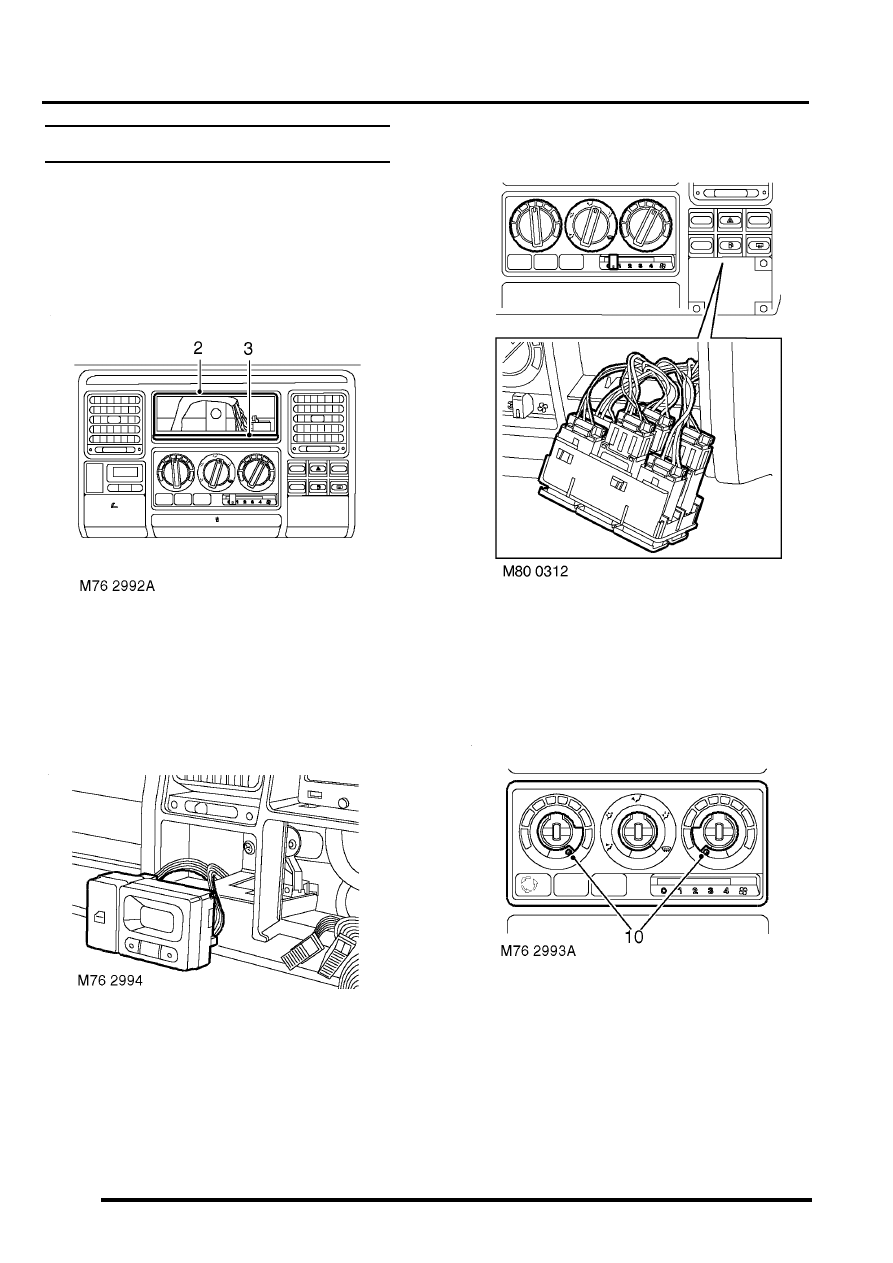
Drink tray assembly - centre fascia
$% 76.46.41
Remove
1. Remove coin tray and ash tray.
2. Remove 6 screws securing drink tray assembly
to fascia.
3. Remove drink tray.
Refit
1. Position drink tray assembly to fascia and
secure with screws.
2. Fit ash tray and coin tray to drink tray assembly.
INTERIOR TRIM COMPONENTS
76-3-16 REPAIRS
Louvre panel assembly - centre fascia
$% 76.46.42
Remove
1. Remove radio cassette player from fascia.
2. Carefully release and remove radio DIN socket
from louvre panel.
3. Remove screw cover from radio aperture.
4. Remove drink tray assembly.
REPAIRS, Drink tray assembly - centre
fascia.
5. Carefully release clock assembly from louvre
panel.
6. Disconnect multiplugs from clock and door
locking switch. Remove clock assembly.
7. Carefully release switch pack from louvre
panel.
8. Disconnect multiplugs from switches and
remove switch pack.
9. Models without A/C: Carefully remove blower
speed and heater control knobs.
10. Models without A/C: Remove 2 screws
securing heater control panel graphic plate and
remove graphic plate.
INTERIOR TRIM COMPONENTS
REPAIRS 76-3-17
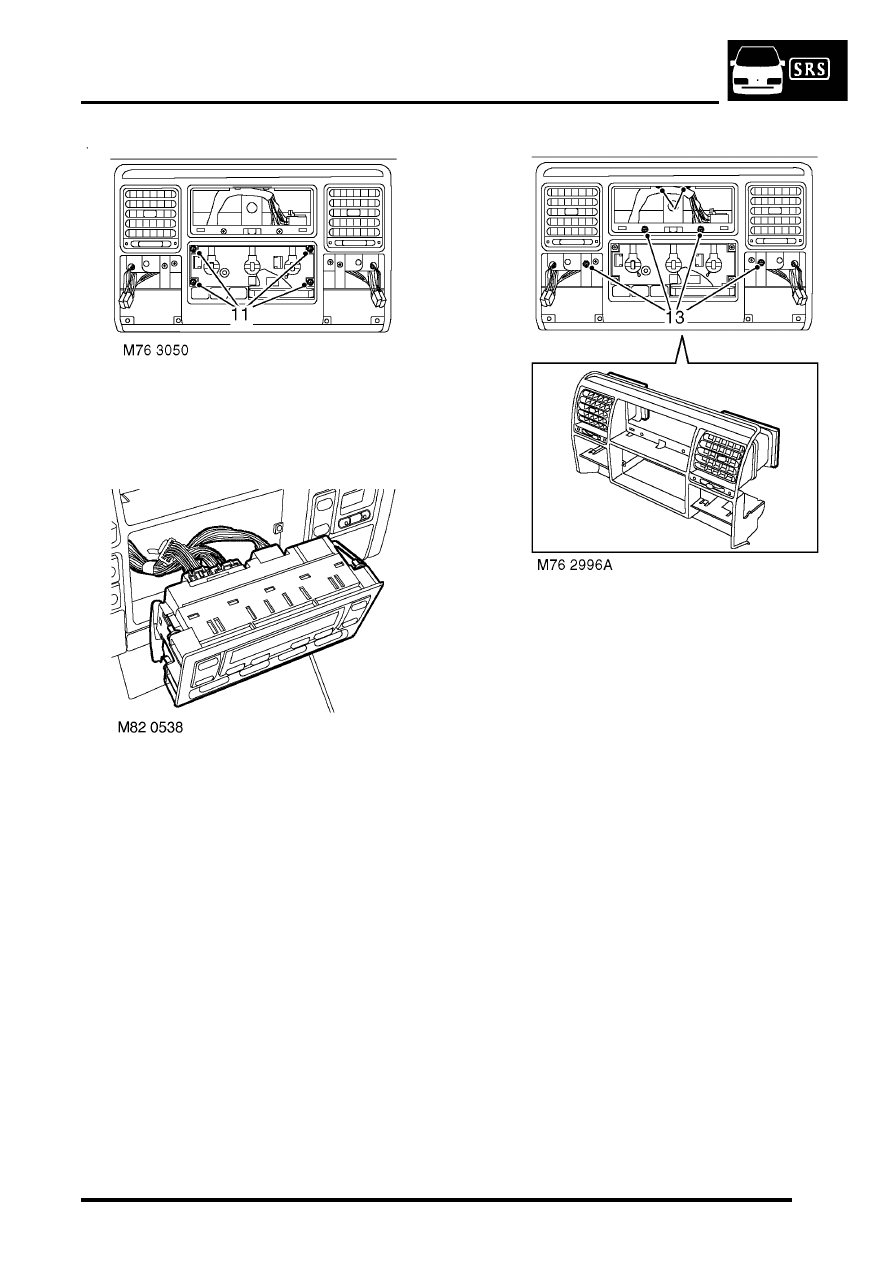
11. Models without A/C: Remove 4 screws
securing heater control panel to louvre panel.
12. Models with A/C: Carefully release ATC ECU
from louvre panel, disconnect multiplugs and
remove ATC ECU.
13. Loosen 2 upper screws and remove 4
remaining screws securing louvre panel to
fascia.
14. Remove louvre panel assembly.
15. Remove seals from face level vents.
Refit
1. Fit seals to face level vents on new louvre
panel.
2. Fit louvre panel to fascia and secure with
screws.
3. Models with A/C: Connect multiplugs to ATC
ECU and fit ATC ECU to fascia.
4. Models without A/C: Fit screws securing
heater control panel to louvre panel.
5. Models without A/C: Fit heater control panel
graphic plate and secure with screws.
6. Models without A/C: Fit blower speed and
heater control knobs.
7. Position switch pack, connect multiplugs to
switches and fit switch pack to louvre panel.
8. Position clock assembly, connect multiplug to
clock and door locking switch and fit clock
assembly to louvre panel.
9. Fit drinks tray.
REPAIRS, Drink tray assembly - centre
fascia.
10. Fit and secure radio DIN socket.
11. Fit screw cover to radio aperture.
12. Fit radio cassette player.
INTERIOR TRIM COMPONENTS
76-3-18 REPAIRS
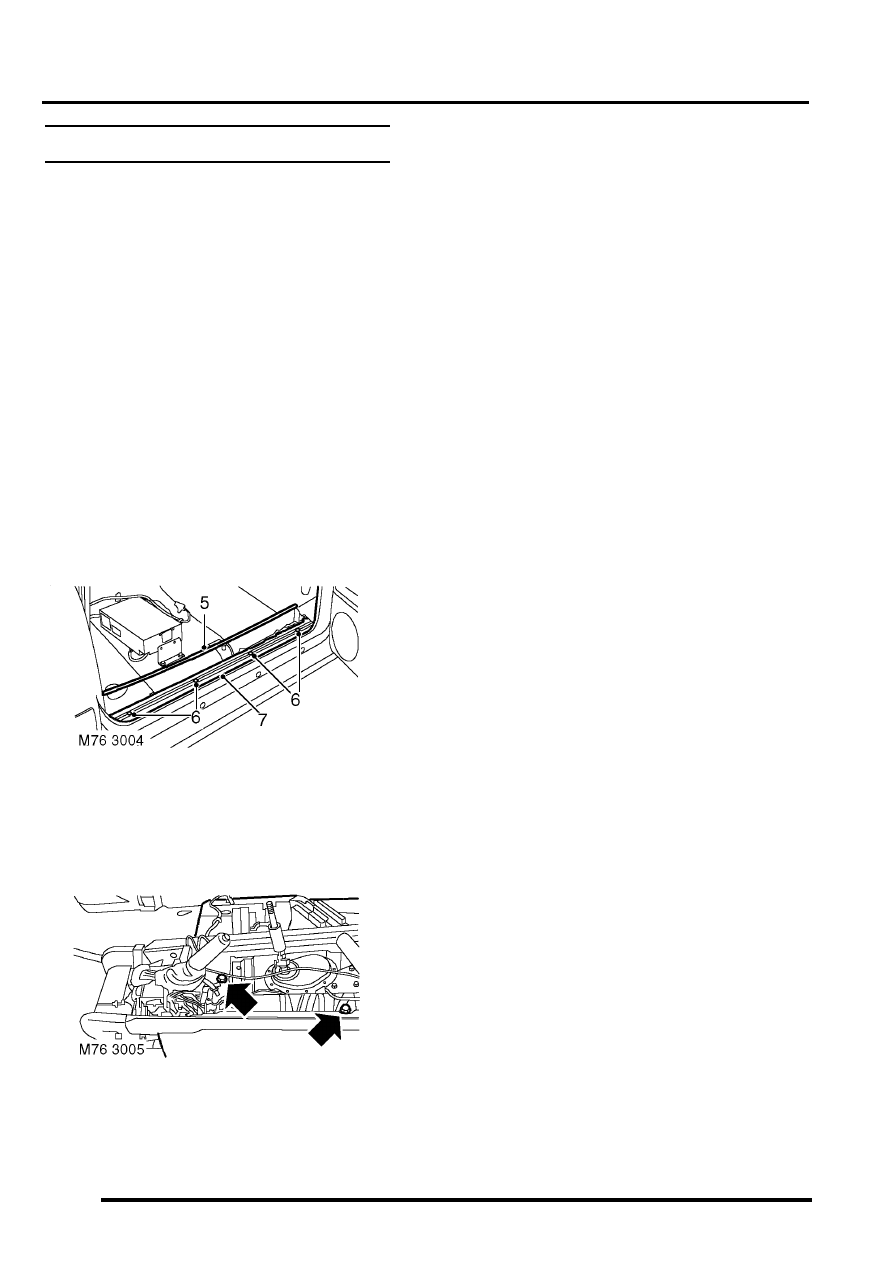
Carpet - front
$% 76.49.02
Remove
1. Models with premium ICE: Remove power
amplifier.
2. Models with premium ICE: Remove CD
autochanger.
3. Remove centre console.
l
For models with manual gearbox:
REPAIRS, Console - centre - manual
models.
l
For models with automatic gearbox:
REPAIRS, Console - centre - automatic
models.
4. Remove both lower 'A' post trim panels.
5. Remove finisher from both front carpet
retainers.
6. Remove 8 screws securing front carpet
retainers to floor.
7. Remove front carpet retainers.
8. Remove 2 nuts securing main body harness to
transmission tunnel.
9. With assistance release and remove carpet.
Refit
1. With assistance position carpet.
2. Secure main body harness to transmission
tunnel with nuts.
3. Position front carpet retainers and secure to
floor with screws.
4. Fit finishers to front carpet retainers
5. Fit both lower 'A' post trim panels.
6. Fit centre console.
l
For models with manual gearbox:
REPAIRS, Console - centre - manual
models.
l
For models with automatic gearbox:
REPAIRS, Console - centre - automatic
models.
7. Models with premium ICE: Fit CD
8. Models with premium ICE: Fit power
Нет комментариевНе стесняйтесь поделиться с нами вашим ценным мнением.
Текст