Defender (1993+). Manual — part 86
CHASSIS AND BODY
DEFENDER 90
4
REVISED: OCT
1993
C H A S S I S AND BODY
DEFENDER 90
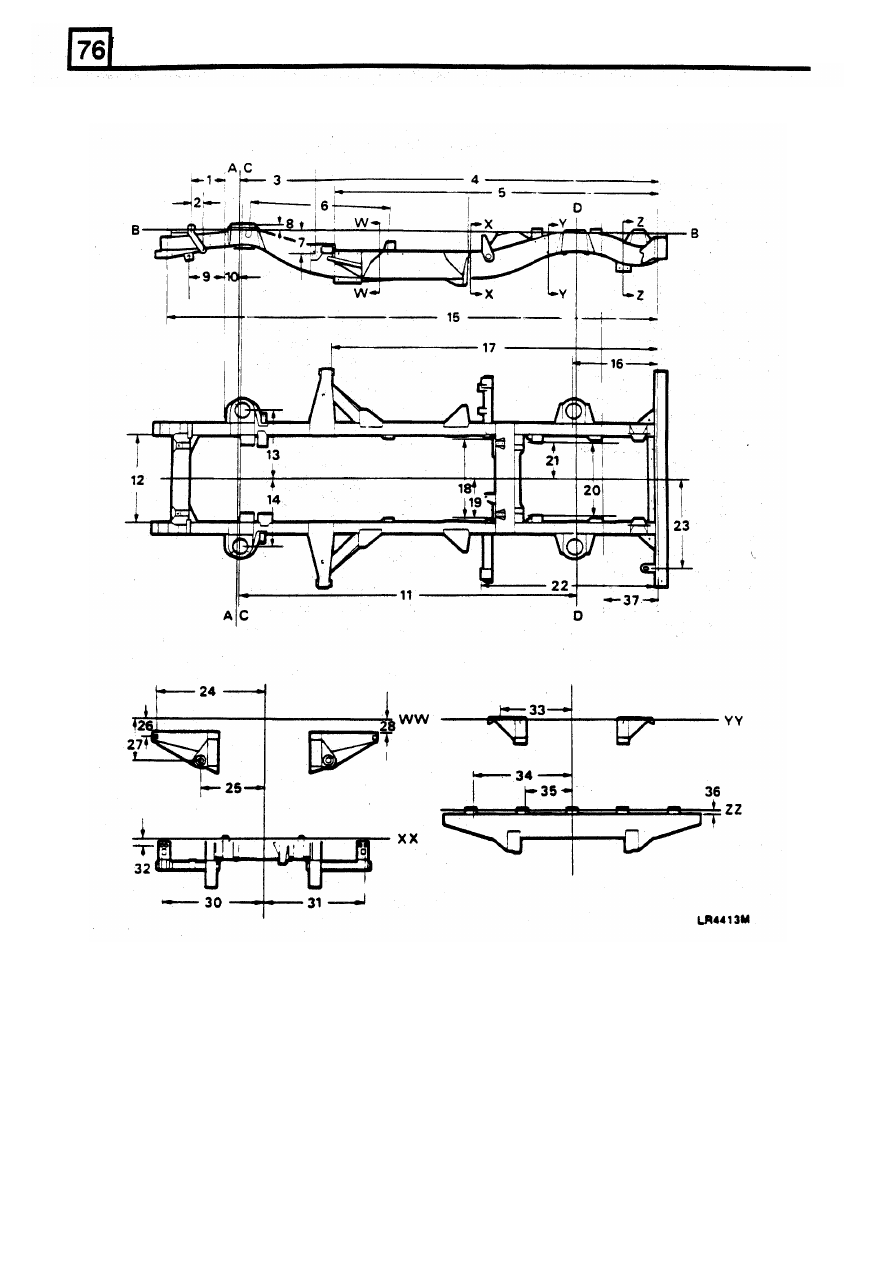
CHASSIS ALIGNMENT DIMENSIONS
A
- Front Datum
B
- Chassis Datum
C
- Front axle centre line
D - Rear axle centre line
239,00
-
236,50 mm
20.
519,60
-
517,00
mm
2. 82,00
-
79,50mm
21.
259,80
-
258,50
mm
3. 633,00 mm
22.
1242,60
-
1240,60
mm
2420,60
-
2418,60
23.
642,50
-
639,50 mm
2306,40
-
2305,40
mm
24.
750,90
mm
6. 981,20
-
978,70 mm
25.
439,50
-
436,50 mm
7. 182,70
26.
136,50
mm
41,50
-
37,00
mm
27.
299,50
-
295,50
mm
9. 252,00
-
250,00 mm
28.
103,00
-
100,00
mm
110,00 mm
29.
131,50
-
126,50 mm
11.
2360,00 mm
-
wheelbase
30.
705,50
-
704,50 mm
12. 636,00
-
654,00
mm
31.
705,50
-
704,50
mm
13. 488
-
483
mm
32.
42,20
-
40,20
mm
14.
488
-
483 mm
33.
491,00
-
486,00 mm
15. 3431,10
-
3426,10 mm
3 4 .
594,20 - 593,40 mm
16. 588,30
-
586,30 mm
35.
283,00
-
282,20 mm
17. 2313,80
-
2311,80 mm
36.
32,25
-
31,25 mm
18. 590,50 mm
37.
397,00
-
395,00 mm
19.
295,25
REVISED: OCT
1993
CHASSIS AND BODY
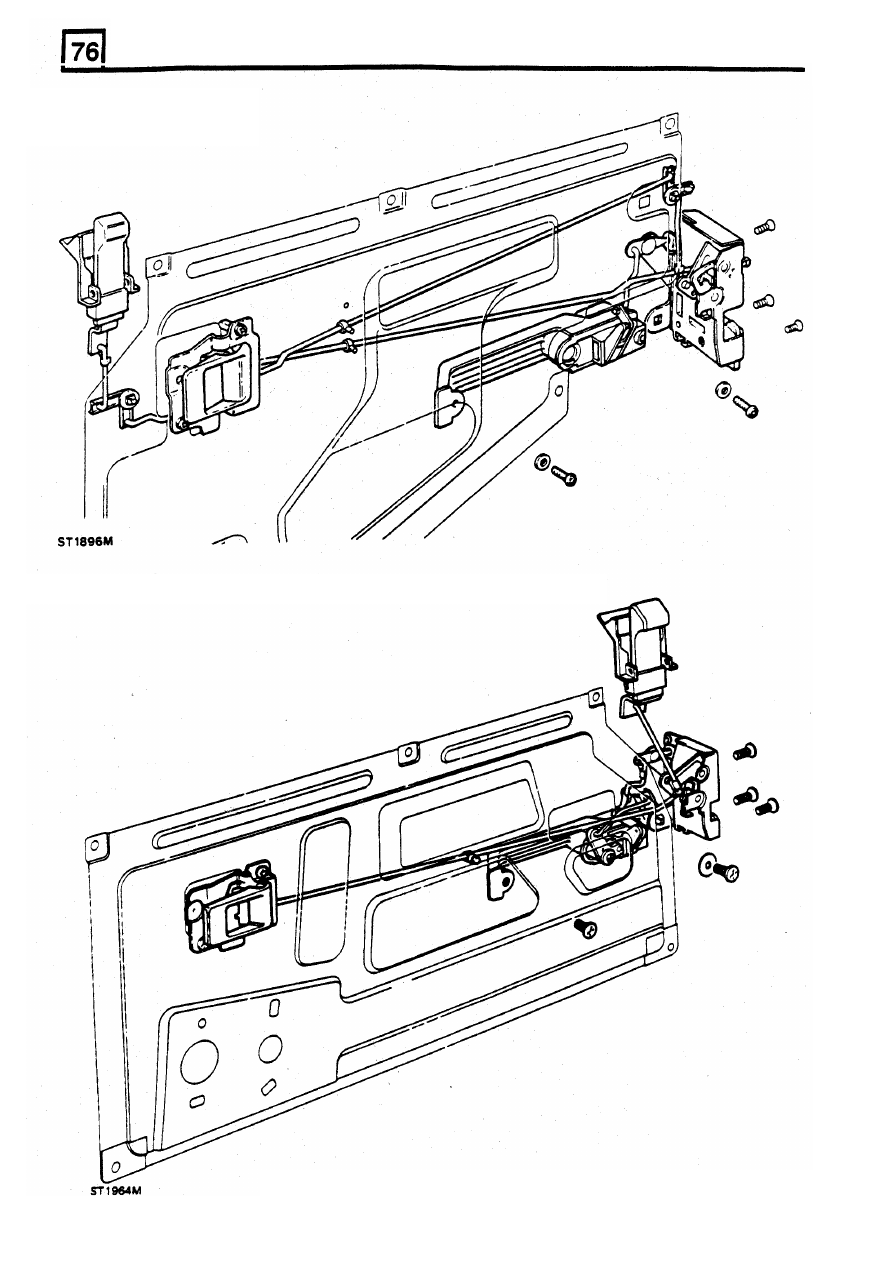
DOORS
DEFENDER
110
6
Right-hand rear side door
lock
mechanism
Right-Hand front door
lock
mechanism
REVISED:
OCT 1993
CHASSIS AND BODY
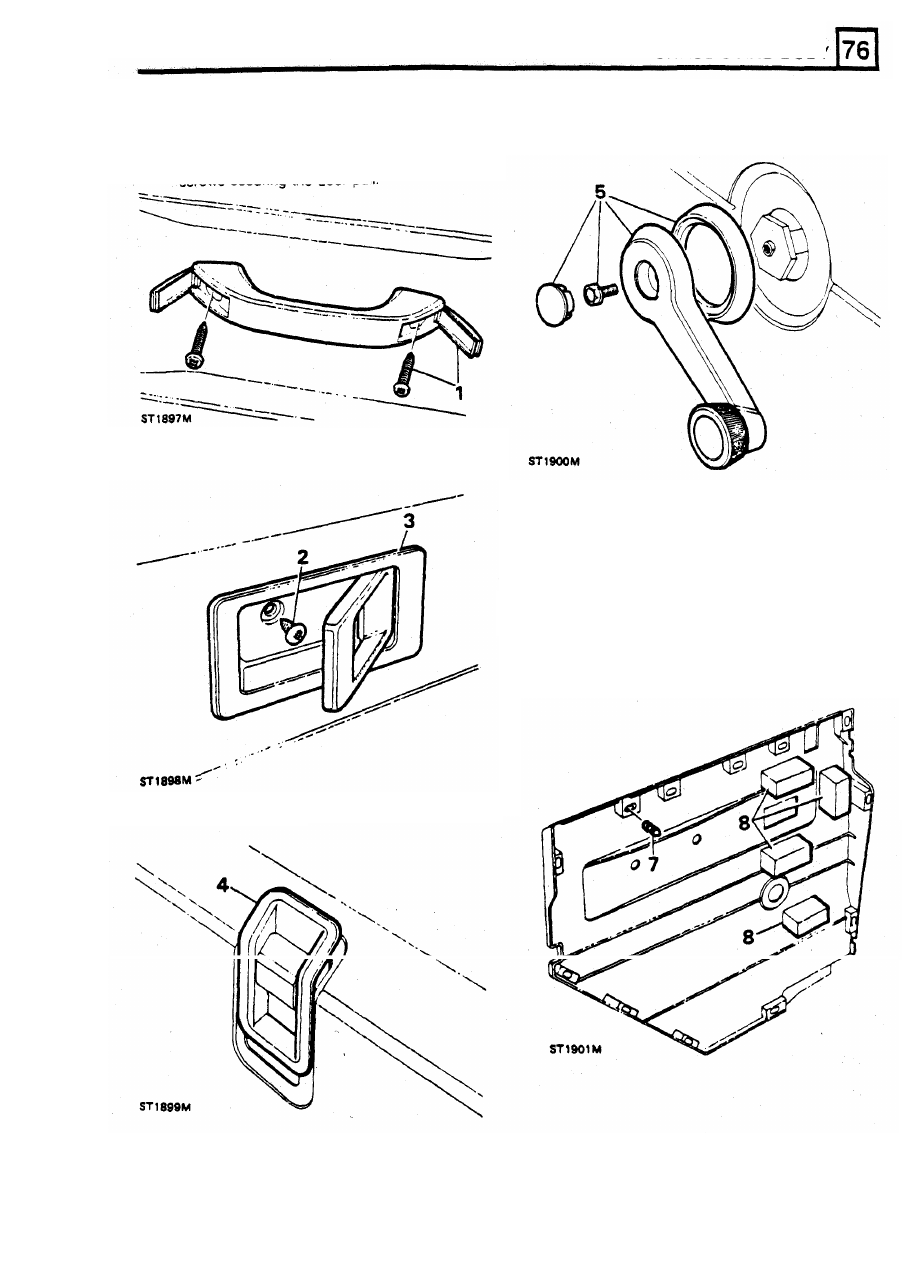
REMOVING THE DOOR TRIM - DEFENDER
110
Front and rear doors
5.
Lever
off
the window regulator center
finisher
and remove the retaining screw
and
withdraw
the handle and bezel.
1.
Prise off the two finishers and remove the two
screws securing the door pull.
2.
Remove the single screw behind the remote
control lever.
3 . Prise
off
the remote control lever bezel.
6. Using a screwdriver, carefully ease the trim
away
from
the
door.
Fitting d o o r trim
7.
Remove any trim fasteners held in the door
panel and insert them into the back of the trim
or use new ones.
8.
Ensure that the anti-vibration pads are in
position and offer-up the trim to the door,
lining-up the fasteners
with
the holes in the
door and push the trim into position.
4.
Prise
off the
door locking
button bezel.
REVISED: OCT
1993
7
Нет комментариевНе стесняйтесь поделиться с нами вашим ценным мнением.
Текст