Toyota Sequoia (2005). Manual — part 805
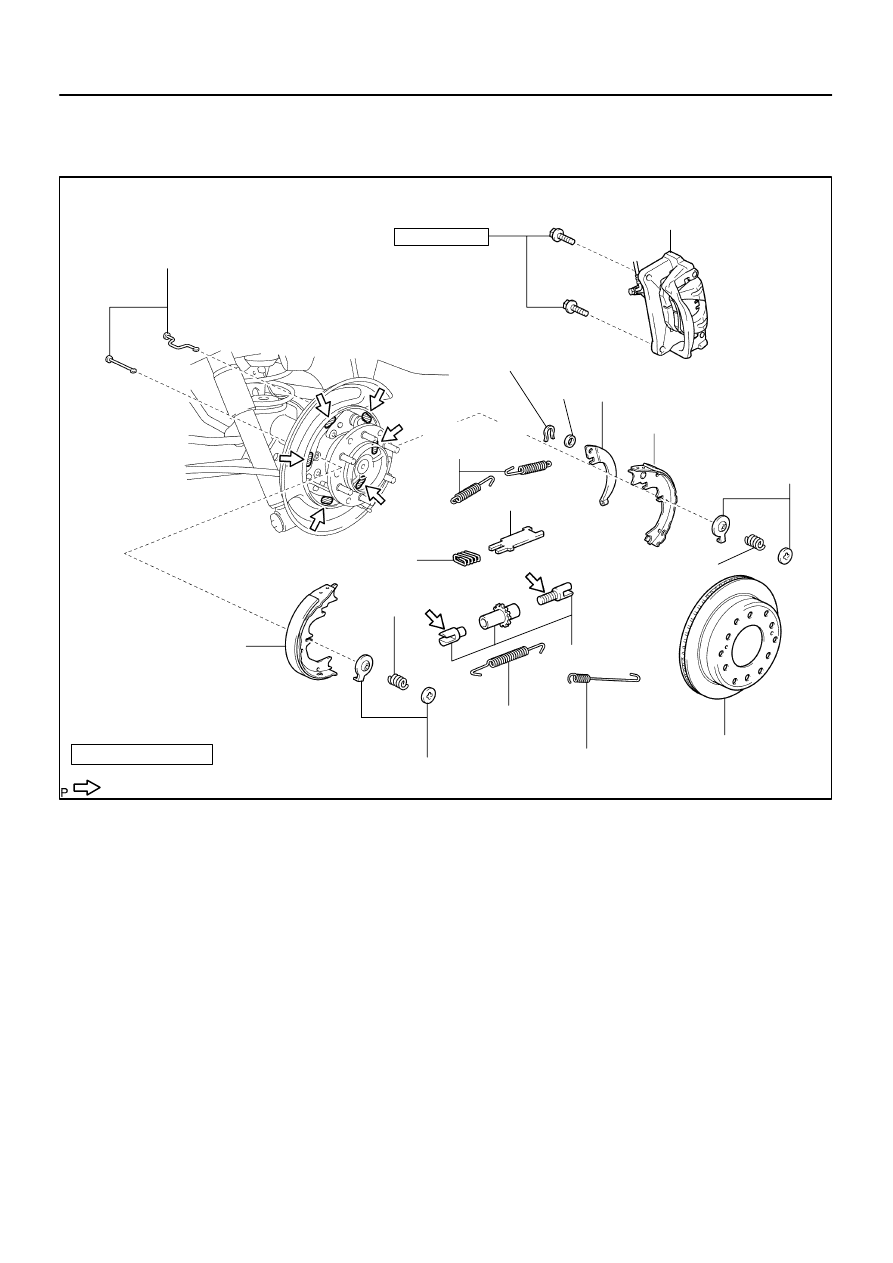
BR0JX–17
F13341
Pin
Rear Disc Brake
Assembly
Front Shoe
C–washer
Shim
Parking Brake Shoe
Lever
Rear Shoe
Shoe Strut
Spring
Adjuster
Cup
Tension Spring
Shoe Hold–down
Spring
Disc
High temperature grease
N·m (kgf·cm, ft·lbf)
: Specified torque
Anchor Spring
Cup
Shoe Hold–down
Spring
Shoe Return
Spring
105 (1,070, 77)
Non–reusable part
BR–42
–
BRAKE
PARKING BRAKE
3209
PARKING BRAKE
COMPONENTS
BR1NF–02
F13327
F13323
F13324
–
BRAKE
PARKING BRAKE
BR–43
3210
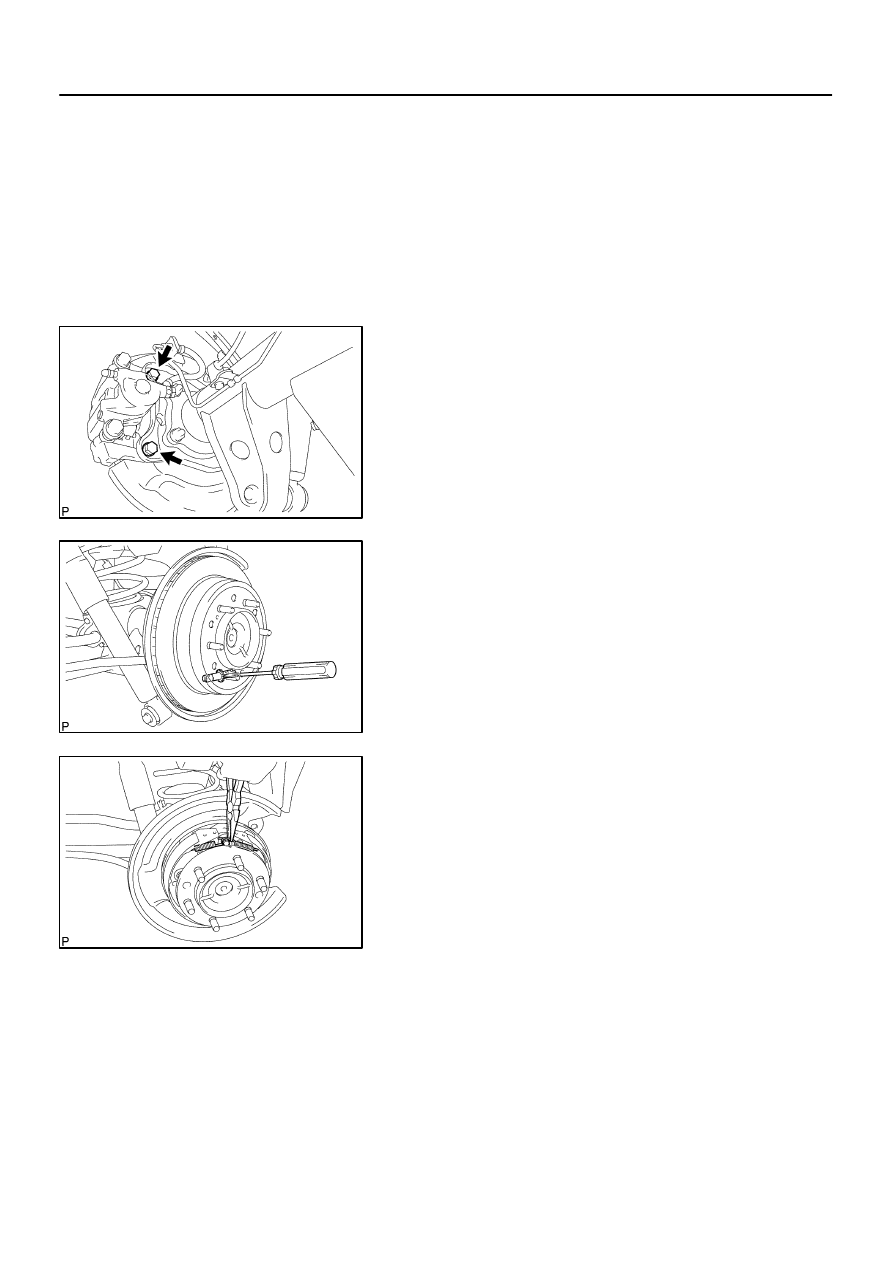
DISASSEMBLY
1.
REMOVE REAR WHEEL
Torque: 110 N·m (1,122 kgf·cm, 81 ft·lbf)
2.
REMOVE REAR DISC BRAKE ASSEMBLY
(a)
Remove the 2 mounting bolts and remove the disc brake
assembly.
Torque: 105 N·m (1,070 kgf·cm, 77 ft·lbf)
(b)
Suspend the disc brake securely and so the hose is not
stretched.
3.
REMOVE DISC
(a)
Release the parking brake lever.
(b)
Place matchmarks on the disc and rear axle hub.
(c)
Remove the disc.
HINT:
If the disc cannot be removed easily, turn the shoe adjust-
er until the wheel turns freely.
If there are no matchmarks, temporarily install the disc,
then measure the disc runout and install the disc in posi-
tion (See page
4.
REMOVE SHOE RETURN SPRINGS
Using needle–nose pliers, remove the 2 shoe return springs.
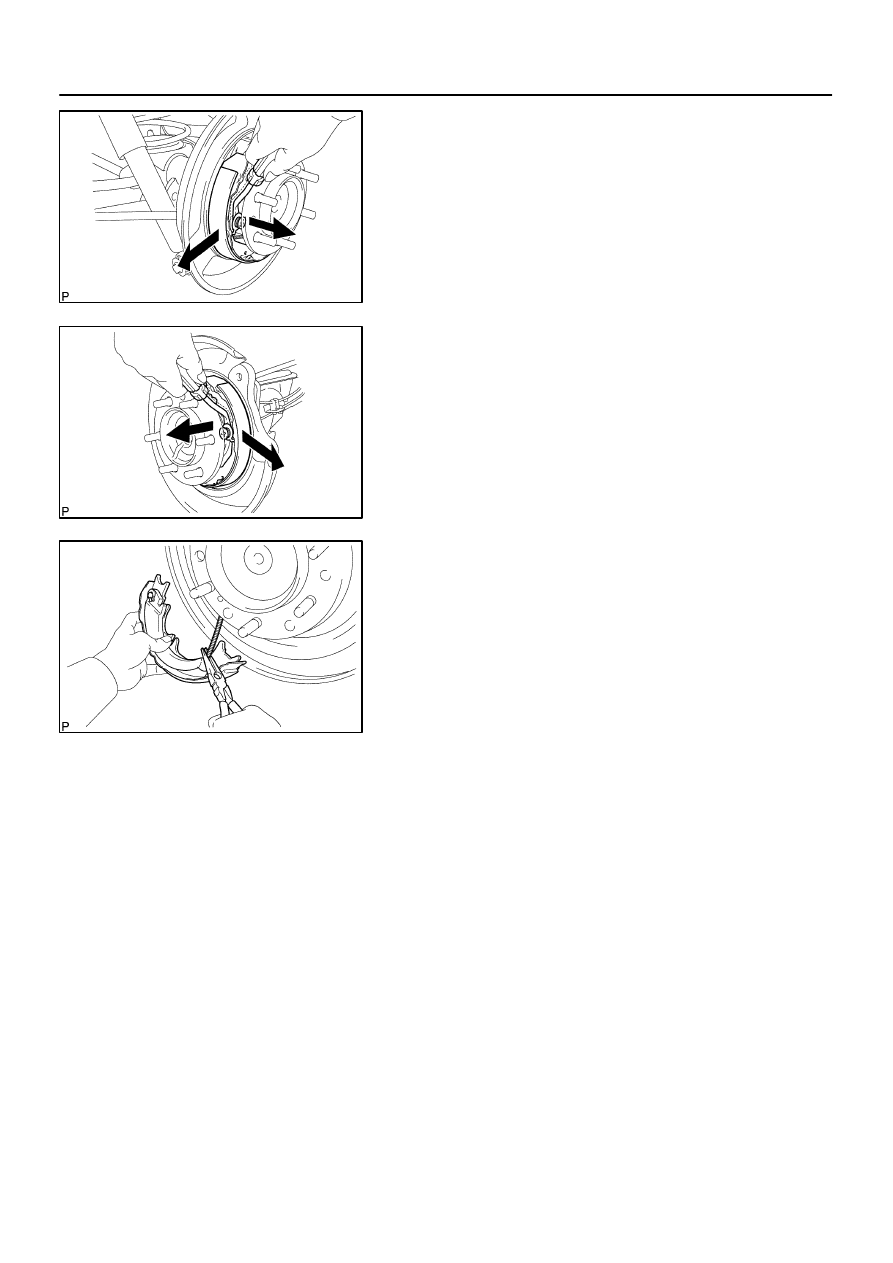
5.
REMOVE SHOE STRUT WITH SPRING
HINT:
At the time of reassembly, install the strut with the spring facing
forward.
6.
REMOVE SHOE ADJUSTER
Slide the front shoe toward outside, remove the shoe adjuster.
7.
REMOVE FRONT SHOE
(a)
Using a needle–nose pliers, disconnect the anchor spring
and tension spring from the front shoe.
(b)
Remove the anchor spring and tension spring.
F13325
F13901
F13326
BR–44
–
BRAKE
PARKING BRAKE
3211
(c)
Using a clip remover, remove the front shoe with holding
the cup.
HINT:
At the time of reassembly, hold the cup with clip remover. In this
condition, install the front shoe.
(d)
Remove the 2 cups, shoe hold–down spring and pin.
8.
REMOVE REAR SHOE
(a)
Using a clip remover, remove the rear shoe with holding
the cup.
HINT:
At the time of reassembly, hold the cup with clip remover. In this
condition, install the rear shoe.
(b)
Remove the 2 cups, shoe hold–down spring and pin.
(c)
Disconnect the parking brake cable from the parking
brake shoe lever.
BR0ZY–05
BR5332
F06409
BR0828
BR5333
Shim
Clearance
–
BRAKE
PARKING BRAKE
BR–45
3212
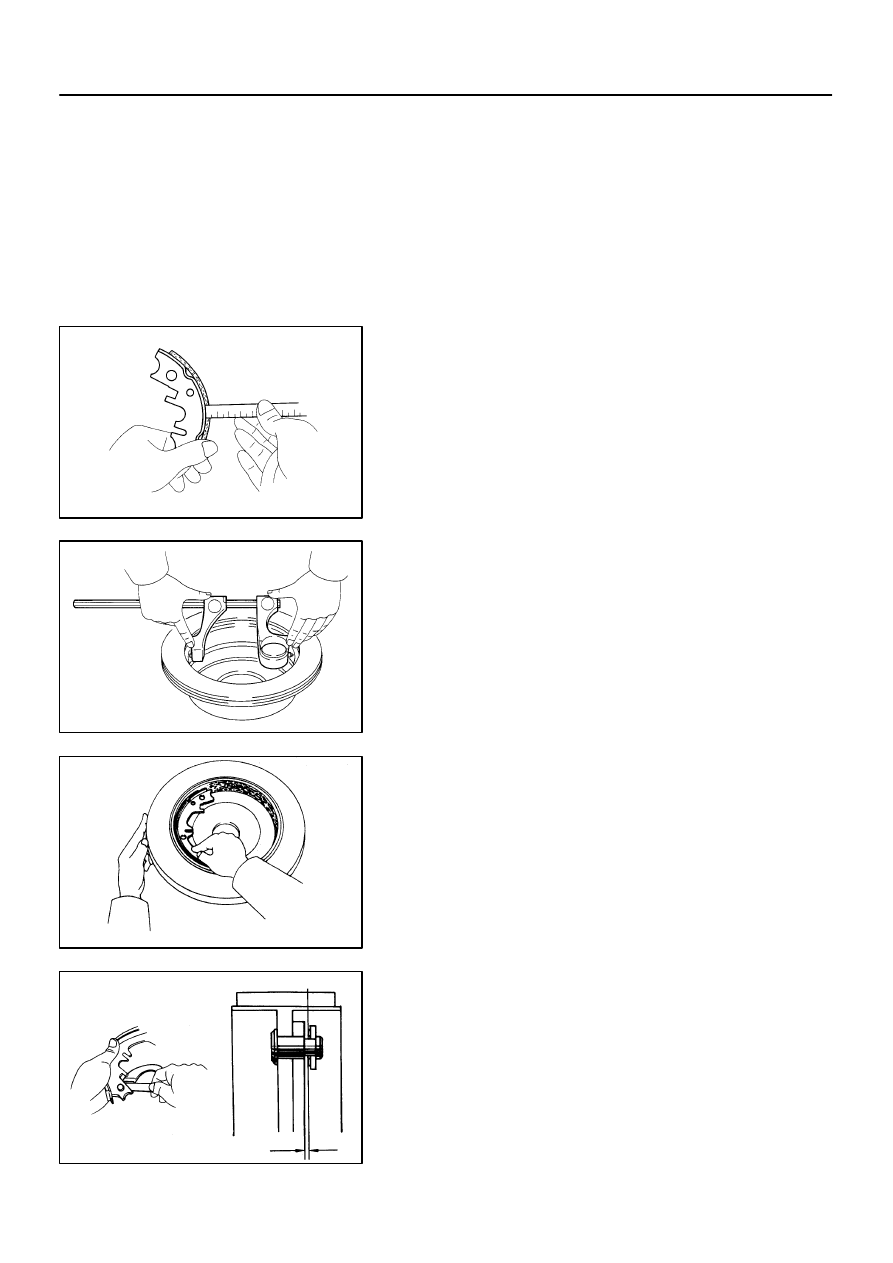
INSPECTION
1.
INSPECT DISASSEMBLED PARTS
Inspect the disassembled parts for wear, rust or damage.
2.
MEASURE BRAKE SHOE LINING THICKNESS
Using a ruler, measure the thickness of the shoe lining.
Standard thickness: 4.0 mm (0.157 in.)
Minimum thickness: 1.0 mm (0.039 in.)
If the lining thickness is at the minimum thickness or less, or if
there is severe and uneven wear, replace the brake shoe.
3.
MEASURE BRAKE DISC INSIDE DIAMETER
Using a brake drum gauge or equivalent, measure the inside di-
ameter of the disc.
Standard inside diameter: 210 mm (8.27 in.)
Maximum inside diameter: 211 mm (8.31 in.)
Replace the disc if the inside diameter is at the maximum value
or more.
Replace the disc or grind it with a lathe if the disc is scored or
worn unevenly.
4.
INSPECT PARKING BRAKE SHOE LINING AND DISC
FOR PROPER CONTACT
Apply chalk to the inside surface of the disc, then grind down
the brake shoe lining to fit. If the contact between the disc and
the brake shoe lining is improper, repair it using a brake shoe
grinder or replace the brake shoe assembly.
5.
MEASURE CLEARANCE BETWEEN PARKING
BRAKE SHOE AND LEVER
Using a feeler gauge, measure the clearance.
Standard clearance: Less than 0.25 mm (0.010 in.)
If the clearance is not within the specification, replace the shim
with one of the correct size.
Нет комментариевНе стесняйтесь поделиться с нами вашим ценным мнением.
Текст