Toyota Sequoia (2005). Manual — part 898
H02441
H02442
H16677
H16678
H16679
BO–28
–
BODY
BACK DOOR
3581
Do not tilt the riveter disconnect the rivet from the ma-
terial while handling a riveter, as the materials are not
tightened firmly.
Install the rivet while attaching materials, as they are
not tightened firmly.
12.
REMOVE BACK DOOR GLASS
(a)
Open the back door glass until the bolts appear in the ser-
vice hole.
(b)
Disconnect the connectors.
(c)
Remove the 2 bolts and guide bracket.
Torque: 8.0 N·m (82 kgf·cm, 71 in.·lbf)
(d)
Remove the 4 bolts and back door glass as shown in the
illustration.
Torque: 8.0 N·m (82 kgf·cm, 71 in.·lbf)
NOTICE:
Be careful not to drop the back door glass.
13.
REMOVE OUTER WEATHERSTRIP
(a)
Apply protective tape to the outer surface as shown in the
illustration, to keep the surface from being scratched.
(b)
Using a moulding remover, remove the outer weather-
strip.
14.
REMOVE BACK DOOR GLASS RUN
15.
REMOVE BACK DOOR GLASS GUIDE RAIL
(a)
Disengage the clamps.
(b)
Remove the 3 nuts and back door glass guide.
H16680
H16681
H16682
–
BODY
BACK DOOR
BO–29
3582
(c)
Employ the same manner described above to the other
side.
16.
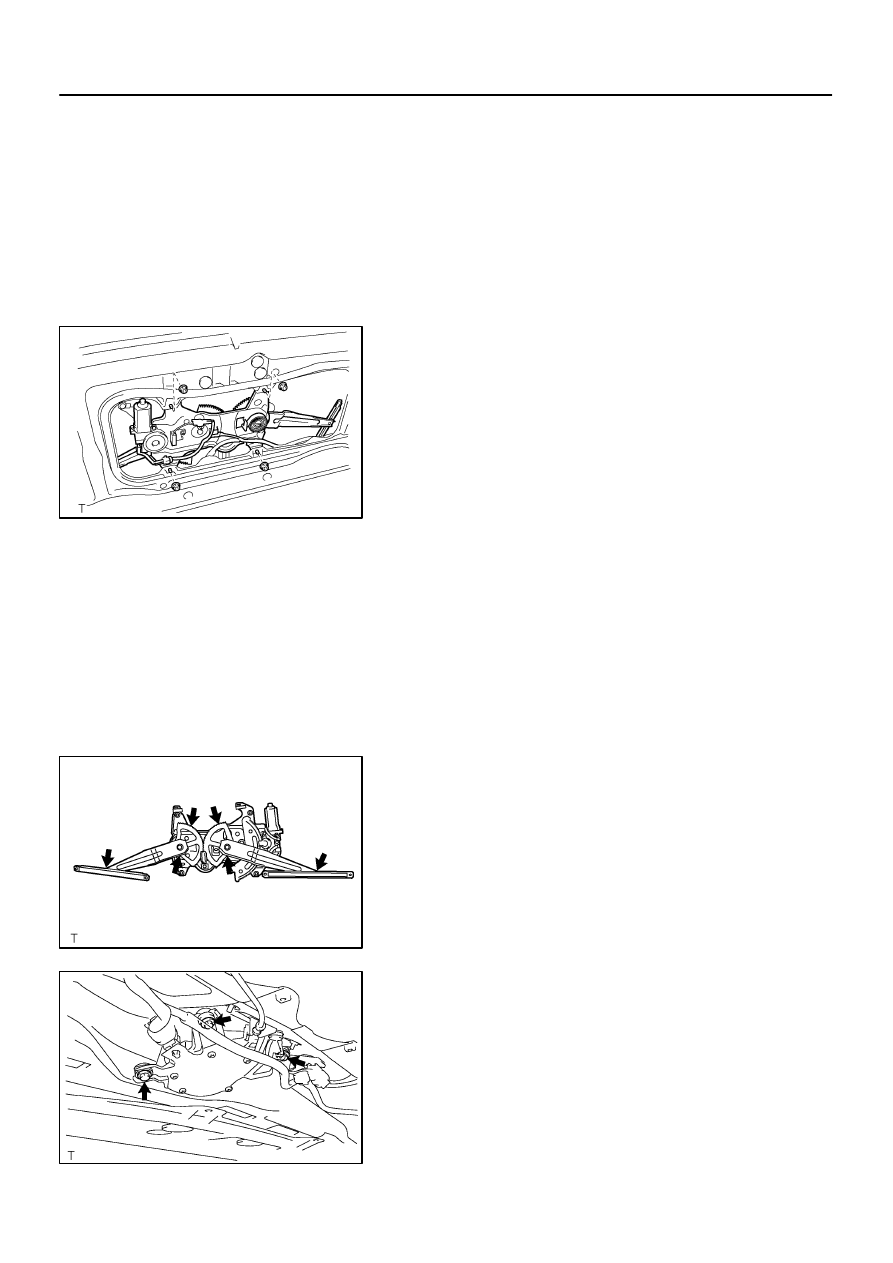
REMOVE POWER WINDOW REGULATOR
(a)
Disconnect the connector.
(b)
Disengage the connector and clamp.
(c)
Remove the 4 nuts and power window regulator.
Torque: 5.5 N·m (56 kgf·cm, 49 in.·lbf)
HINT:
Remove the power window regulator through the service hole.
(d)
Remove the 3 screws and power window regulator motor
from the power window regulator.
(e)
Remove the nut and limit switch from the power window
regulator.
HINT:
At the time of reassembly, please refer to following item.
Remove the window regulator gear, then apply MP grease to
the power window regulator.
NOTICE:
At the time of reassembly, please refer to following item.
Do not apply grease to the spring of the power window reg-
ulator.
17.
REMOVE REAR WIPER MOTOR
(a)
Disconnect the connector.
(b)
Disengage the connector and clamp.
(c)
Remove the service hole plug.
(d)
Unfasten the 3 bolts, then remove the rear wiper motor.
Torque: 5.5 N·m (56 kgf·cm, 49 in.·lbf)
18.
REMOVE BACK DOOR LOCK
(a)
Remove the back door handle protector.
(b)
Disconnect the control cable from the back door outside
handle.
H16683
H16684
5 Clips
BO–30
–
BODY
BACK DOOR
3583
(c)
Using a screwdriver, remove the back door lock protector.
HINT:
Tape the screwdriver tip before use.
(d)
Remove the 3 bolts and back door lock.
Torque: 8.0 N·m (82 kgf·cm, 71 in.·lbf)
19.
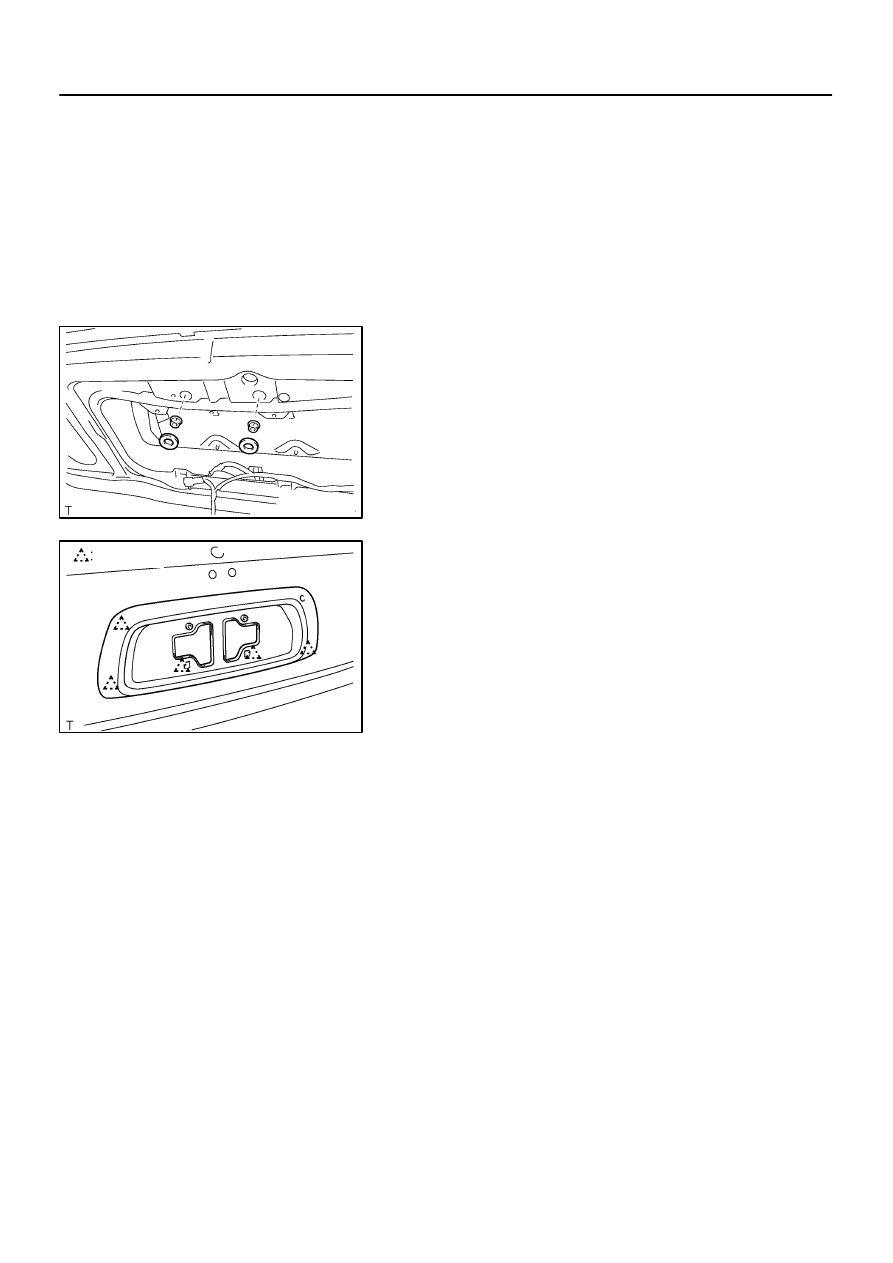
REMOVE OUTSIDE GARNISH
(a)
Remove the 2 service hole plugs.
(b)
Remove the 2 nuts.
(c)
Using a screwdriver, remove the outside garnish.
HINT:
Tape the screwdriver tip before use.
(d)
Remove the 2 screws and outside handle from the out-
side garnish.
(e)
Remove the nut and key cylinder from the outside gar-
nish.
(f)
Remove the 4 screws and licence plate light assembly
from the outside garnish.
20.
w/ Rear spoiler:
REMOVE REAR SPOILER (See page
21.
w/ o Rear spoiler:
REMOVE HIGH MOUNT STOP LIGHT
BO45V–01
H16685
H16686
H16687
H16688
–
BODY
BACK DOOR
BO–31
3584
ADJUSTMENT
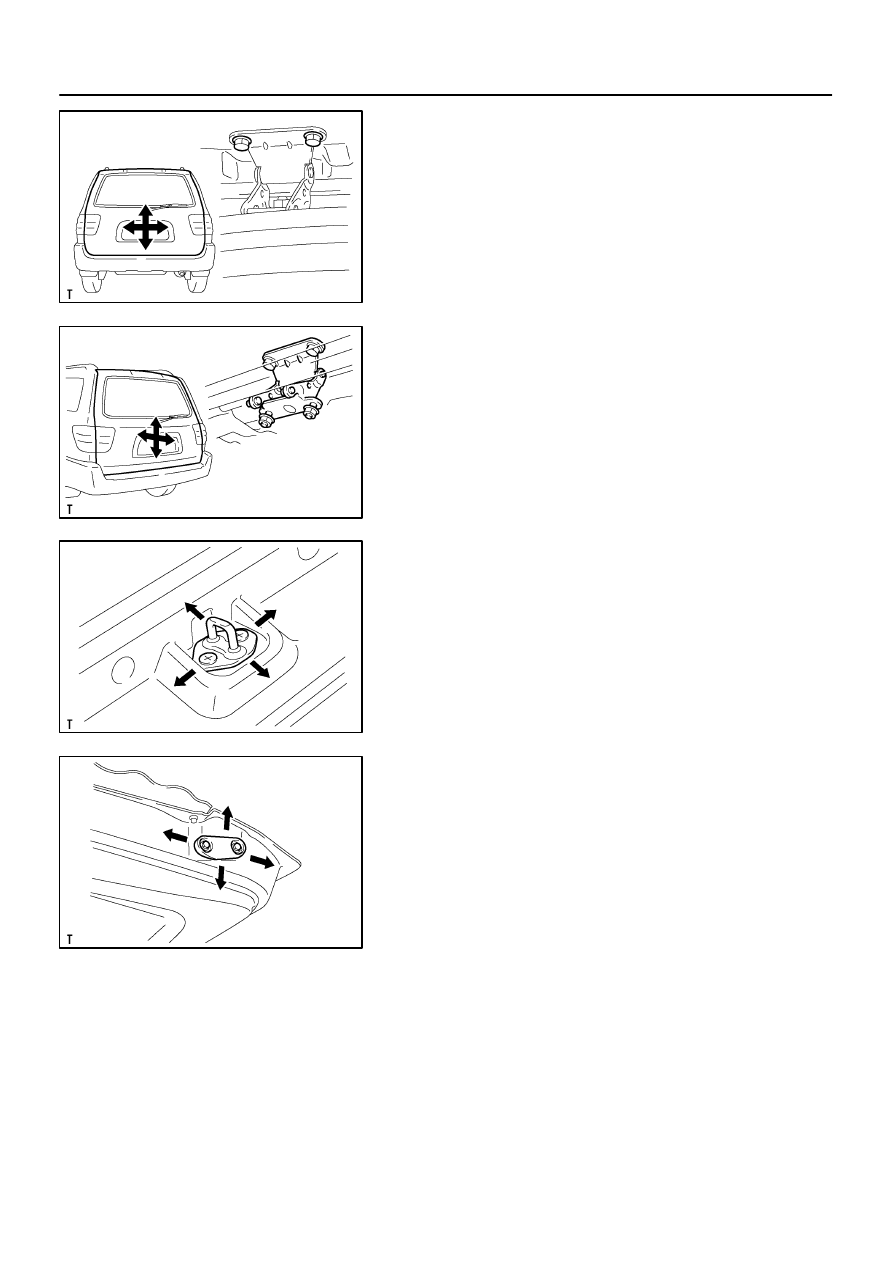
1.
ADJUST DOOR IN LEFT/RIGHT AND VERTICAL
DIRECTIONS
Loosen the door side hinge bolts to adjust.
Torque: 19.5 N·m (199 kgf·cm, 14.4 ft·lbf)
2.
ADJUST DOOR IN FORWARD/REARWARD AND VER-
TICAL DIRECTIONS
Loosen the body side hinge bolts and nuts to adjust.
Torque: 19.5 N·m (199 kgf·cm, 14.4 ft·lbf)
3.
ADJUST DOOR LOCK STRIKER
(a)
Check that the door fit and door linkages are adjusted cor-
rectly.
(b)
Loosen the striker mounting screws.
Torque: 27 N·m (275.5 kgf·cm, 19.9 ft·lbf)
(c)
Using a plastic hammer, tap the striker to adjust.
4.
ADJUST LOWER STOPPER
Loosen the stopper mounting bolts to adjust.
Нет комментариевНе стесняйтесь поделиться с нами вашим ценным мнением.
Текст