Toyota Sequoia (2005). Manual — part 897
BO45S–01
BO–24
–
BODY
REAR DOOR
3577
REASSEMBLY
Reassembly is in the reverse order of disassembly (See page
).
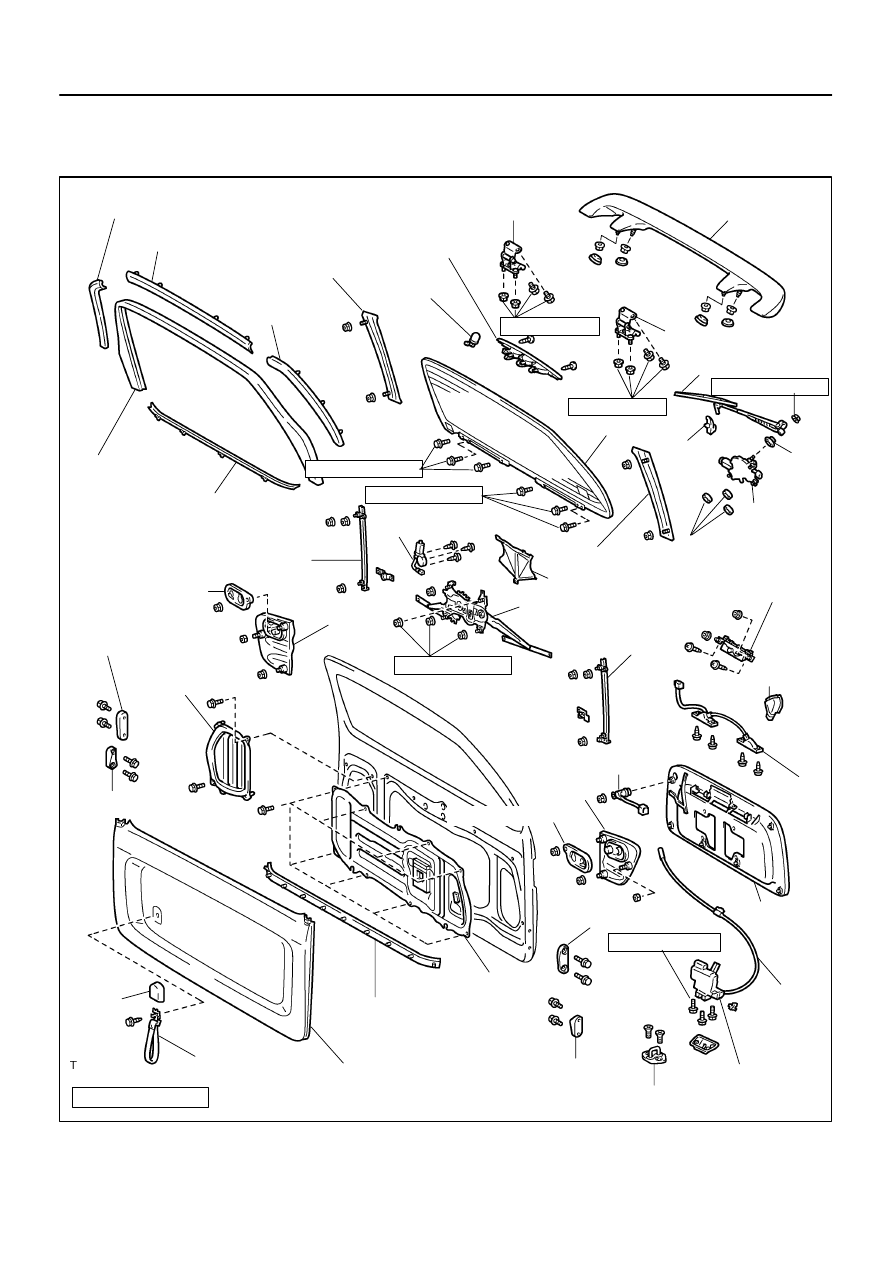
BO45T–01
H16689
Back Door Side Garnish
Back Door Center Garnish
w/o Rear spoiler:
High Mount Stop Light
Outside Moulding
Back Door Hinge
w/ Rear spoiler:
Rear Spoiler
Back Door Hinge
Rear Wiper Arm
Wiper
Motor
Grommet
Rear Wiper
Motor
Service Hole Plug
Outside Moulding
Step Liner
Back Door Glass
Back Door Side
Garnish
Back Door Glass Run
Outer Weatherstrip
Back Door
Glass Guide Rail
Outer Cover
Power Window Regulator
Back Door
Glass Guide Rail
Outside Handle
Key Cylinder
Rear Light
Lower Stopper
Rear Light
Opening Hole Cover
Stopper Cushion
Back Door Lock Protector
Control
Cable
Stopper Cushion
: Specified torque
Strap Cover
Back Door Pull Strap
Back Door Trim Board
Inner Weatherstrip
No. 1 Service
Hole Cover
Opening Hole Cover
19.5 (199, 14.4)
8.0 (82, 71 in.·lbf)
5.5 (56, 49 in.·lbf)
5.5 (56, 49 in.·lbf)
8.0 (82, 71 in.·lbf)
N·m (kgf·cm, ft·lbf)
No. 2 Service
Hole Cover
Back Door
Handle
Protector
Licence Plate
Light
Assembly
Outside
Garnish
Washer Nozzle
Lower Stopper
Power Window
Regulator Motor
Back Door Lock
19.5 (199, 14.4)
8.0 (82, 71 in.·lbf)
–
BODY
BACK DOOR
BO–25
3578
BACK DOOR
COMPONENTS
H16671
BO45U–01
H16672
H16673
H16674
5 Clips
H16675
3 Clips
BO–26
–
BODY
BACK DOOR
3579
DISASSEMBLY
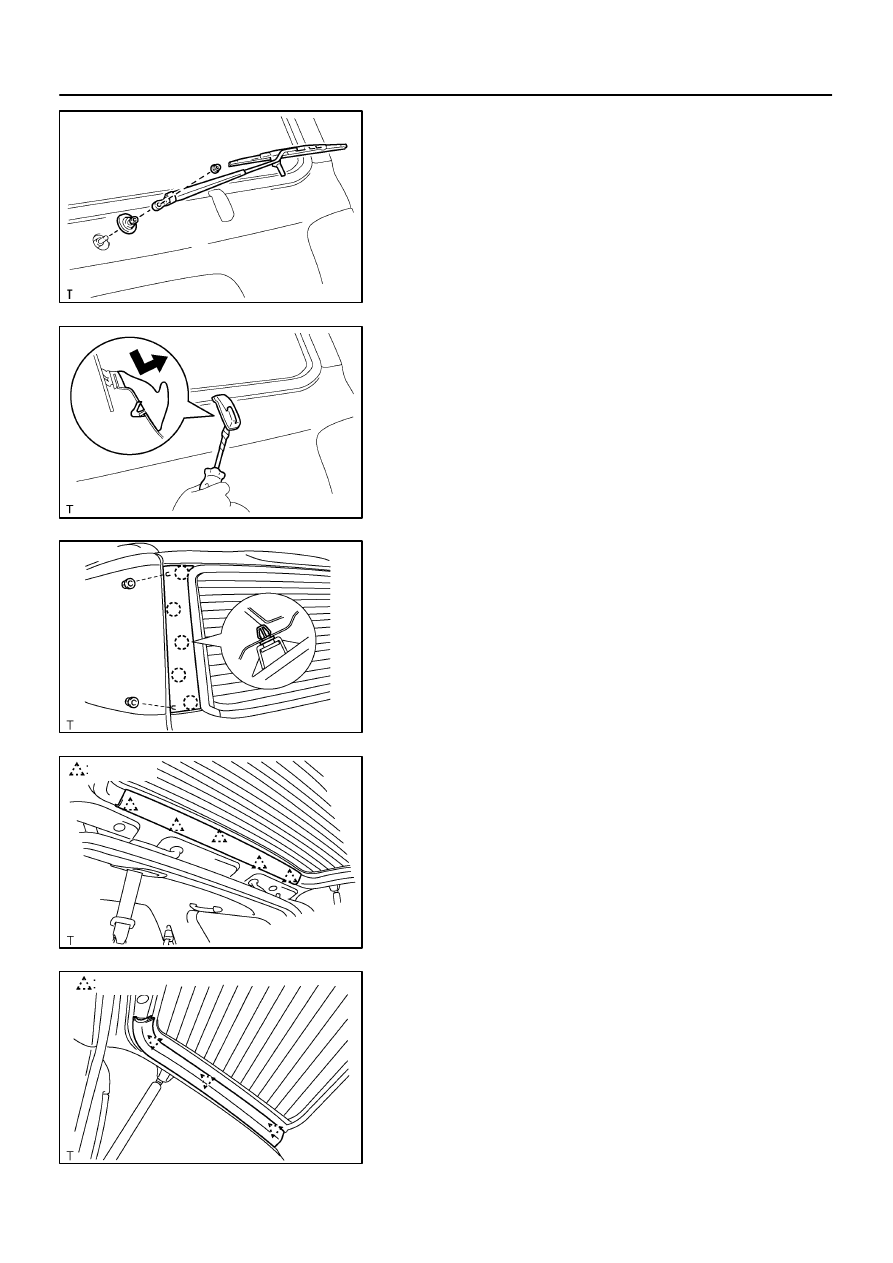
1.
REMOVE REAR WIPER ARM
(a)
Open the cover.
(b)
Remove the nut and rear wiper arm.
Torque: 5.5 N·m (56 kgf·cm, 49 in.·lbf)
(c)
Remove the rear wiper motor grommet.
2.
REMOVE STEP LINER
Using a screwdriver, remove the step liner.
HINT:
Tape the screwdriver tip before use.
3.
REMOVE OUTSIDE MOULDING
(a)
Remove the 2 nuts.
(b)
Using a screwdriver, remove the outside moulding.
(c)
Employ the same manner described above to the other
side.
4.
REMOVE BACK DOOR PULL STRAP
(a)
Using a screwdriver, remove the strap cover.
HINT:
Tape the screwdriver tip before use.
(b)
Remove the screw and back door pull strap.
5.
REMOVE BACK DOOR CENTER GARNISH
Using a screwdriver, remove the back door center garnish.
HINT:
Tape the screwdriver tip before use.
6.
REMOVE BACK DOOR SIDE GARNISH
(a)
Using a screwdriver, remove the back door side garnish.
HINT:
Tape the screwdriver tip before use.
(b)
Employ the same manner described above to the other
side.
H16676
10 Clips
H02440
–
BODY
BACK DOOR
BO–27
3580
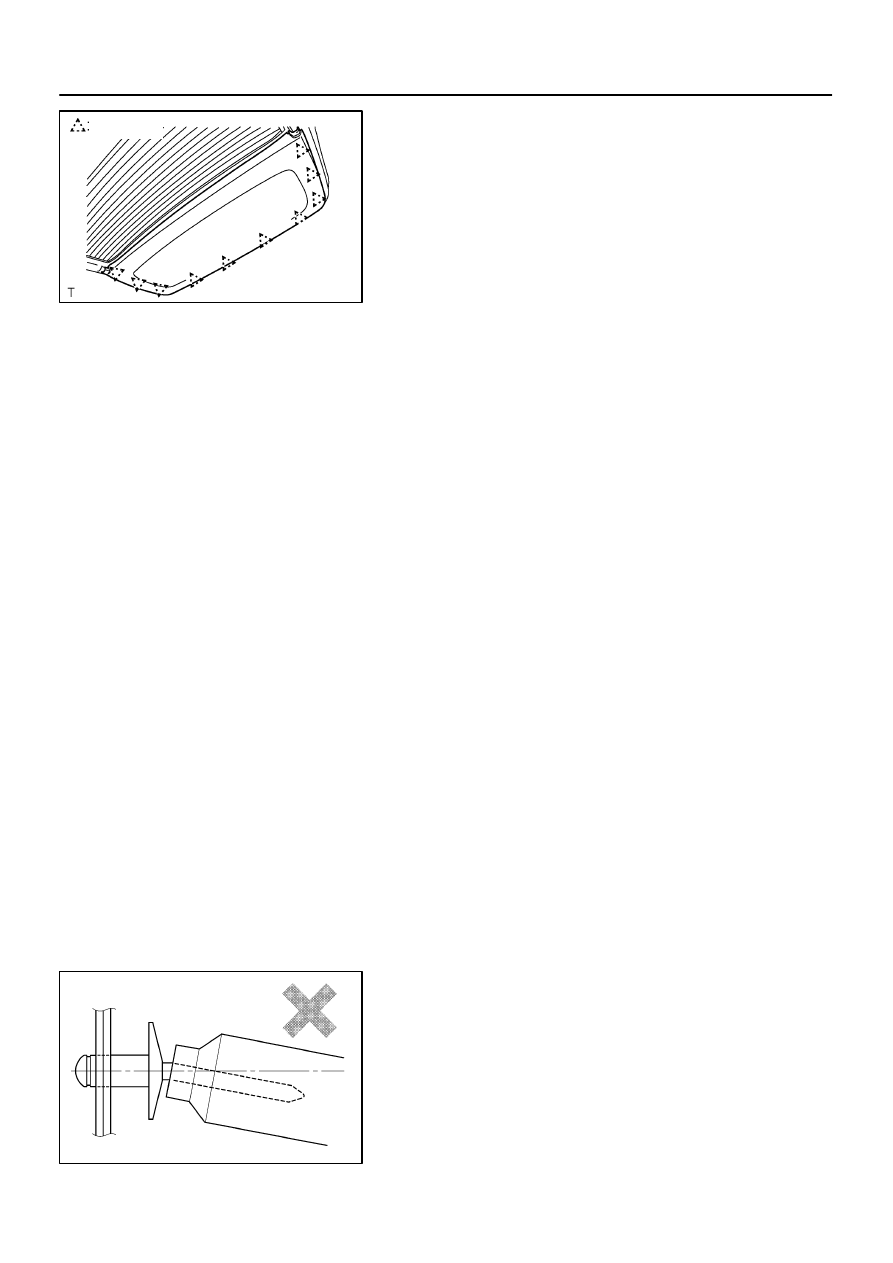
7.
REMOVE BACK DOOR TRIM BOARD
(a)
Insert a screwdriver between the back door and back
door trim board to pry the back door trim board out.
NOTICE:
Be careful not to damage the back door and back door trim
board.
HINT:
Tape the screwdriver tip before use.
(b)
Pull the back door trim board to remove it as shown in the
illustration.
8.
REMOVE INNER WEATHERSTRIP
Using a screwdriver, remove the inner weatherstrip from the
back door trim board.
HINT:
Tape the screwdriver tip before use.
9.
REMOVE NO. 1 SERVICE HOLE COVER
10.
REMOVE NO. 2 SERVICE HOLE COVER
11.
REMOVE BACK DOOR ECU
(a)
Using a drill of less than ø3.2 mm (0.126 in.), drill out the
2 rivet heads.
HINT:
Gentry and vertically put the drill to the rivets, and cut the rivet
flanges.
CAUTION:
Take care as the cut rivets are hot.
NOTICE:
Prizing the hole with a drill can lead to damage to the rivet
hole or the drill itself.
(b)
Remove the back door ECU.
HINT:
At the time of reassembly, please refer to the following item.
Using an air riveter with nose piece No. 1 or a hand riveter with
nose piece No. 1 to install new 3 rivets to the front door outside
lower moulding.
NOTICE:
At the time of reassembly, please refer to the follow-
ing items.
Do not prize a riveter, as riveter is damaged, it is not
tightened and the mandrel is bent.
Нет комментариевНе стесняйтесь поделиться с нами вашим ценным мнением.
Текст