Nissan Qashqai (2007-2010). Manual — part 1367
FRONT COMBINATION LAMP
EXL-173
< ON-VEHICLE REPAIR >
[XENON TYPE]
C
D
E
F
G
H
I
J
K
M
A
B
EXL
N
O
P
7.
Rotate the back cover. Rotate the halogen bulb socket.
8.
Remove the retaining plate counterclockwise and unlock it. Remove halogen bulb.
9.
Rotate the parking lamp bulb socket clockwise and unlock it.
10. Remove the bulb from the parking lamp bulb socket.
11. Rotate the front turn signal lamp bulb socket counterclockwise and unlock it.
12. Remove the bulb from the front turn signal lamp bulb socket.
ASSEMBLY
Assemble in the reverse order of disassembly.
CAUTION:
• Install HID control unit securely.
• After installing the bulb, install the resin cap and the bulb socket securely for watertightness.
EXL-174
< ON-VEHICLE REPAIR >
[XENON TYPE]
FRONT FOG LAMP
FRONT FOG LAMP
Exploded View
INFOID:0000000000955509
Removal and Installation
INFOID:0000000000978091
REMOVAL
1.
Remove the inner fender protector. Keep a service area. Refer to
.
2.
Remove the front fog lamp connector.
3.
Remove the screw. Remove the front fog lamp.
4.
Remove the clip. Remove the front fog lamp bracket.
INSTALLATION
Installation is the reverse order of removal.
Replacement
INFOID:0000000000978092
CAUTION:
Disconnect the battery negative terminal or the fuse.
1.
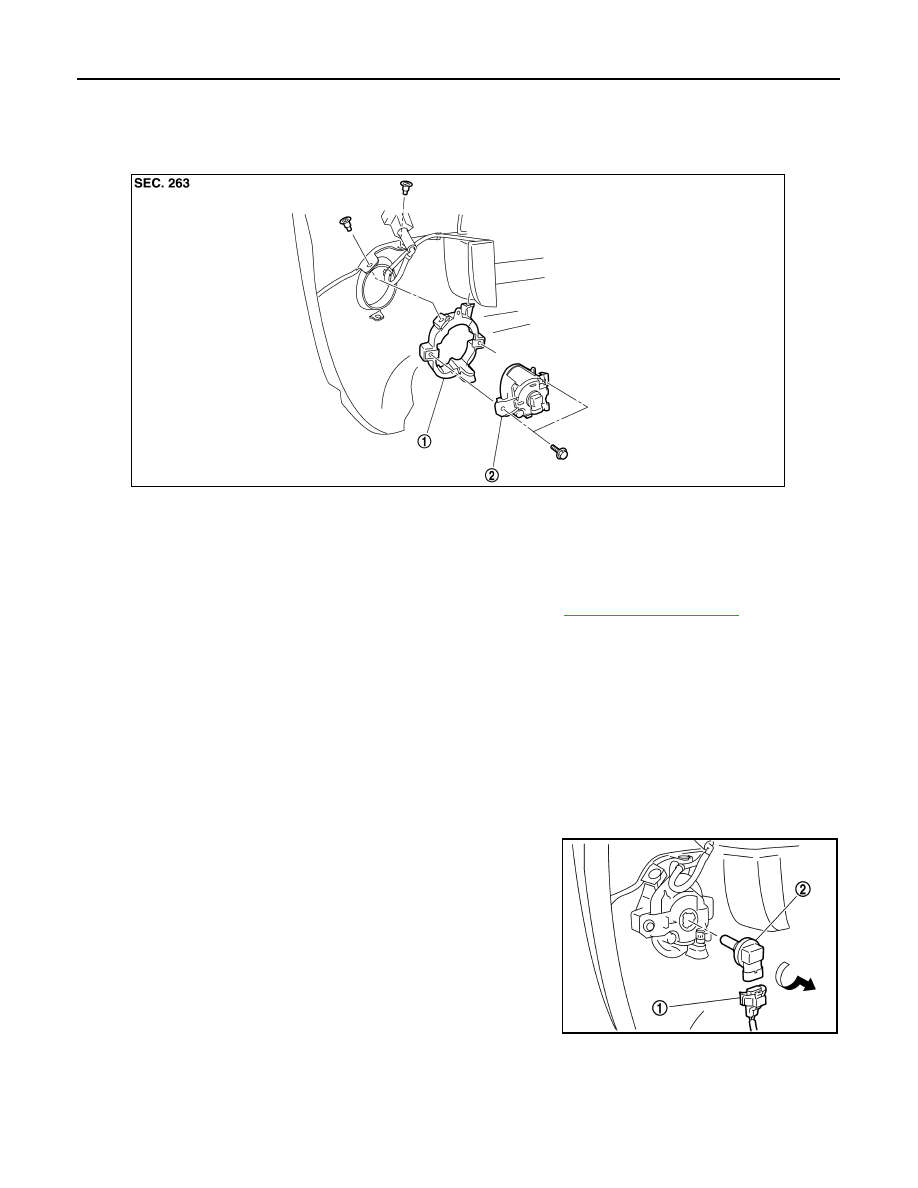
Remove the fender protector. Keep the service area.
2.
Remove the front fog lamp bulb connector (1).
3.
Rotate the bulb (2) counterclockwise and unlock it.
1.
Front fog lamp bracket
2.
Front fog lamp
JPLIA0251ZZ
JPLIA0252ZZ

LIGHT & RAIN SENSOR
EXL-175
< ON-VEHICLE REPAIR >
[XENON TYPE]
C
D
E
F
G
H
I
J
K
M
A
B
EXL
N
O
P
LIGHT & RAIN SENSOR
Exploded View
INFOID:0000000000955511
CAUTION:
• When the light & rain sensor is removed from windshield, gel/adhesive part of housing should not be
re-used.
• When re-using the light & rain sensor (i.e. after windshield replacement), replace the light & rain sen-
sor housing.
REMOVAL
DISASSEMBLY
CAUTION:
Never touch the electronic circuit board.
Removal and Installation
INFOID:0000000000955512
1.
Light & rain sensor connector
2.
Light & rain senor
3.
Inside mirror cover (lower)
4.
Inside mirror cover (upper)
A.
Metal spring clip
JPLIA0301ZZ
1.
Light & rain senor housing
2.
Light & rain senor
A.
Pawl
Refer to
for symbols not described above.
JSLIA0096ZZ
EXL-176
< ON-VEHICLE REPAIR >
[XENON TYPE]
LIGHT & RAIN SENSOR
CAUTION:
• When the light & rain sensor is removed from windshield, gel/adhesive part of housing should not be
re-used.
• When re-using the light & rain sensor (i.e. after windshield replacement), replace the light & rain sen-
sor housing.
REMOVAL
1.
Remove the inside mirror cover (upper and lower). Refer to
.
2.
Disengage the both sides of metal spring clips, and remove the light & rain sensor from the windshield.
3.
Disconnect light & rain sensor connector.
NOTE:
When replacing the light & rain sensor housing;
Disengage the pawls, and remove the light & rain sensor housing from the light & rain sensor.
CAUTION:
Never touch the electronic circuit board.
INSTALLATION
Install in the reverse order of removal.
CAUTION:
• Surface of windshield should be cleaned.
• Never touch gel/adhesive of new part.
Нет комментариевНе стесняйтесь поделиться с нами вашим ценным мнением.
Текст