Nissan Qashqai (2007-2010). Manual — part 2006
CHASSIS MAINTENANCE
MA-63
< ON-VEHICLE MAINTENANCE >
C
D
E
F
G
H
I
J
K
L
M
B
MA
N
O
A
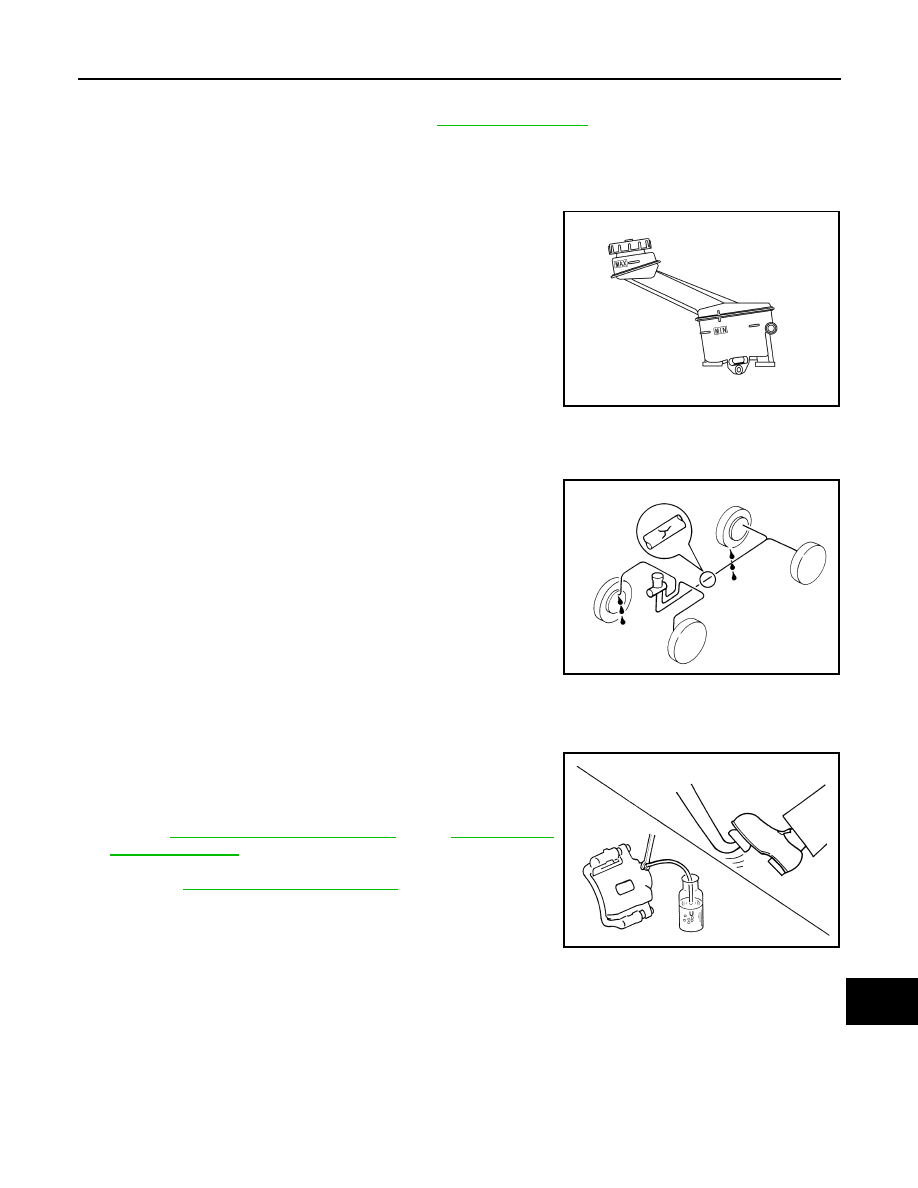
BRAKE FLUID LEVEL AND LEAKS
BRAKE FLUID LEVEL AND LEAKS : Inspection
INFOID:0000000001088925
• If fluid level is extremely low, check brake/clutch system for leaks.
BRAKE LINES AND CABLES
BRAKE LINES AND CABLES : Inspection
INFOID:0000000001088935
• Check brake/clutch fluid lines and parking brake cables for
improper attachment, leaks, chafing, abrasions, deterioration, etc.
BRAKE FLUID
BRAKE FLUID : Changing
INFOID:0000000001088936
1.
Drain brake fluid from each bleed valve.
2.
Refill until new brake fluid comes out from each bleed valve.
Use same procedure as in bleeding hydraulic system to refill
brake fluid.
Refer to
BR-12, "Bleeding Brake System"
(LHD),
• Refill with recommended brake fluid.
Refer to
MA-21, "Fluids and Lubricants"
• Never reuse drained brake fluid.
• Be careful not to splash brake fluid on painted areas.
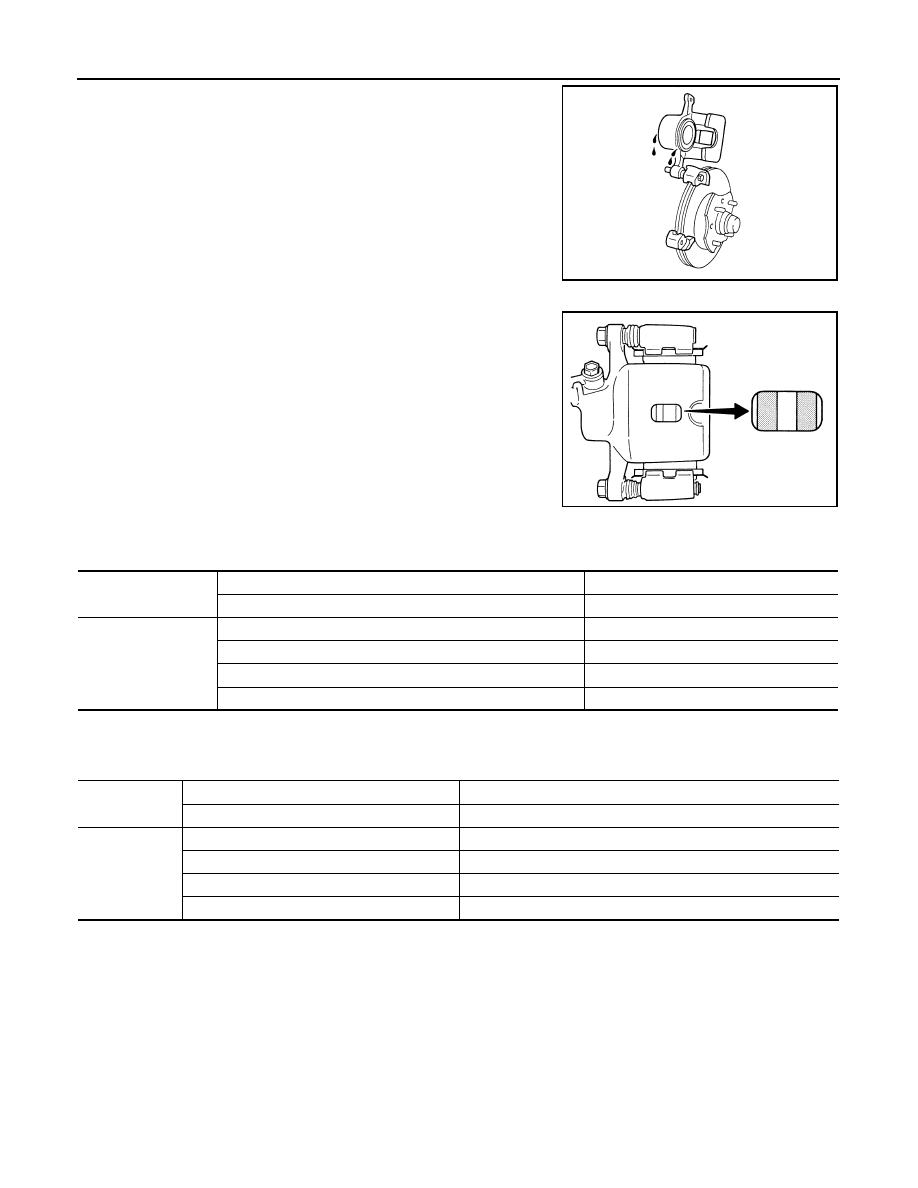
DISC BRAKE
DISC BRAKE : Inspection
INFOID:0000000001088943
DISC ROTOR
Check condition, wear, and damage.
CALIPER
Wheel nuts tightening torque:
Refer to
.
SFIA0066J
SBR389C
SBR419C
MA-64
< ON-VEHICLE MAINTENANCE >
CHASSIS MAINTENANCE
• Check for leakage.
BRAKE PAD
• Check for wear or damage.
DISC BRAKE : Front Disc Brake
INFOID:0000000001095941
Unit: mm (in.)
DISC BRAKE : Rear Disc Brake
INFOID:0000000001095942
Unit: mm (in.)
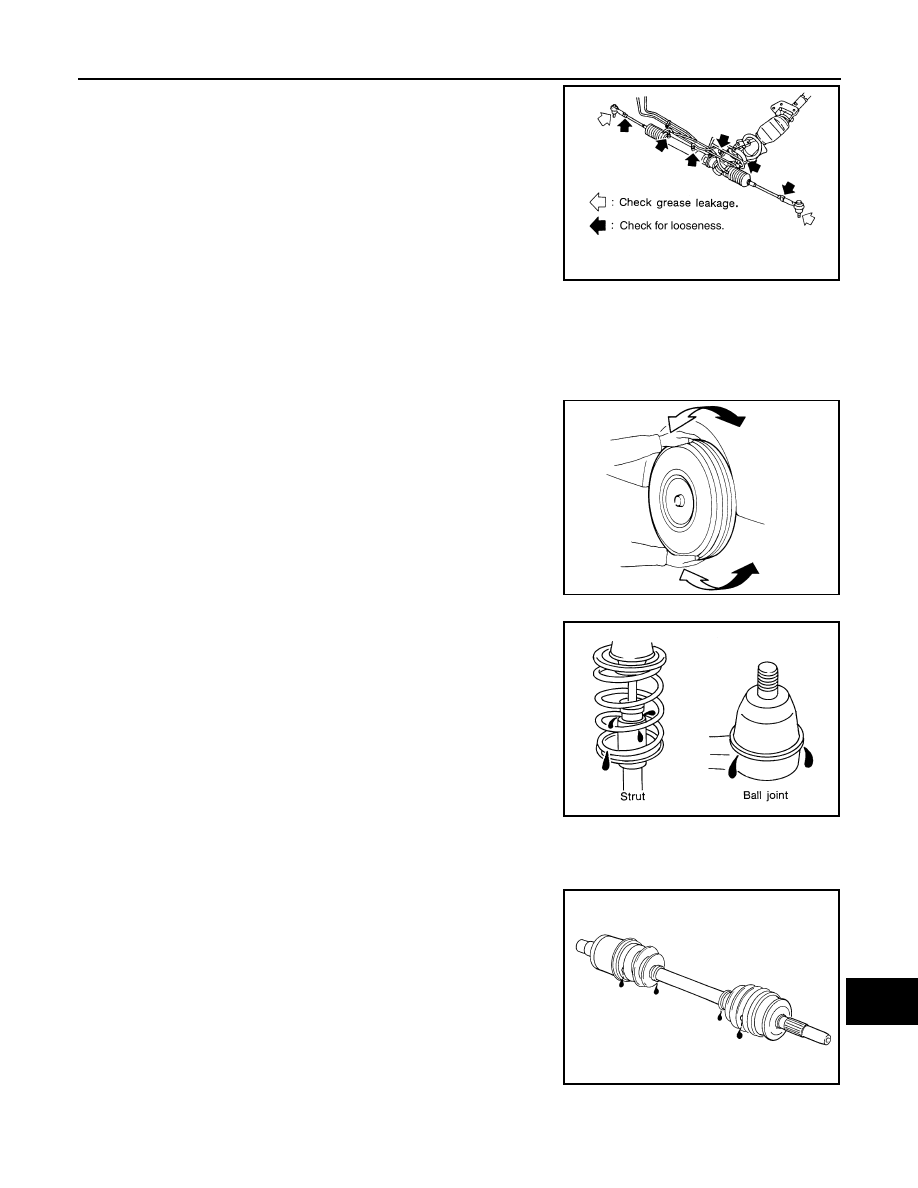
STEERING GEAR AND LINKAGE
STEERING GEAR AND LINKAGE : Inspection
INFOID:0000000001088947
STEERING GEAR
SMA922A
BRA0010D
Brake pad
Standard thickness
11.0 (0.433)
Wear limit thickness
2.0 (0.079)
Disc rotor
Standard thickness
26.0 (1.024)
Wear limit thickness
24.0 (0.945)
Thickness variation (measured at 8 positions)
0.020 (0.0008)
Runout limit (with it attached to the vehicle)
0.035 (0.0014)
Brake pad
Standard thickness
8.5 (0.335)
Wear limit thickness
2.0 (0.079)
Disc rotor
Standard thickness
9.0 (0.354)
Wear limit thickness
8.0 (0.315)
Thickness variation (measured at 8 positions)
0.020 (0.0008)
Runout limit (with it attached to the vehicle)
—
CHASSIS MAINTENANCE
MA-65
< ON-VEHICLE MAINTENANCE >
C
D
E
F
G
H
I
J
K
L
M
B
MA
N
O
A
• Check gear housing and boots for looseness, damage and grease
leakage.
• Check connection with steering column for looseness.
STEERING LINKAGE
Check ball joint, dust cover and other component parts for looseness, wear, damage and grease leakage.
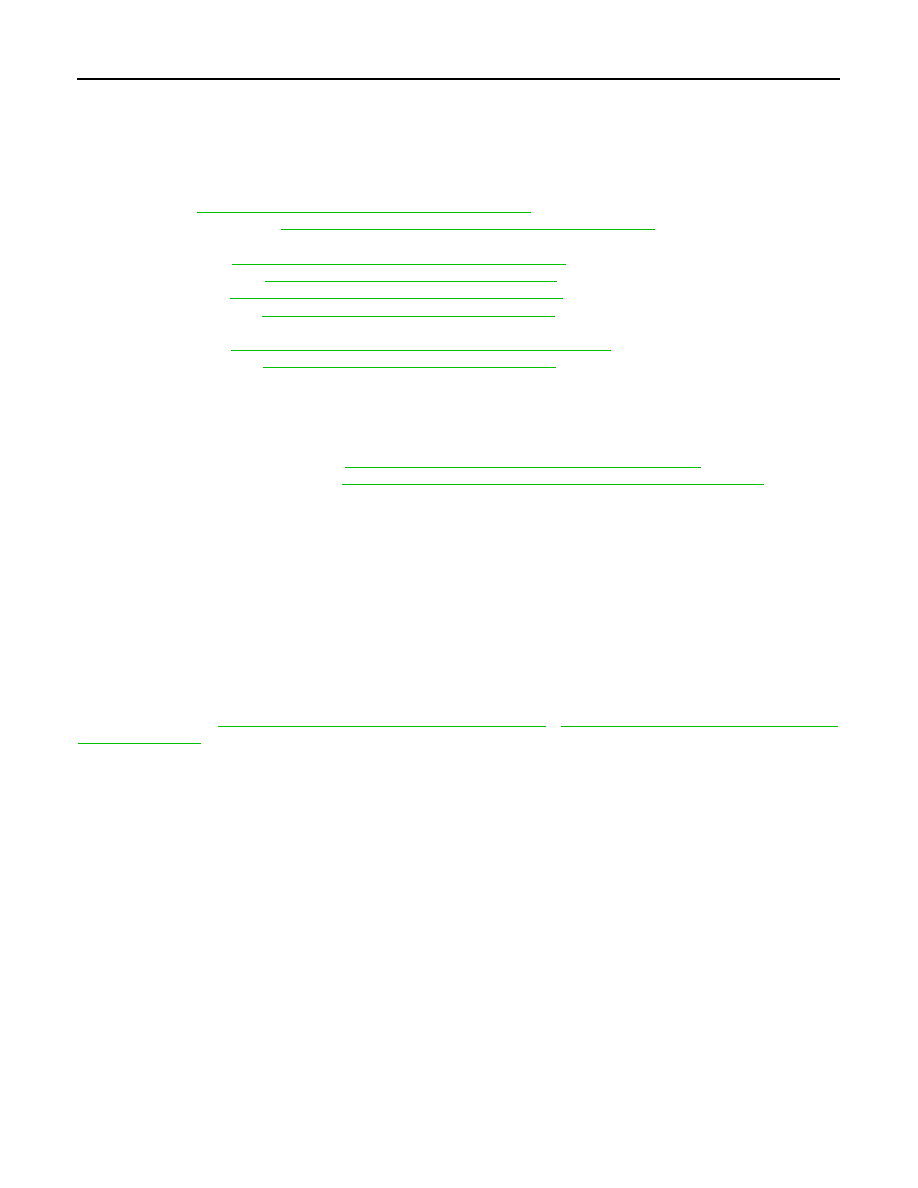
AXLE AND SUSPENSION PARTS
AXLE AND SUSPENSION PARTS : Inspection
INFOID:0000000001088949
Check front and rear axle and suspension parts for excessive play,
cracks, wear or other damage.
• Shake each wheel to check for excessive play.
• Check wheel bearings for smooth operation.
• Check axle and suspension nuts and bolts for looseness.
• Check strut (shock absorber) for oil leakage or other damage.
• Check suspension ball joint for grease leakage and ball joint dust
cover for cracks or other damage.
DRIVE SHAFT
DRIVE SHAFT : Inspection
INFOID:0000000001088951
• Check boot and drive shaft for cracks, wear, damage and grease
leakage.
SLIA0014E
SMA525A
SFA392B
SFA108A
MA-66
< ON-VEHICLE MAINTENANCE >
BODY MAINTENANCE
BODY MAINTENANCE
LOCKS, HINGES AND HOOD LATCH
LOCKS, HINGES AND HOOD LATCH : Lubricating
INFOID:0000000001088898
For hood and hood lock illustration.
• Hood: Refer to
DLK-223, "HOOD ASSEMBLY : Exploded View"
• Hood lock control: Refer to
DLK-227, "HOOD LOCK CONTROL : Exploded View"
.
For door and door lock illustration.
• Front door: Refer to
DLK-235, "DOOR ASSEMBLY : Exploded View"
• Front door lock: Refer to
DLK-255, "DOOR LOCK : Exploded View"
.
• Rear door: Refer to
DLK-241, "DOOR ASSEMBLY : Exploded View"
.
• Rear door lock: Refer to
DLK-262, "DOOR LOCK : Exploded View"
For back door and back door lock illustration.
• Back door: Refer to
DLK-247, "BACK DOOR ASSEMBLY : Exploded View"
.
• Back door lock: Refer to
DLK-268, "DOOR LOCK : Exploded View"
SEAT BELT, BUCKLES, RETRACTORS, ANCHORS AND ADJUSTERS
SEAT BELT, BUCKLES, RETRACTORS, ANCHORS AND ADJUSTERS : Inspection
INFOID:0000000001088899
For front seat belt illustration. Refer to
SB-5, "SEAT BELT RETRACTOR : Exploded View"
For rear seat belt illustration. Refer to
SB-11, "OUTER SEAT BELT RETRACTOR : Exploded View"
.
CAUTION:
• After any collision, inspect all seat belt assemblies, including retractors and other attached hard-
wares (I.e. anchor bolt, guide rail set). Nissan recommends to replace all seat belt assemblies in use
during a collision, unless not damaged and properly operating after minor collision.
Also inspect seat belt assemblies not in use during a collision, and replace if damaged or improperly
operating.
Seat belt pre-tensioner should be replaced even if the seat belts are not in use during a frontal colli-
sion where the driver and passenger air bags are deployed.
• If any component of seat belt assembly is questionable, do not repair.
Replace as seat belt assembly.
• If webbing is cut, frayed, or damaged, replace belt assembly.
• Never oil tongue and buckle.
• Use a genuine NISSAN seat belt assembly.
For details, refer to
SB-3, "SEAT BELT RETRACTOR : Inspection"
SB-10, "OUTER SEAT BELT RETRAC-
in SB section.
• Check anchors for loose mounting
• Check belts for damage
• Check retractor for smooth operation
• Check function of buckles and tongues when buckled and released
BODY CORROSION
BODY CORROSION : Checking Body Corrosion
INFOID:0000000001088905
Visually check body panels for collision damage (scratches, chipping, rubbing, etc.) or damage to the anti-cor-
rosion materials. In particular, check the following locations.
HEMMED PANELS
Hood front end, door lower end, trunk lid rear end, etc.
PANEL JOINT
Side sill of rear fender and center pillar, rear wheel housing of rear fender, around strut tower in engine com-
partment, etc.
PANEL EDGE
Trunk lid opening, sunroof opening, fender wheel-arch flange, fuel filler lid flange, around holes in panel, etc.
PARTS CONTACT
Waist moulding, windshield moulding, bumper, etc.
Нет комментариевНе стесняйтесь поделиться с нами вашим ценным мнением.
Текст