KIA Borrego (2017 year). Manual — part 24

Driving your vehicle
Use high quality ethylene gly-
Change to "winter weight" oil
To keep locks from freezing
col coolant
if necessary
To keep the locks from freezing,
Your vehicle is delivered with high
In some climates it is recommended
squirt an approved de-icer fluid or
quality ethylene glycol coolant in the
that a lower viscosity "winter weight"
glycerine into the key opening. If a
cooling system. It is the only type of
oil be used during cold weather. See
lock is covered with ice, squirt it with
coolant that should be used because
chapter
9 for recommendations. If
an approved de-icing fluid to remove
it helps prevent corrosion in the cool-
you aren't sure what weight oil you
the ice. If the lock is frozen internally,
ing system, lubricates the water
should use, we recommend that you
you may be able to thaw it out by
pump and prevents freezing. Be sure
consult an authorized Kia dealer.
using a heated key. Handle the heat-
to replace or replenish your coolant
ed key with care to avoid injury.
in accordance with the maintenance
Check spark plugs and ignition
schedule in chapter 8. Before winter,
system
Use approved window washer
have your coolant tested to assure
anti-freeze in system
that its freezing point is sufficient for
Inspect your spark plugs as
the temperatures anticipated during
described in chapter 8 and replace
To keep the water in the window
the winter.
them if necessary. Also check all
washer system from freezing, add an
ignition wiring and components to be
approved window washer anti-freeze
sure they are not cracked, worn or
solution in accordance with instruc-
Check battery and cables
damaged in any way.
tions on the container. Window wash-
Winter puts additional burdens on
er anti-freeze is available from an
the battery system. Visually inspect
authorized Kia dealer and most auto
the battery and cables as described
parts outlets. Do not use engine
in chapter 8. We recommend that the
coolant or other types of anti-freeze
level of charge in your battery be
as these may damage the paint fin-
checked by an authorized Kia dealer.
ish.
6 78

Driving your vehicle
Don't let your parking brake
Don't let ice and snow accu-
Carry emergency equipment
freeze
mulate underneath
Depending on the severity of the
Under some conditions your parking
Under some conditions, snow and
weather, you should carry appropri-
brake can freeze in the engaged
ice can build up under the fenders
ate emergency equipment. Some of
position. This is most likely to hap-
and interfere with the steering. When
the items you may want to carry
pen when there is an accumulation
driving in severe winter conditions
include tire chains, tow straps or
of snow or ice around or near the
where this may happen, you should
chains, flashlight, emergency flares,
rear brakes or if the brakes are wet.
periodically check underneath the
sand, shovel, jumper cables, window
If there is a risk the parking brake
vehicle to be sure the movement of
scraper, gloves, ground cloth, cover-
may freeze, apply it only temporarily
the front wheels and the steering
alls, blanket, etc.
while you put the shift lever in P
components is not obstructed.
(Park) and block the rear wheels so
the vehicle cannot roll. Then release
the parking brake.
6 79
Driving your vehicle
VEHICLE WEIGHT
This section will guide you in the
Cargo weight
GVWR
proper loading of your vehicle and/or
(Gross vehicle weight rating)
This figure includes all weight added
trailer, to keep your loaded vehicle
to the Base Curb Weight, including
This is the maximum allowable
weight within its design rating capa-
cargo and optional equipment.
weight of the fully loaded vehicle
bility, with or without a trailer. Properly
(including all options, equipment,
loading your vehicle will provide max-
passengers and cargo). The GVWR
imum return of the vehicle design
GAW (Gross axle weight)
is shown on the certification label.
performance. Before loading your
This is the total weight placed on
vehicle, familiarize yourself with the
each axle (front and rear) - including
following terms for determining your
Overloading
vehicle curb weight and all payload.
vehicle's weight ratings, with or with-
out a trailer, from the vehicle's speci-
fications and the certification label:
GAWR
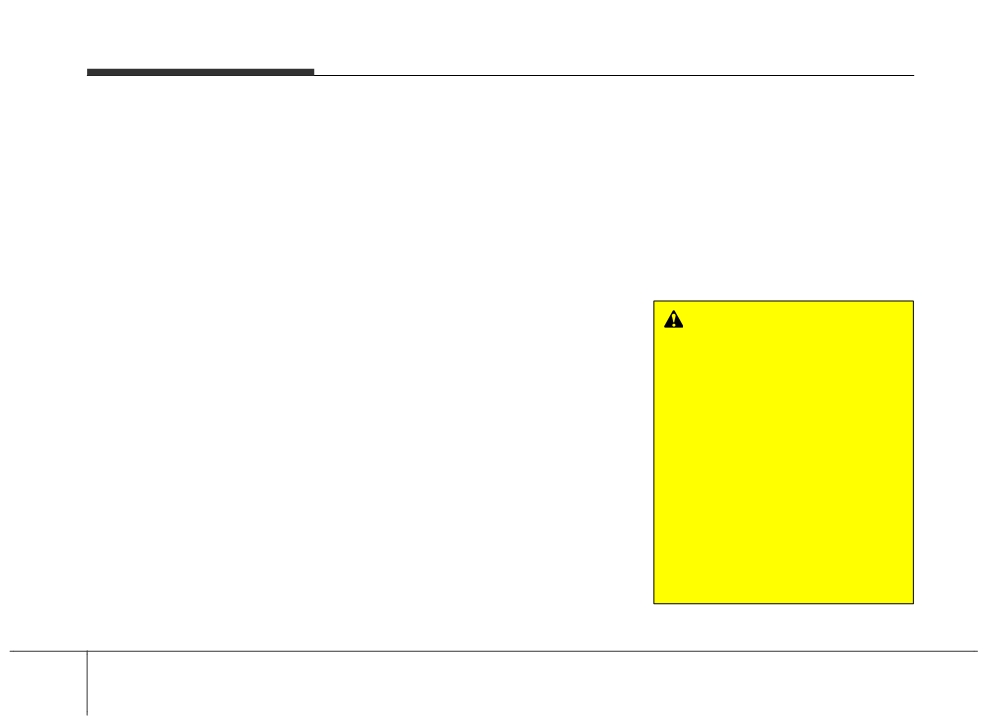
WARNING - Vehicle
weight
(Gross axle weight rating)
The gross axle weight rating
Base curb weight
This is the maximum allowable
(GAWR) and the gross vehicle
weight that can be carried by a single
This is the weight of the vehicle
weight rating (GVWR) for your
axle (front or rear). These numbers
including a full tank of fuel and all
vehicle are on the certification
are shown on the certification label.
standard equipment. It does not
label attached to the driver's (or
include passengers, cargo, or option-
The total load on each axle must
front
passenger’s)
door.
al equipment.
never exceed its GAWR.
Exceeding these ratings can
cause an accident or vehicle
damage. You can calculate the
GVW (Gross vehicle weight)
Vehicle curb weight
weight of your load by weighing
This is the weight of your new vehicle
This is the Base Curb Weight plus
the items (and people) before
when you picked it up from your deal-
actual Cargo Weight plus passengers.
putting them in the vehicle. Be
er plus any aftermarket equipment.
careful not to overload your
vehicle.
6 80

What to do in an emergency
Road warning
7-2
• EC Declaration of Conformity for Jack
7-26
• Hazard warning flasher
7-2
Towing
7-27
In case of an emergency while driving
7-3
• Towing service
7-27
• If the engine stalls at a crossroad or crossing
7-3
• Emergency towing
7-28
• If you have a flat tire while driving
7-3
• Tie-down hook (for flatbed towing)
7-31
• If engine stalls while driving
7-3
Emergency Commodity
7-32
If the engine will not start
7-4
• Fire extinguisher
7-32
• If engine doesn't turn over or turns over slowly
7-4
• First aid kit
7-32
• If engine turns over normally but does not start
7-4
• Triangle reflector
7-32
Emergency starting
7-5
• Tire pressure gauge
7-32
• Jump starting
7-5
• Push-starting
7-7
If the engine overheats
7-8
Tire Pressure Monitoring System (TPMS)
7-9
• Check tire pressure
7-9
• Low tire pressure telltale
7-11
• Low tire pressure position telltale
7-11
7
• TPMS (Tire Pressure Monitoring System)
malfunction indicator
7-12
• Changing a tire with TPMS
7-13
If you have a flat tire (with spare tire )
7-16
• Jack and tools
7-16
• Removing and storing the spare tire
7-17
• Changing tires
7-18
• Jack label
7-25

What to do in an emergency
ROAD WARNING
Hazard warning flasher
It should be used whenever emer-
gency repairs are being made or
when the vehicle is stopped near the
edge of a roadway.
Depress the flasher switch with the
ignition switch in any position. The
flasher switch is located in the center
console switch panel. All turn signal
lights will flash simultaneously.
• The hazard warning flasher oper-
ates whether your vehicle is run-
OHM066001L
ning or not.
• The turn signals do not work when
The hazard warning flasher serves
the hazard flasher is on.
as a warning to other drivers to exer-
cise
extreme caution when
• Care must be taken when using
approaching, overtaking, or passing
the hazard warning flasher while
your vehicle.
the vehicle is being towed.
7 2

What to do in an emergency
IN CASE OF AN EMERGENCY WHILE DRIVING
If the engine stalls at a cross-
If you have a flat tire while
If engine stalls while driving
road or crossing
driving
1. Reduce your speed gradually,
If the engine stalls at a crossroad or
If a tire goes flat while you are driving:
keeping a straight line. Move cau-
crossing, set the shift lever in the N
tiously off the road to a safe place.
1. Take your foot off the accelerator
(Neutral) position and then push the
pedal and let the vehicle slow
2. Turn on your emergency flashers.
vehicle to a safe place.
down while driving straight ahead.
3. Try to start the engine again. If
Do not apply the brakes immedi-
your vehicle does not start, we
ately or attempt to pull off the road
recommend that you consult an
as this may cause a loss of control.
authorized Kia dealer.
When the vehicle has slowed down
to such a speed that it is safe to do
so, brake carefully and pull off the
road. Drive off the road as far as
possible and park on a firm level
ground. If you are on a divided
highway, do not park in the median
area between the two traffic lanes.
2. When the vehicle is stopped, turn
on your emergency hazard flash-
ers, set the parking brake and put
the transaxle in P (Park).
3. Have all passengers get out of the
vehicle. Be sure they all get out on
the side of the vehicle that is away
from traffic.
4. When changing a flat tire, follow
the instruction provided later in
this section.
7 3

What to do in an emergency
IF THE ENGINE WILL NOT START
If engine doesn't turn over or
If engine turns over normally
turns over slowly
WARNING
but does not start
If the engine will not start, do
1. If your vehicle has an automatic
1. Check the fuel level.
not push or pull the vehicle to
transaxle, be sure the shift lever is
2. With the ignition switch in the
start it. This could result in a
in N (Neutral) or P (Park) and the
LOCK position, check all connec-
collision or cause other dam-
emergency brake is set.
tors at the ignition coils and spark
age. In addition, push or pull
2. Check the battery connections to
plugs. Reconnect any that may be
starting may cause the catalytic
be sure they are clean and tight.
disconnected or loose.
converter to be overloaded and
3. Turn on the interior light. If the light
create a fire hazard.
3. Check the fuel line in the engine
dims or goes out when you oper-
compartment.
ate the starter, the battery is dis-
4. If the engine still does not start, we
charged.
recommend that you call an
4. Check the starter connections to
authorized Kia dealer.
be sure they are securely tight-
ened.
5. Do not push or pull the vehicle to
start it. See instructions for "Jump
starting".
7 4

What to do in an emergency
EMERGENCY STARTING
Jump starting
CAUTION
Jump starting can be dangerous if
Use only a 12-volt jumper sys-
done incorrectly. Therefore, to avoid
tem. You can damage a 12-volt
harm to yourself or damage to your
starting motor, ignition system,
vehicle or battery, follow the jump
and other electrical parts
starting procedures. If in doubt, we
beyond repair by use of a 24-
strongly recommend that you have a
volt power supply (either two
competent technician or towing serv-
12-volt batteries in series or a
ice jump start your vehicle.
24-volt motor generator set).
1VQA4001
Connect cables in numerical order
WARNING - Battery
and disconnect in reverse order.
Never attempt to check the elec-
trolyte level of the battery as
this may cause the battery to
rupture or explode causing seri-
ous injury.
7 5

What to do in an emergency
Jump starting procedure
(Continued)
WARNING - Battery
1. Make sure the booster battery is
•
Do not allow the (+) and (-)
•
Keep all flames or sparks
12-volt and that its negative termi-
jumper cables to touch. It may
away from the battery. The
nal is grounded.
cause sparks.
battery produces hydrogen
2. If the booster battery is in another
gas which may explode if
•
The battery may rupture or
vehicle, do not allow the vehicles
exposed to flame or sparks.
explode when you jump start
come in contact.
with a low or frozen battery.
If these instructions are not
3. Turn off all unnecessary electrical
followed exactly, serious per-
loads.
sonal injury and damage to
4. Connect the jumper cables in the
the vehicle may occur! If you
exact sequence shown in the illus-
are not sure how to follow this
tration. First connect one end of a
procedure, seek qualified
jumper cable to the positive termi-
assistance. Automobile bat-
nal of the discharged battery (1),
teries contain sulfuric acid.
then connect the other end to the
This is poisonous and highly
positive terminal on the booster
corrosive. When jump start-
battery (2).
ing, wear protective glasses
and be careful not to get acid
Proceed to connect one end of the
on yourself, your clothing or
other jumper cable to the negative
on the vehicle.
terminal of the booster battery (3),
then the other end to a solid, sta-
•
Do not attempt to jump start
tionary, metallic point (for example,
the vehicle if the discharged
the engine lifting bracket) away
battery is frozen or if the elec-
from the battery (4). Do not con-
trolyte level is low; the battery
nect it to or near any part that
may rupture or explode.
moves when the engine is cranked.
(Continued)
7 6

What to do in an emergency
Do not allow the jumper cables to
5. Start the engine of the vehicle with
Push-starting
contact anything except the cor-
the booster battery and let it run at
Vehicles equipped with automatic
rect battery terminals or the cor-
2,000 rpm, then start the engine
transaxle cannot be push-started.
rect ground. Do not lean over the
of the vehicle with the discharged
battery when making connections.
battery.
Follow the directions in this section
for jump-starting.
If the cause of your battery discharg-
CAUTION - Battery cables
ing is not apparent, we recommend
that the system be checked by an
Do not connect the jumper cable
WARNING
authorized Kia dealer.
from the negative terminal of the
Never tow a vehicle to start it
booster battery to the negative
because the sudden surge for-
terminal of the discharged battery.
ward when the engine starts
This can cause the discharged
could cause a collision with the
battery to overheat and crack,
tow vehicle.
releasing battery acid.
Make sure to connect one end of
the jumper cable to the negative
terminal of the booster battery,
and the other end to a metallic
point, far away from the battery.
7 7

What to do in an emergency
IF THE ENGINE OVERHEATS
If your temperature gauge indicates
If the drive belt seems to be satis-
6. If you cannot find the cause of the
overheating, you will experience a
factory, check for coolant leaking
overheating, wait until the engine
loss of power, or hear loud pinging or
from the radiator, hoses or under
temperature has returned to nor-
knocking, the engine is probably too
the vehicle. (If the air conditioning
mal. Then, if coolant has been lost,
hot. If this happens, you should:
had been in use, it is normal for
carefully add coolant to the reser-
cold water to be draining from it
voir to bring the fluid level in the
when you stop).
reservoir up to the halfway mark.
1. Pull off the road and stop as soon
as it is safe to do so.
7. Proceed with caution, keeping
WARNING
alert for further signs of overheat-
2. Place the shift lever in P (Park)
ing. If overheating happens again,
and set the parking brake. If the air
While the engine is running,
we recommend that you call an
conditioning is on, turn it off.
keep hair, hands and clothing
authorized Kia dealer.
away from moving parts such
3. If engine coolant is running out
as the fan and drive belts to pre-
under the vehicle or steam is
coming out from the hood, stop
vent injury.
CAUTION
the engine. Do not open the hood
•
Serious loss of coolant indi-
until the coolant has stopped run-
5. If the water pump drive belt is bro-
cates there is a leak in the
ning or the steaming has stopped.
ken or engine coolant is leaking
cooling system and we recom-
If there is no visible loss of engine
out, stop the engine immediately
mend that the system be
coolant and no steam, leave the
and we recommend that you call
checked by an authorized Kia
engine running and check to be
an authorized Kia dealer.
dealer.
sure the engine cooling fan is
•
When the engine overheats
operating. If the fan is not running,
from low engine coolant, sud-
turn the engine off.
WARNING
denly adding engine coolant
4. Check to see if the water pump
Do not remove the radiator cap
may cause cracks in the
drive belt is missing. If it is not miss-
when the engine is hot. This can
engine. To prevent damage,
ing, check to see that it is tight.
allow coolant to blow out of the
add engine coolant slowly in
opening and cause serious
small quantities.
burns.
7 8
What to do in an emergency
TIRE PRESSURE MONITORING SYSTEM (TPMS) (IF EQUIPPED)
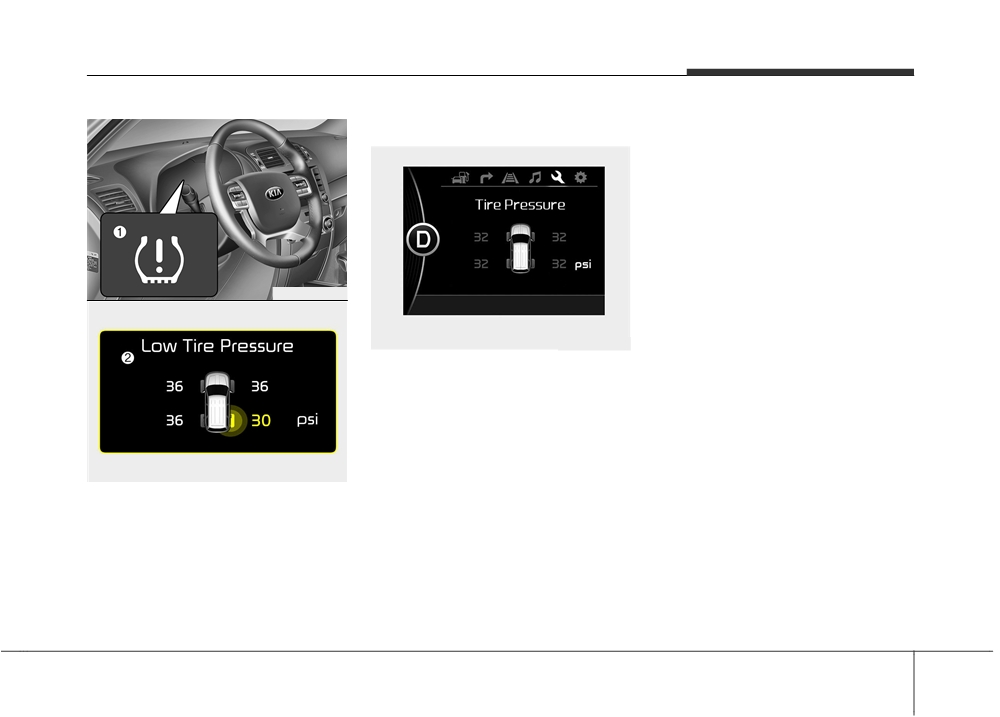
Check tire pressure
• You can change the tire pressure
unit in the user settings mode on
the cluster.
- psi, kpa, bar (Refer to “User set-
tings mode” in chapter 4).
OHM066040L
OHM056153L
• You can check the tire pressure in
the information mode on the clus-
ter.
- Refer to “User settings mode” in
chapter 4.
• Tire pressure is displayed 1~2 min-
OHM046533L
utes later after driving.
(1) Low tire pressure telltale /
• If tire pressure is not displayed
TPMS malfunction indicator
when the vehicle is stopped, “Drive
(2) Low tire pressure position telltale
to display” message displays. After
(Shown on the LCD display)
driving, check the tire pressure.
7 9

What to do in an emergency
Each tire, including the spare (if pro-
Please note that the TPMS is not a
TPMS malfunctions may occur for a
vided), should be checked monthly
substitute for proper tire maintenance,
variety of reasons, including the
when cold and inflated to the inflation
and it is the driver’s responsibility to
installation of replacement or alter-
pressure recommended by the vehi-
maintain correct tire pressure, even if
nate tires or wheels on the vehicle
cle manufacturer on the vehicle plac-
under-inflation has not reached the
that prevent the TPMS from function-
ard or tire inflation pressure label.
level to trigger illumination of the
ing properly. Always check the TPMS
TPMS low tire pressure telltale.
malfunction telltale after replacing
(If your vehicle has tires of a different
one or more tires or wheels on your
size than the size indicated on the
vehicle to ensure that the replace-
vehicle placard or tire inflation pres-
Your vehicle has also been equipped
ment or alternate tires and wheels
sure label, you should determine the
with a TPMS malfunction indicator to
allow the TPMS to continue to func-
proper tire inflation pressure for
indicate when the system is not oper-
tion properly.
those tires.)
ating properly. The TPMS malfunction
As an added safety feature, your vehi-
indicator is combined with the low tire
cle has been equipped with a tire pres-
pressure telltale. When the system
sure monitoring system (TPMS) that
detects a malfunction, the telltale will
illuminates a low tire pressure telltale
flash for approximately 1 minute and
when one or more of your tires is sig-
then remain continuously illuminated.
nificantly under-inflated. Accordingly,
This sequence will continue upon
when the low tire pressure telltale illu-
subsequent vehicle start-ups as long
minates, you should stop and check
as the malfunction exists. When the
your tires as soon as possible, and
TPMS malfunction indicator remains
inflate them to the proper pressure.
illuminated after blinking for approxi-
Driving on a significantly under-inflat-
mately 1 minute, the system may not
ed tire causes the tire to overheat and
be able to detect or signal low tire
can lead to tire failure. Under-inflation
pressure as intended.
also reduces fuel efficiency and tire
tread life, and may affect the vehicle’s
handling and stopping ability.
7 10

What to do in an emergency
✽ NOTICE
Low tire pressure
If either telltale illuminates, immedi-
telltale
ately reduce your speed, avoid hard
If any of the below happens, we rec-
cornering and anticipate increased
ommend that the system be checked
stopping distances. You should stop
by an authorized Kia dealer.
Low tire pressure position tell-
and check your tires as soon as pos-
1.The low tire pressure telltale/
tale
sible. Inflate the tires to the proper
TPMS malfunction indicator do
pressure as indicated on the vehicle’s
not illuminate for 3 seconds when
placard or tire inflation pressure label
the ignition switch is turned to the
located on the driver’s side center pil-
ON position or engine is running.
lar outer panel. If you cannot reach a
2.The TPMS malfunction indicator
service station or if the tire cannot
remains illuminated after blinking
hold the newly added air, replace the
for approximately 1 minute.
low pressure tire with a spare tire.
3.The Low tire pressure position
telltale remains illuminated.
If you drive the vehicle for about 10
minutes at speeds above 25 km/h
after replacing the low pressure tire
with the spare tire, one of the follow-
ing will happen:
OHM056152L
• The TPMS malfunction indicator
When the tire pressure monitoring
1
may blink for approximately
system warning indicators are illumi-
minute and then remain continu-
nated and warning massage dis-
ously illuminated because the
played on the cluster LCD display,
TPMS sensor is not mounted on
one or more of your tires is signifi-
the spare wheel.
(changed tire
cantly under-inflated. The low tire
equipped with a sensor not in the
pressure position telltale light will
vehicle)
indicate which tire is significantly
under-inflated by illuminating the cor-
responding position light.
7 11

What to do in an emergency
• The TPMS malfunction indicator
TPMS (Tire Pressure
will remain continuously illuminated
WARNING - Low pressure
Monitoring System)
while driving because the TPMS
damage
malfunction indicator
sensor is not mounted on the spare
Significantly low tire pressure
wheel. (changed tire equipped with
makes the vehicle unstable and
a sensor in the vehicle)
The TPMS malfunction indicator will
can contribute to loss of vehicle
control and increased braking
illuminate after it blinks for approxi-
mately one minute when there is a
CAUTION
distances.
problem with the Tire Pressure
In winter or cold weather, the
Continued driving on low pres-
Monitoring System.
low tire pressure telltale may
sure tires can cause the tires to
We recommend that the system be
illuminate if the tire pressure
overheat and fail.
checked by an authorized Kia dealer
was adjusted to the recom-
to determine the cause of the prob-
mended tire inflation pressure
lem.
in warm weather. It does not
mean your TPMS is malfunction-
ing because the decreased tem-
✽ NOTICE
perature leads to a lowering of
If there is a malfunction with the
tire pressure.
TPMS, the low tire pressure position
When you drive your vehicle from
telltale will not be displayed even
a warm area to a cold area or
though the vehicle has an under-
from a cold area to a warm area,
inflated tire.
or the outside temperature is
higher or lower, you should
check the tire inflation pressure
and adjust the tires to the recom-
mended tire inflation pressure.
7 12

What to do in an emergency
Changing a tire with TPMS
(Continued)
CAUTION
If you have a flat tire, the low Tire
This can interfere with normal
•
The TPMS malfunction indica-
Pressure and Position telltales will
operation of the Tire Pressure
tor may blink for approximate-
come on. We recommend that the
Monitoring System (TPMS).
ly 1 minute and then remain
system be checked by an authorized
continuously illuminated if the
Kia dealer.
vehicle is moving around elec-
tric power supply cables or
radios transmitter such as at
CAUTION
police stations, government
We recommend that you use the
and public offices, broadcast-
sealant approved by Kia.
ing stations, military installa-
The sealant on the tire pressure
tions, airports, or transmitting
sensor and wheel shall be elim-
towers, etc. This can interfere
inated when you replace the tire
with normal operation of the
with a new one.
Tire Pressure Monitoring
System (TPMS).
Each wheel is equipped with a tire
•
The TPMS malfunction indica-
pressure sensor mounted inside the
tor may blink for approximate-
tire behind the valve stem. You must
ly 1 minute and then remain
use TPMS specific wheels. It is rec-
continuously illuminated if
ommended that you have your tires
snow chains are used or some
serviced by an authorized Kia dealer.
separate electronic devices
such as notebook computer,
mobile charger, remote starter
or navigation etc., are used in
the vehicle.
(Continued)
7 13

What to do in an emergency
If you drive the vehicle for about 10
You may not be able identify a low
minutes at speeds above 25 km/h
tire by simply looking at it. Always
WARNING - TPMS
after replaceing the low pressure tire
use a good quality tire pressure
•
The TPMS cannot alert you to
with the spare tire, one of the follow-
gauge to measure the tire's inflation
severe and sudden tire dam-
ing will happen:
pressure. Please note that a tire that
age caused by external fac-
• The TPMS malfunction indicator
is hot (from being driven) will have a
tors such as nails or road
higher pressure measurement than a
may blink for approximately
1
debris.
tire that is cold (from sitting station-
minute and then remain continuous-
•
If you feel any vehicle instabil-
ary for at least 3 hours and driven
ly illuminated because the TPMS
ity, immediately take your foot
less than 1 mile (1.6 km) during that
sensor is not mounted on the spare
off the accelerator, apply the
3 hour period).
wheel. (changed tire equipped with
brakes gradually and with
a sensor not in the vehicle)
Allow the tire to cool before measur-
light force, and slowly move to
ing the inflation pressure. Always be
• The TPMS malfunction indicator
a safe position off the road.
sure the tire is cold before inflating to
will remain continuously illuminated
the recommended pressure.
while driving because the TPMS
sensor is not mounted on the spare
A cold tire means the vehicle has
wheel. (changed tire equipped with
been sitting for 3 hours and driven for
a sensor in the vehicle)
less than 1 mile (1.6 km) in that 3
hour period.
CAUTION
We recommend that you use the
sealant approved by Kia if your
vehicle is equipped with a Tire
Pressure Monitoring System.
The liquid sealant can damage
the tire pressure sensors.
7 14
Большое спасибо!
Ваше мнение очень важно для нас.
Нет комментариевНе стесняйтесь поделиться с нами вашим ценным мнением.
Текст