Subaru Impreza 3 / Impreza WRX / Impreza WRX STI. Service manual — part 502
DI-53
Rear Differential (T-type)
DIFFERENTIALS
5. TOTAL PRELOAD
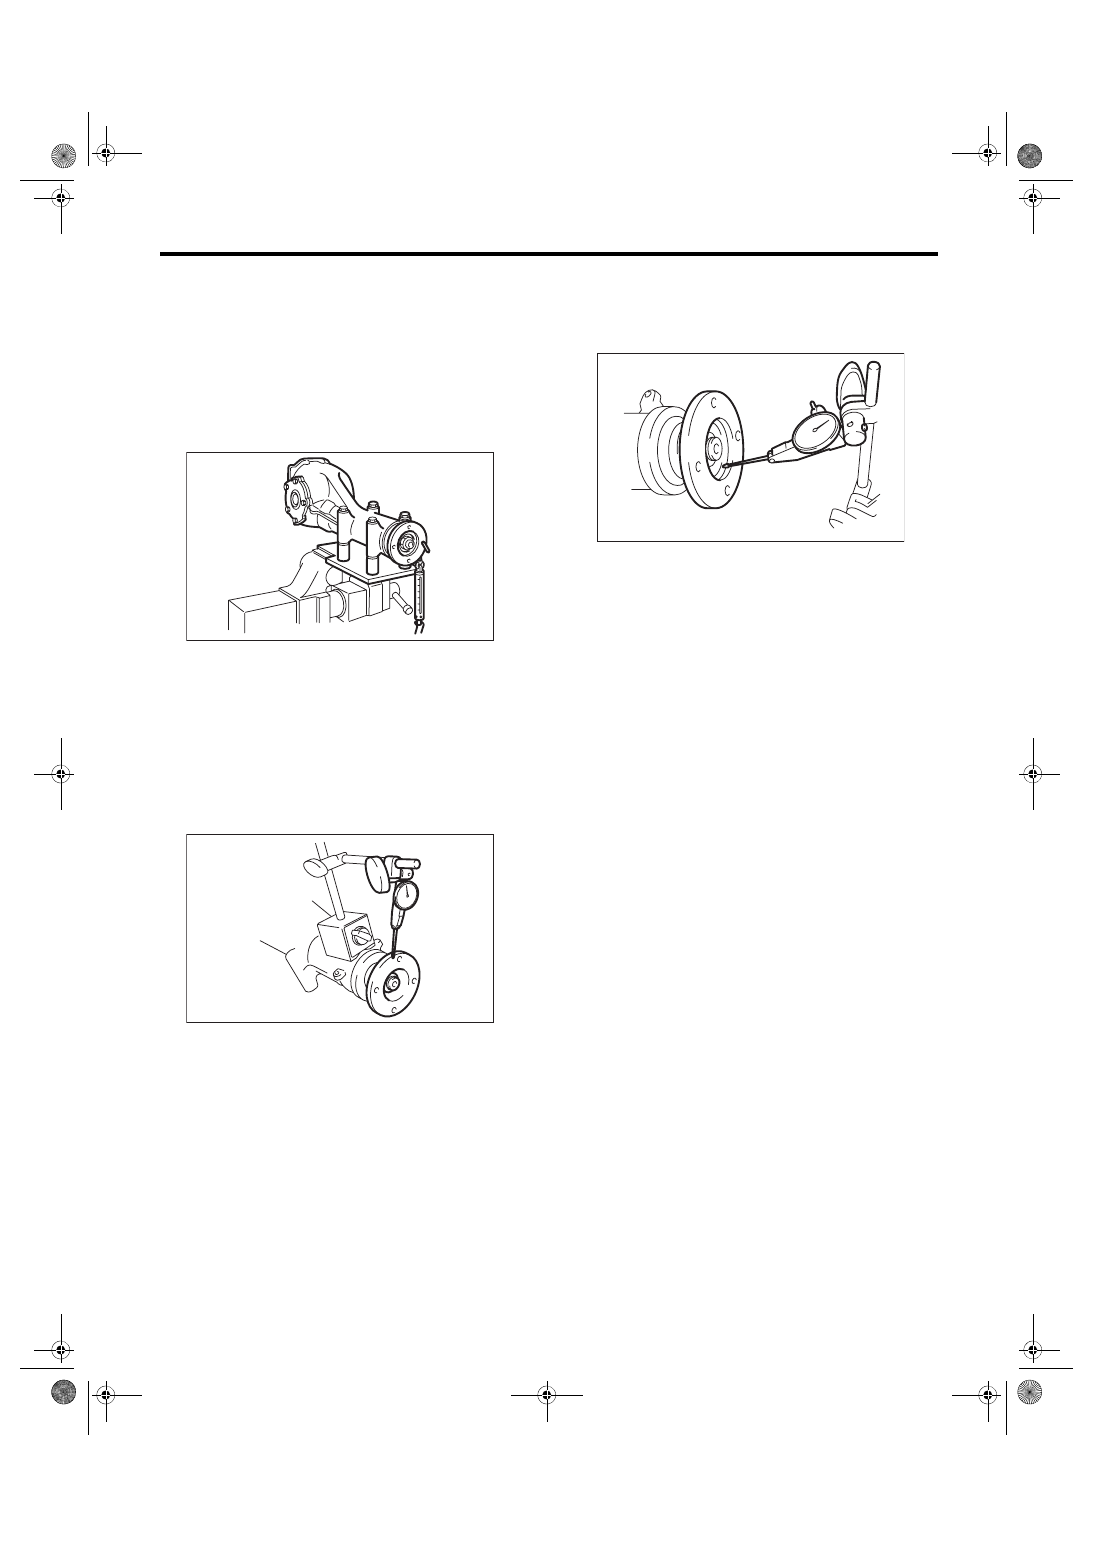
Using a spring scale, check the total preload.
Total preload:
T-type (B2):
20.7 — 54.4 N (2.1 — 5.5 kgf, 4.7 — 12.2 lbf)
T-type (H3):
26.5 — 53 N (2.7 — 5.4 kgf, 6.0 — 11.9 lbf)
If the total preload is not within the specification,
adjust the side retainer shim.
6. COMPANION FLANGE
1) If rust or dirt is attached to the companion flange,
remove them.
2) Set a dial gauge at a companion flange surface
(mating surface of propeller shaft and companion
flange), and then measure the companion flange
runout.
Limit of runout:
0.08 mm (0.003 in)
3) Set the gauge inside of the companion flange,
and measure the runout.
Limit of runout:
0.08 mm (0.003 in)
4) If either runout exceeds the limit, move the
phase of companion flange and drive pinion 90°
each, and find the point where the runout is within
the limit.
5) If the runout exceeds the limit after changing the
phase, replace the companion flange and recheck
the runout.
6) If the runout exceeds the limit after replacing the
companion flange, the drive pinion may be assem-
bled incorrectly or bearing is faulty.
F: ADJUSTMENT
1. SIDE GEAR BACKLASH (T-TYPE (B2))
Adjust the side gear backlash. <Ref. to DI-31, AS-
SEMBLY, Rear Differential (T-type).>
2. HYPOID DRIVEN GEAR BACKLASH
Adjust hypoid driven gear backlash. <Ref. to DI-31,
ASSEMBLY, Rear Differential (T-type).>
3. TOOTH CONTACT BETWEEN HYPOID
DRIVEN GEAR AND DRIVE PINION
Adjust the tooth contact between hypoid driven
gear and drive pinion gear. <Ref. to DI-31, ASSEM-
BLY, Rear Differential (T-type).>
4. TOTAL PRELOAD
Adjust the side retainer shim. <Ref. to DI-31, AS-
SEMBLY, Rear Differential (T-type).>
DI-00117
DI-00360
DI-00361
DI-54
Rear Differential Front Oil Seal
DIFFERENTIALS
5. Rear Differential Front Oil
Seal
A: INSPECTION
Check that there is no leakage from front oil seal
portion. If there is any leakage replace the oil seal
and inspect the propeller shaft.
B: REPLACEMENT
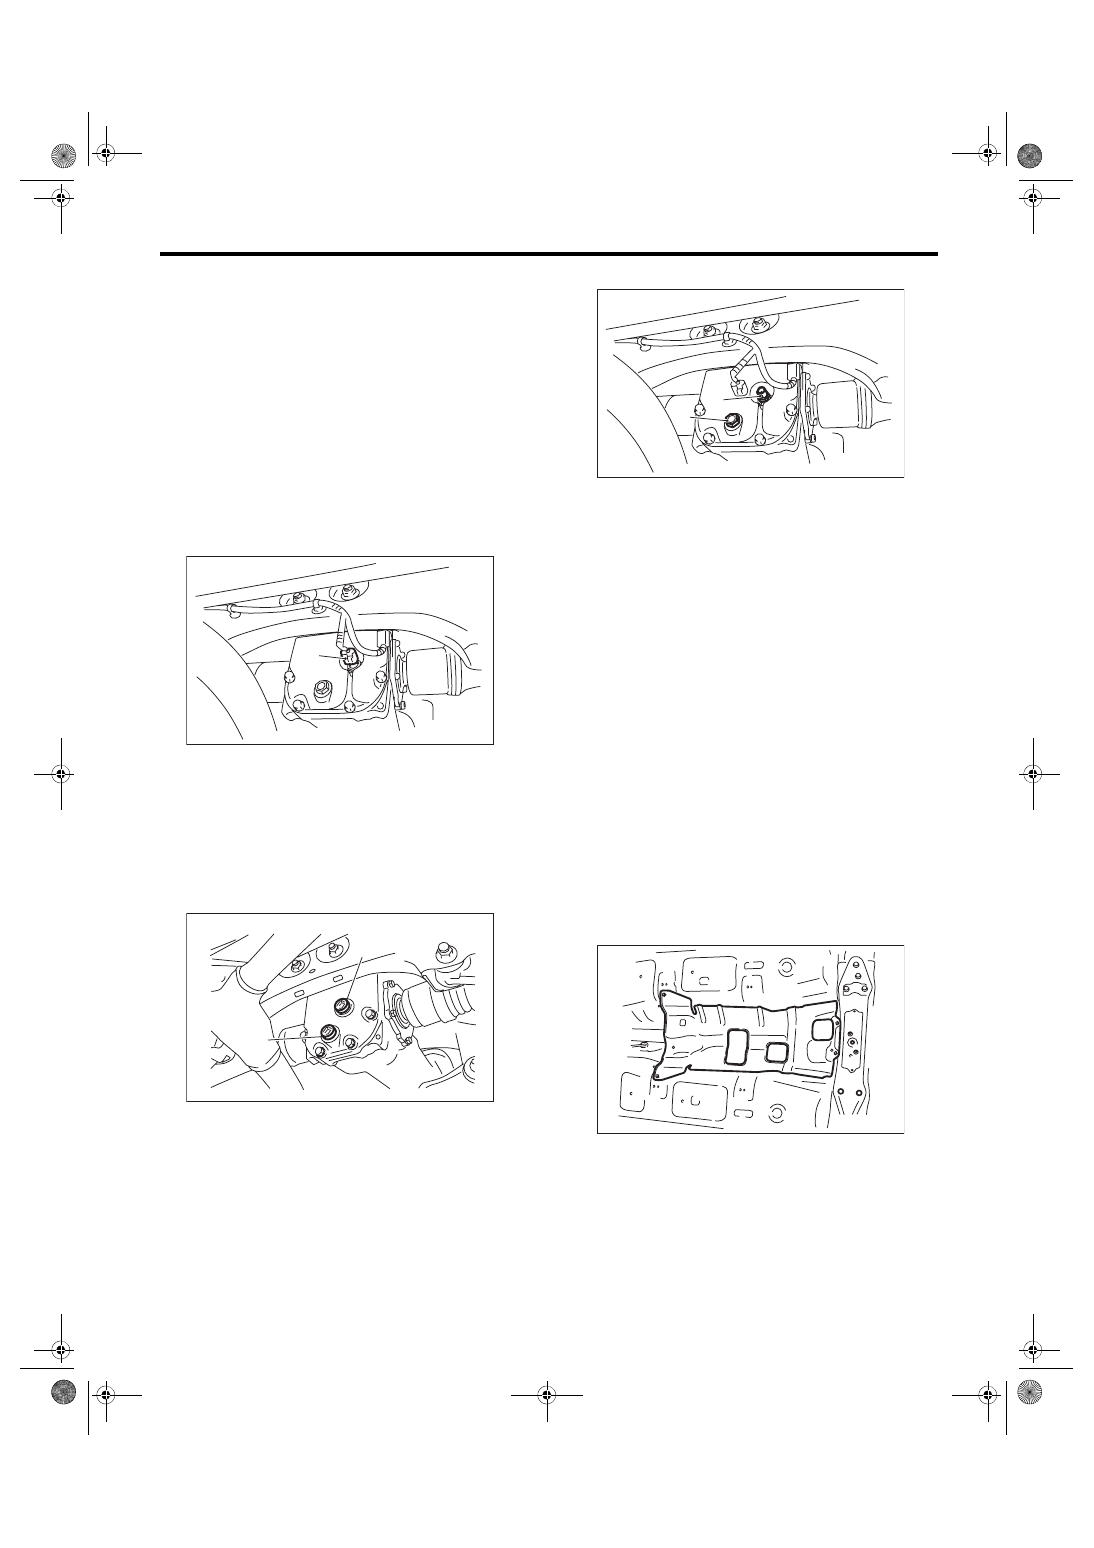
1) Disconnect the ground cable from battery.
2) Shift the select lever or gear shift lever to neutral.
3) Release the parking brake.
4) Lift up the vehicle.
5) Disconnect the oil temperature switch connec-
tor. (T-type (H3))
6) Remove the drain plug and filler plug or the oil
temperature switch, and drain the gear oil.
NOTE:
Remove the oil temperature switch and adapter as
a unit.
• T-type (B2)
• T-type (H3)
7) Install the drain plug.
NOTE:
• For the T-type (B2), apply liquid gasket to the
drain plug.
• For T-type (H3), use a new gasket.
Liquid gasket:
THREE BOND 1105 (Part No. 004403010) or
equivalent
Tightening torque:
T-type (B2);
49 N·m (5.0 kgf-m, 36.1 ft-lb)
T-type (H3);
60 N·m (6.1 kgf-m, 44.3 ft-lb)
8) Remove the rear exhaust pipe and muffler.
• 6MT model
<Ref. to EX(STI)-13, REMOVAL, Rear Exhaust
Pipe.> <Ref. to EX(STI)-15, REMOVAL, Muffler.>
• 5MT model
<Ref. to EX(w/o STI)-2, General Description.>
9) Remove the heat shield cover.
10) Remove the propeller shaft. <Ref. to DS-11,
11) Check the initial torque and write it down.
(A) Oil temperature switch connector
(A) Filler plug
(B) Drain plug
DI-00749
(A)
DI-00522
(A)
(B)
(A) Oil temperature switch
(B) Drain plug
DI-00593
(A)
(B)
AT-04522
DI-55
Rear Differential Front Oil Seal
DIFFERENTIALS
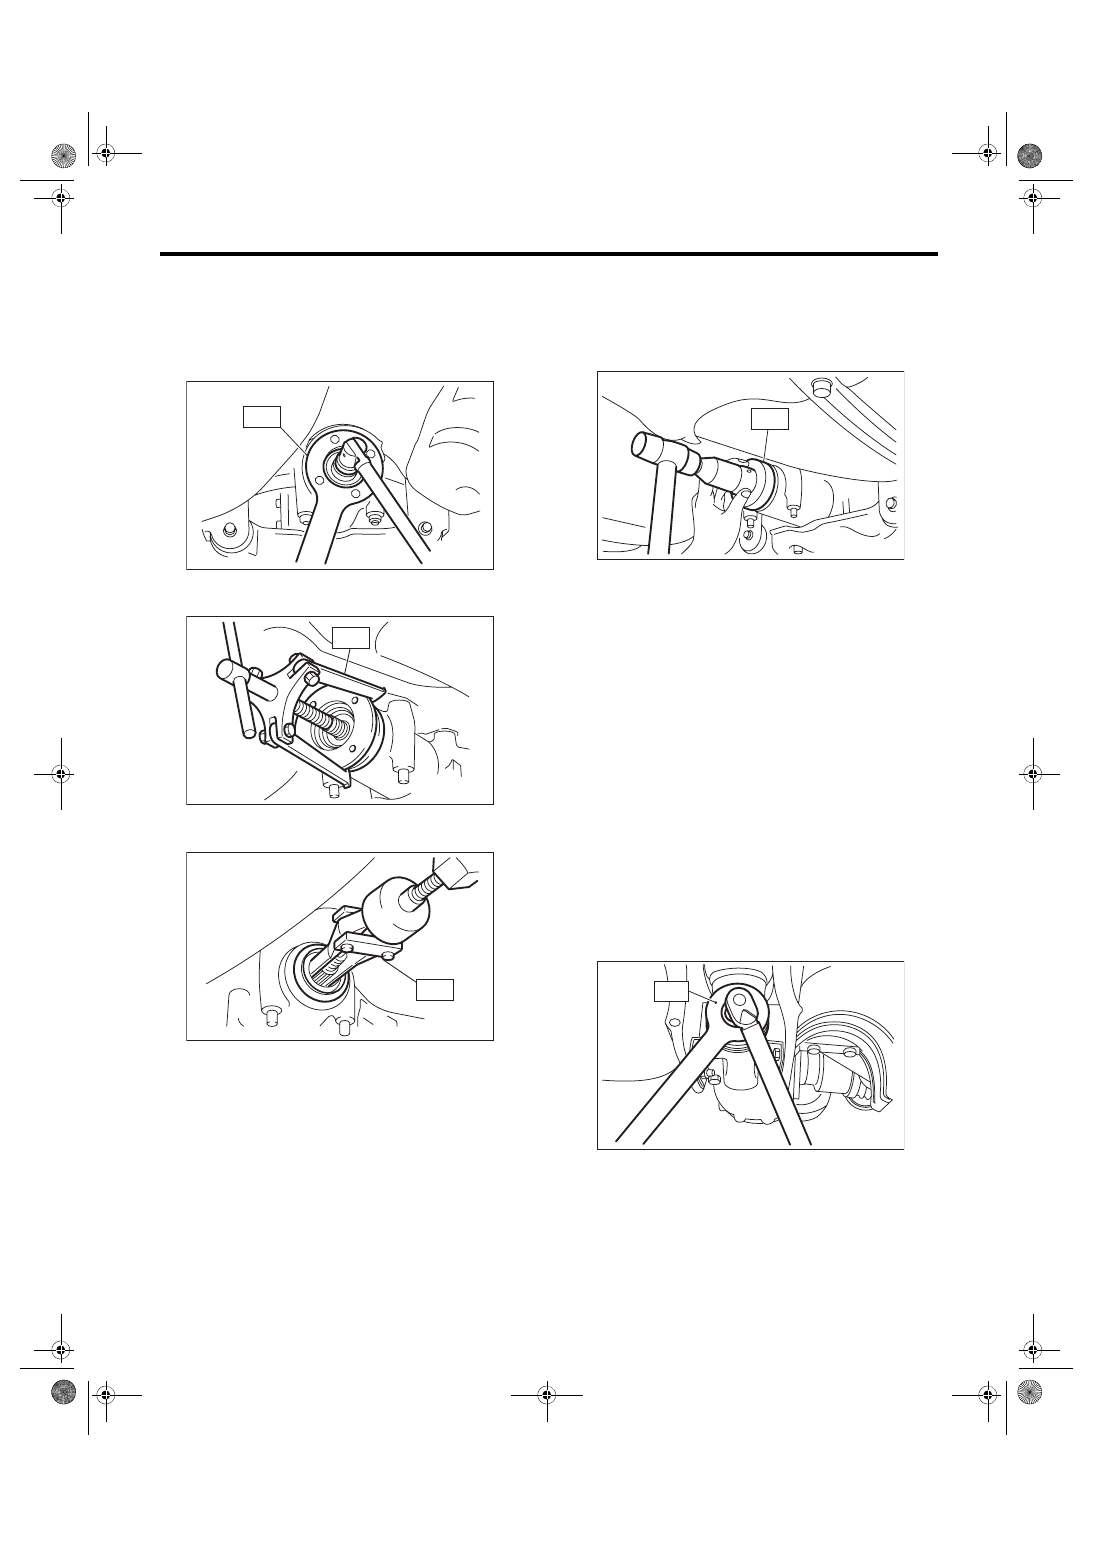
12) Remove the self-locking nut while holding the
companion flange with ST.
ST 18633AA000 WRENCH COMPL (T-TYPE
(H3))
ST 498427200
FLANGE WRENCH (T-TYPE
(B2))
13) Remove the companion flange using ST.
ST 399703600
PULLER ASSY
14) Remove the oil seal using ST or screwdriver.
ST 398527700
PULLER ASSY
15) Using the ST, install the oil seal.
NOTE:
• Use a new oil seal.
• Apply differential gear oil to the oil seal lips.
ST 498447120
INSTALLER
16) Use a plastic hammer to install companion
flange.
17) Tighten the self-locking nut to the specified
torque so that the rotating resistance of the com-
panion flange is the same value as that before re-
placing the oil seal.
NOTE:
• Use a new self-locking nut.
• Before installing the self-locking nut, apply seal
material to self-locking nut threads.
Seal material:
THREE BOND 1324 (Part No. 004403042) or
equivalent
Tightening torque:
167 — 196 N·m (17.0 — 20.0 kgf-m, 123.2 —
144.6 ft-lb)
ST 18633AA000 WRENCH COMPL (T-TYPE
(H3))
ST 498427200
FLANGE WRENCH (T-TYPE
(B2))
18) Hereafter, reassemble in the reverse order of
disassembly.
19) After installing, fill the differential carrier with
gear oil up to the bottom of the filler plug hole or the
oil temperature switch hole. <Ref. to DI-19, RE-
PLACEMENT, Differential Gear Oil.>
DI-00194
ST
DI-00196
ST
DI-00197
ST
DI-00292
ST
ST
DI-00199
DI-56
Rear Differential Side Oil Seal
DIFFERENTIALS
6. Rear Differential Side Oil Seal
A: INSPECTION
Check that there is no oil leakage from the side oil
seal. If there is any leakage, replace the oil seal.
B: REPLACEMENT
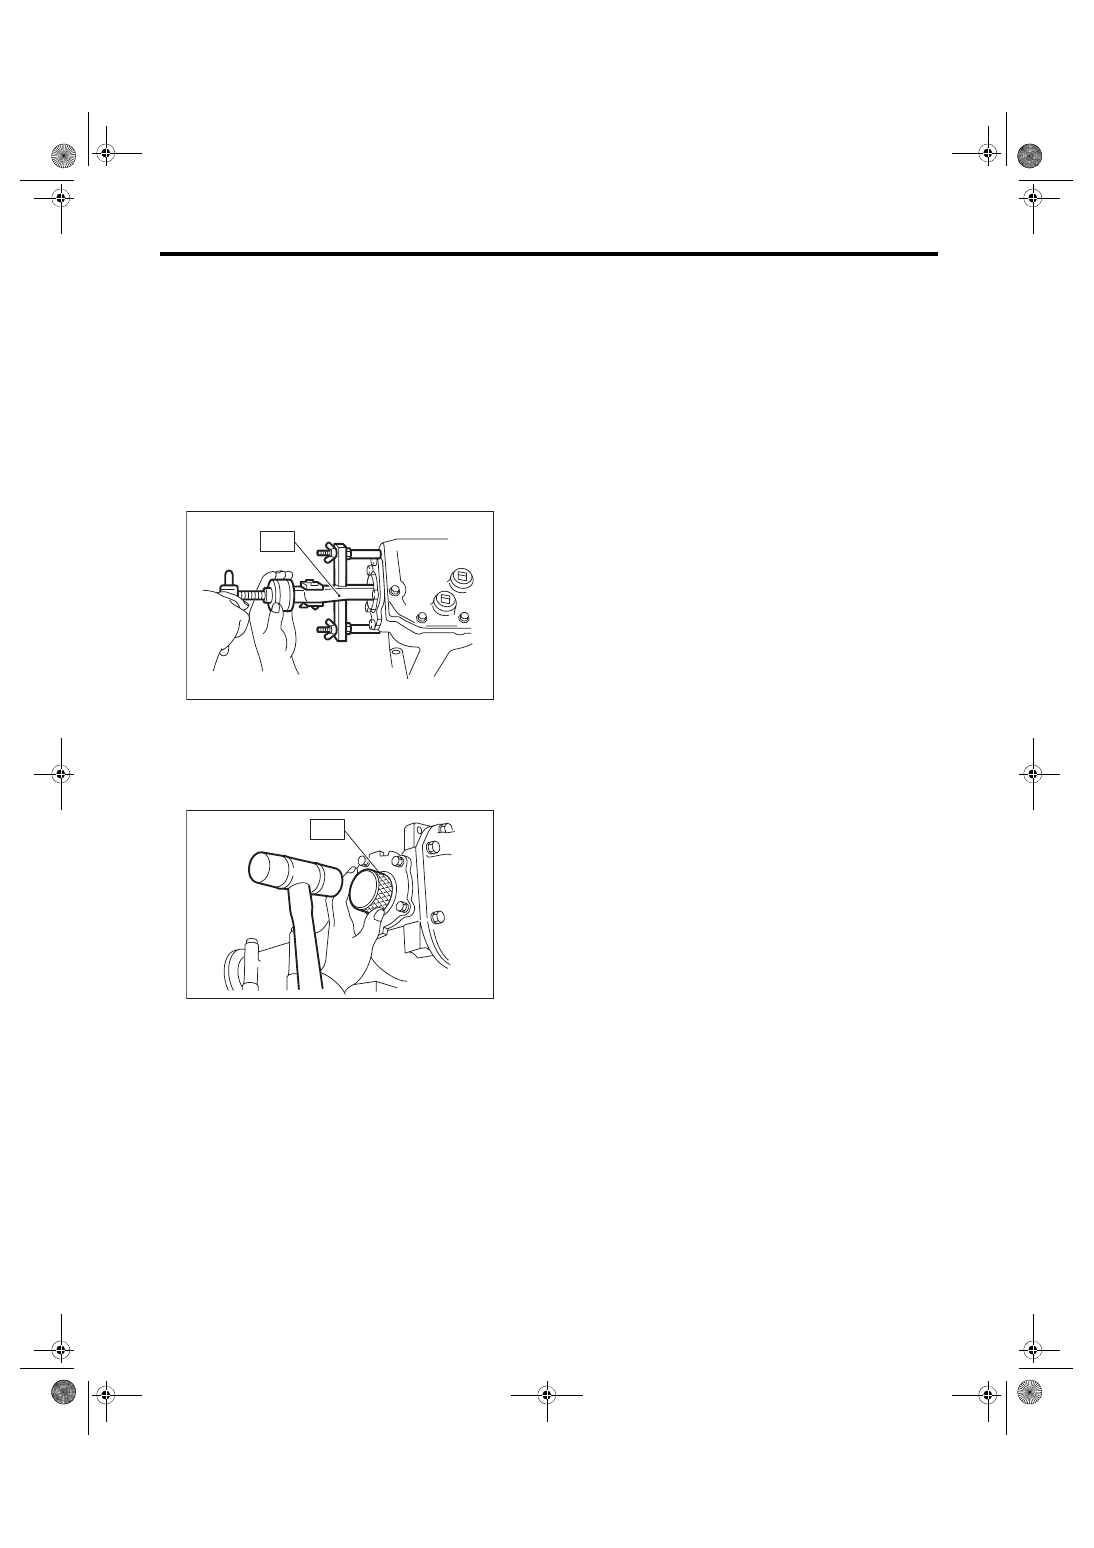
1) Remove the rear differential. <Ref. to DI-22, RE-
MOVAL, Rear Differential (T-type).>
2) Remove the rear differential side oil seal using a
ST or screwdriver wrapped with vinyl tape to pre-
vent the side retainer from scratching.
ST 398527700
PULLER ASSY
3) Using the ST, install the side oil seal.
NOTE:
• Use a new oil seal.
• Apply differential gear oil to the oil seal lips.
ST 398437700
DRIFT
4) Install the rear differential. <Ref. to DI-24, IN-
STALLATION, Rear Differential (T-type).>
ST
DI-00208
DI-00209
ST
Нет комментариевНе стесняйтесь поделиться с нами вашим ценным мнением.
Текст