Subaru Impreza 3 / Impreza WRX / Impreza WRX STI. Service manual — part 738
EI-39
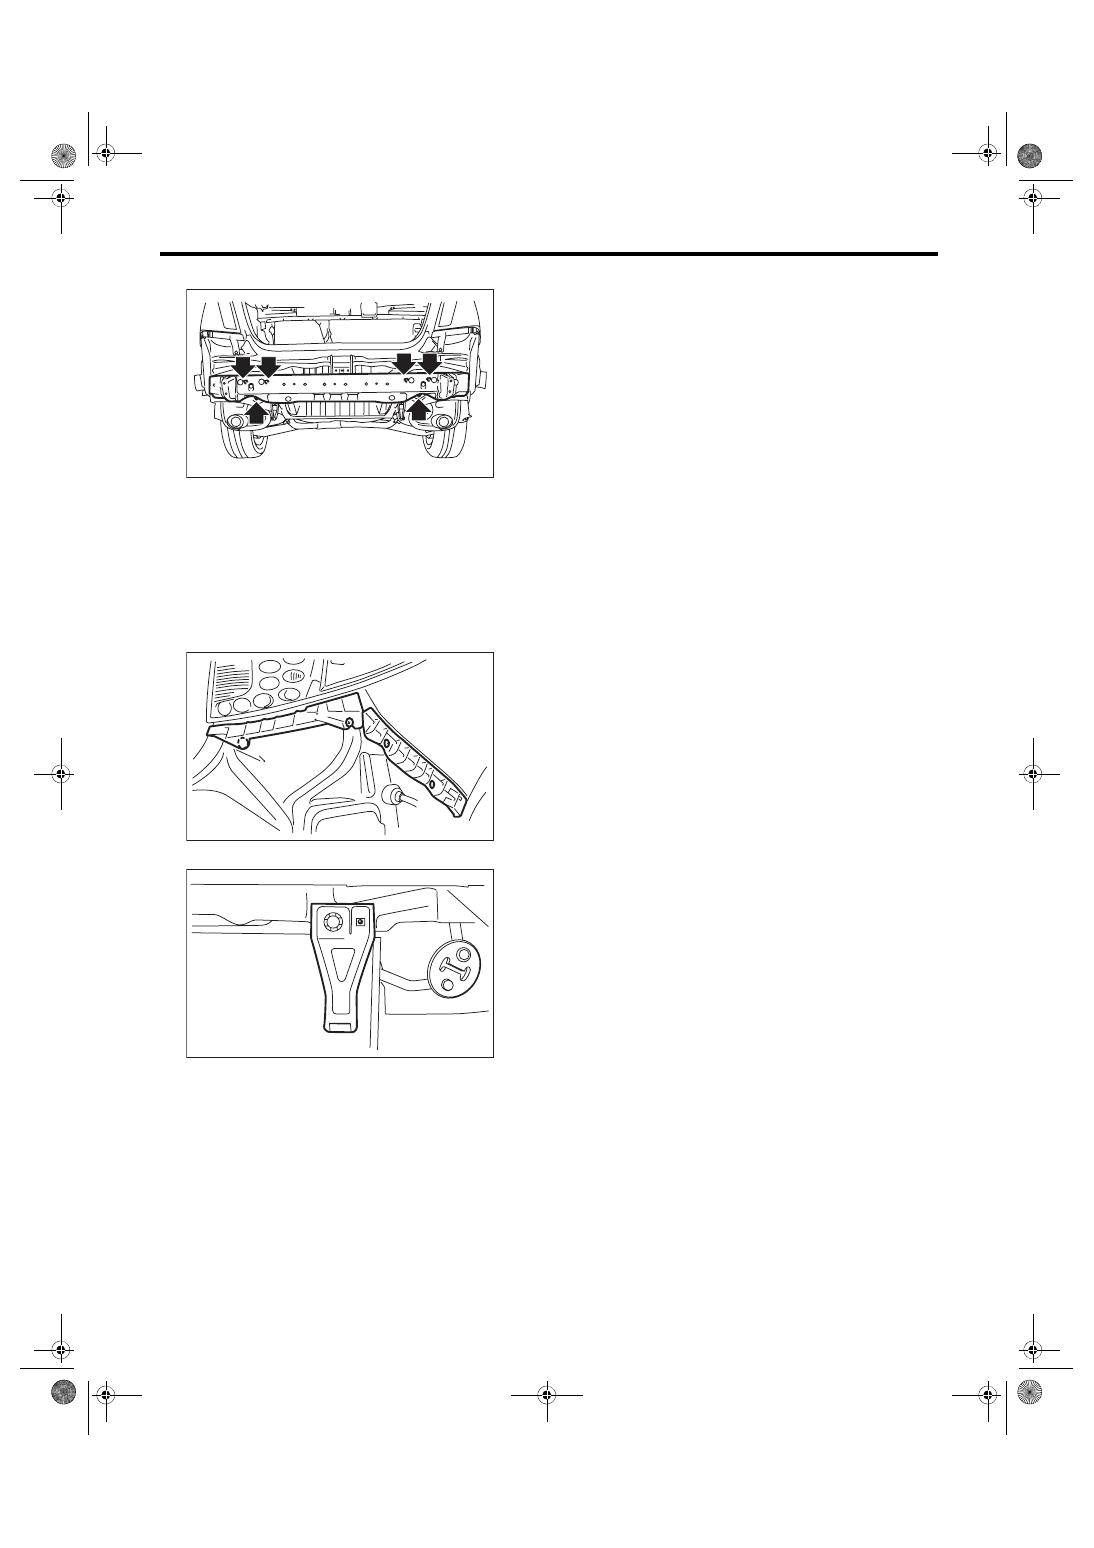
Rear Bumper
EXTERIOR/INTERIOR TRIM
• 4 door model
NOTE:
After all nuts have been removed, lift the whole
bumper beam slightly while detaching it from the
vehicle body.
3. REAR BUMPER BRACKET
Remove the rear bumper face from vehicle body,
and remove each bumper bracket.
• Corner bracket
• Lower bracket
B: INSTALLATION
Install each part in the reverse order of removal.
NOTE:
If the bumper face comes off easily from the beam
upper rear, adjust the hook of the bracket side.
Tightening torque:
Refer to “COMPONENT” of “General Descrip-
tion”. <Ref. to EI-7, REAR BUMPER, COMPO-
C: REPAIR
Refer to the description for front bumper repair.
<Ref. to EI-33, REPAIR, Front Bumper.>
EI-01876
EI-01789
EI-01924
EI-40
Cowl Panel
EXTERIOR/INTERIOR TRIM
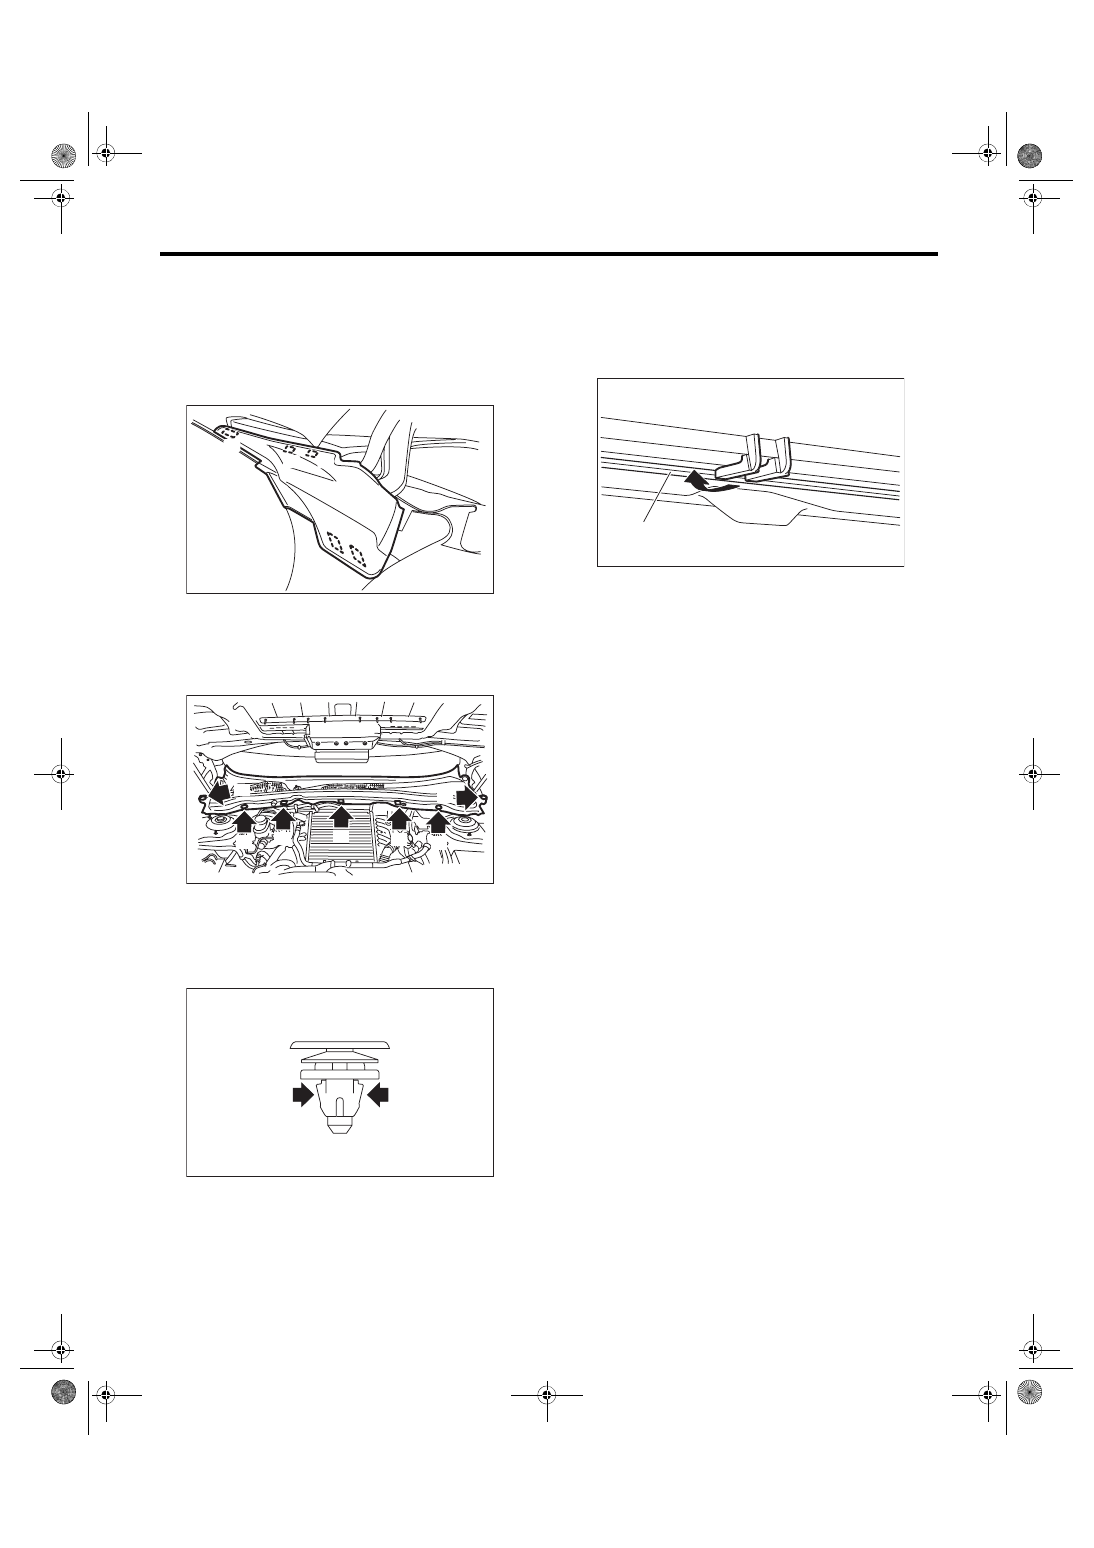
9. Cowl Panel
A: REMOVAL
1) Open the front hood.
2) Remove the wiper arm. <Ref. to WW-16, RE-
3) Detach the tabs and remove the cowl panel side.
(1) Detach tabs (A), (B), and (C) from the vehi-
cle exterior.
(2) Detach tabs (D) and (E).
4) Remove the clips (A) and (B), and remove the
cowl panel.
CAUTION:
When removing clip (B), push the claws of the
clips from the left and right to remove.
Be careful because the clip can be damaged if
you pull unnecessarily hard on them.
B: INSTALLATION
Install each part in the reverse order of removal.
NOTE:
Hook the claw of the cowl panel on the lower end of
the windshield.
EI-02386
(A)
(B)
(C)
(D)
(E)
EI-01790
(A)
(A)
(A)
(A)
(B)
(B)
(B)
EI-01686
(1) Windshield cross section
EI-00888
(1)
EI-41
Roof Spoiler
EXTERIOR/INTERIOR TRIM
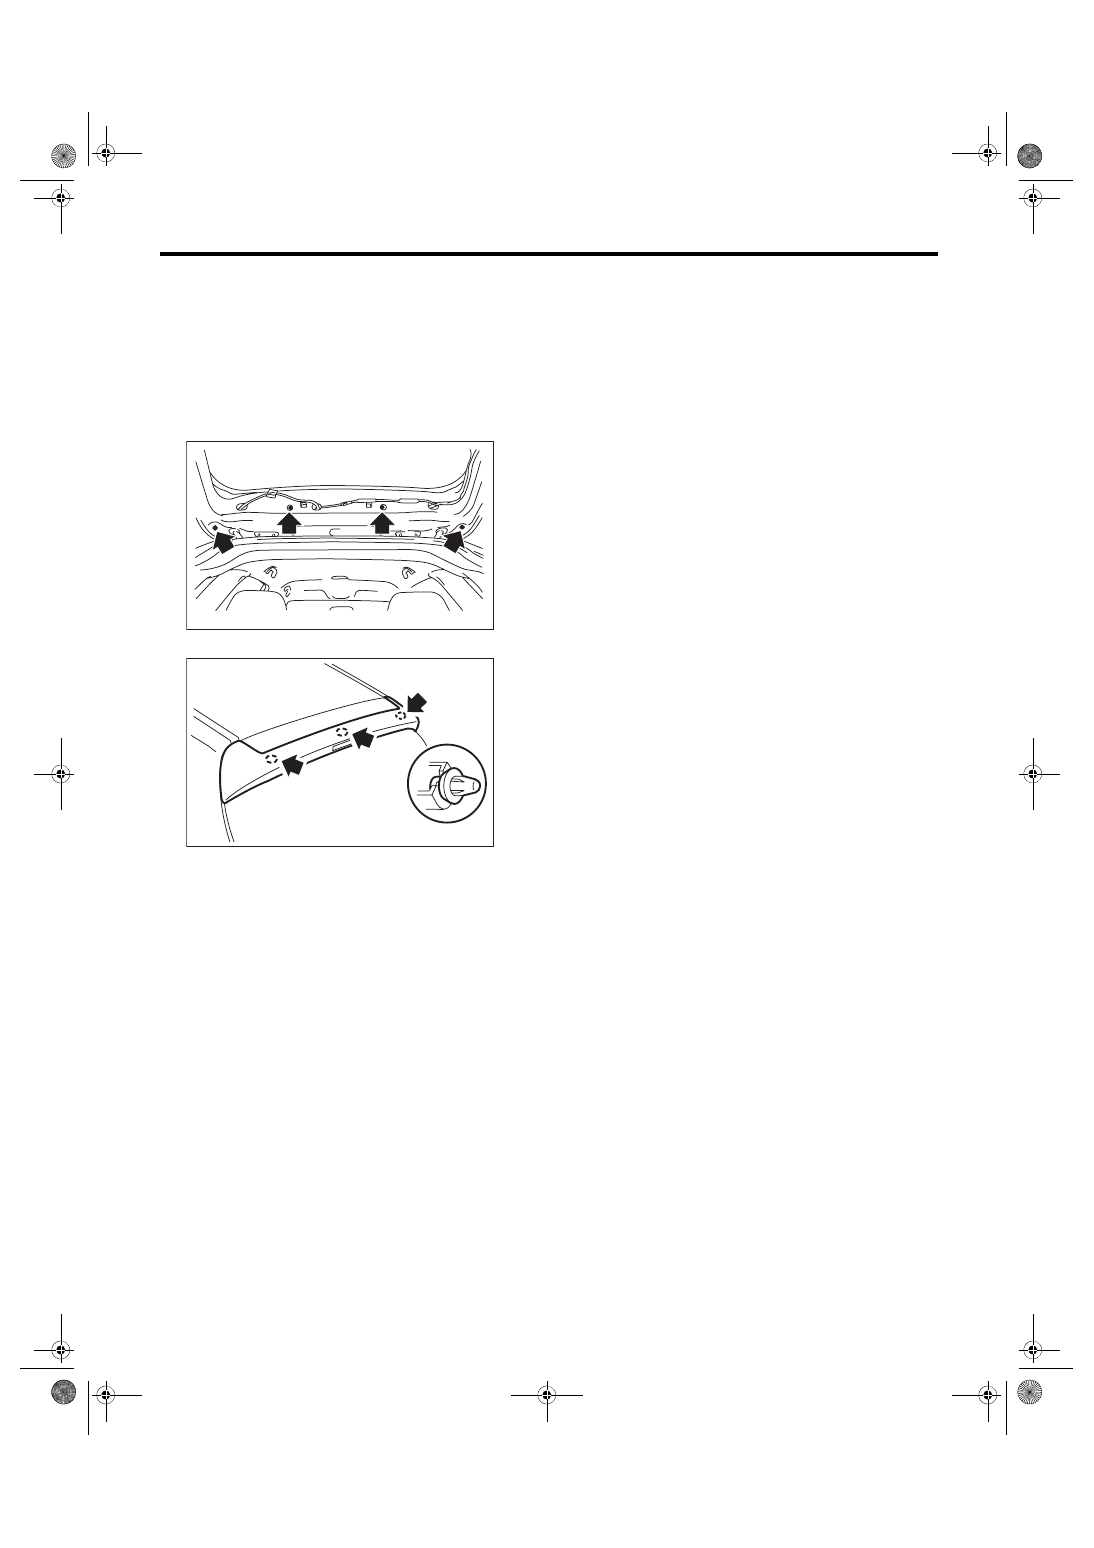
10.Roof Spoiler
A: REMOVAL
1) Disconnect the ground cable from battery.
2) Remove the rear gate trim. <Ref. to EI-69, RE-
3) Disconnect the connector of high-mounted stop
light and the washer hose of rear washer.
4) Remove the bolts and nuts.
5) Remove the clips, and remove the roof spoiler.
B: INSTALLATION
CAUTION:
• Improper installing may cause the water leak-
age, make sure the harness grommet is in-
stalled securely.
• Check that there is no foreign matter in roof
spoiler between the high-mounted stop light
harness or washer hose, it may cause washer
defective and improper installation of spoiler.
• Check the attaching condition of cushioning
materials (spacer rubbers), and replace them
with new parts if they are detached from the
roof spoiler.
• When replacing or reusing two nuts on the
center of vehicle, apply locking agent on nuts
and bolts before tightening them to the speci-
fied torque.
Install each part in the reverse order of removal.
Locking agent:
THREE BOND 1303N (liquid type)
LOCTITE 268, 248 (solid type) 272, 243
(liquid type)
or equivalent
Tightening torque:
7.5 N·m (0.76 kgf-m, 5.5 ft-lb)
EI-01792
EI-01791
EI-42
Rear Spoiler
EXTERIOR/INTERIOR TRIM
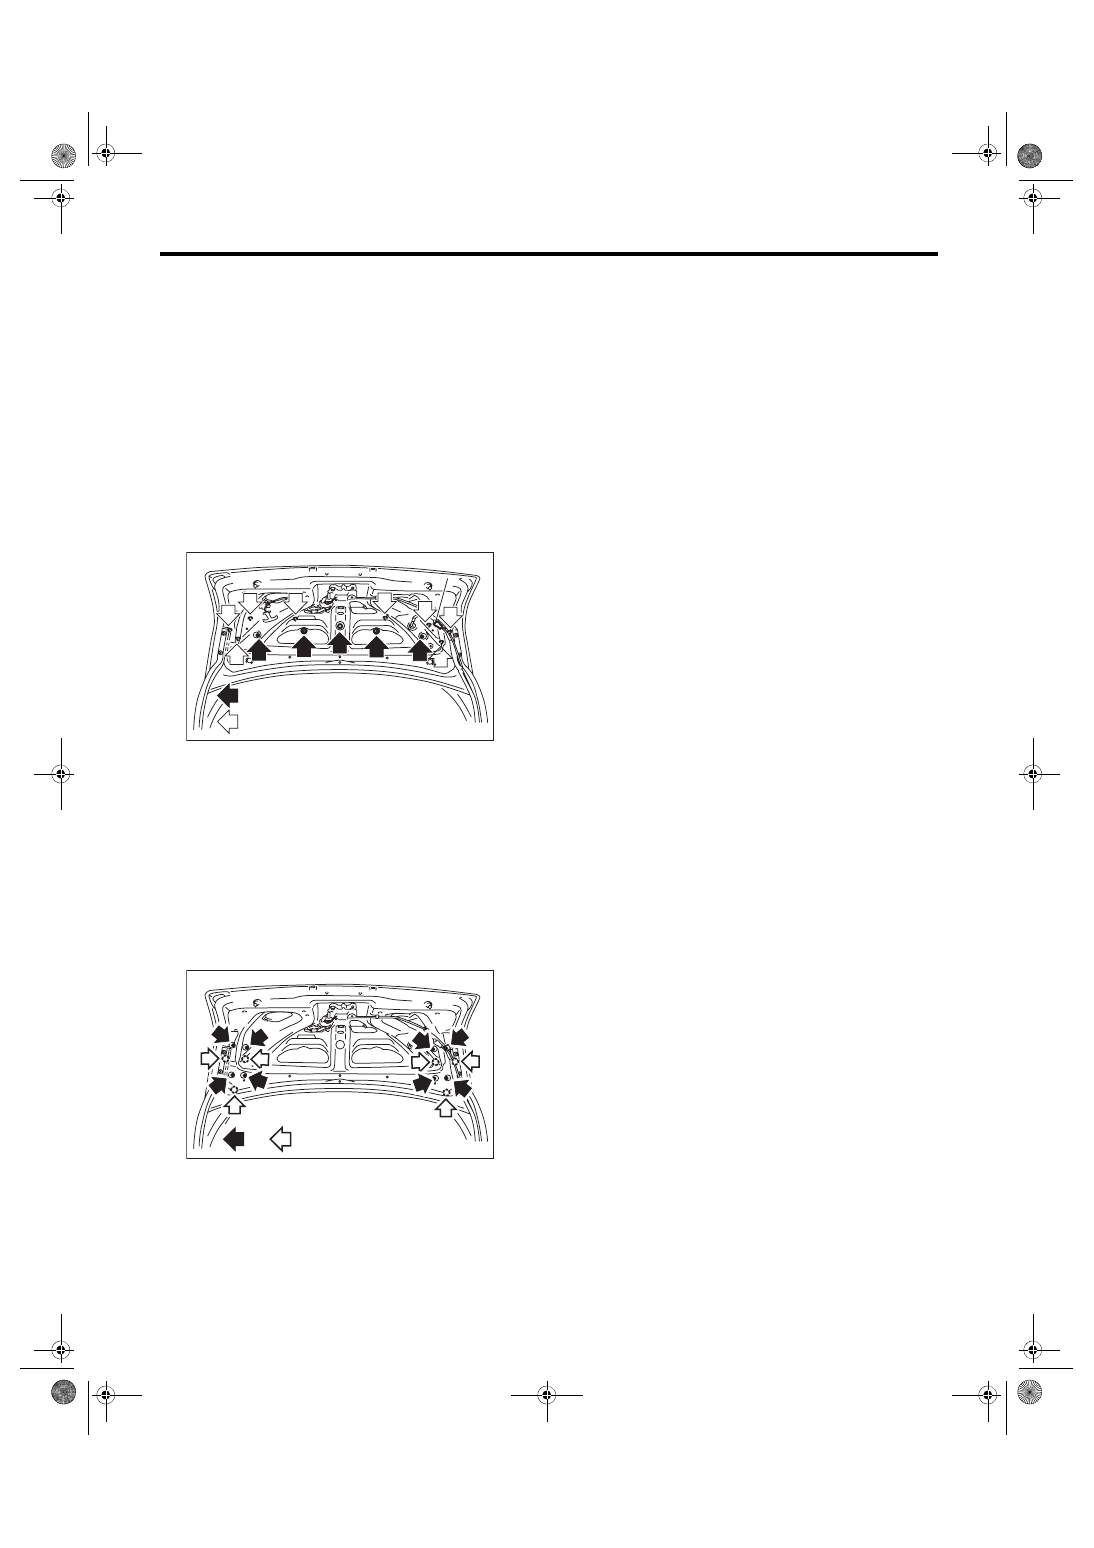
11.Rear Spoiler
A: REMOVAL
1. SMALL TYPE
1) Disconnect the ground cable from battery.
2) Open the trunk lid.
3) Remove the high mount stop light connector (A).
4) Remove the rear spoiler attachment nut (B) and
clip (C), and remove the rear spoiler.
CAUTION:
• When removing the nut, be careful not to
drop the nut inside the trunk lid panel.
• Be careful not to cause damage during re-
moval and installation.
2. LARGE TYPE
1) Disconnect the ground cable from battery.
2) Open the trunk lid.
3) Remove the clips and the trunk lid trim.
4) Remove the rear spoiler attachment nut (a) and
clip (b), and remove the rear spoiler.
CAUTION:
• When removing the nut, be careful not to
drop the nut inside the trunk lid panel.
• Be careful not to damage the vehicle body
during removal and installation.
B: INSTALLATION
CAUTION:
Improper installing may cause the water leak-
age, make sure the harness grommet is in-
stalled securely.
1) Install each part in the reverse order of removal.
2) Clean the trunk lid and spoiler attachment sur-
face before installation.
Tightening torque:
7.5 N·m (0.76 kgf-m, 5.5 ft-lb)
EI-01877
:(B)
:(B)
:(B)
:(C)
:(C)
:(C)
(A)
(A)
(A)
EI-02959
:(a)
:(C)
:(C)
:(b)
Нет комментариевНе стесняйтесь поделиться с нами вашим ценным мнением.
Текст