Subaru Impreza 3 / Impreza WRX / Impreza WRX STI. Service manual — part 739
EI-43
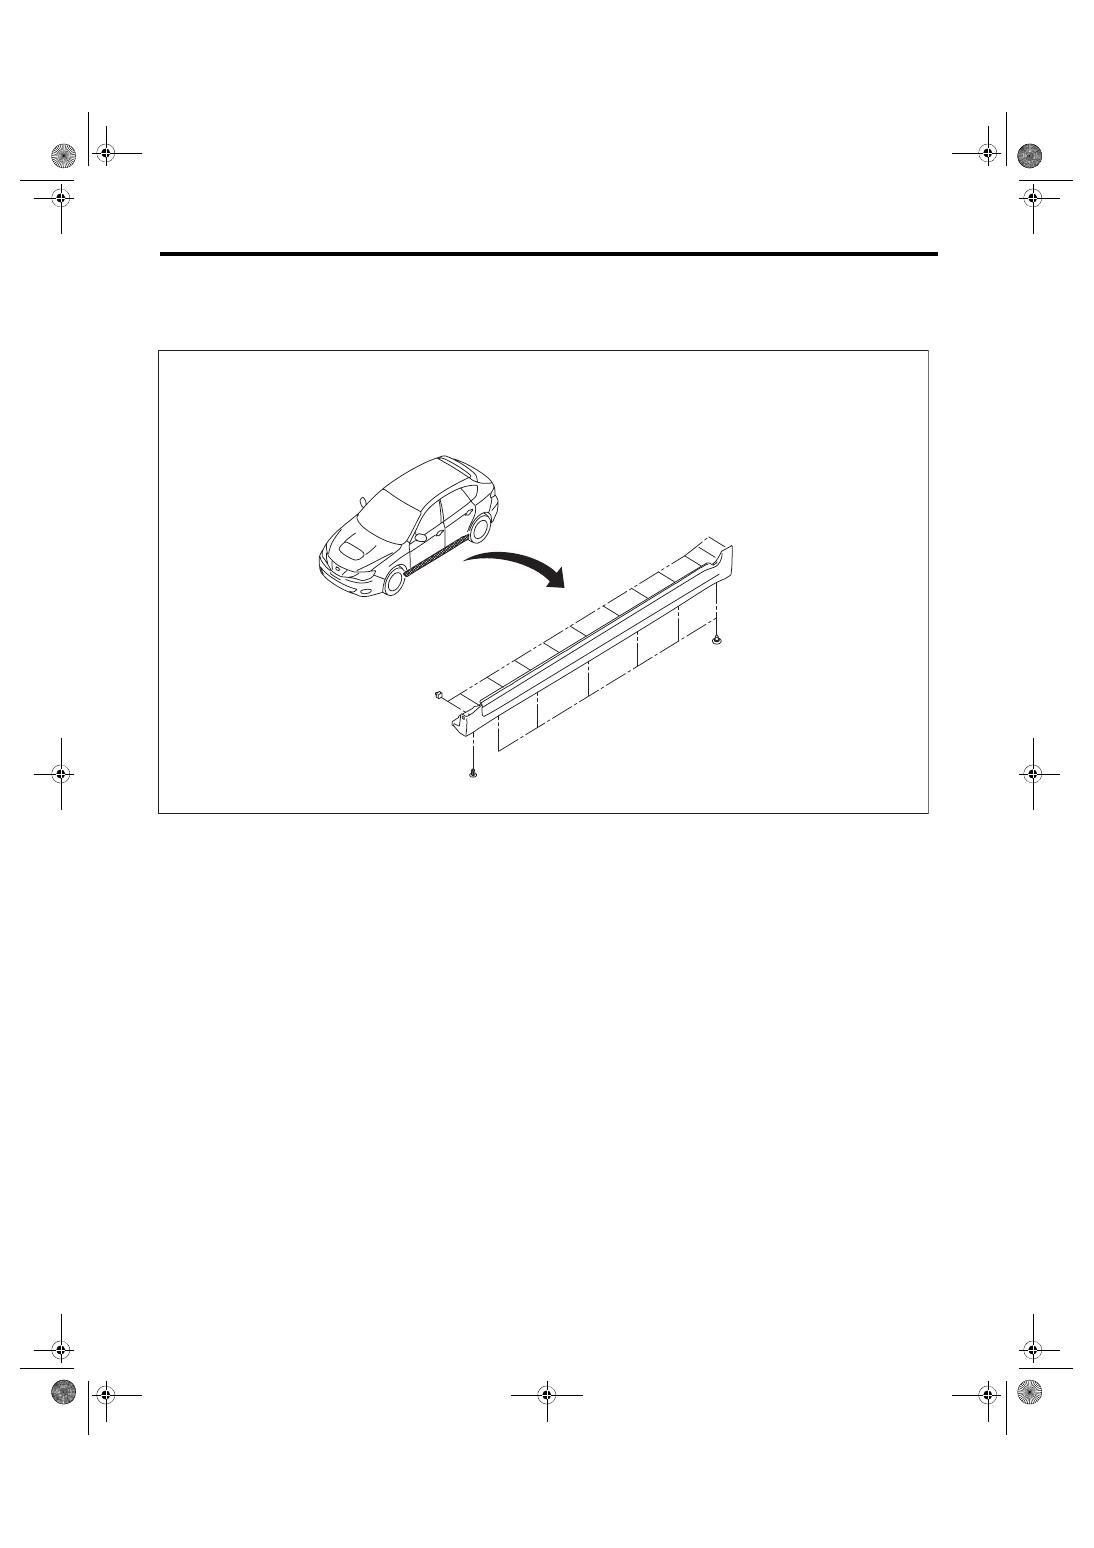
Side Sill Spoiler
EXTERIOR/INTERIOR TRIM
12.Side Sill Spoiler
A: REMOVAL
Remove the clip, and side spoiler.
B: INSTALLATION
Install each part in the reverse order of removal.
EI-02025
EI-44
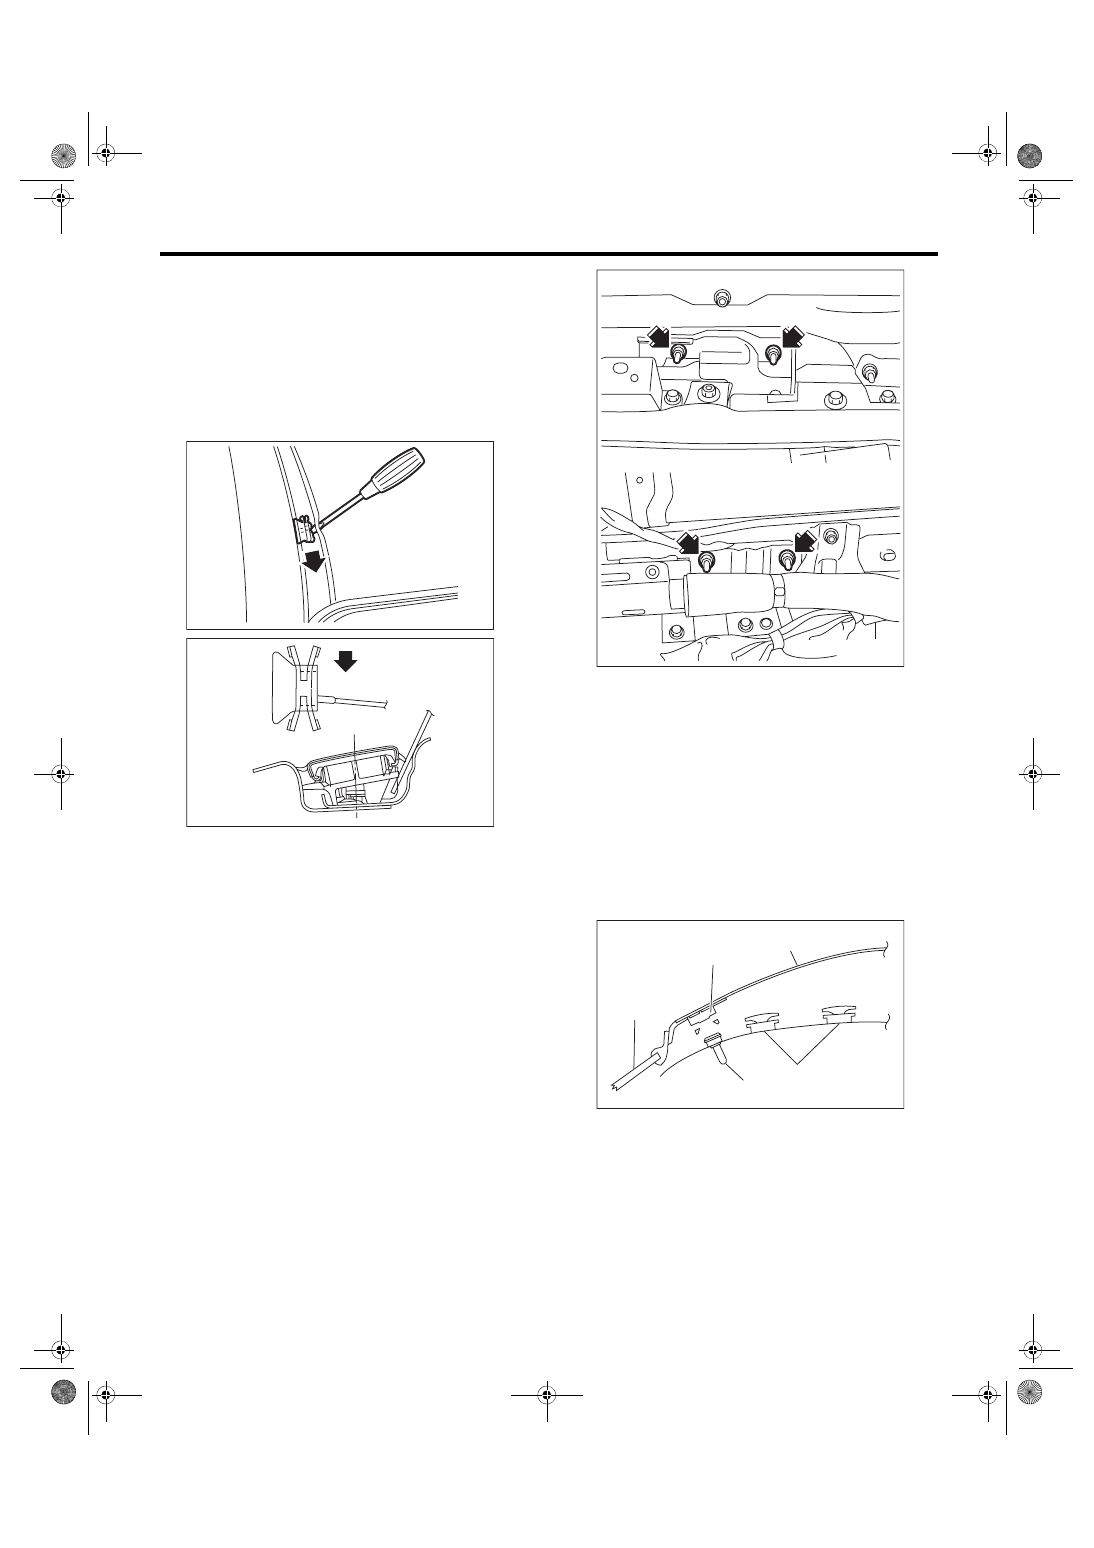
Roof Molding
EXTERIOR/INTERIOR TRIM
13.Roof Molding
A: REMOVAL
1) Peel the end of the roof molding, and slide the in-
ner clip in the direction of the arrow using a flat tip
screwdriver, to remove the clip from the stud on the
vehicle side.
Right side: Slide towards the front of the vehicle.
Left side: Slide towards the rear of the vehicle.
2) Pull up the roof molding upward, and remove
from the vehicle.
3) Remove the roof trim. <Ref. to EI-66, REMOV-
4) Remove the nut, and remove the roof carrier
bracket.
B: INSTALLATION
CAUTION:
Always replace clips that were damaged during
removal of the roof molding.
1) Install the roof carrier bracket.
Tightening torque:
7.5 N·m (0.76 kgf-m, 5.5 ft-lb)
2) Remove the clips from the roof molding, and at-
tach to the studs on the vehicle.
3) Push the front end of the roof molding against
the front window, and attach the forward position-
ing clip onto the rivet on the body.
4) While pushing down the roof molding from
above, connect the roof molding and the clip.
EI-01565
EI-01380
(1) Windshield
(2) Positioning clip
(3) Roof molding
(4) Rivet
(5) Clip
EI-00659
EI-01381
(2)
(1)
(4)
(5)
(3)
EI-45
Door Trim
EXTERIOR/INTERIOR TRIM
14.Door Trim
A: REMOVAL
1. FRONT DOOR
1) Disconnect the ground cable from battery.
2) Remove the gusset cover.
(1) Pull the gusset cover backward to detach
the claws (A) on the backside of the gusset cov-
er.
(2) Insert a plastic remover into the position
shown in the figure while retaining the condition
in step (1), and lift up the gusset cover.
(3) Remove the gusset cover in the direction of
the arrow to detach the clip section (B), and dis-
connect the connector.
3) Open the cover of the inner remote section, and
remove the screws.
4) Remove the power window switch panel.
(1) Open the cover and remove the screws.
(2) Lift up the tip of switch panel by using a plas-
tic remover.
(3) Remove the side claws by using a plastic re-
mover.
(4) Disconnect the harness connector, and re-
move the power window switch panel.
EI-02368
(A)
EI-02369
EI-02370
(B)
EI-01878
EI-03082
EI-01881
EI-02372
EI-46
Door Trim
EXTERIOR/INTERIOR TRIM
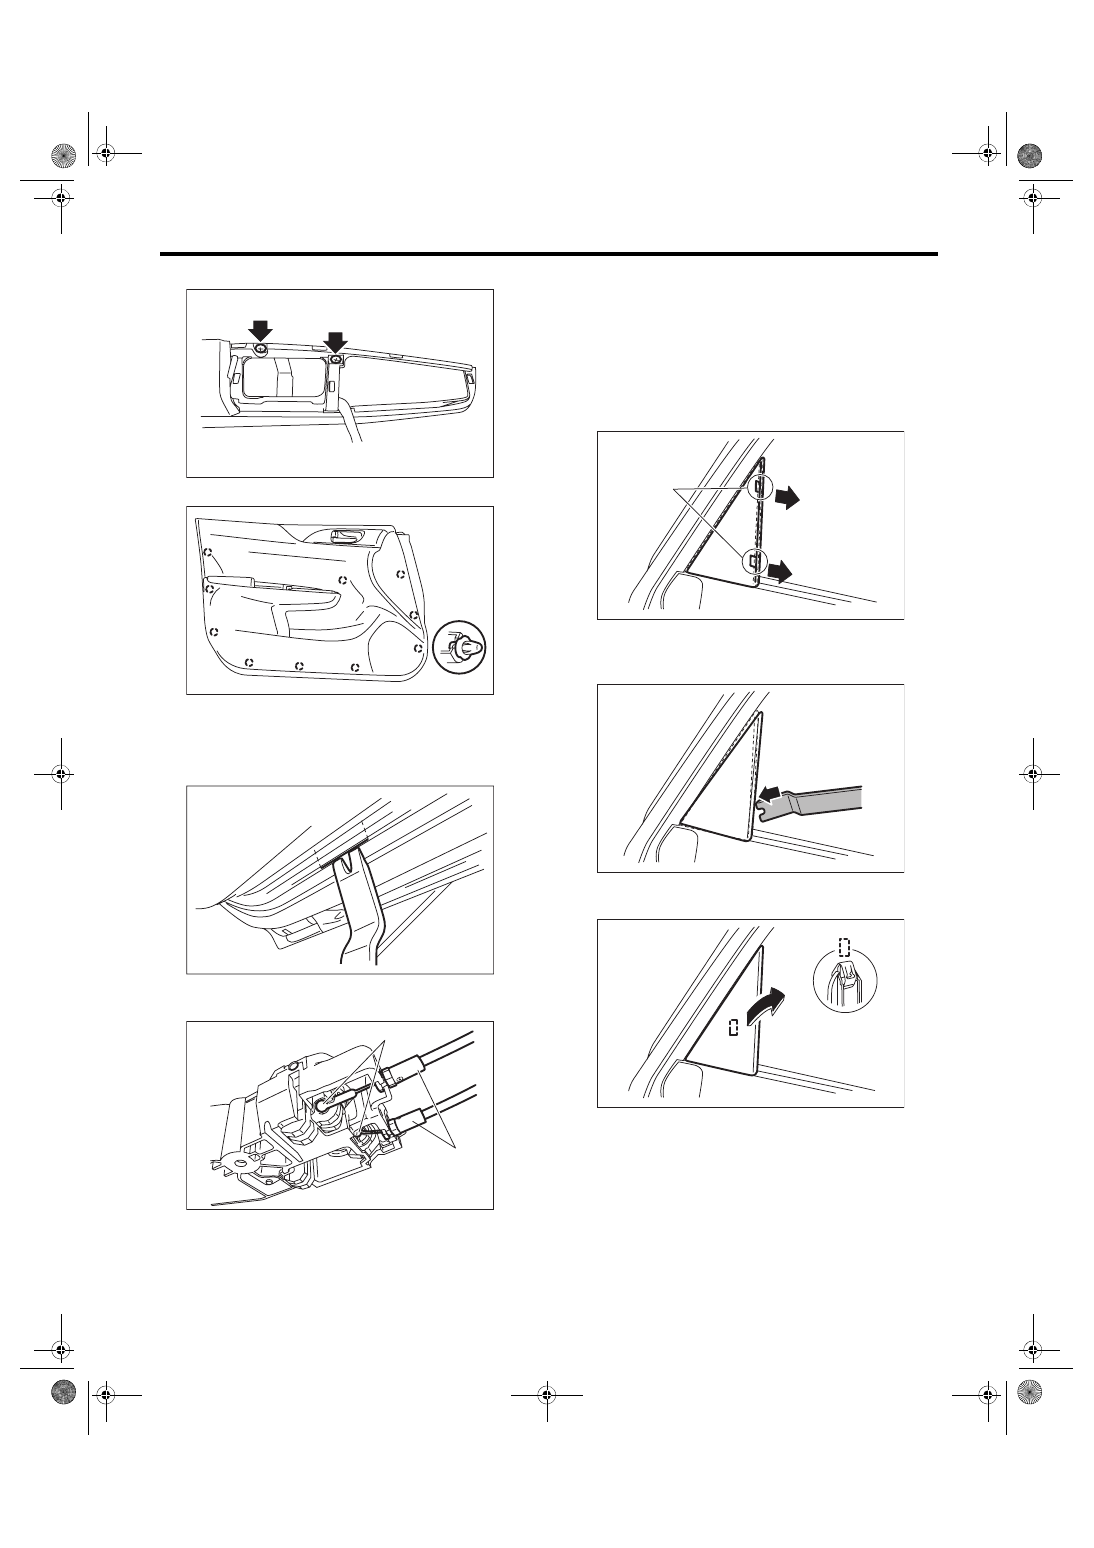
5) Remove the door trim screws.
6) Remove the door trim.
(1) Remove the clips, then lift the door trim.
NOTE:
Insert a plastic clip remover into the slit at the bot-
tom of the door trim, to lift the door trim.
(2) Remove the cable (1) and (2) from the cable
holder of inner remote.
(3) Remove the door trim.
2. REAR DOOR
1) Disconnect the ground cable from battery.
2) Remove the gusset cover.
(1) Push gusset cover in direction of vehicle
front to detach the claws (A) on the backside of
the gusset cover.
CAUTION:
Be careful not to damage the claws (A).
(2) Insert a plastic remover into the position
shown in the figure while retaining the condition
in step (1), and lift up the gusset cover.
(3) Remove the gusset cover in the direction of
the arrow to detach the clip section.
EI-02373
EI-01882
EI-01658
(2)
(1)
SL-00441
EI-02374
(A)
EI-02375
EI-02376
Нет комментариевНе стесняйтесь поделиться с нами вашим ценным мнением.
Текст