Subaru Impreza 3 / Impreza WRX / Impreza WRX STI. Service manual — part 470
FS-15
Wheel Alignment
FRONT SUSPENSION
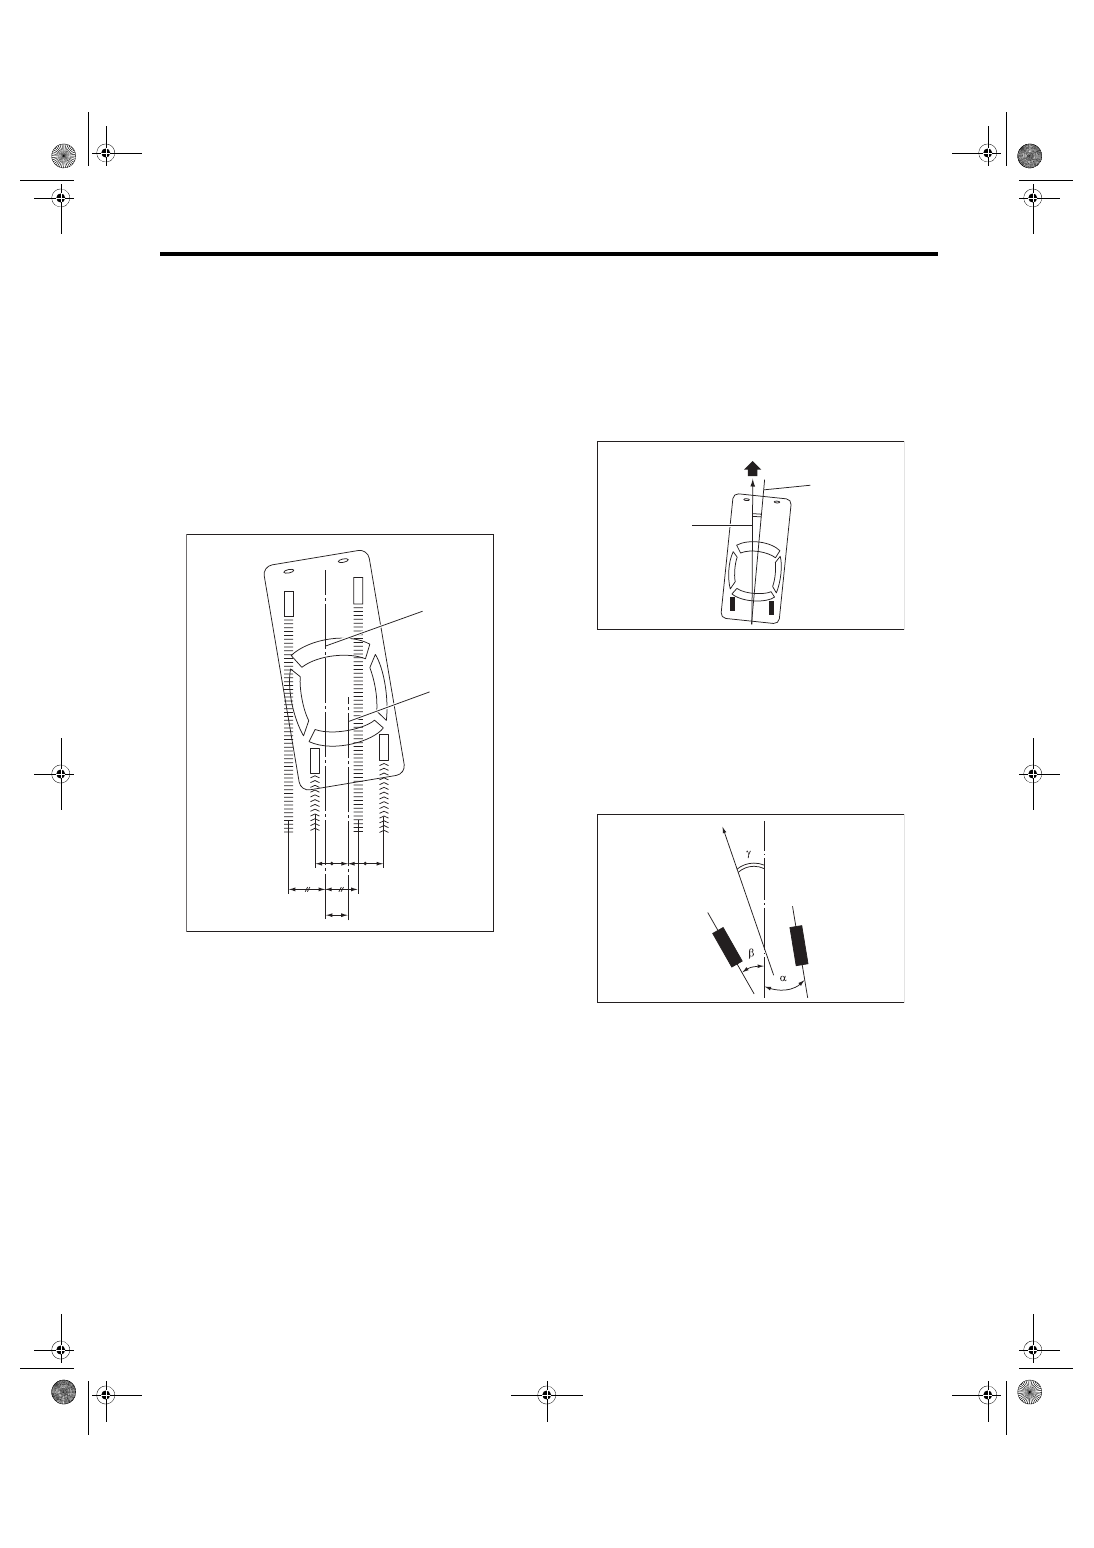
7. THRUST ANGLE
• Inspection
1) Park the vehicle on a level surface.
2) Move the vehicle 3 to 4 meters (10 to 13 feet)
straight forward.
3) Draw the center of loci for both the front and rear
axles.
4) Measure distance “L” between the center lines of
the axle loci.
Thrust angle
0°
±
30
′
Less than 30
′
when “L” is 23 mm (0.9 in) or
less
• Adjustment
When adjusting, adjust it to the following value.
Thrust angle
0°
±
20
′
Less than 20
′
when “L” is 15 mm (0.6 in) or
less
1) Make thrust angle adjustments by turning the
toe-in adjusting bolts of the rear suspension equally
in the same direction.
2) When one rear wheel is adjusted in a toe-in di-
rection, adjust the other rear wheel equally in toe-
out direction, in order to make the thrust angle ad-
justment.
3) When the left and right adjusting bolts are turned
by one graduation, the thrust angle will change ap-
prox. 15′ (“L” is approx. 11 mm (0.43 in)).
NOTE:
Thrust angle is a mean value of left and right wheel
toe angles in relation to the vehicle body center
line. Vehicle is driven straight in the thrust angle di-
rection while slanting in the oblique direction de-
pending on the degree of the mean thrust angle.
Thrust angle:
γ
= (
α
–
β
)/2
α: Rear RH wheel toe-in angle
β: Rear LH wheel toe-in angle
Substitute only the positive toe-in values from each
wheel into α and β in the calculation.
(1) Center line of loci (front axle)
(2) Center line of loci (rear axle)
(1)
(2)
L
FS-00022
(1) Front
(2) Thrust angle
(3) Body center line
(1) Front
(2) Body center line
FS-00024
(2)
(3)
(1)
FS-00976
(1)
(2)
FS-16
Front Crossmember Support Plate
FRONT SUSPENSION
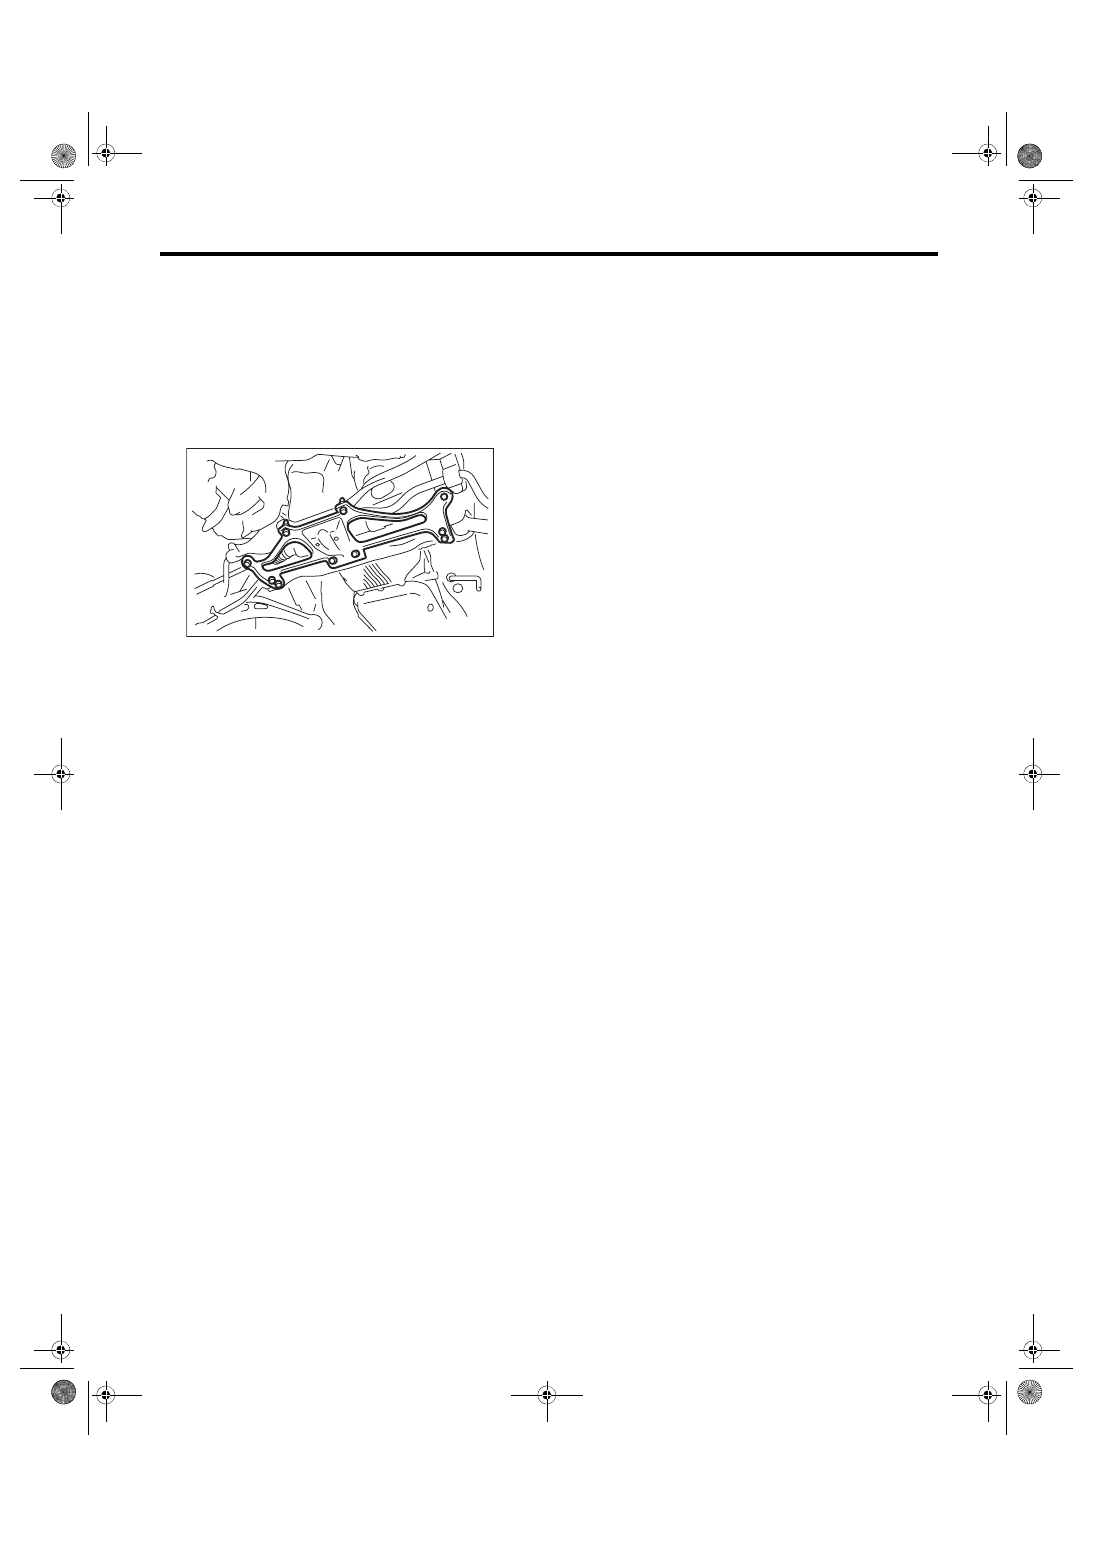
3. Front Crossmember Support
Plate
A: REMOVAL
1) Lift up the vehicle.
2) Remove the front under cover. <Ref. to EI-28,
3) Remove the bolt, and remove the front cross-
member support plate.
B: INSTALLATION
Install each part in the reverse order of removal.
Tightening torque:
60 N·m (6.1 kgf-m, 44.3 ft-lb)
FS-00104
FS-17
Front Stabilizer
FRONT SUSPENSION
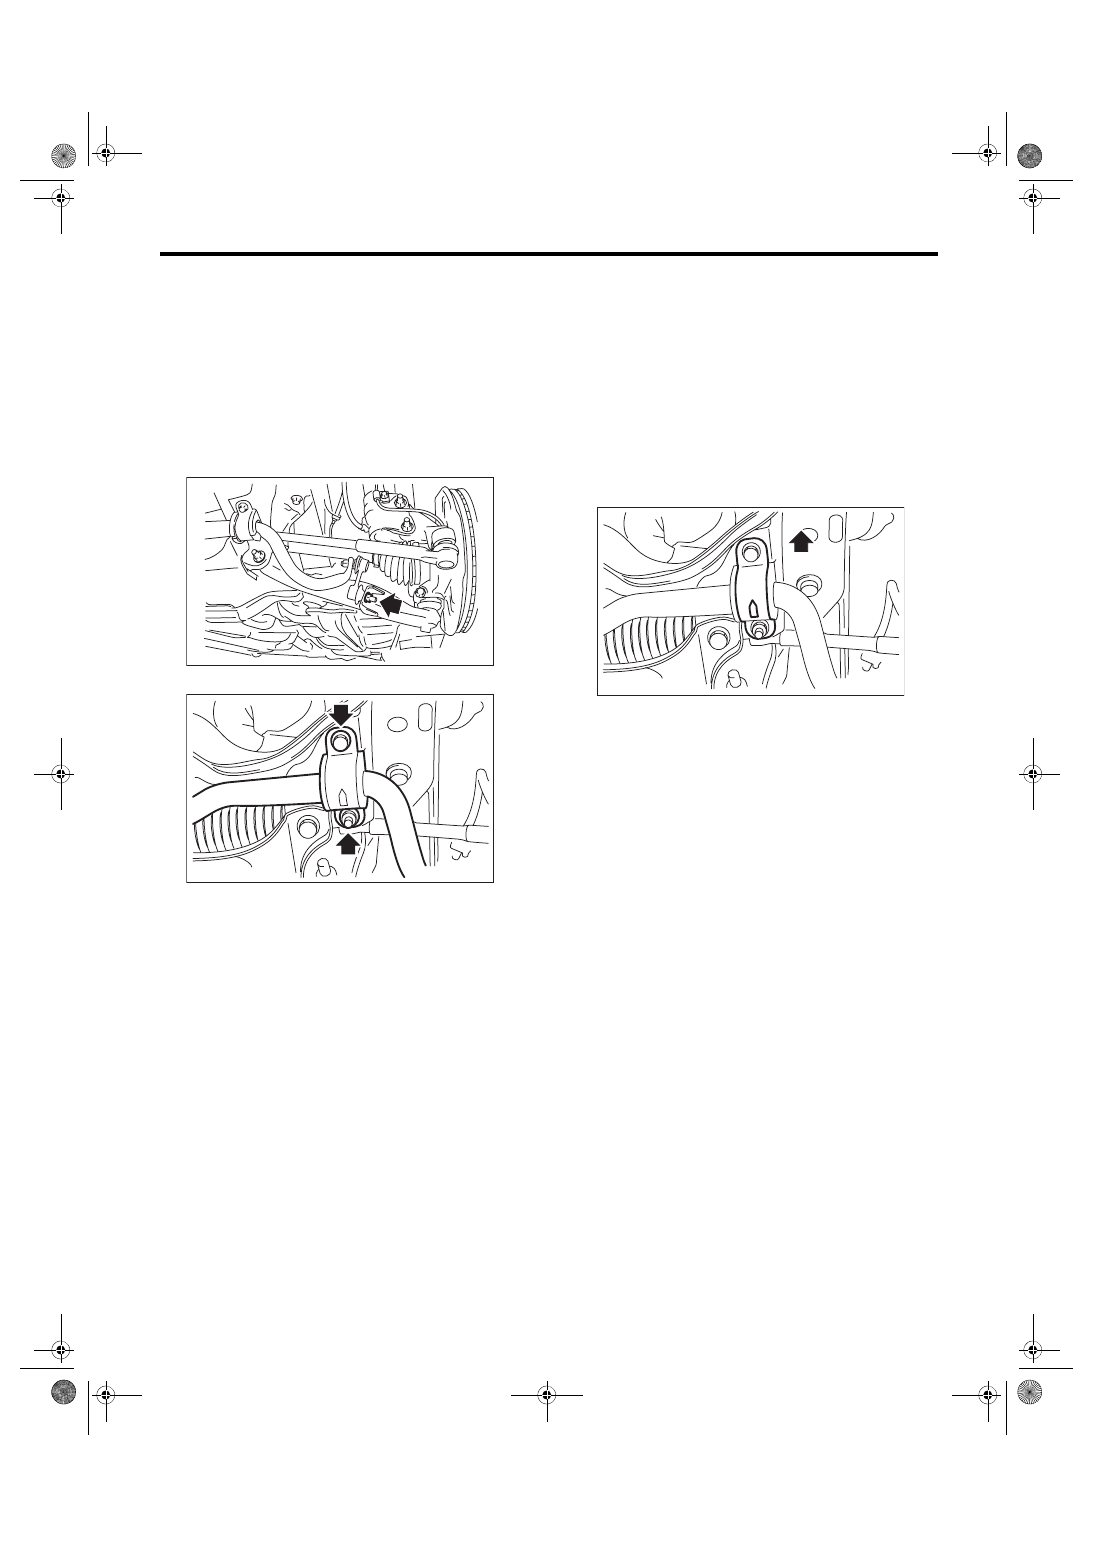
4. Front Stabilizer
A: REMOVAL
1) Lift up the vehicle, and then remove the front
wheels.
2) Remove the front under cover. <Ref. to EI-28,
3) Remove the front crossmember support plate.
<Ref. to FS-16, REMOVAL, Front Crossmember
4) Remove the stabilizer link.
5) Remove the stabilizer bracket.
B: INSTALLATION
Install each part in the reverse order of removal.
CAUTION:
• Use a new flange nut.
• Ensure the stabilizer bushing and stabilizer
have the same identification colors.
• Install the stabilizer bushing (front cross-
member side) while aligning it with the paint
mark on stabilizer.
• The stabilizer bracket has a set orientation.
Install it with the arrow mark facing the upper
side of the vehicle.
Tightening torque:
Stabilizer link:
38 N·m (3.9 kgf-m, 28.0 ft-lb)
Stabilizer bracket:
25 N·m (2.5 kgf-m, 18.4 ft-lb)
Tie-rod end (castle nut):
27 N·m (2.75 kgf-m, 19.9 ft-lb)
C: INSPECTION
1) Check the bushing for abnormal cracks, fatigue
or damage.
2) Check the stabilizer link for damage.
FS-00262
FS-00114
(1) Front side of vehicle
FS-00116
(1)
FS-18
Front Ball Joint
FRONT SUSPENSION
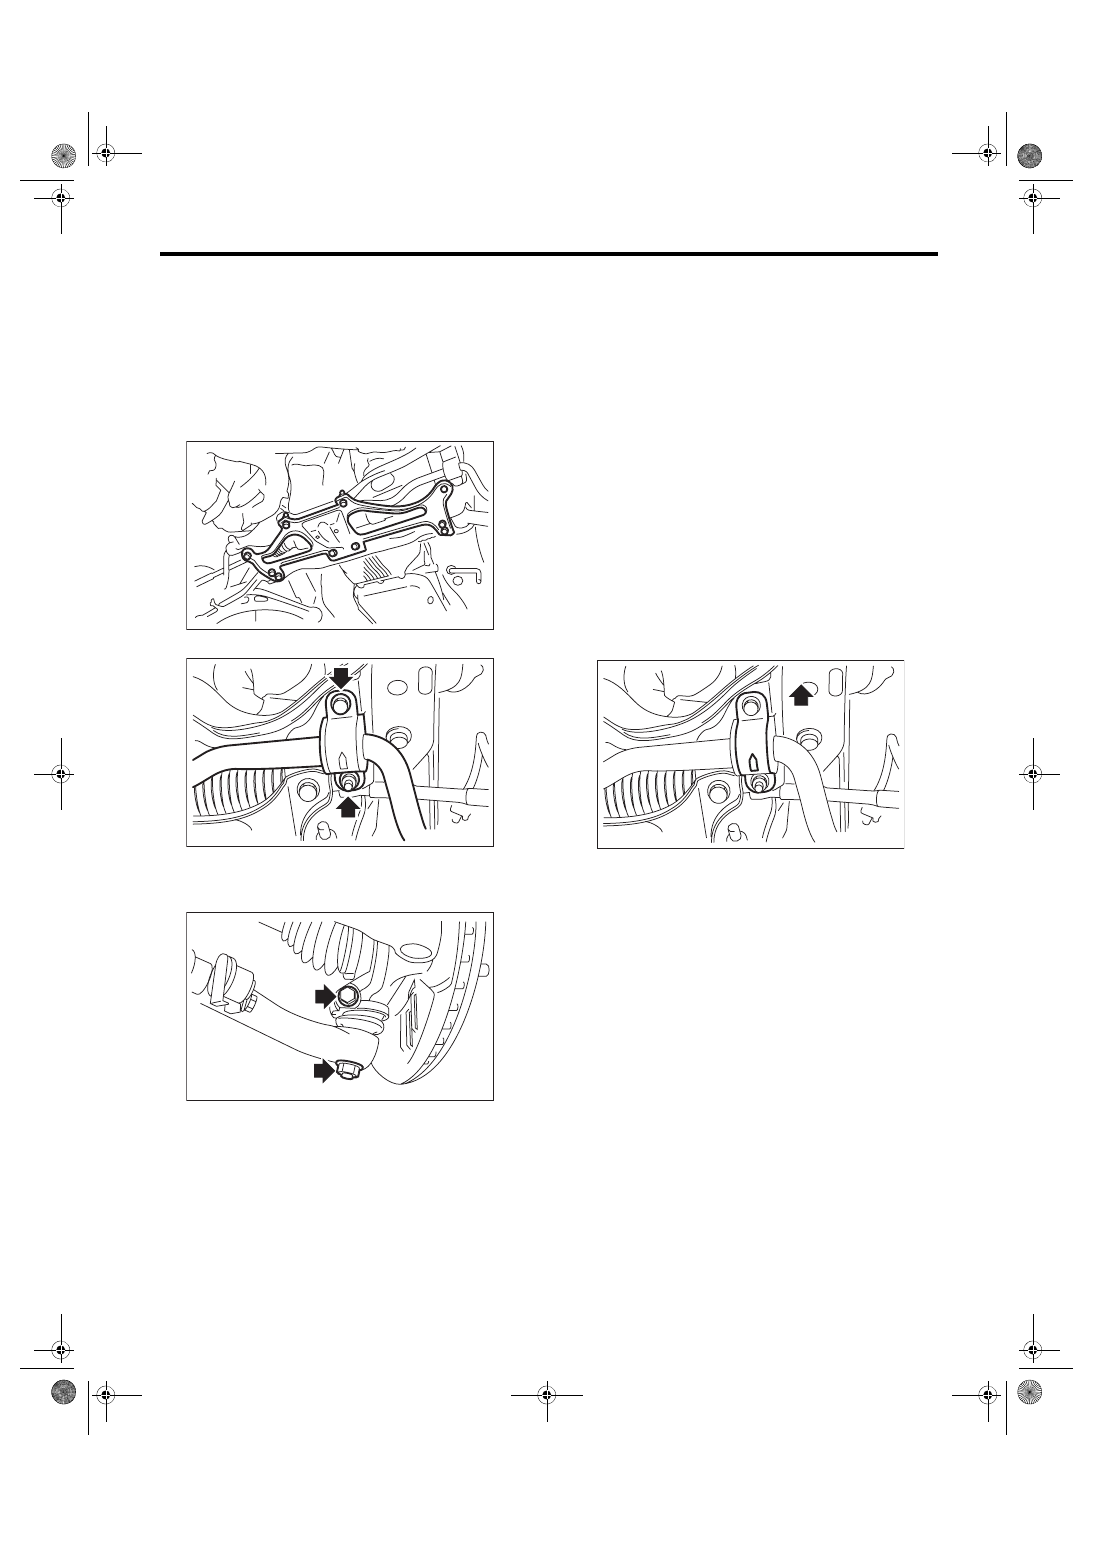
5. Front Ball Joint
A: REMOVAL
1) Lift up the vehicle, and then remove the front
wheels.
2) Remove the front under cover. <Ref. to EI-28,
3) Remove the bolt, and remove the front cross-
member support plate.
4) Remove the both sides of stabilizer bracket.
5) Pull out the pin from ball stud, remove the castle
nut, and extract the ball stud from front arm.
6) Remove the bolt installing ball joint to housing.
7) Extract the ball joint from housing.
B: INSTALLATION
1) Insert the ball joint into housing.
CAUTION:
Do not apply grease to the tapered portion of
ball stud.
Tightening torque (Bolt):
50 N·m (5.1 kgf-m, 36.9 ft-lb)
2) Install the ball joint into front arm.
Tightening torque (Castle nut):
39 N·m (4.0 kgf-m, 28.8 ft-lb)
3) Retighten the castle nut further up to 60° until the
hole in the ball stud is aligned with a slot in castle
nut. Then, insert a new cotter pin and bend it
around the castle nut.
4) Install the stabilizer bracket.
NOTE:
The stabilizer bracket has a set orientation. Install it
with the arrow mark facing the upper side of the ve-
hicle.
Tightening torque:
25 N·m (2.5 kgf-m, 18.4 ft-lb)
5) Install the front crossmember support plate.
Tightening torque:
60 N·m (6.1 kgf-m, 44.3 ft-lb)
6) Install the front wheels.
FS-00104
FS-00114
FS-00115
(1) Front side of vehicle
FS-00116
(1)
Нет комментариевНе стесняйтесь поделиться с нами вашим ценным мнением.
Текст