Subaru Impreza 3 / Impreza WRX / Impreza WRX STI. Service manual — part 746
EI-71
Floor Mat
EXTERIOR/INTERIOR TRIM
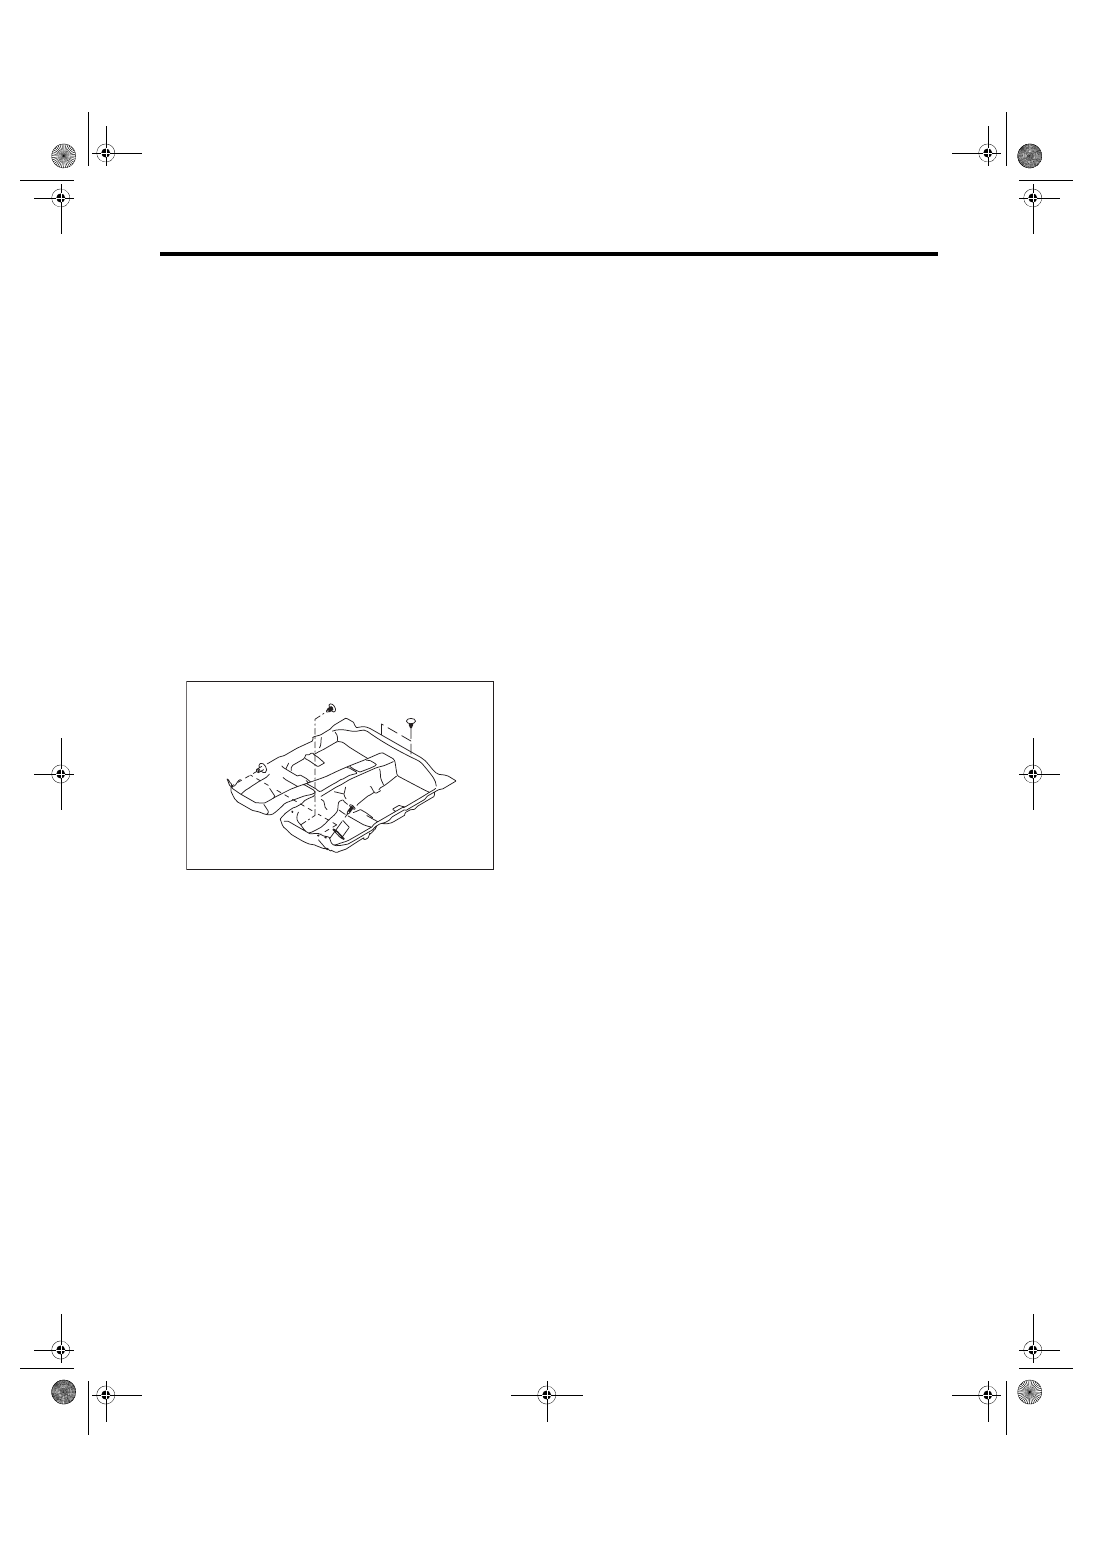
29.Floor Mat
A: REMOVAL
1) Remove the front seats. <Ref. to SE-6, REMOV-
2) Remove the rear seat cushion. <Ref. to SE-13,
3) Remove the console box. <Ref. to EI-51, Con-
4) Remove the console side panel. <Ref. to EI-52,
5) Remove the lower inner trim. <Ref. to EI-57, RE-
6) Remove the fuel filler lid opener. <Ref. to SL-41,
FUEL FILLER LID OPENER, REMOVAL, Remote
7) Remove the clips from the floor mat.
8) Remove the mat hook on both sides.
9) Remove the mat from toe board area.
10) Remove the mat from rear heater duct.
11) Roll the mat, and then take it out of opened rear
door.
B: INSTALLATION
Install each part in the reverse order of removal.
NOTE:
• Secure the mat firmly with hook and clip.
• Insert the mat edge firmly into the groove of side
sill cover.
EI-02004
EI-72
Rear Gate Garnish
EXTERIOR/INTERIOR TRIM
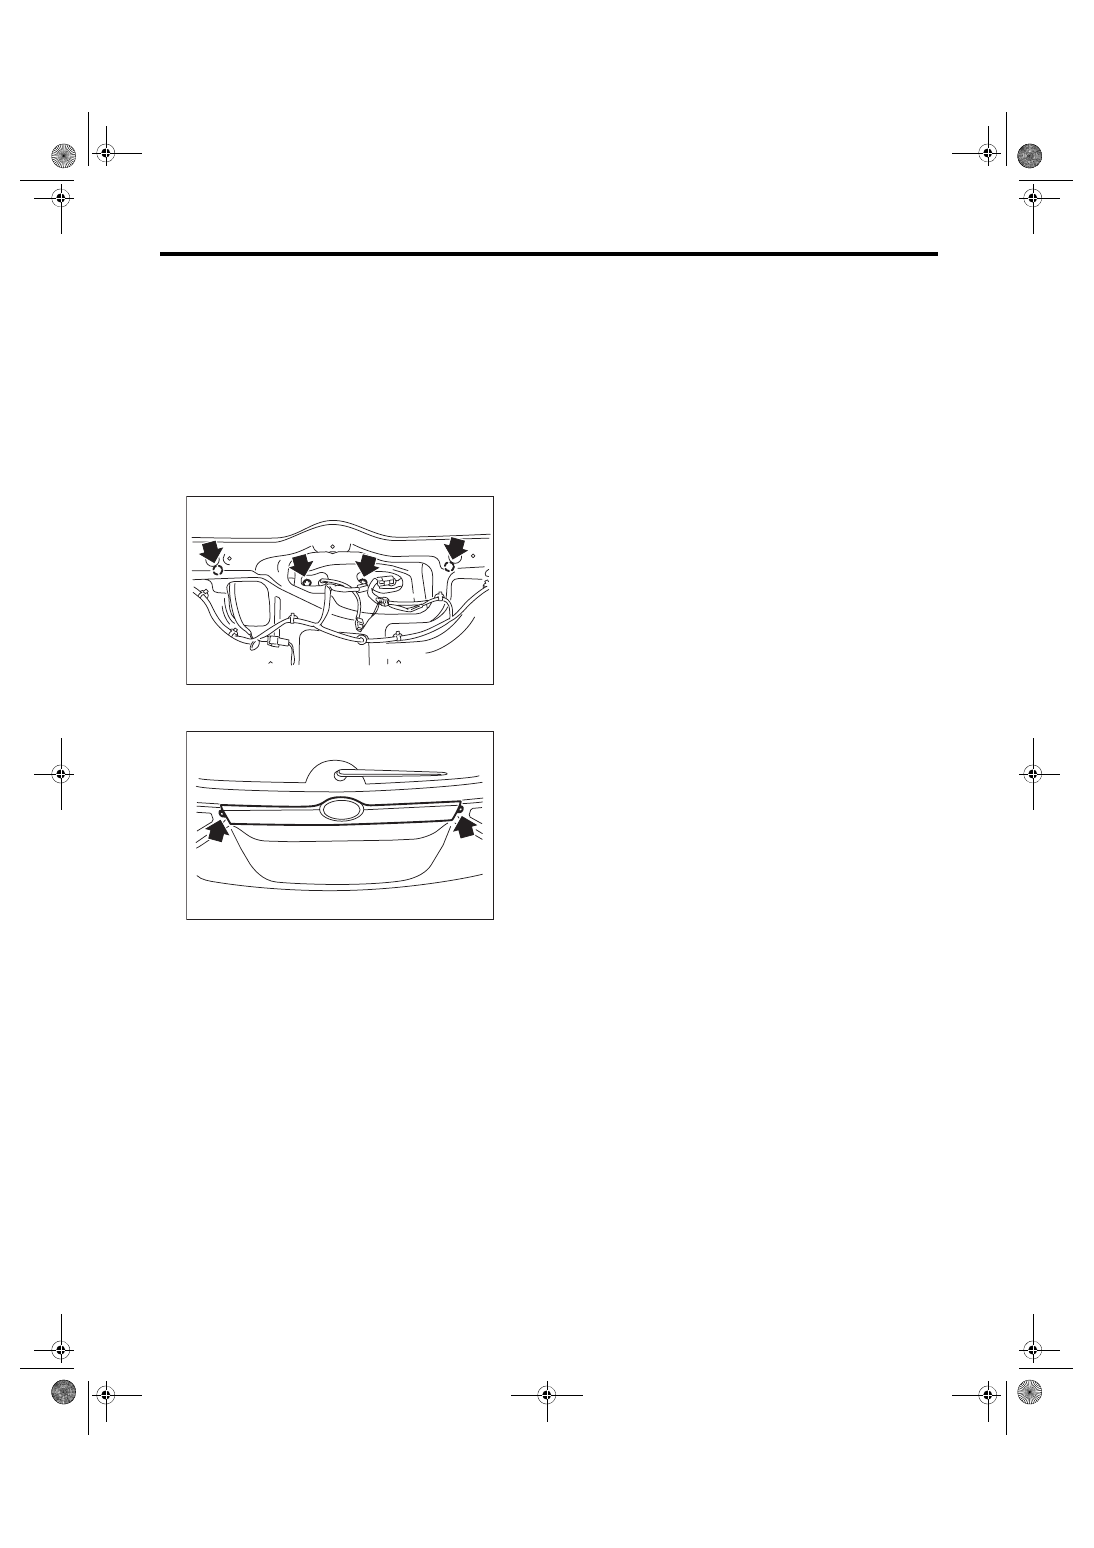
30.Rear Gate Garnish
A: REMOVAL
1) Remove the rear gate trim. <Ref. to EI-69, RE-
2) Remove the rear wiper motor. <Ref. to WW-21,
3) Remove the rear finisher light. <Ref. to LI-29,
REMOVAL, Rear Finisher Light Assembly.>
4) Disconnect the connector of rear gate opener
button.
5) Remove the nuts.
6) Remove the clips, and remove the rear gate gar-
nish.
B: INSTALLATION
CAUTION:
Make sure that the harness grommet is secure-
ly installed.
If not properly installed, this may cause leaks.
Install each part in the reverse order of removal.
Tightening torque:
4.5 N·m (0.46 kgf-m, 3.3 ft-lb)
EI-01822
EI-01823
EI-73
Trunk Lid Garnish
EXTERIOR/INTERIOR TRIM
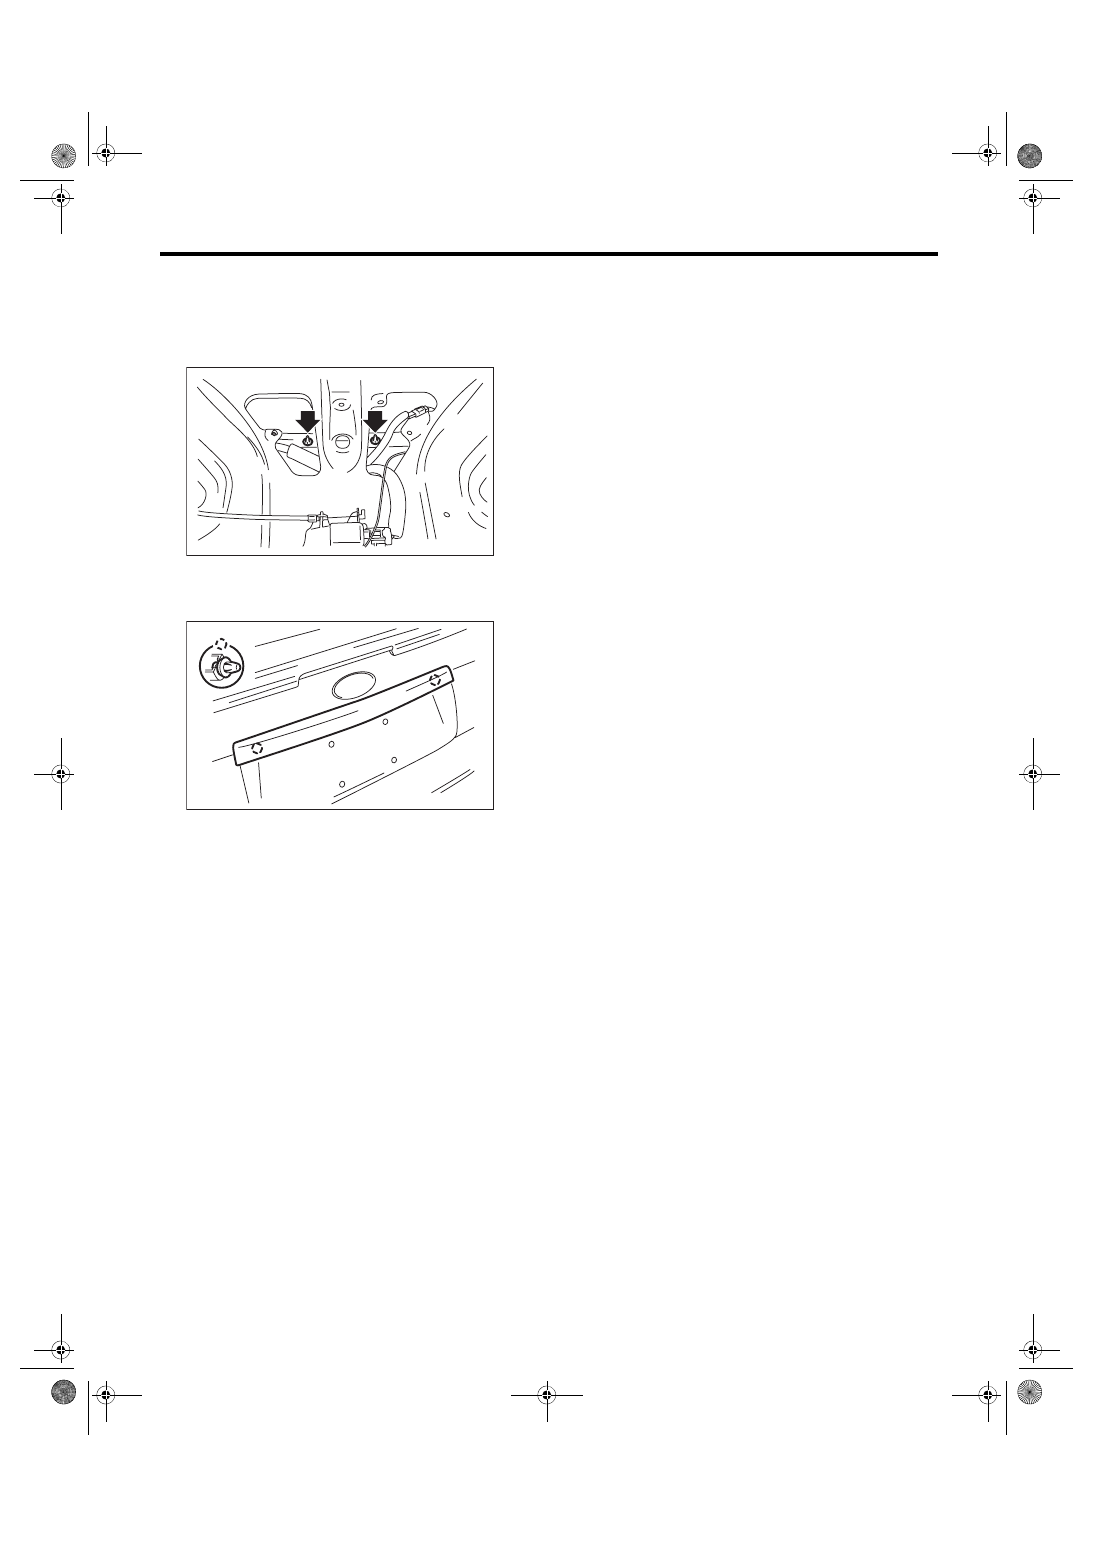
31.Trunk Lid Garnish
A: REMOVAL
1) Remove the nut in the upper part of the trunk lid
garnish.
2) Disconnect the license plate light harness con-
nector.
3) Remove the clips and the trunk lid garnish.
B: INSTALLATION
Install each part in the reverse order of removal.
Tightening torque:
4.5 N·m (0.46 kgf-m, 3.3 ft-lb)
EI-01908
EI-01907
EI-74
Heat Shield Cover
EXTERIOR/INTERIOR TRIM
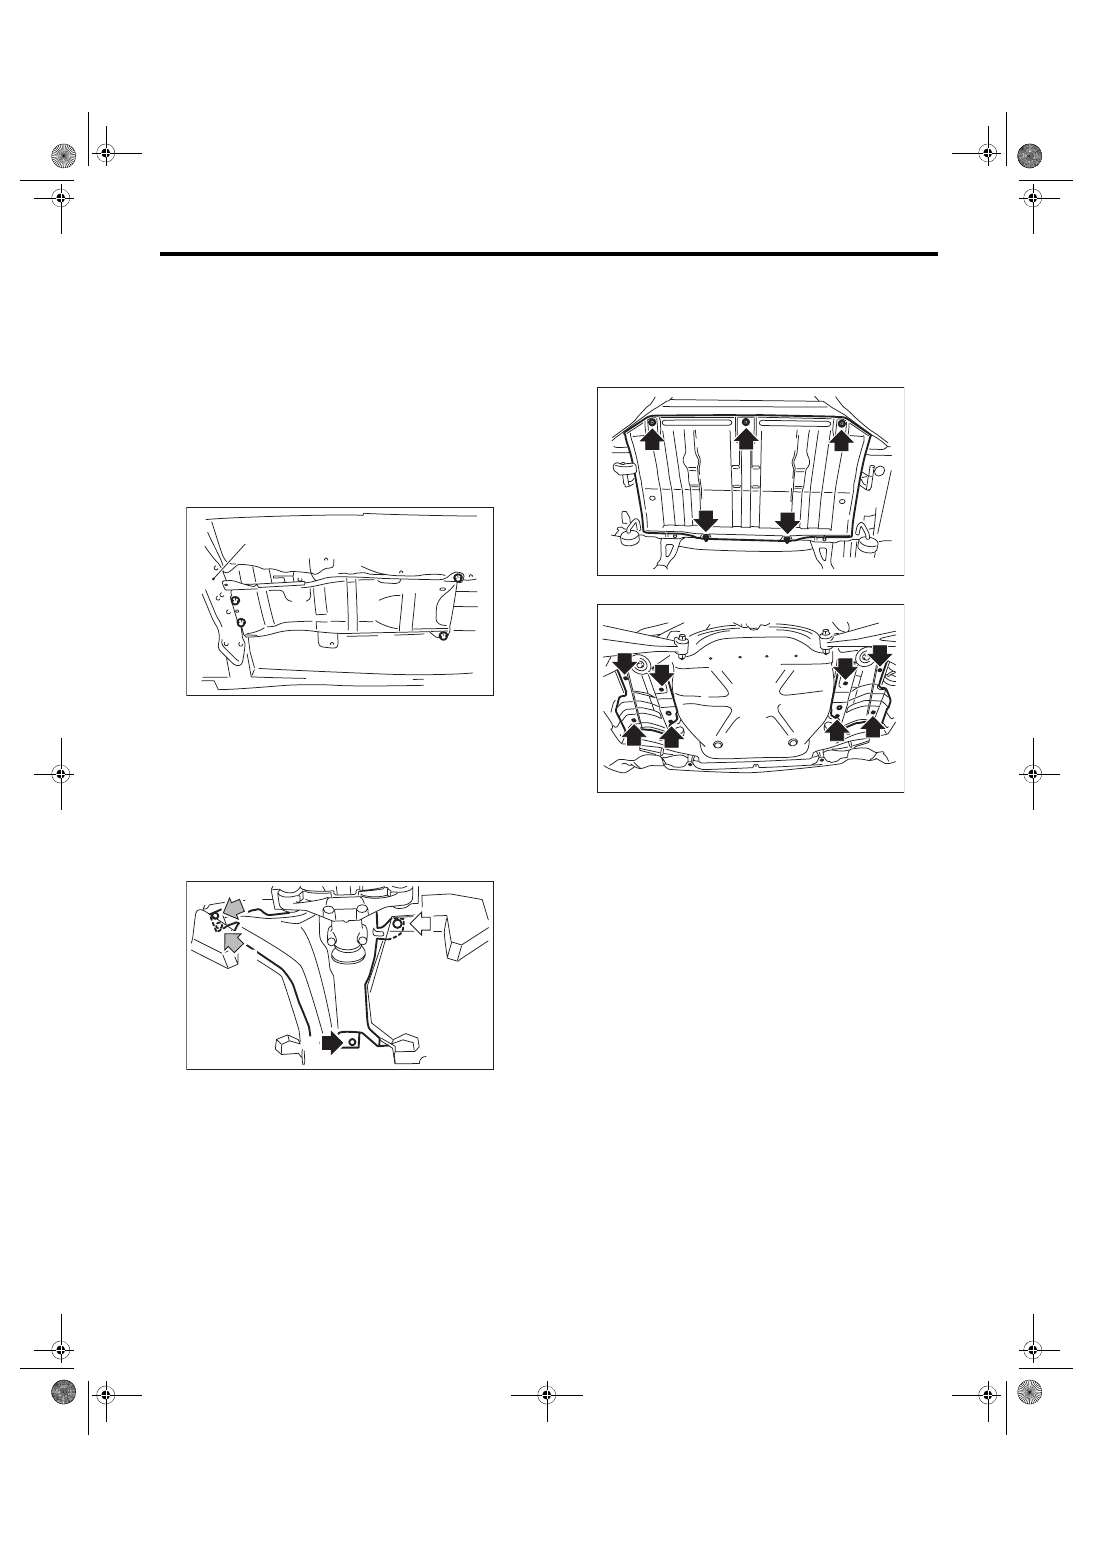
32.Heat Shield Cover
A: REMOVAL
1. FRONT HEAT SHIELD COVER
1) Disconnect the ground cable from battery.
2) Disconnect the connector from oxygen (A/F)
sensor. <Ref. to EX(STI)-8, REMOVAL, Center Ex-
3) Remove the exhaust pipe. <Ref. to EX(STI)-13,
4) Remove the four bolts to remove the front heat
shield cover.
2. CENTER HEAT SHIELD COVER
1) Remove the rear exhaust pipe. <Ref. to
EX(STI)-13, REMOVAL, Rear Exhaust Pipe.>
2) Remove the propeller shaft. <Ref. to DS-11, RE-
3) Remove the bolt (A), nut (B) and clip (C) to re-
move center heat shield cover.
3. REAR HEAT SHIELD COVER
1) Remove the muffler. <Ref. to EX(STI)-15, RE-
2) Remove the bolts, and remove the rear heat
shield cover.
• 5 door model
• 4 door model
B: INSTALLATION
Install each part in the reverse order of removal.
Tightening torque:
Refer to “COMPONENT” of “General Descrip-
tion”. <Ref. to EI-24, HEAT SHIELD COVER,
COMPONENT, General Description.>
(A) Transmission mount
DI-00211
(A)
EI-02007
(B)
(A)
(C)
(B)
EI-01824
EI-01909
Нет комментариевНе стесняйтесь поделиться с нами вашим ценным мнением.
Текст