Subaru Legacy (2005 year). Service manual — part 304
LU(H4DOTC)-15
LUBRICATION
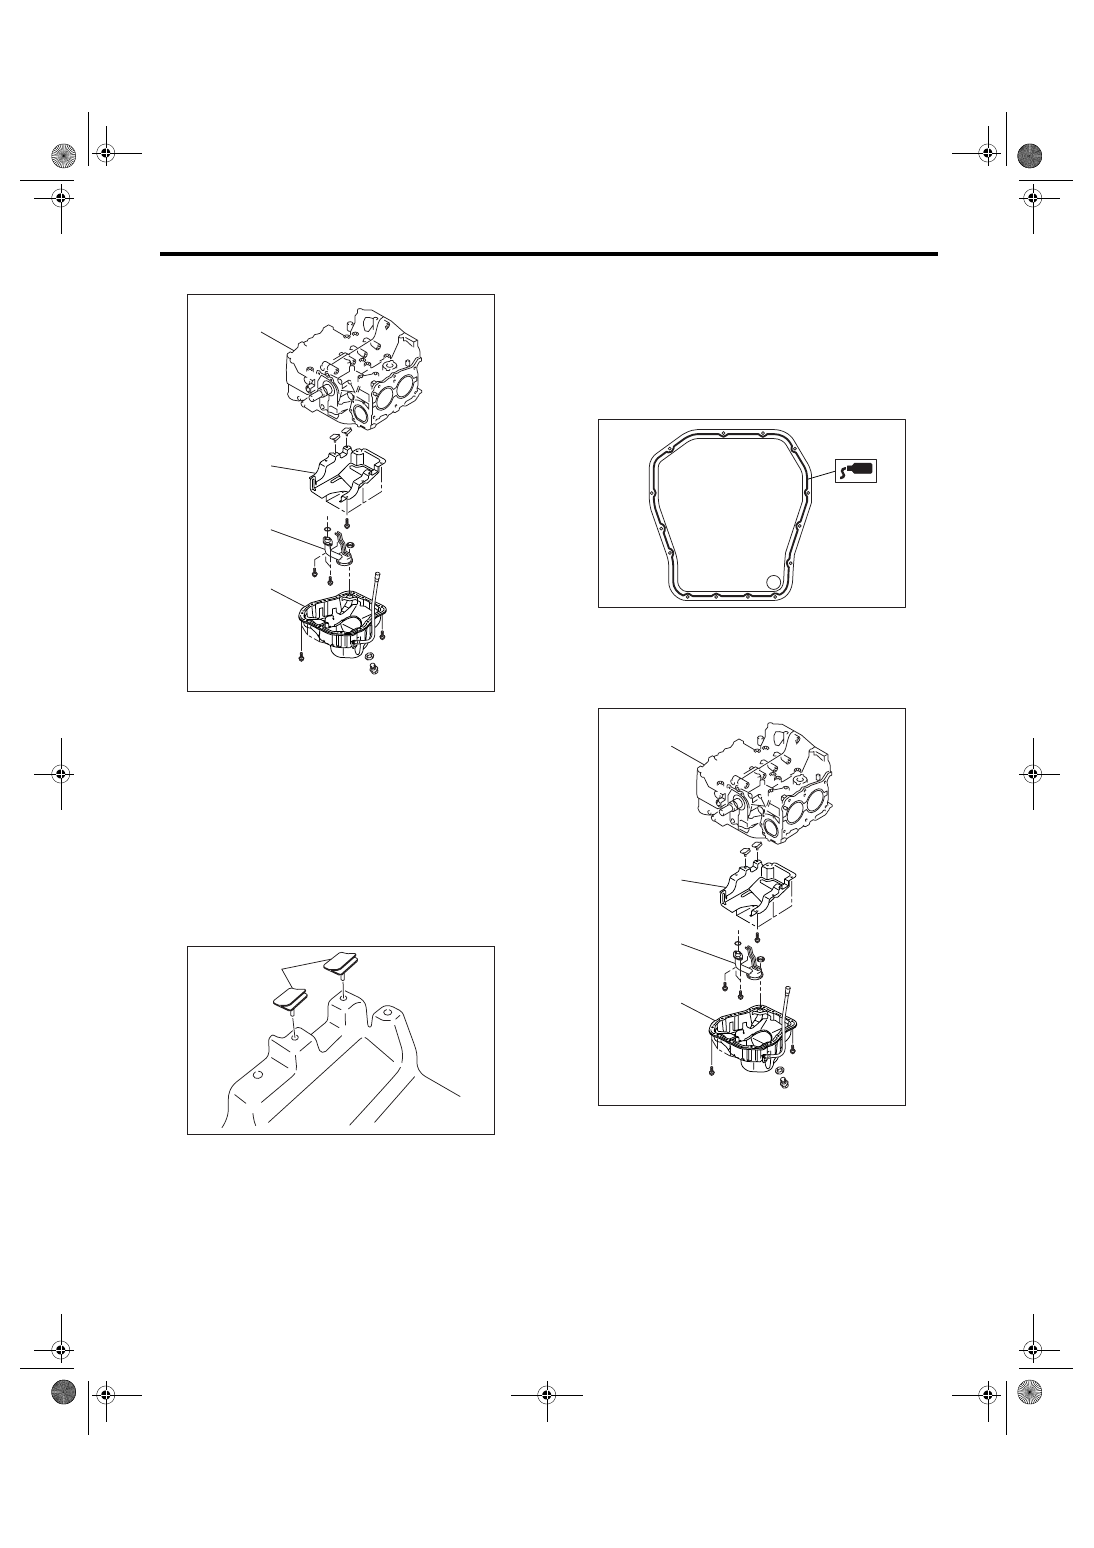
Oil Pan and Strainer
20) Remove the baffle plate.
B: INSTALLATION
CAUTION:
Before installing the oil pan, wipe clean the oil
pan and the mating face of engine block.
1) Make sure that the seals (A) are installed se-
curely on the buffle plate in a direction as shown in
the figure below.
2) Install the baffle plate.
Tightening torque:
6.4 N
⋅
m (0.65 kgf-m, 4.7 ft-lb)
3) Install the oil strainer onto baffle plate.
NOTE:
Use a new O-ring.
Tightening torque:
10 N
⋅
m (1.0 kgf-m, 7.4 ft-lb)
4) Apply liquid gasket to the mating surfaces, and
install the oil pan.
Liquid gasket:
THREE BOND 1207C (Part No. 004403012) or
equivalent
5) Tighten the bolt which installs oil pan to engine
block.
Tightening torque:
5 N
⋅
m (0.5 kgf-m, 3.7 ft-lb)
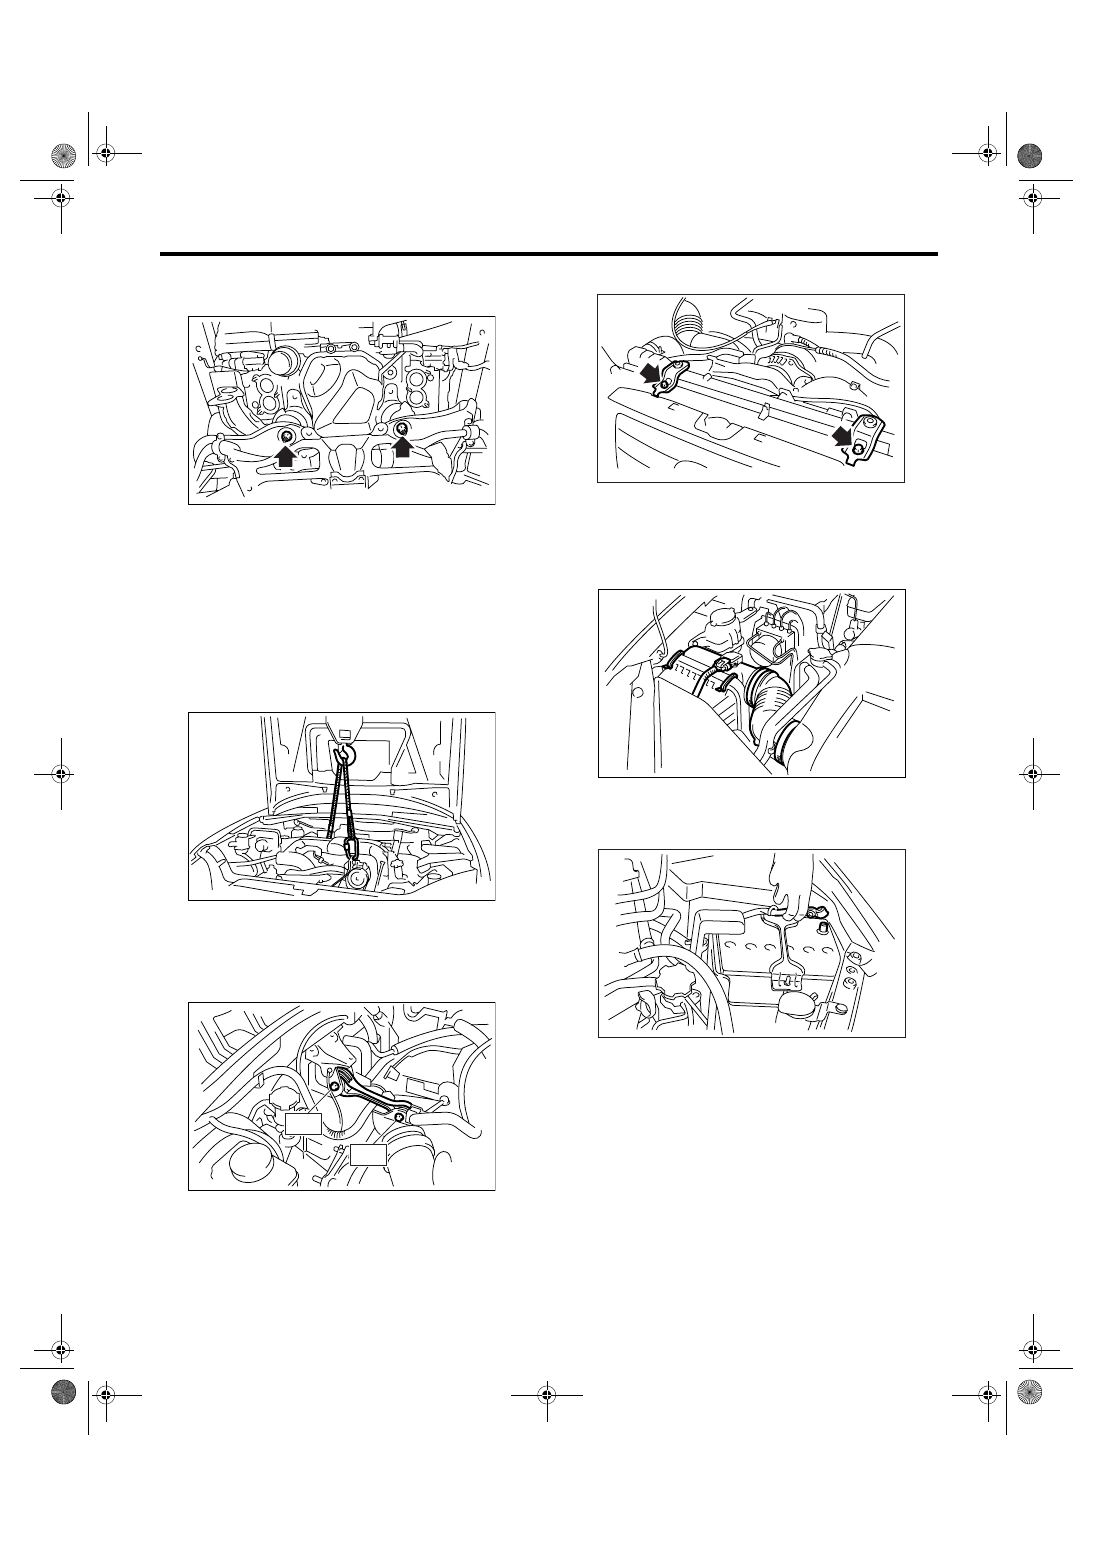
6) Lower the engine onto front crossmember.
7) Tighten the nuts which install front cushion rub-
ber onto front crossmember.
(A) Oil pan
(B) Oil strainer
(C) Baffle plate
(D) Cylinder block
LU-02156
(A)
(C)
(D)
(B)
LU-00052
(A)
(A) Oil pan
(B) Oil strainer
(C) Baffle plate
(D) Cylinder block
LU-00034
LU-02156
(A)
(C)
(D)
(B)
LU(H4DOTC)-16
LUBRICATION
Oil Pan and Strainer
Tightening torque:
85 N
⋅
m (8.7 kgf-m, 62.7 ft-lb)
8) Install the front exhaust pipe. <Ref. to
EX(H4DOTC)-5, INSTALLATION, Front Exhaust
Pipe.> <Ref. to EX(H4SO 2.0)-7, INSTALLATION,
Front Exhaust Pipe.>
9) Install the under cover.
10) Lower the vehicle.
CAUTION:
When lowering the vehicle, lower the lift-up de-
vice and wire ropes at the same time.
11) Remove the lifting device and wire ropes.
12) Install the pitching stopper.
Tightening torque:
T1: 50 N
⋅
m (5.1 kgf-m, 36.9 ft-lb)
T2: 58 N
⋅
m (5.9 kgf-m, 42.8 ft-lb)
13) Install the linear motion mounting.
<Ref. to ME(H4DOTC)-38, INSTALLATION, Linear
Motion Mounting.>
14) Install the radiator upper brackets.
15) Install the intercooler.
12, INSTALLATION, Intercooler.>
16) Install the air intake boot and air cleaner upper
cover.
17) Connect the connector to mass air flow sensor.
18) Install the front wheels.
19) Install the collector cover.
20) Connect the ground cable to battery.
21) Fill engine oil. <Ref. to LU(H4DOTC)-9, IN-
SPECTION, Engine Oil.>
C: INSPECTION
Visually check that the oil pan, oil strainer, oil
strainer stay and baffle plate are not damaged.
LU-02023
LU-00222
LU-00224
T2
T1
CO-00040
LU-00220
IN-00203
LU(H4DOTC)-17
LUBRICATION
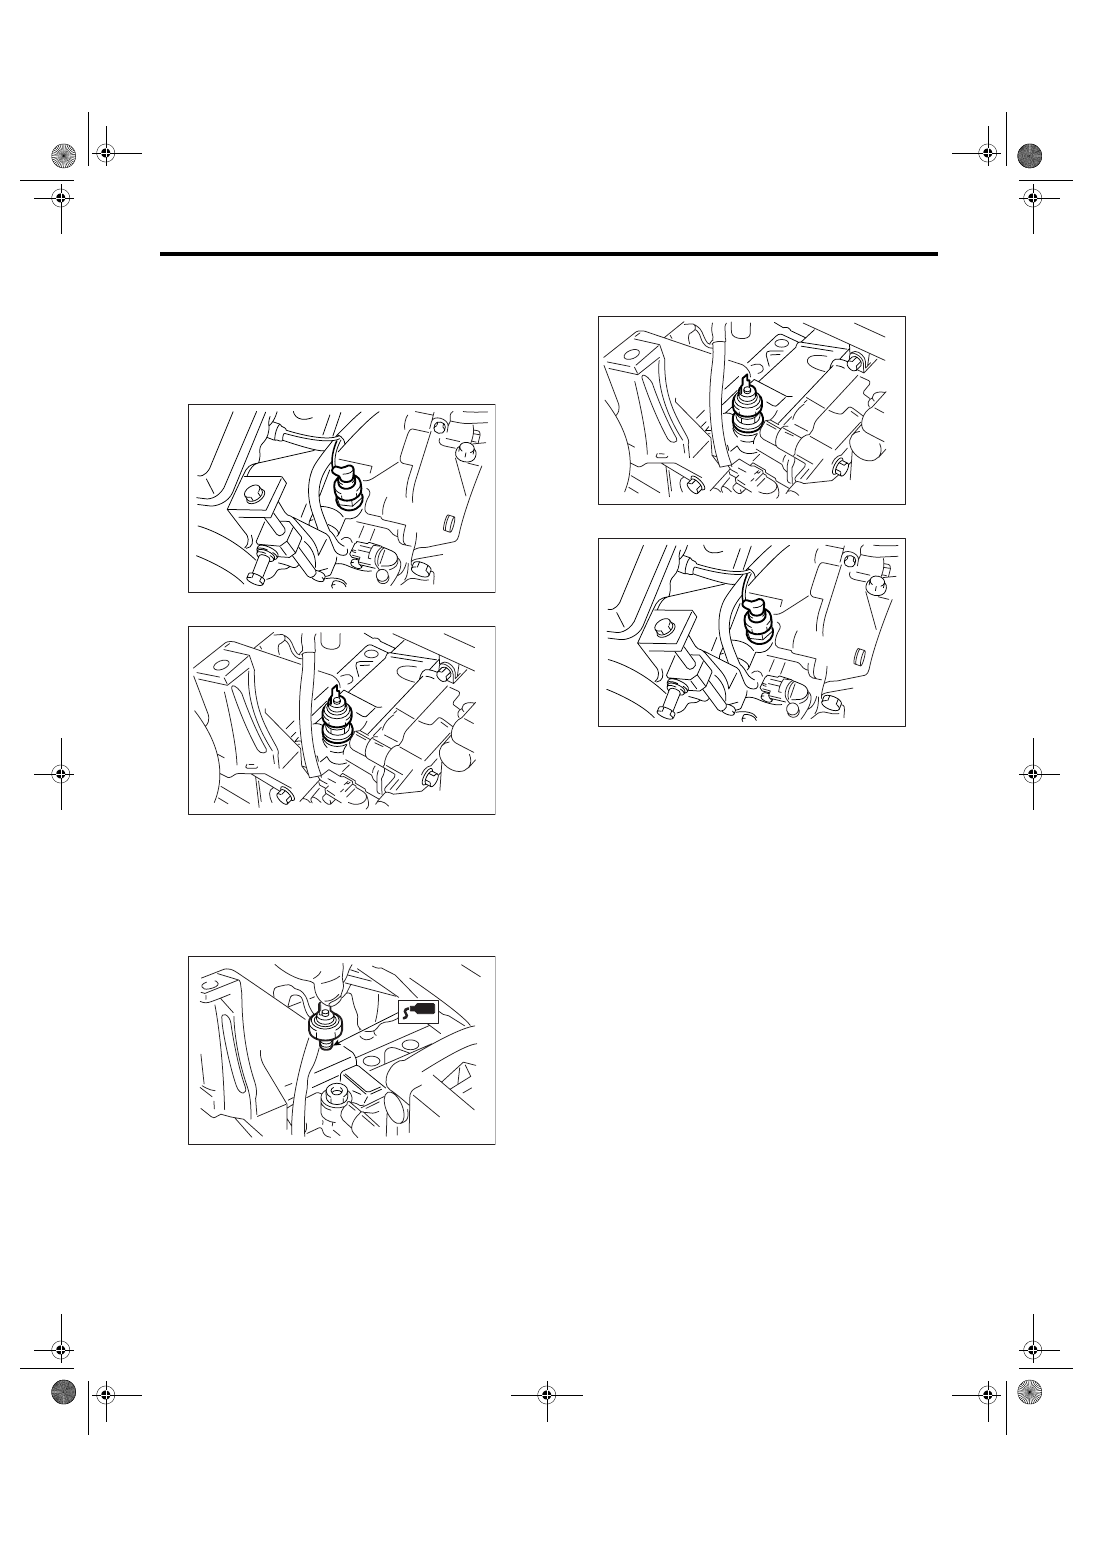
Oil Pressure Switch
6. Oil Pressure Switch
A: REMOVAL
1) Remove the collector cover.
2) Remove the generator from bracket. <Ref. to
SC(H4SO 2.0)-14, REMOVAL, Generator.>
3) Disconnect the terminal from oil pressure switch.
4) Remove the oil pressure switch.
B: INSTALLATION
1) Apply liquid gasket to the oil pressure switch
threads.
Liquid gasket:
THREE BOND 1324 (Part No. 004403042) or
equivalent
2) Install the oil pressure switch onto engine block.
Tightening torque:
25 N
⋅
m (2.5 kgf-m, 18.4 ft-lb)
3) Connect the terminal to oil pressure switch.
4) Install the generator to bracket. <Ref. to
SC(H4SO 2.0)-14, INSTALLATION, Generator.>
5) Install the collector cover.
C: INSPECTION
Check the oil pressure switch installation portion for
oil leakage and oil seepage.
LU-00036
LU-00037
LU-00038
LU-00037
LU-00036
LU(H4DOTC)-18
LUBRICATION
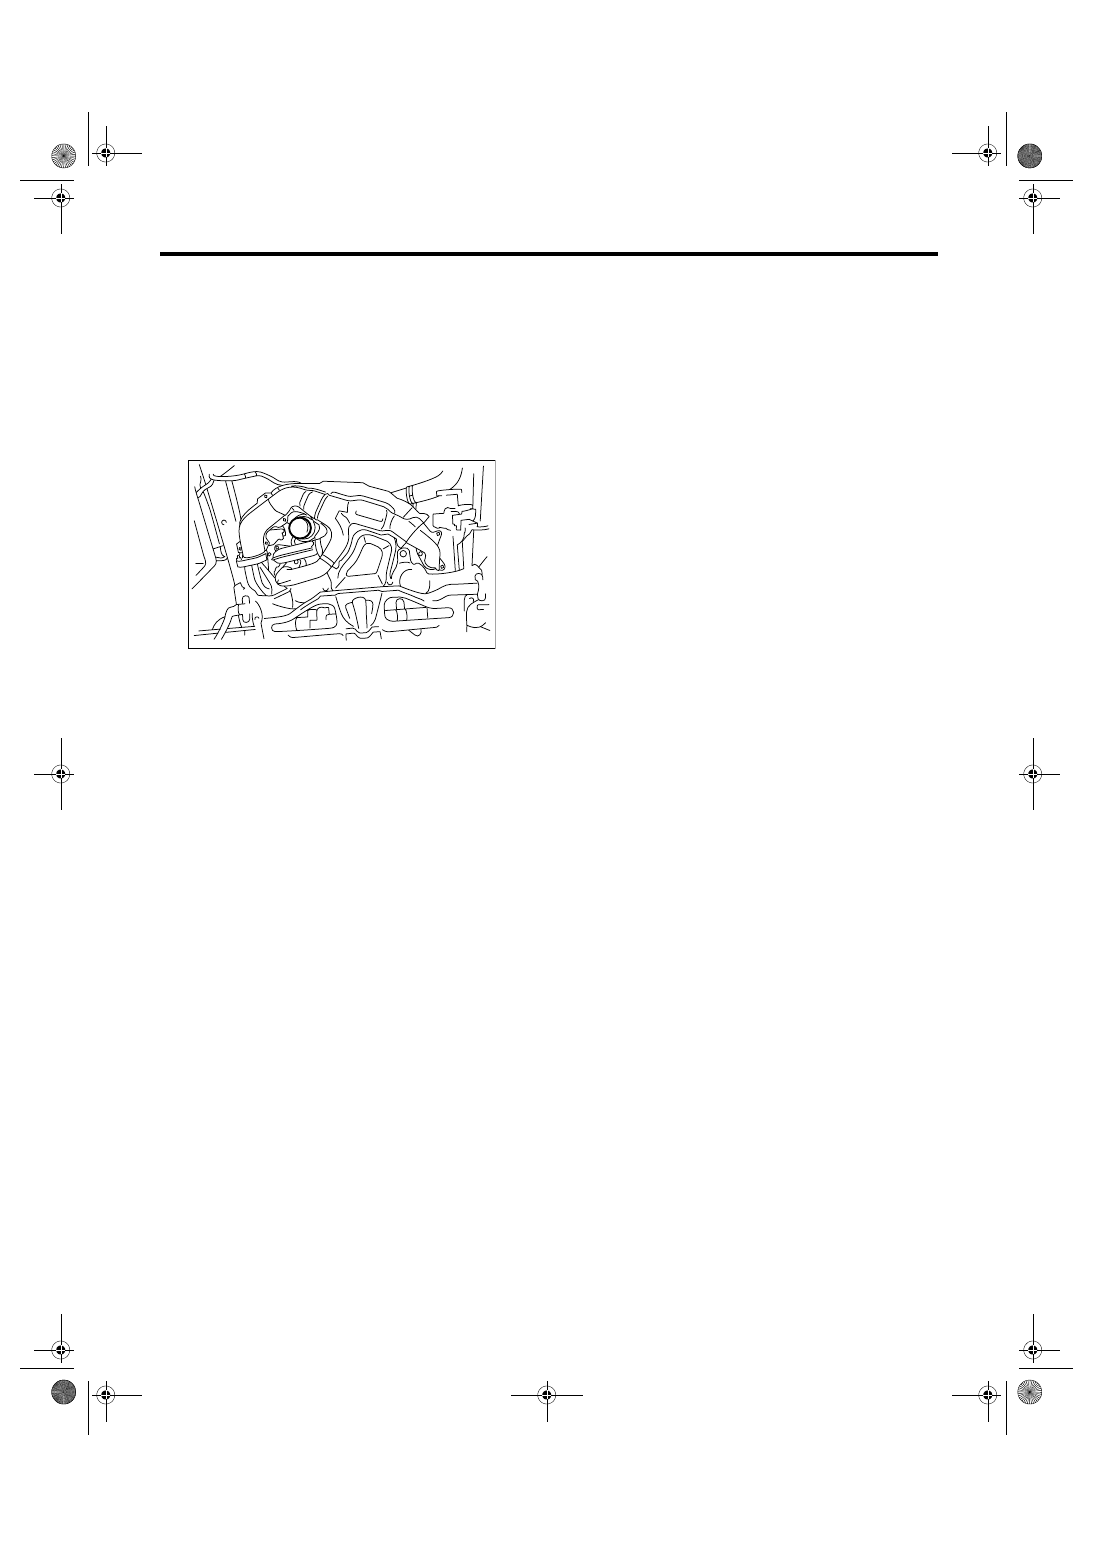
Engine Oil Filter
7. Engine Oil Filter
A: REMOVAL
1) Lift-up the vehicle.
2) Remove the under cover.
3) Remove the oil filter using ST.
ST
18332AA000
OIL FILTER WRENCH (Outer
diameter: 68 mm (2.68 in))
ST
18332AA010
OIL FILTER WRENCH (Outer
diameter: 65 mm (2.56 in))
B: INSTALLATION
1) Clean the oil filter installation surface on cylinder
block or oil cooler.
2) Apply a thin coat of engine oil to the seal rubber
of new oil filter.
3) Install the oil filter turning it by hand, being care-
ful not to damage the seal rubber.
4) Tighten more after the seal rubber contacts oil
cooler.
NOTE:
• In case of oil filter in outer diameter 68 mm (2.68
in), tighten by approx. 1 turn.
• In case of oil filter in outer diameter 65 mm (2.56
in), tighten by approx. 2/3 to 3/4 turn.
• Do not tighten excessively because oil may leak.
5) Install the under cover.
6) Lower the vehicle.
C: INSPECTION
1) After installing the oil filter, run the engine and
make sure that no oil is leaking around seal rubber.
NOTE:
The filter element and filter case are permanently
jointed; therefore, interior cleaning is not neces-
sary.
2) Check the engine oil level.
<Ref. to LU(H4DOTC)-9, INSPECTION, Engine
Oil.>
LU-00227
Нет комментариевНе стесняйтесь поделиться с нами вашим ценным мнением.
Текст