Subaru Legacy IV (2008 year). Service manual — part 1053
LI-29
License Plate Light Assembly
LIGHTING SYSTEM
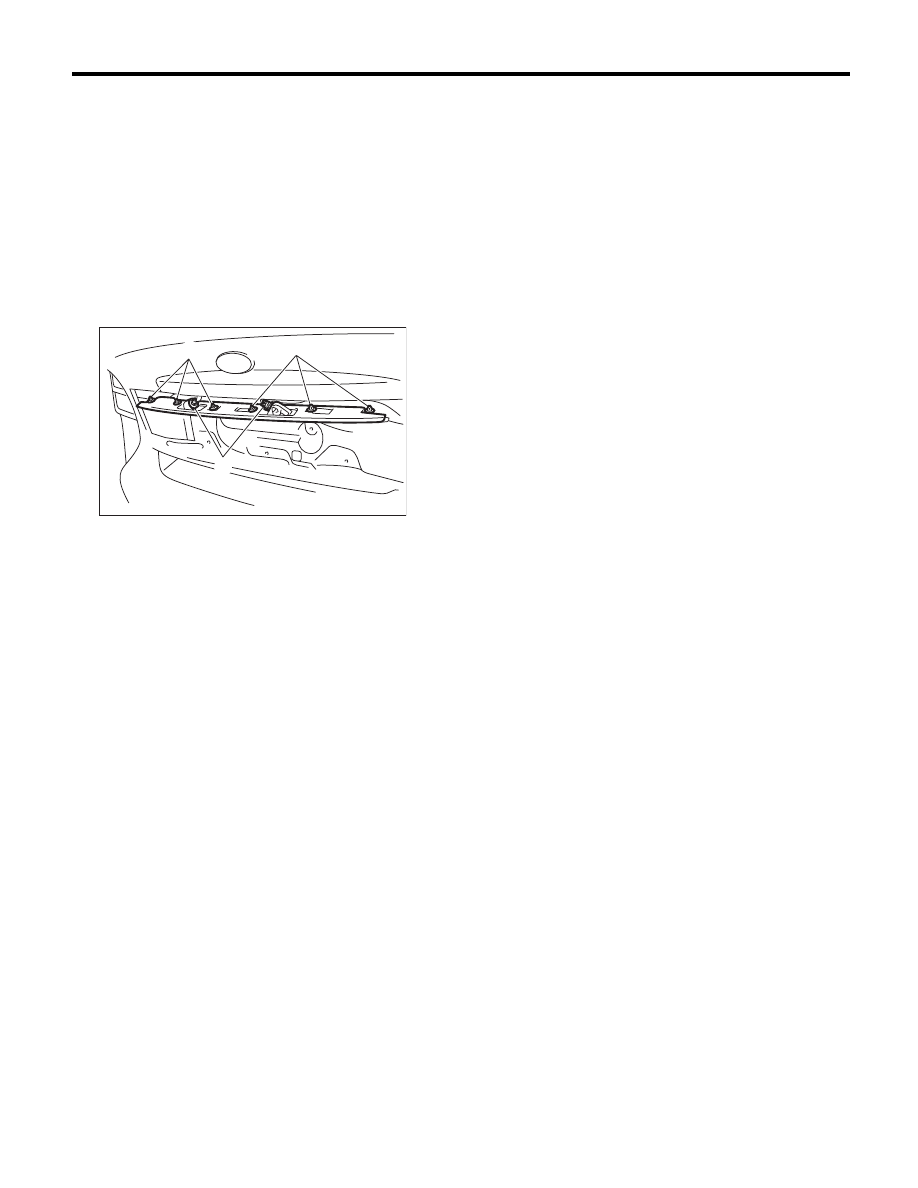
25.License Plate Light Assembly
A: REMOVAL
1. SEDAN MODEL
1) Disconnect the ground cable from the battery.
2) Remove the trunk lid garnish. <Ref. to EI-74,
REMOVAL, Trunk Lid Garnish.>
3) Remove the trunk lid trim. <Ref. to EI-70,
TRUNK LID TRIM, REMOVAL, Trunk Room Trim.>
4) Turn and remove the bulb socket (A). Disengage
clip (B) and remove the license plate light assem-
bly.
2. WAGON MODEL
1) Disconnect the ground cable from the battery.
2) Remove the rear gate trim. <Ref. to EI-68, RE-
MOVAL, Rear Gate Trim.>
3) Disconnect the harness connector and remove
the rear gate garnish. <Ref. to EI-75, REMOVAL,
Rear Gate Garnish.>
4) Remove the license plate light from the rear gate
garnish.
B: INSTALLATION
Install in the reverse order of removal.
LI-00306
(A)
(B)
(B)
LI-30
License Plate Light
LIGHTING SYSTEM
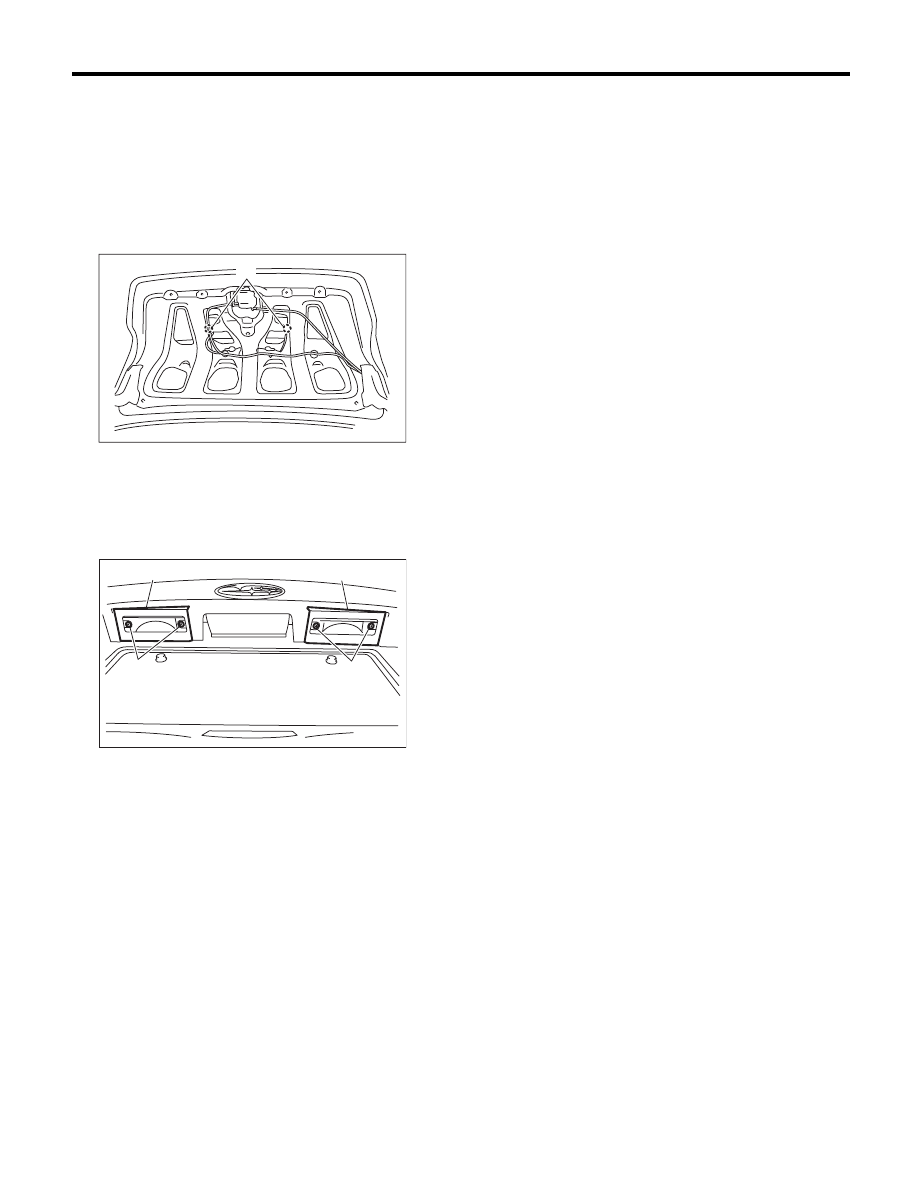
26.License Plate Light
A: REMOVAL
1. SEDAN MODEL
1) Disconnect the ground cable from the battery.
2) Remove the trunk lid trim. <Ref. to EI-70,
TRUNK LID TRIM, REMOVAL, Trunk Room Trim.>
3) Turn and remove the bulb socket (A).
4) Remove the bulb.
2. WAGON MODEL
1) Disconnect the ground cable from the battery.
2) Remove the license plate light mounting screw
(A) and then remove the lens (B).
3) Remove the bulb.
B: INSTALLATION
Install in the reverse order of removal.
Tightening torque:
1.5 N·m (0.15 kgf-m, 1.1 ft-lb)
C: INSPECTION
1) Visually check the bulb for blow out.
2) Check the bulb specification. <Ref. to LI-2,
SPECIFICATION, General Description.>
3) If NG, replace the bulb with a new part.
LI-00307
(A)
(A)
(A)
(B)
(B)
LI-00308
LI-31
High-mounted Stop Light
LIGHTING SYSTEM
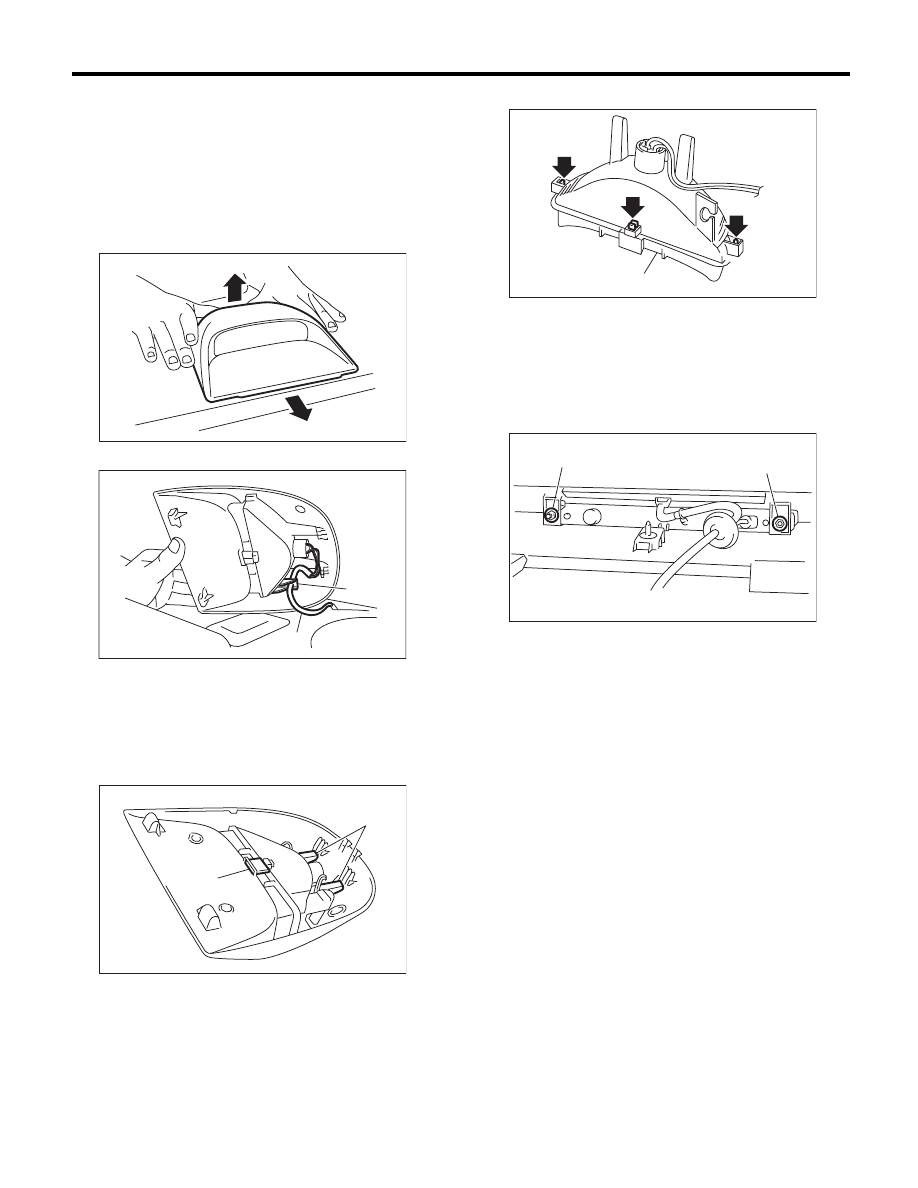
27.High-mounted Stop Light
A: REMOVAL
1. SEDAN MODEL
1) Disconnect the ground cable from battery.
2) Push the high-mounted stop light towards the
rear of the vehicle (1), raise the rear end (2) and re-
move the clips to remove the stop light.
3) Remove the harness from the clamp.
4) Disengage two claws (A), pull out the high-
mounted stop light from the cover and remove claw
(B).
5) Disengage the three claws and remove lens (A).
6) Remove the bulb.
2. WAGON MODEL
1) Remove the roof spoiler. <Ref. to EI-41, RE-
MOVAL, Roof Spoiler.>
2) Remove the nuts (A), then detach the high-
mounted stop light.
B: INSTALLATION
Install in the reverse order of removal.
Tightening torque:
4.5 N·m (0.46 kgf-m, 3.3 ft-lb)
C: INSPECTION
1. SEDAN MODEL
1) Visually check the bulb for blow out.
2) Check the bulb specification. <Ref. to LI-2,
SPECIFICATION, General Description.>
3) If NG, replace the bulb with a new part.
2. WAGON MODEL
1) Install the high-mounted stop light to test if it illu-
minates normally.
2) If the high-mounted stop light does not illumi-
nate, replace it with a new part.
NOTE:
Since LED (Light Emitting Diodes) is used for the
high-mounted stop light of the wagon model, re-
place the high-mounted stop light as an assembly
when the LED burns out.
(1) Harness
(2) Clamp
(1)
(2)
LI-00333
(2)
(1)
LI-00334
LI-00309
(A)
(B)
LI-00310
(A)
LI-00312
(A)
(A)
LI-32
Spot Map Light
LIGHTING SYSTEM
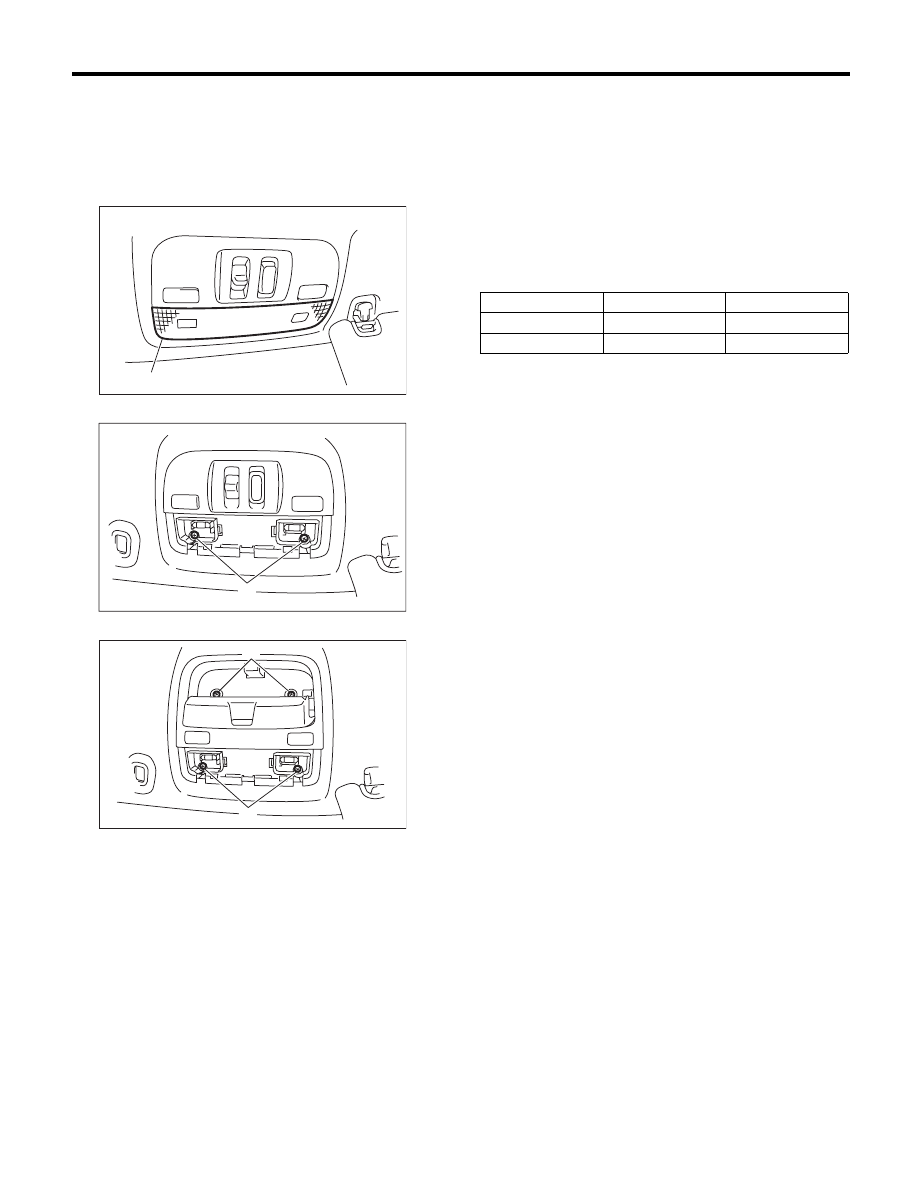
28.Spot Map Light
A: REMOVAL
1) Disconnect the ground cable from battery.
2) Remove the lens (A) and spot map light mount-
ing screws (B).
• Model with sunroof
• Model without sunroof
3) Disconnect the harness connectors and remove
the spot map light.
B: INSTALLATION
Install in the reverse order of removal.
C: INSPECTION
1. SPOT MAP LIGHT BULB
1) Visually check the bulb for blow out.
2) Check the bulb specification. <Ref. to LI-2,
SPECIFICATION, General Description.>
3) If NG, replace the bulb with a new part.
2. SPOT MAP LIGHT SWITCH
Measure the resistance between spot map light
switch terminals.
LI-00313
(A)
LI-00314
(B)
LI-00320
(B)
(B)
Switch position
Terminal No.
Standard
OFF
—
1 M
: or more
ON
1 and 2
18
r5.4 :
Нет комментариевНе стесняйтесь поделиться с нами вашим ценным мнением.
Текст