Subaru Legacy IV (2008 year). Service manual — part 1063
ET-9
Rear Speaker
ENTERTAINMENT
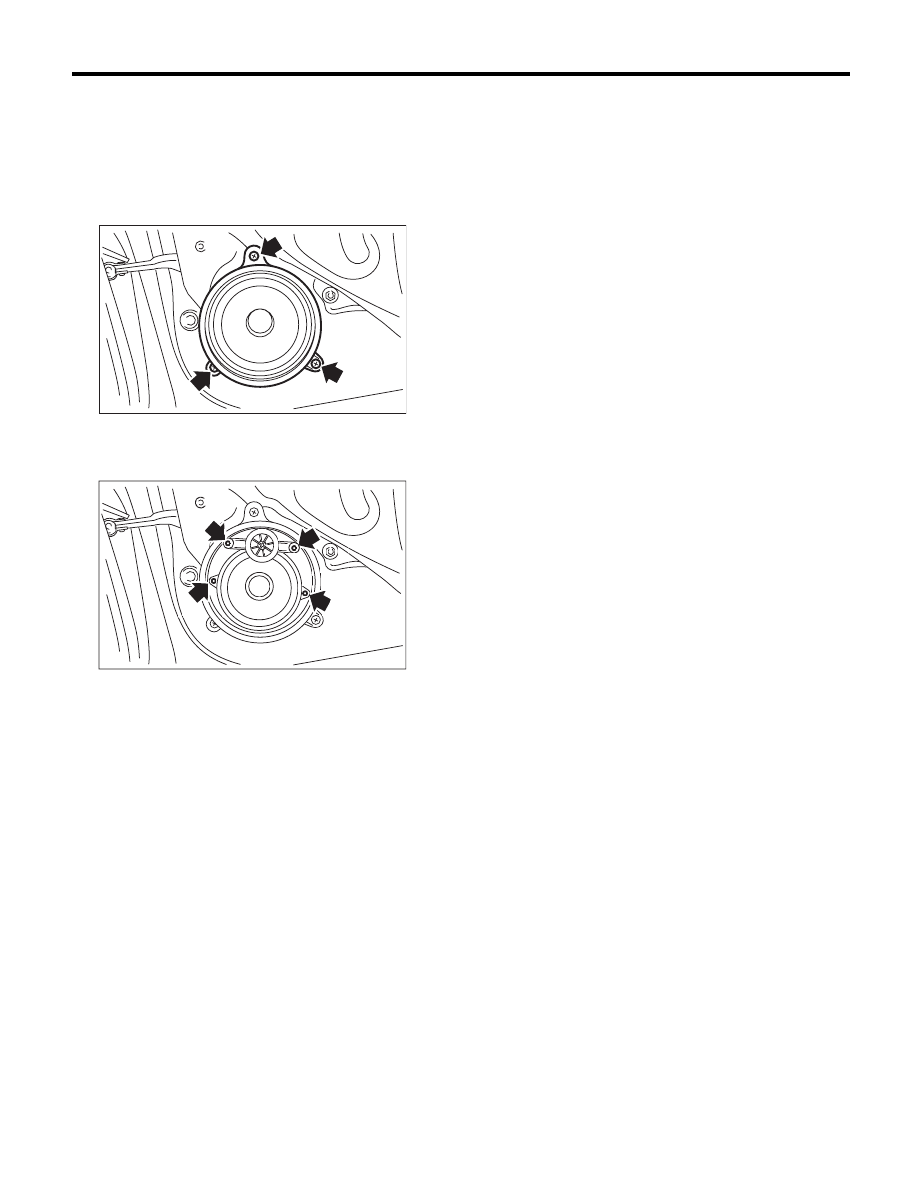
6. Rear Speaker
A: REMOVAL
1) Disconnect the ground cable from the battery.
2) Remove the rear door trim. <Ref. to EI-49, RE-
MOVAL, Door Trim.>
3) Remove the rear speaker mounting screws.
CAUTION:
Do not disassemble the rear speaker of premi-
um audio system.
4) Disconnect the harness connector and remove
the rear speaker.
B: INSTALLATION
Install in the reverse order of removal.
ET-00084
ET-00323
G
G
G
G
G
G
G
G
G
G
G
G
G
G
G
G
G
G
G
G
G
G
NG
G
N
N
N
N
N
N
N
N
N
N
N
N
N
N
N
NG
N
N
N
NG
G
G
N
NG
NG
N
N
G
G
NG
NG
G
NG
G
G
G
G
G
G
N
N
G
G
N
N
G
G
N
NG
G
G
G
G
G
ET-10
Woofer
ENTERTAINMENT
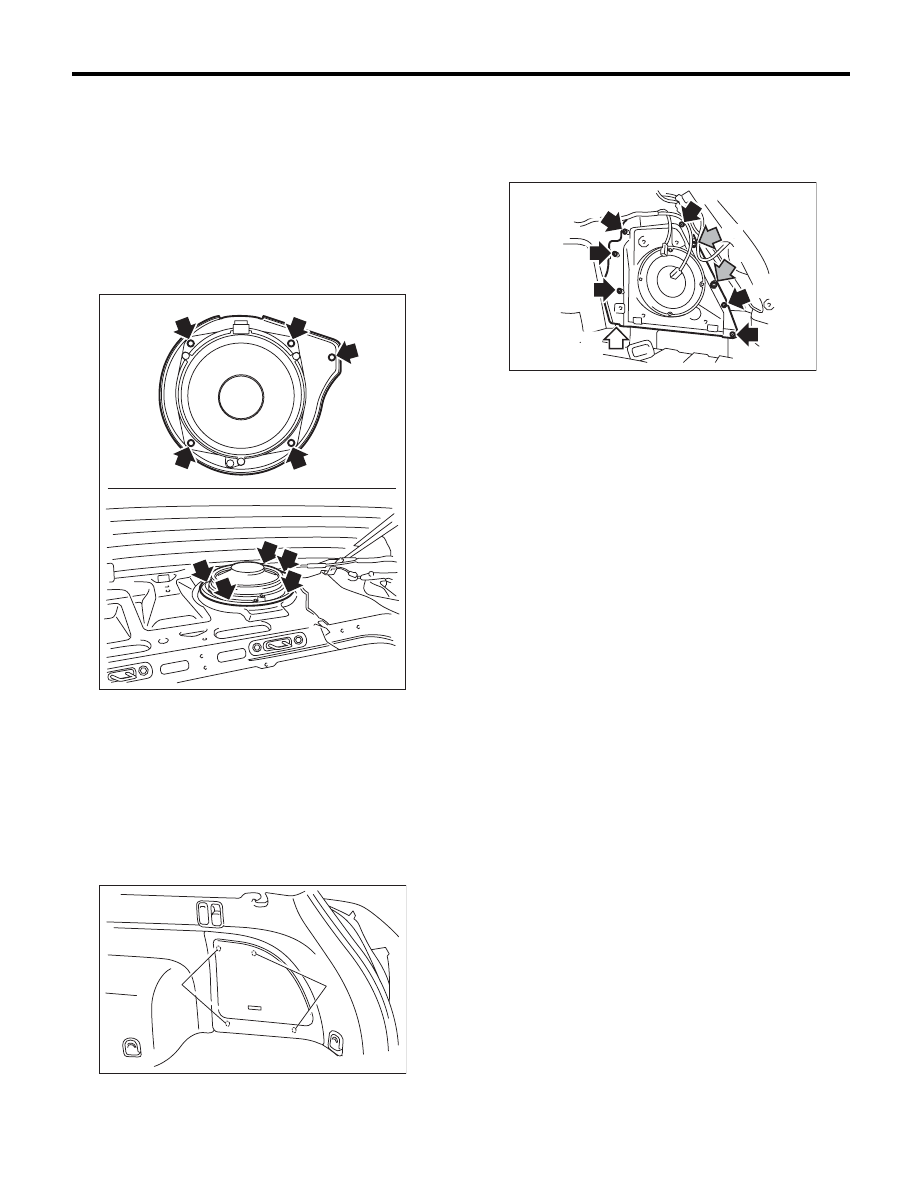
7. Woofer
A: REMOVAL
1. SEDAN MODEL
NOTE:
Only model with premium audio system
1) Disconnect the ground cable from the battery.
2) Remove the rear shelf trim. <Ref. to EI-69, RE-
MOVAL, Rear Shelf Trim.>
3) Remove the woofer mounting screws.
4) Disconnect the harness connector and detach
the woofers.
2. WAGON MODEL
NOTE:
Only model with premium audio system
1) Disconnect the ground cable from the battery.
2) Remove the hooks (A) and detach the woofer
cover. <Ref. to EI-63, REMOVAL, Rear Quarter
Trim.>
3) Remove the quarter lower trim. <Ref. to EI-63,
REMOVAL, Rear Quarter Trim.>
4) Remove the woofer bracket mounting screws
(A) and clips (B), then remove the harness connec-
tor.
5) Pull up the temporary clip (C), and remove the
woofer assembly.
B: INSTALLATION
Install in the reverse order of removal.
ET-00324
ET-00086
(A)
(A)
ET-00325
(B)
(B)
(C)
(A)
(A)
(A)
(A)
(A)
(A)
ET-11
Power Amplifier
ENTERTAINMENT
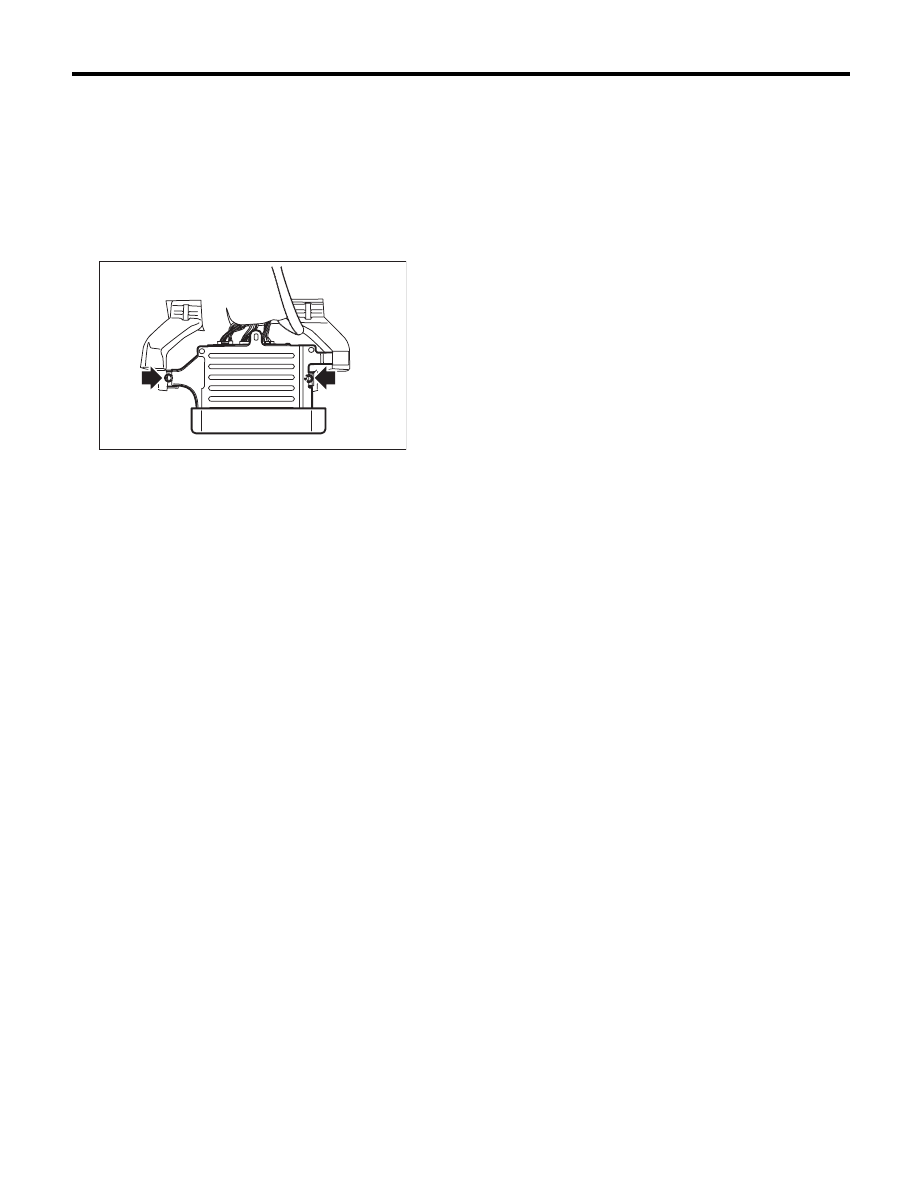
8. Power Amplifier
A: REMOVAL
1) Disconnect the ground cable from the battery.
2) Slide passenger’s side seat to the full forward
position.
3) Remove the nut.
4) Disconnect the harness connector and remove
the power amplifier.
B: INSTALLATION
Install in the reverse order of removal.
Tightening torque:
4.5 N·m (0.46 kgf-m, 3.32 ft-lb)
ET-00322
ET-12
Antenna
ENTERTAINMENT
9. Antenna
A: INSPECTION
CAUTION:
When wiping dirt off the glass to avoid heat
wire damage, be careful of the following.
• Use a dry and soft cloth.
• Move the cloth along the heat wire.
Inspection method of antenna, it is differ from print-
ing pattern of antenna.
1. TYPE A
1) Disconnect the ground cable from the battery.
2) Remove the trim.
Sedan model: Remove the rear quarter trim rear.
<Ref. to EI-63, SEDAN MODEL, REMOVAL, Rear
Quarter Trim.>
Wagon model: Remove the rear gate trim. <Ref. to
EI-68, REMOVAL, Rear Gate Trim.>
3) Disconnect the antenna harness connector and
antenna terminals.
4) Prepare the extension harness (A), (B).
5) Connect the extension harness (A) to terminal of
rear defogger harness (power supply side) and an-
tenna terminal.
6) Connect the extension harness (B) to rear de-
fogger harness (ground side ) terminal.
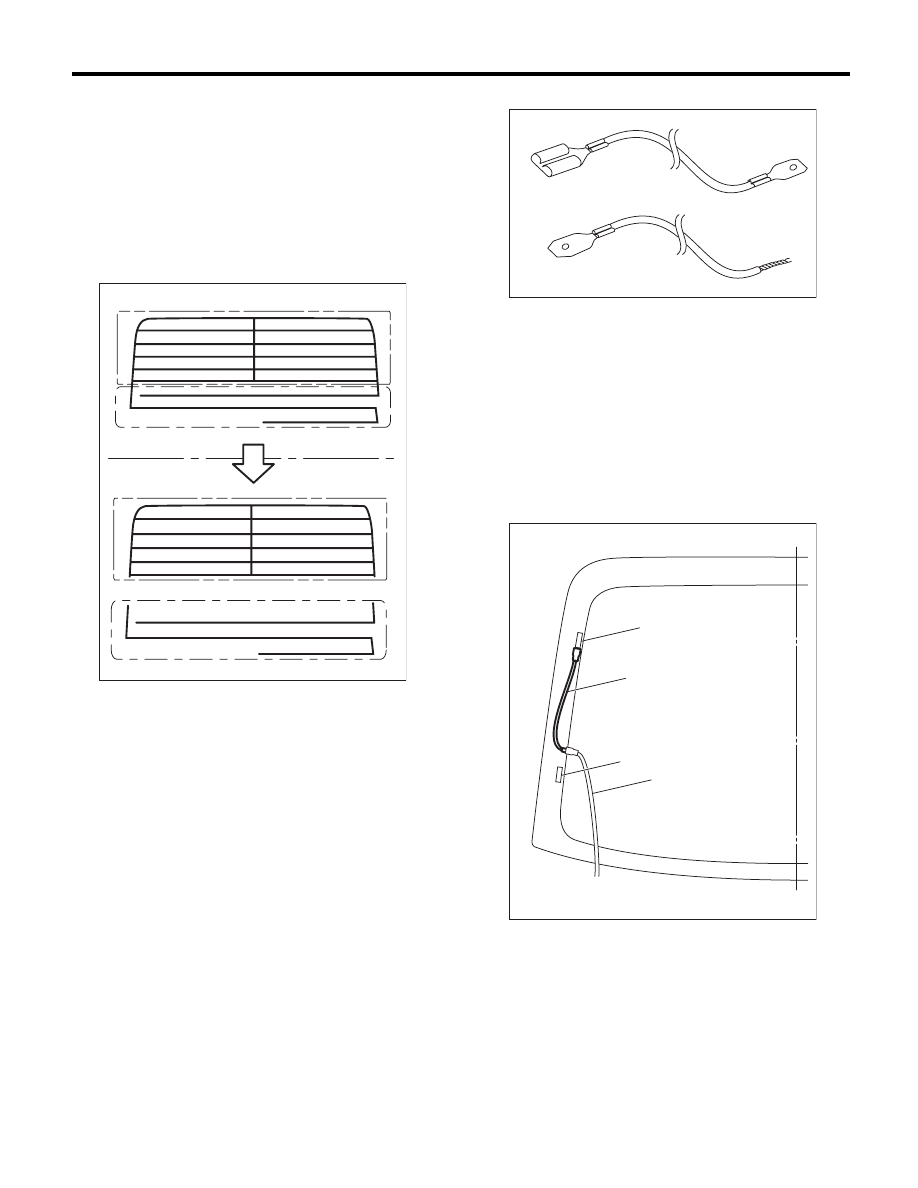
TYPE-A Printing pattern of grid
TYPE-B Printing pattern of straight
TYPE-A
TYPE-B
TYPE-A
TYPE-B
ET-00326
(A) Attach the flat terminals (male and female) to
both ends of the harness of 2,000 mm (78.7 in)
length (electrical wire unit dimensions approx.
2.0 mm
2
(0.0032 sp in))
(B) Attach the flat terminal (female) to one side of
the harness, another side to twist the harness
of 2,000 mm (78.7 in) length (electrical wire unit
dimensions approx. 2.0 mm
2
(0.0032 sp in))
(1) Antenna terminal
(2) Extension harness (A)
(3) Rear defogger terminal
(4) Rear defogger harness (power supply side - red
blue)
(A)
(B)
ET-00329
(1)
(2)
(3)
(4)
ET-00330
Нет комментариевНе стесняйтесь поделиться с нами вашим ценным мнением.
Текст