Subaru Legacy IV (2008 year). Service manual — part 1062
ET-5
Audio
ENTERTAINMENT
C: INSPECTION
NOTE:
• For self diagnosis of the audio system, there is a communications check (communication condition be-
tween the audio and the control panel) and a switch check. Perform a communications check first and make
sure it is operating normally before proceeding to the inspection of switches.
• Complete operations from when the self diagnosis mode of step 1 operates and the buzzer sounds, until
you press the preset 1 switch in step 4, within 15 seconds. If 15 seconds or more pass, a communications
error will be displayed.
• During the diagnosis, do not press the POWER (8), FM/AM (12), CD (11), AUX (13) or SAT (18) switches.
Pressing these switches will disengage the self diagnosis mode. For the CD and AUX switch, the self diag-
nosis mode will be disengaged if the disc load and unit are connected.
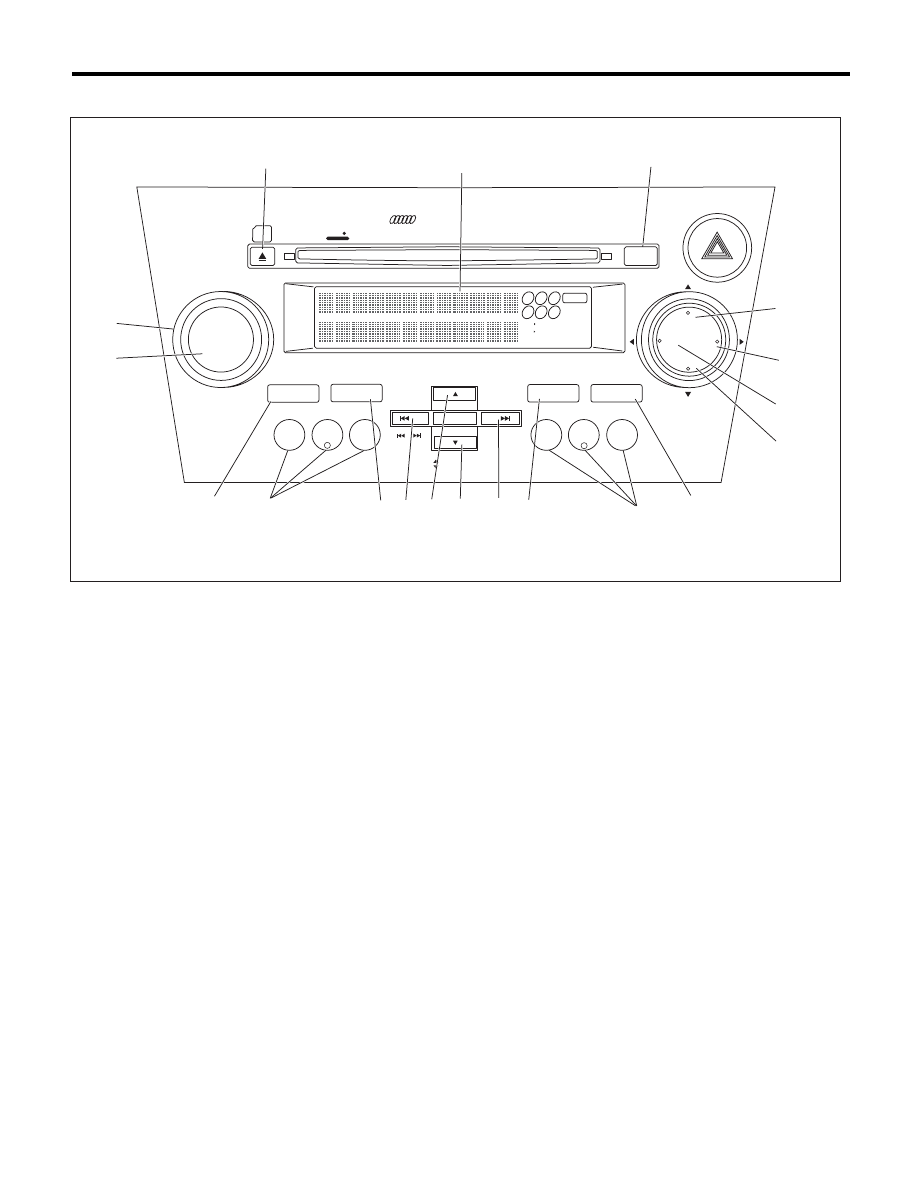
(1)
SEEK / SCAN UP switch
(7)
AUDIO switch
(13)
AUX switch
(2)
SEEK / SCAN DOWN switch
(8)
PUSH/POWER switch
(14)
BAL switch
(3)
TUNE / TRACK UP switch
(9)
VOLUME
(15)
VDF display
(4)
TUNE / TRACK DOWN switch
(10)
Presets 1 — 6
(16)
LOAD switch
(5)
RPT switch
(11)
CD switch
(17)
EJECT switch
(6)
TEXT switch
(12)
FM/AM switch
(18)
SAT switch
MP3/WMA
LOAD
%&%*#0)'427*
SRS
PUSH ON / VOL
AUDIO
RDM
RPT
TEXT
BAL
TUNE/TRACK
SEEK/SCAN
FOLDER/CATEGORY
1
2
3
4
5
6
CDIN
DF RPT
DF RDM
ST CAT
㧔٨㧕
1
2
3
4
5
6
(9)
(10)
(10)
(15)
(7)
(5)
(14)
(6)
(4) (1)
(2)
(3)
(17)
(16)
(8)
ET-00266
SRS
CD
#7:
FM
AM
SAT
(11)
(13)
(12)
(18)
ET-6
Audio
ENTERTAINMENT
1. SELF DIAGNOSIS OF THE CONTROL PANEL AND AUDIO
2. SWITCH CHECK LIST
Step
Check
Yes
No
1
SETTING THE SELF-DIAGNOSIS MODE BY
OPERATING THE CONTROL PANEL.
1) Turn the audio system OFF with the ignition
switch ACC or ON.
2) With the TUNE/TRACK UP switch and the
SEEK/SCAN DOWN switch held down, hold the
RPT switch down for 2 seconds or more.
3) A buzzer will sound and all the VFD display
will illuminate, and then the unit will enter the
diagnosis mode.
Does the self diagnosis mode
of the control panel operate?
Go to step 3.
Go to step 2.
2
CHECK BUZZER.
Did the buzzer sound when
going into the diagnosis mode?
Go to step 3.
Check the connec-
tion of harness
connector, and if
there are no prob-
lems found, repair
or replace the
audio unit and con-
trol panel. <Ref. to
ET-4, REMOVAL,
Audio.>
3
CHECK THE VFD DISPLAY.
Did all the VFD display illumi-
nate?
Go to step 4.
<Ref. to ET-4,
REMOVAL,
Audio.>
4
CHECK THE COMMUNICATION STATUS.
Press the preset 1 switch, and confirm the VFD
display section of the control panel.
Is the «Main Check!» or «Sub
Check!» displayed on the VFD
display?
Repair or replace
the audio unit.
<Ref. to ET-4,
REMOVAL,
Audio.>
Go to step 5.
5
CHECK SWITCH.
Operate the switches in the following list, and
check the display content on the VFD display.
Does the switch check list and
the operated switches match?
<Ref. to ET-6, SWITCH CHECK
LIST, INSPECTION, Audio.>
The self-diagnosis
of the audio unit is
normal.
Repair or replace
the audio unit.
<Ref. to ET-4,
REMOVAL, Audio.>
Switch
Display
TUNE/TRACK
UP OK
TUNE/TRACK
DOWN OK
SEEK/SCAN
UP OK
SEEK/SCAN
DOWN OK
EJECT
EJECT OK
RPT
RPT OK
VOL UP
VOL UP OK
VOL DOWN
VOL DOWN OK
TONE/BAL
BAL OK
1 (Preset)
P-1 OK
2 (Preset)
P-2 OK
3 (Preset)
P-3 OK
4 (Preset)
P-4 OK
5 (Preset)
P-5 OK
6 (Preset)
P-6 OK
LOAD
LOAD OK
AUDIO
AUDIO OK
TEXT
TEXT OK
ET-7
Front Speaker
ENTERTAINMENT
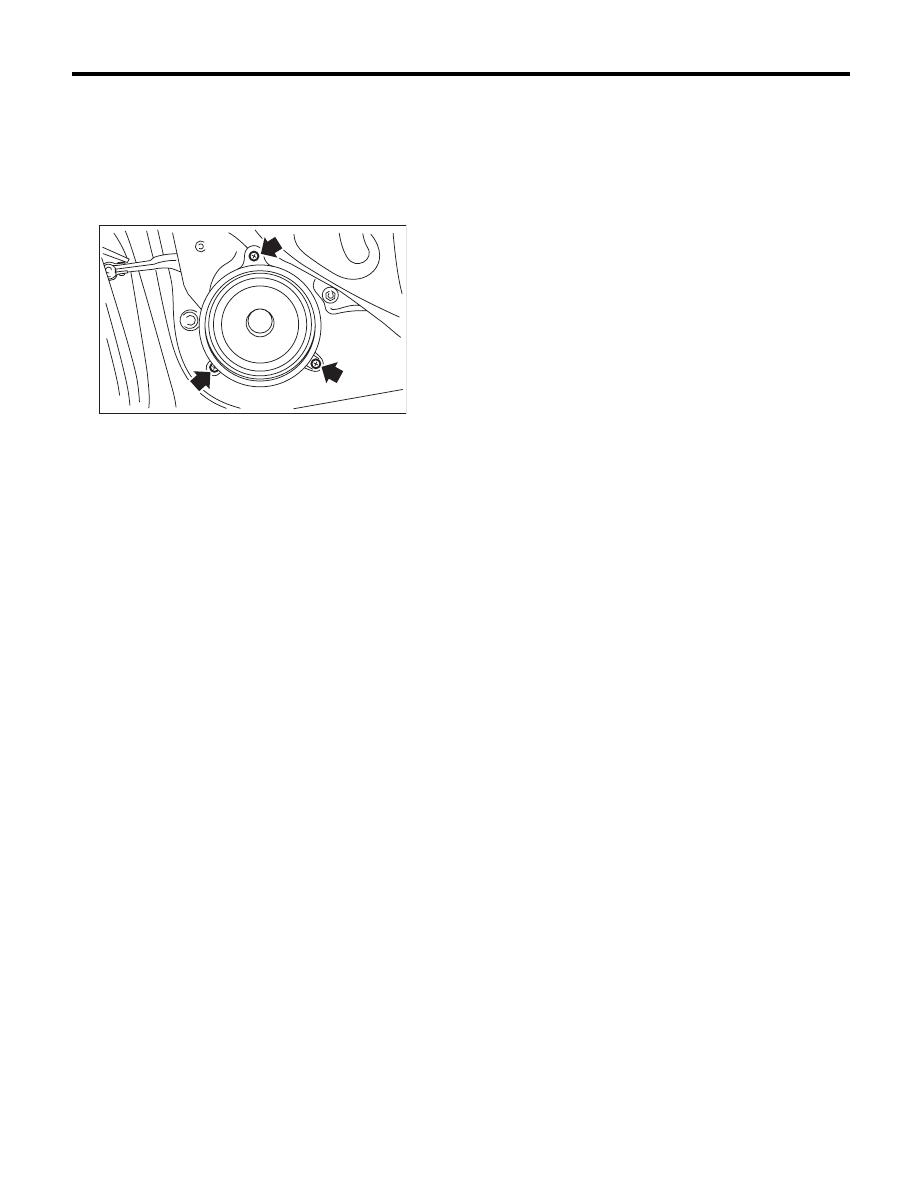
4. Front Speaker
A: REMOVAL
1) Disconnect the ground cable from the battery.
2) Remove the front door trim. <Ref. to EI-49, RE-
MOVAL, Door Trim.>
3) Remove the front speaker mounting screws.
4) Disconnect the harness connector and remove
the front speaker.
B: INSTALLATION
Install in the reverse order of removal.
ET-00080
ET-8
Tweeter
ENTERTAINMENT
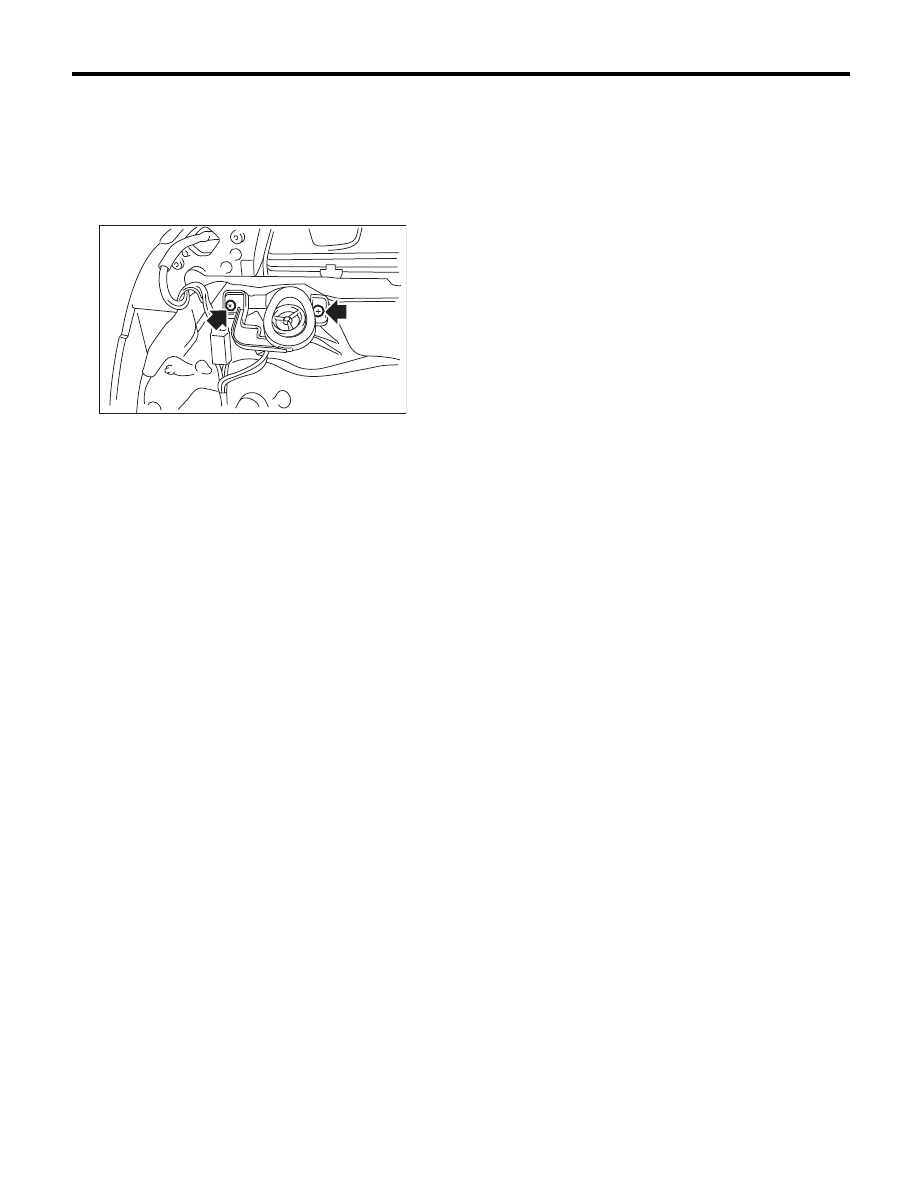
5. Tweeter
A: REMOVAL
1) Disconnect the ground cable from the battery.
2) Remove the front door trim. <Ref. to EI-49, RE-
MOVAL, Door Trim.>
3) Remove the tweeter mounting screws.
4) Disconnect the harness connector and remove
the tweeter.
B: INSTALLATION
Install in the reverse order of removal.
ET-00081
Нет комментариевНе стесняйтесь поделиться с нами вашим ценным мнением.
Текст