Subaru Legacy IV (2008 year). Service manual — part 69
ME(H4SO)-72
Cylinder Block
MECHANICAL
4) Apply a coat of engine oil to the washer and bolt
thread.
NOTE:
Use a new seal washer.
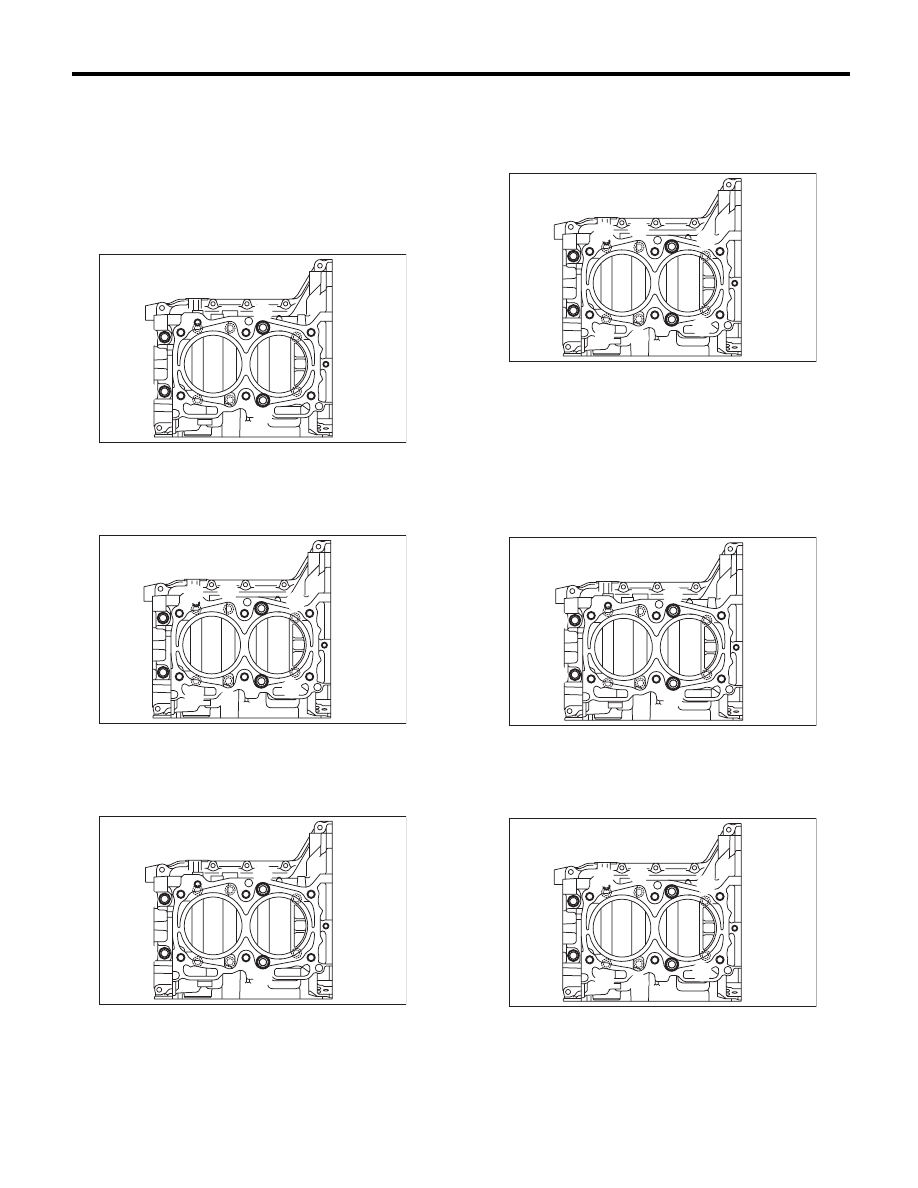
5) Tighten the 10 mm cylinder block connecting
bolts on the LH side (A — D) in alphabetical order.
Tightening torque:
10 N·m (1.0 kgf-m, 7.4 ft-lb)
6) Tighten the 10 mm cylinder block connecting
bolts on the RH side (E — J) in alphabetical order.
Tightening torque:
10 N·m (1.0 kgf-m, 7.4 ft-lb)
7) Tighten the LH side cylinder block connecting
bolts (A — D) further in alphabetical order.
Tightening torque:
18 N·m (1.8 kgf-m, 13.3 ft-lb)
8) Tighten the RH side cylinder block connecting
bolts (E — J) further in alphabetical order.
Tightening torque:
18 N·m (1.8 kgf-m, 13.3 ft-lb)
9) Tighten the LH side cylinder block connecting
bolts (A — D) further in alphabetical order.
• (A), (C): Angle tightening
Tightening angle:
90°
• (B), (D): Torque tightening
Tightening torque:
40 N·m (4.1 kgf-m, 29.5 ft-lb)
10) Tighten the RH side cylinder block connecting
bolts (E — J) further in alphabetical order.
Tightening angle:
90°
ME-00840
(A)
(B)
(D)
(C)
ME-00841
(H)
(G)
(I)
(F)
(E)
(J)
ME-00840
(A)
(B)
(D)
(C)
ME-00841
(H)
(G)
(I)
(F)
(E)
(J)
ME-00840
(A)
(B)
(D)
(C)
ME-00841
(H)
(G)
(I)
(F)
(E)
(J)
ME(H4SO)-73
Cylinder Block
MECHANICAL
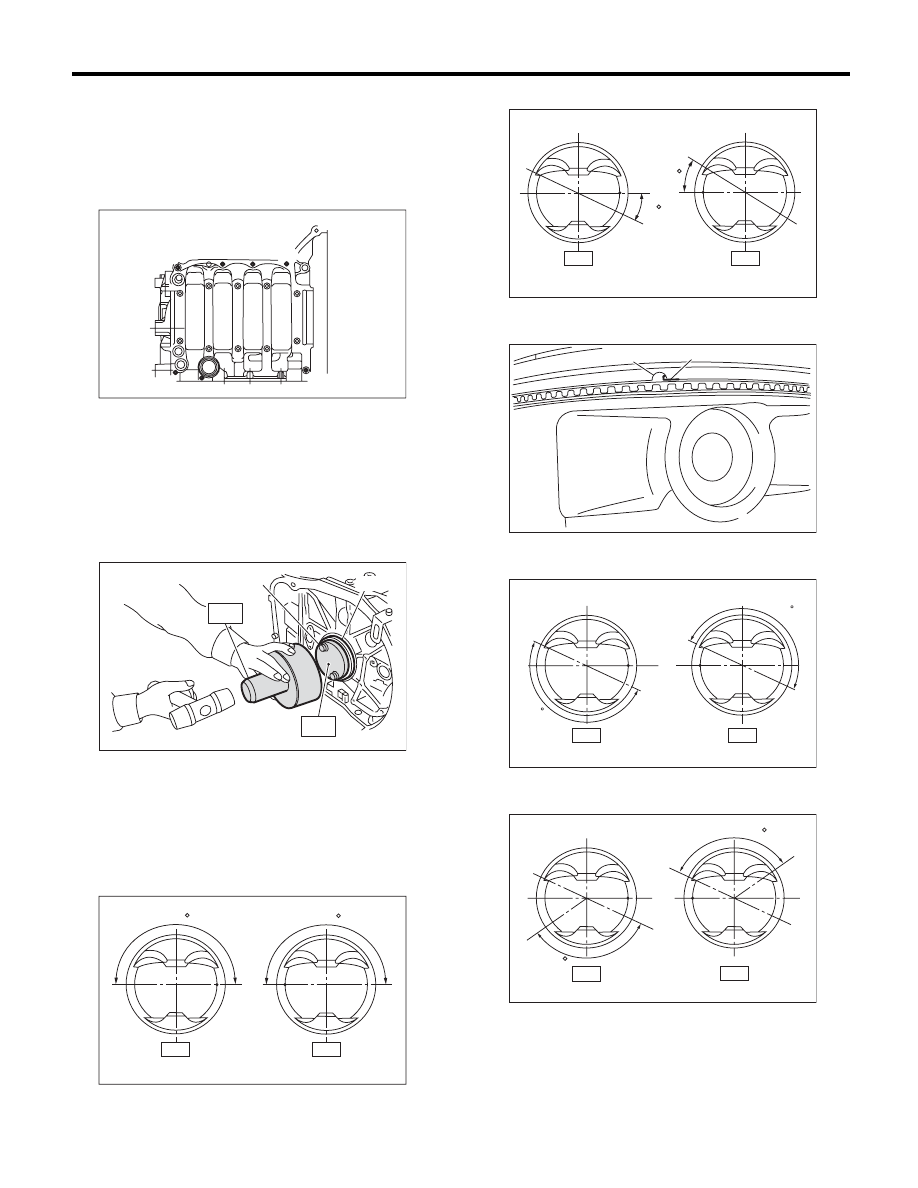
11) Tighten the 8 mm and 6 mm cylinder block con-
necting bolts on LH side (A — H) in alphabetical se-
quence.
Tightening torque:
(A) — (G): 25 N·m (2.5 kgf-m, 18.4 ft-lb)
(H): 6.4 N·m (0.7 kgf-m, 4.7 ft-lb)
12) Apply a coat of engine oil to the oil seal periph-
ery, then install the rear oil seal using ST1 and ST2.
NOTE:
Use new rear oil seal.
ST1
499597100
CRANKSHAFT OIL SEAL
GUIDE
ST2
499587200
CRANKSHAFT OIL SEAL
INSTALLER
13) Position the top ring gap at (A) or (B) in the fig-
ure.
14) Position the second ring gap at 180° on the re-
verse side the top ring gap.
15) Position the upper rail gap at (C) in the figure.
16) Align the upper rail spin stopper (E) to the side
hole (D) on the piston.
17) Position the expander gap at (F) on the 180°
opposite direction of (C) in the figure.
18) Set the lower rail gap at position (G), located
120° clockwise from (C).
NOTE:
• Make sure ring gaps do not face the same direc-
tion.
• Make sure ring gaps are not within the piston
skirt area.
(A) Rear oil seal
(B) Flywheel attaching bolt
ME-00147
(B)
(C)
(D)
(E)
(F)
(G)
(H)
(A)
ME-00148
ST1
ST2
(B)
(A)
ME-02721
L H
R H
(A)
(B)
(A)
(B)
180
180
ME-02722
L H
R H
(C)
(C)
25
25
ME-02471
(E)
(D)
L H
(F)
(C)
R H
180
(F)
(C)
180
ME-02723
L H
R H
(G)
(G)
(C)
(C)
120
120
ME-02724
ME(H4SO)-74
Cylinder Block
MECHANICAL
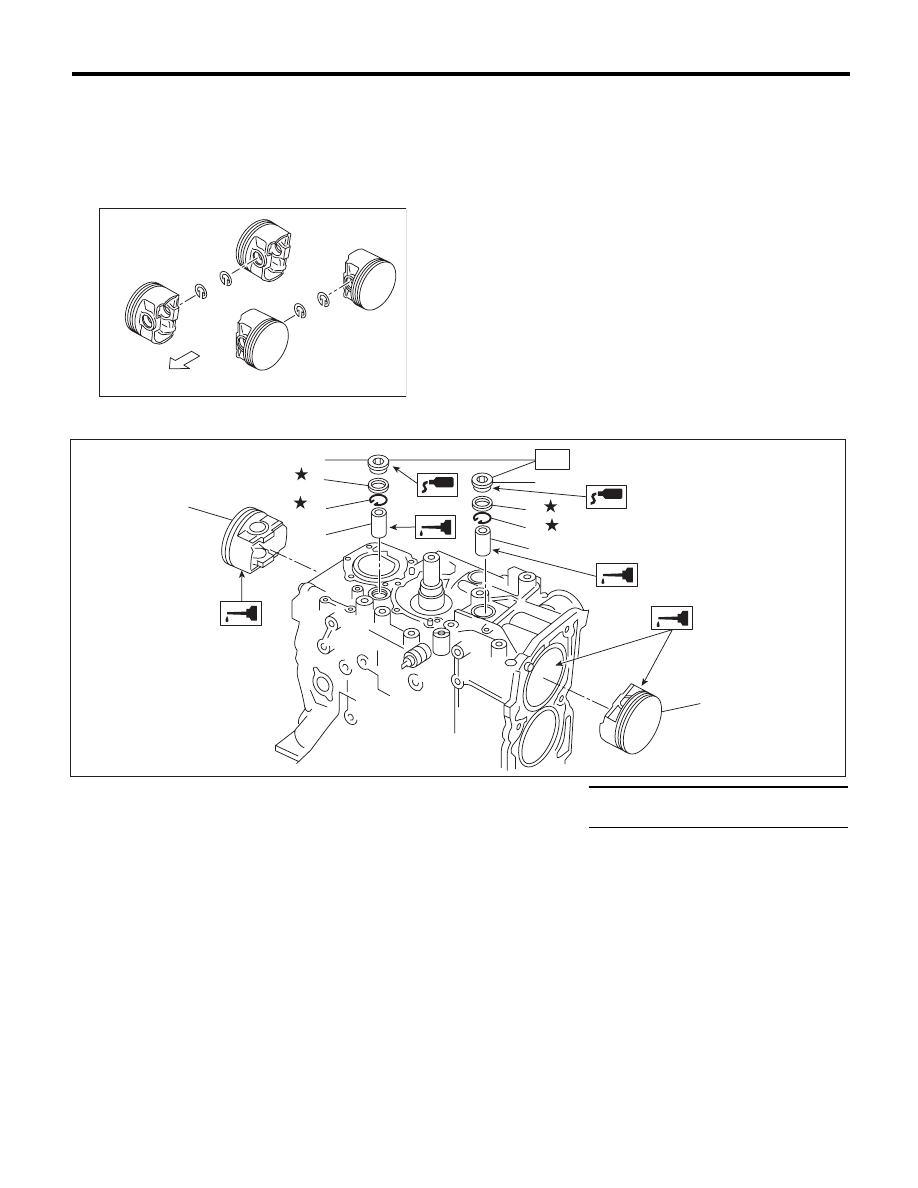
19) Install the snap ring.
Before positioning the piston on the cylinder block,
attach the snap ring in the service hole of the cylin-
der block, and the piston hole on the opposite side.
NOTE:
Use new snap rings.
(A) Front side
ME-00306
#4
#3
#2
#1
(A)
(1)
Piston
(4)
Gasket
Tightening torque:N·m (kgf-m, ft-lb)
(2)
Piston pin
(5)
Service hole plug
T: 70 (7.1, 51.6)
(3)
Snap
ring
ME-02442
(1)
(1)
(2)
(2)
(3)
(3)
(4)
(4)
(5)
(5)
T
ME(H4SO)-75
Cylinder Block
MECHANICAL
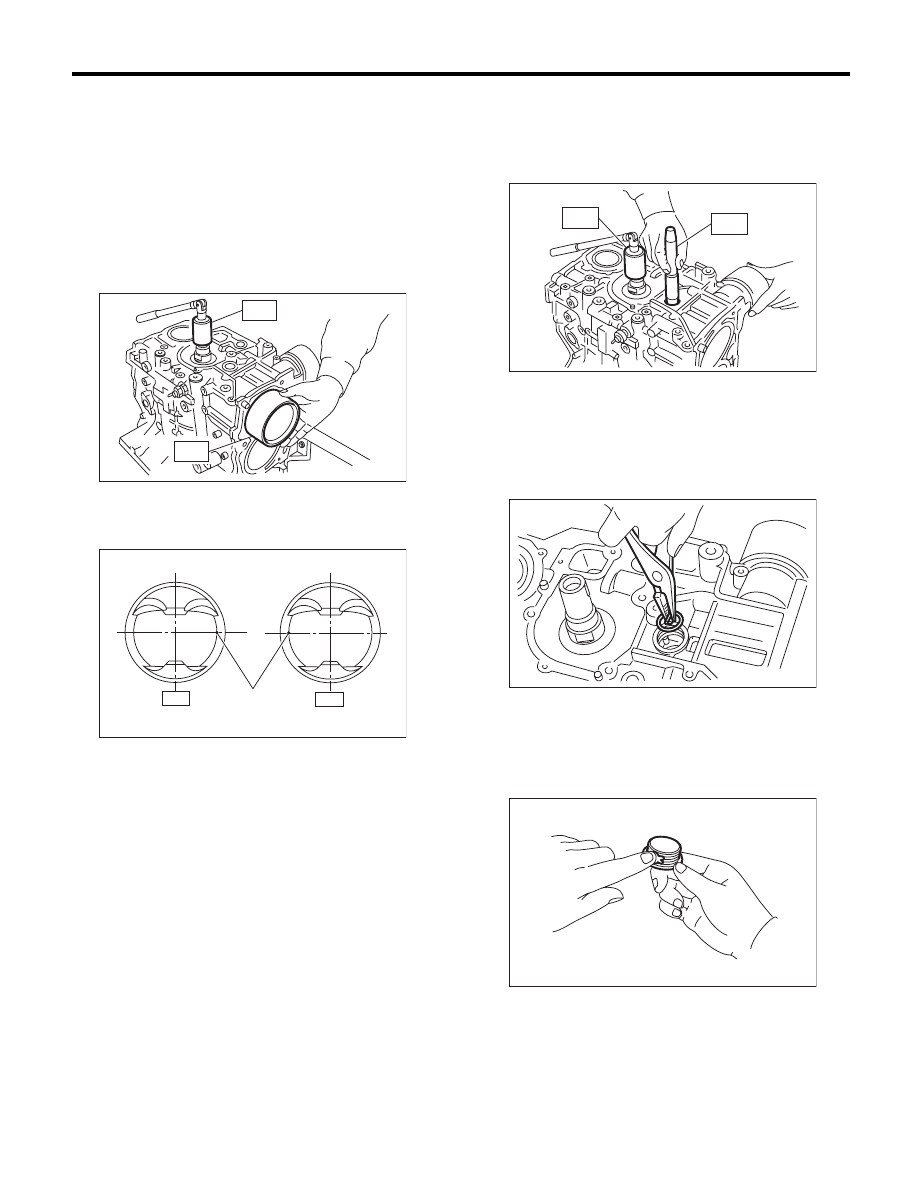
20) Install the piston.
(1) Set the parts so that the #1 and #2 cylinders
are on the upper side.
(2) Using the ST1, turn the crankshaft so that
#1 and #2 connecting rods are set at bottom
dead center.
ST1
499987500
CRANKSHAFT SOCKET
(3) Apply a coat of engine oil to the pistons and
cylinders and insert pistons in their cylinders us-
ing ST2.
ST2
498747300
PISTON GUIDE
NOTE:
Face the piston front mark towards the front of the
engine.
21) Install the piston pin.
(1) Apply a coat of engine oil to ST3.
(2) Insert ST3 into the service hole to align pis-
ton pin hole with connecting rod small end.
ST3
499017100
PISTON PIN GUIDE
(3) Apply a coat of engine oil to piston pin, and
insert the piston pin into piston and connecting
rod through service hole.
(4) Install the snap ring.
NOTE:
Use new snap rings.
(5) Apply liquid gasket to the threaded portion
of the service hole plug.
Liquid gasket:
THREE BOND 1105 (Part No. 004403010) or
equivalent
(A) Front mark
ME-00157
ST2
ST1
L H
(A)
R H
ME-02725
ME-00158
ST1
ST3
ME-00159
ME-00160
Нет комментариевНе стесняйтесь поделиться с нами вашим ценным мнением.
Текст